Have you just created your first HomeKit accessory? Then we help you set up all the functions that HomeKit offers, such as assigning Siri names and classifying rooms and zones. In this HomeKit manual you will find step by step how to set up HomeKit.
HomeKit is a function of your iOS device that allows you to connect all sorts of devices in your house and control them with Siri. Think of lamps, door locks, plugs and your heating. HomeKit has all sorts of advantages and it is certainly worth setting up if you already have a suitable device. In this HomeKit manual you can read the step-by-step plan for setting up HomeKit and what you need to get started with HomeKit.

What is HomeKit
Thanks to HomeKit you can operate all kinds of different devices, independently of the brand, via your iPhone or iPad. You do that from one universal app, so you no longer need a different app for your lamps, heating or door lock. Siri, too, plays an important role in HomeKit: ask the assistant to turn on the lights and the rest goes without saying. You can read more about what HomeKit is exactly in our detailed explanation.
Set up HomeKit
To use HomeKit, you need at least the following:
- An iPhone (iPhone 4s or newer), iPad (3rd generation or newer) or iPod touch (5th generation or newer) with at least iOS 8.1
- A HomeKit accessory for the home (Possibly one of the projects on this site)
- The HomeKit app for setting names, rooms and zones
- A private Wi-Fi network
Do you use an iPhone or iPad with iOS 9 or older? Then you can only do the setting via the app from the manufacturer of the accessory. If you have Philips Hue, you use the Hue app for that. Because by far the majority of people have at least iOS 10, we use the standard Housing app in this step-by-step plan. If you have removed this before, download it again.
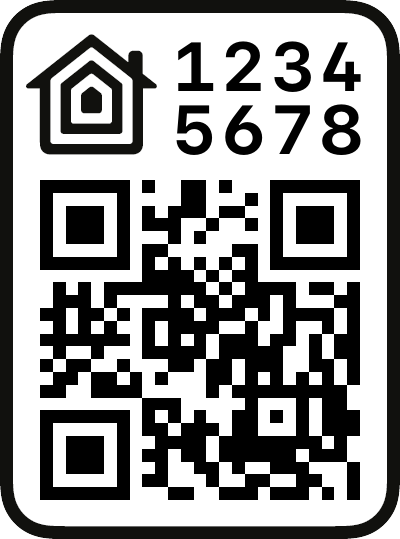
Step 1: scan code with the HomeKit app
To activate and use HomeKit, you must install a HomeKit accessory according to the manufacturer’s steps. You then add this accessory to HomeKit. This can be done in a number of ways, but the most common way is to scan a HomeKit code. You will usually find this in the manual and / or on the device itself. Some other devices are added via NFC or are automatically recognized if they are connected to your own network. When you have created your own as shown in these steps you can scan that one.
Scanning the HomeKit code is easiest via the Home app, but it is also possible with apps from some manufacturers. If you have already set up the device via the manufacturer’s app, a screen will appear in many cases to add it to HomeKit, after which you can scan the code.

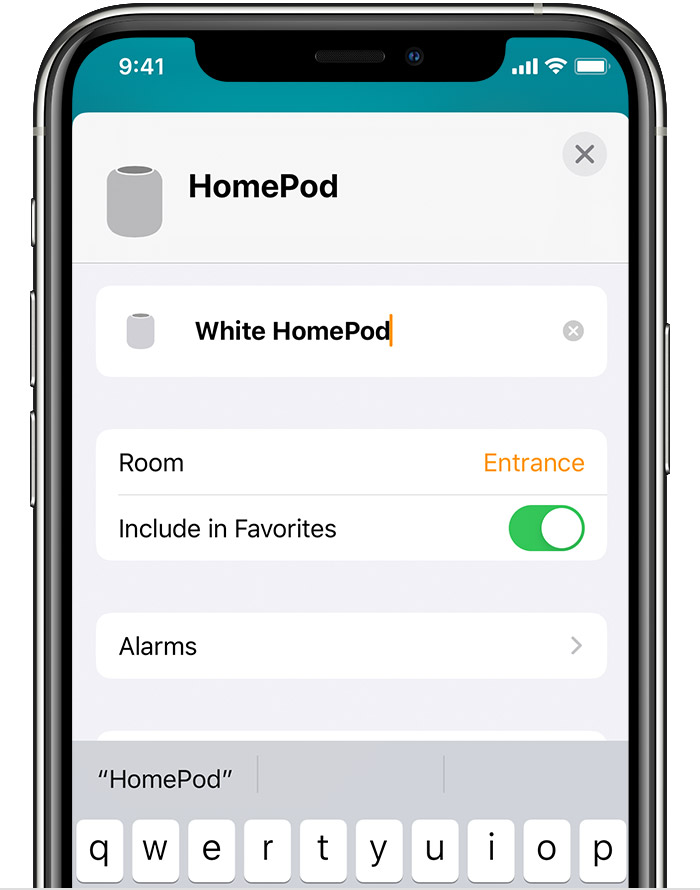
Step 2: Set Siri names
After scanning, choose a logical name for the accessory. This is important for two reasons. First of all, you immediately recognize the corresponding device with a good name. If after a while you fill your house with more and more HomeKit devices, you immediately know which one you need with a good name. In addition, it is important for Siri. If you want to use voice control, you can say the name of the device and say that you want to enable it.
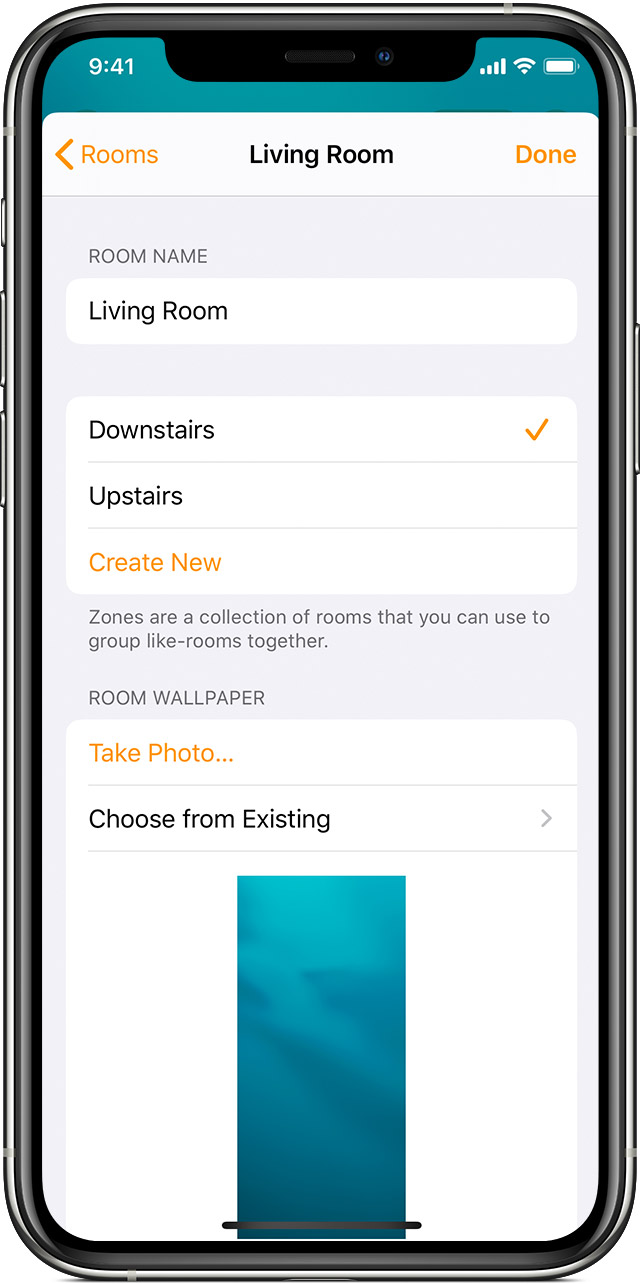
Step 3: Choose the right room
It is important that you put your devices in HomeKit directly in the right room. This is useful when switching on your devices via Siri (“Switch on all lights in the living room”), but also when automating your accessories. You can then set it so that all smart plugs and lights in the living room go out as soon as you leave home. It also provides a better overview of which devices you have and makes operation easier.
When setting up a device, choose which room you want to put it in. You can also create a new room directly from that screen, if you have not already done so.
Step 4: Control HomeKit from outside
To control HomeKit via Siri you must in principle be connected to your own Wi-Fi network. You can also operate your accessories from outside, but this requires an extra device: the Apple TV, an iPad at home or a HomePod.
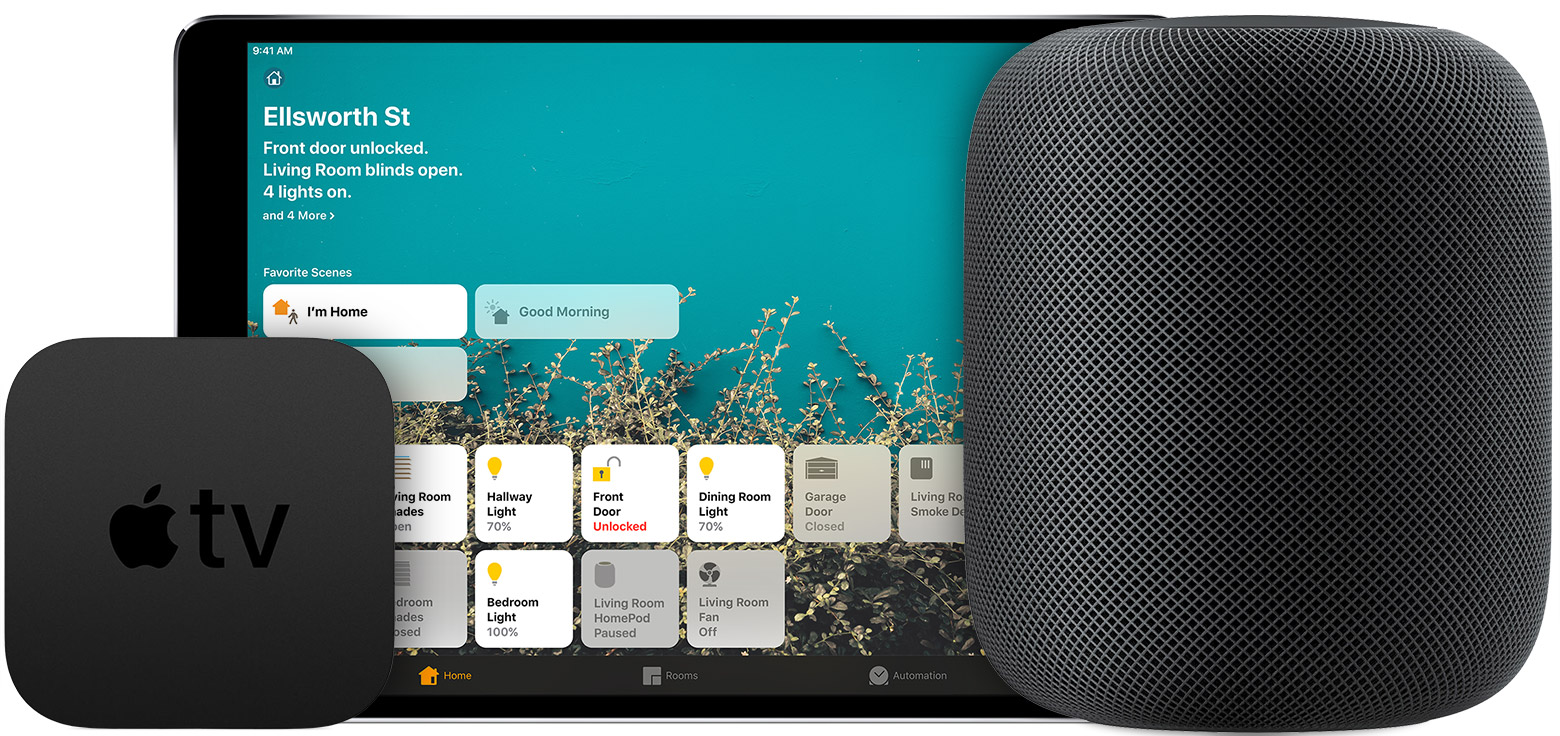
These devices then serve as a home hub for HomeKit. Because they are connected via the internet and linked to your iCloud account, your smart devices at home can connect to your iPhone, even when you are not at home. Automations are also possible with a HomeKit hub, so it is certainly worth adding to your setup.
Step 5: Invite other people and other options
If you are not alone in the house, it is also useful to give your housemates access to your HomeKit accessories. In the Home app it is possible to invite other people to HomeKit, so that they too can turn on the lights, for example. The person who has set up HomeKit remains the administrator. The manager is the only person who can add new participants. As an administrator, you also determine yourself who can operate devices remotely.
Step 6: Ready!
Congratulations, you are now ready to make full use of your HomeKit accessory. Now you can use Siri to turn on your lights, to change color, to open doors, to operate your thermostat and to have all of this connected. If you have purchased a new HomeKit accessory, add it in the same steps as above.
You can now operate your devices to your heart’s content through your voice. Activate Siri on one of your Apple devices and you can use the following commands, among others:
“Turn on the lights on top.”
“Turn off Benjamin’s light.”
“Turn off the light in the kitchen.”
“Dim the light in the dining room to 50 percent.”
“Color the light in the living room blue.”
“Let the light in the living room burn to its fullest.”
“Set the house to 22 degrees.”
“Set the thermostat below to 21 degrees.”
“Turn on the printer at the office.”
“Good night.”

You can also set scenes and activate them with Siri. By setting scenes and linking lamps to them, for example, you can turn on all lamps at once and let them burn in a certain color. Tell Siri the exact name of your created scene and all the linked lights will come on.

If you want to get more out of it, you can even automate your devices, organize HomeKit zones and much more.