Now that I have the ESP HomeKit SDK up and running its time to add a cool feature. A QR Code Just like the official HomeKit products have. Once you have your iOS device and your HomeKit hardware, you’ll need to add it to your Home app. To do that, you’ll be asked to enter an eight-digit code or scan the HomeKit QR code that’s included with your device.

QR Code
To be able to use a QR Code you nee to add some lines of code to your original code.So you can use a QR code to pair with the accessories. To enable that feature, you need to configure accessory to use static password and set some Setup ID:
homekit_server_config_t config = {
.accessories = accessories,
.password = "123-45-678",
.setupId="1QJ8",
};
The last piece of information you need is accessory category code. You can find it in mDNS announcement in accessory logs
mDNS announcement: Name=Sample LED-1692md=MyLEDpv=1.0id=16:92:CE:D4:EE:7Ac#=1s#=1ff=0sf=1ci=5 Port=5556 TTL=4500
(notice “ci=5” <- this is accessory category code)
Then you need to generate QR code using supplied script:
tools/gen_qrcode 5 123-45-678 1QJ8 qrcode.png
Before we can execute this line we need to setup some required software.
Installing required components
Before you can make the QR Code please visit my ESP HomeKit SDK article. We need to use the same directory as we used here. So in this case we go to our main folder called ESP. Open the Terminal app. Click the Finder icon in your dock. Click Go. Click Utilities. Double-click Terminal. and type:
cd ESP
Now you can clone esp-homekit repository within this directory:
git clone --recursive https://github.com/maximkulkin/esp-homekit.git
Python
Before installing Python, you’ll need to install GCC. GCC can be obtained by downloading Xcode, the smaller Command Line Tools (must have an Apple account) or the even smaller OSX-GCC-Installer package.
Note: If you already have Xcode installed, do not install OSX-GCC-Installer. In combination, the software can cause issues that are difficult to diagnose.
Note: If you perform a fresh install of Xcode, you will also need to add the command line tools by running xcode-select --install on the terminal.
While OS X comes with a large number of Unix utilities, those familiar with Linux systems will notice one key component missing: a package manager. Homebrew fills this void. To install Homebrew, open Terminal or your favourite OS X terminal emulator and run:
ruby -e "$(curl -fsSL https://raw.githubusercontent.com/Homebrew/install/master/install)"
The script will explain what changes it will make and prompt you before the installation begins. Once you’ve installed Homebrew, insert the Homebrew directory at the top of your PATH environment variable. You can do this by adding the following line at the bottom of your ~/.profile file
echo "export PATH="/usr/local/opt/python/libexec/bin:$PATH"" >> ~/.bash_profile
If you have OS X 10.12 (Sierra) or older use this line instead
export PATH=/usr/local/bin:/usr/local/sbin:$PATH
Now, we can install Python 3:
brew install python
This will take a minute or two.

Pip
Homebrew installs pip pointing to the Homebrew’d Python 3 for you. we only need to install some perquisites.
Now we can Install Pillow (needed to make your QR Code):
pip install Pillow
UPDATE 15-01-2020: DEPRECATION: Python 2.7 will reach the end of its life on January 1st, 2020. Please upgrade your Python as Python 2.7 won’t be maintained after that date. A future version of pip will drop support for Python 2.7. More details about Python 2 support in pip, can be found at https://pip.pypa.io/en/latest/development/release-process/#python-2-support
pip3 install Pillow
And Install QR Code (needed to make your QR Code)
pip install qrcode
UPDATE 15-01-2020: DEPRECATION: Python 2.7 will reach the end of its life on January 1st, 2020. Please upgrade your Python as Python 2.7 won’t be maintained after that date. A future version of pip will drop support for Python 2.7. More details about Python 2 support in pip, can be found at https://pip.pypa.io/en/latest/development/release-process/#python-2-support
pip3 install qrcode
Then you need to generate The code using supplied script:
tools/gen_qrcode 5 123-45-678 1QJ8 qrcode.png
It will generate a QR Code like this one here.
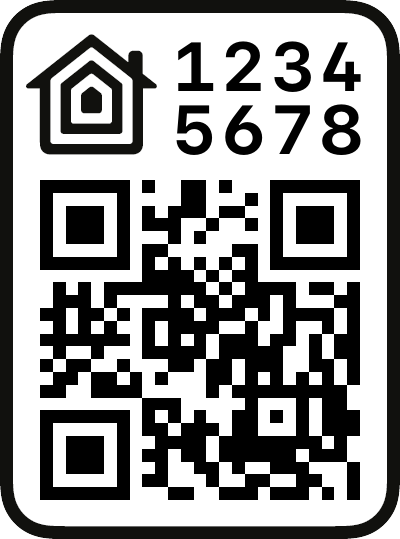
When you compile your code as described in my previous ESP HomeKit SDK article. You can add your accessory to HomeKit by scanning this code! You can print your QR Code and past in at the base plate of your device.

Note: To produce and sell HomeKit compatible accessories, your company need to be certified for that (https://developer.apple.com/homekit/, If you’re interested in developing or manufacturing a HomeKit accessory that will be distributed or sold, your company must enroll in the MFi Program.) Espressif have their implementation of HomeKit framework, but it will give you it only if you have MFi certification (notice this text at the bottom of page you mentioned: Please note that the Espressif HomeKit SDK is available to MFi licensees only, and you need to provide the Account Number for verification purposes when requesting the SDK.).This project is a non-commercial implementation of HAP protocol, not meant for commercial use.
REFERENCE
Maxim Kulkin, esp-homekit (2019), Apple HomeKit accessory server library for ESP-OPEN-RTOS , https://github.com/maximkulkin/esp-homekit Maxim Kulkin, esp-homekit-demo (2019), Demo of Apple HomeKit accessory server library , https://github.com/maximkulkin/esp-homekit-demo