
Software
ESP8266 HomeKit SDK in Docker: Build Your Own Firmware
Two Docker images with the ESP toolchain and ESP-Open-RTOS, to build ESP8266 HomeKit firmware on a Mac, from build to Apple Home.
- ESP8266
- HomeKit
- 7 min read

The ESP8266 HomeKit accessories on this site run firmware that was built with a toolchain, the ESP-Open-RTOS operating system and the HomeKit library of Maxim Kulkin. Installing all that by hand is a lot of work and it breaks easily. This project puts the whole build environment in two Docker images, so you can compile the HomeKit examples on a Mac without installing a toolchain.
You do not need this to use the accessories on this site: they install as ready-made binaries with Life Cycle Manager 2, as described in ESP8266 HomeKit Blinds. It is for anyone who wants to build their own firmware.
What you need
| Item | What it is for |
|---|---|
| A Mac | The steps and screenshots are made on macOS |
| Docker Desktop | Runs the two build images |
| Python 3 and pip | To install esptool, for example through Homebrew |
| esptool | Flashes the first bootloader files to the module |
| A text editor | To fill in your WiFi name and password |
| A GitHub account | For the over-the-air updates: the firmware is a release on GitHub |
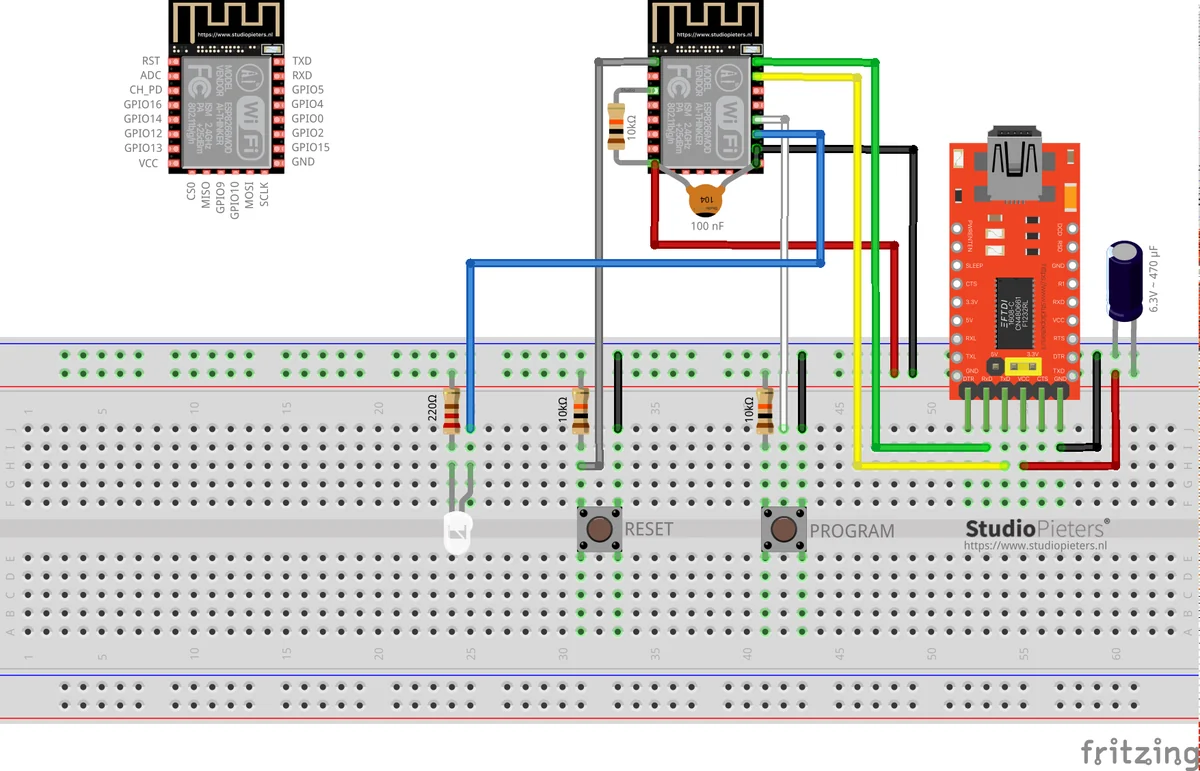
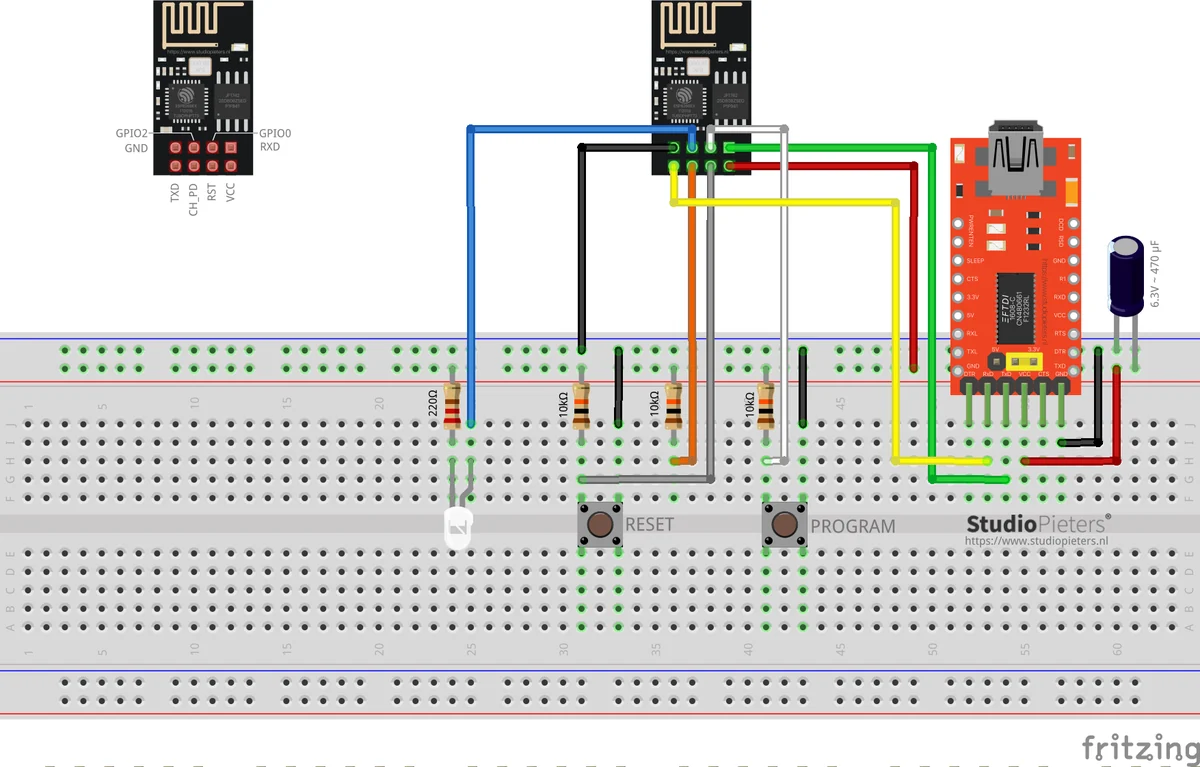
| An ESP8266 on a breadboard with an FTDI adapter | See the diagrams below |
The breadboard setups
Both setups have RESET and PROGRAM buttons, a led with a resistor and an FTDI adapter with a capacitor of 470 µF on the supply. The ESP-12 has a 100 nF capacitor and pull-up resistors as well. See the ESP8266 pinout and the ESP8266-01 pinout for the pins.
Build the two Docker images
Install Docker Desktop for Mac and start it. The build needs two images. The first one, esp-sdk, holds the toolchain. It is built in Ubuntu 20.04 from the esp-open-sdk project, and only the finished toolchain is copied into the final image:
# Download base image ubuntu 20.04
FROM ubuntu:20.04 as builder

# Add User
RUN groupadd -g 1000 docker && useradd docker -u 1000 -g 1000 -s /bin/bash --no-create-home
RUN mkdir /build && chown docker:docker /build

# Disable Prompt During Packages Installation
RUN DEBIAN_FRONTEND="noninteractive" apt-get update && apt-get -y install tzdata

# Update Ubuntu Software repository and install prerequisites
RUN apt-get update && apt-get install -y
  make unrar-free autoconf automake libtool gcc g++ gperf
  flex bison texinfo gawk ncurses-dev libexpat-dev python-dev python python3-serial
  python3-pip sed git unzip bash help2man wget bzip2 libtool-bin

# Install Python prerequisites
RUN apt-get update && apt-get install -y wget &&
    wget https://bootstrap.pypa.io/pip/3.5/get-pip.py &&
    python get-pip.py &&
    pip --version &&
    pip install pyserial

# Clone and setup ESP-OPEN-SDK
RUN su docker -c "
    git clone --recursive https://github.com/pfalcon/esp-open-sdk.git /build/esp-open-sdk ;
    cd /build/esp-open-sdk ;
    # download the latest version to solve bash >= 3.1 error
    rm -rf ./crosstool-NG ;
    git clone --recursive https://github.com/wdankier/crosstool-NG.git ;
    cd /build/esp-open-sdk/crosstool-NG ;
    ls ;
    mkdir .build ;
    cd .build ;
    mkdir tarballs ;
    cd tarballs ;
    wget https://github.com/libexpat/libexpat/releases/download/R_2_1_0/expat-2.1.0.tar.gz ;
    cd /build/esp-open-sdk ;
    make STANDALONE=n ;
"

# Set base image ubuntu 20.04
FROM ubuntu:20.04

# Update Ubuntu Software repository and install prerequisites
RUN apt-get update && apt-get install -y make python python3-serial

# Install Python prerequisites
RUN apt-get update && apt-get install -y wget &&
    wget https://bootstrap.pypa.io/pip/3.5/get-pip.py &&
    python get-pip.py &&
    pip --version &&
    pip install pyserial

# Set PATH
COPY --from=builder /build/esp-open-sdk/xtensa-lx106-elf /opt/xtensa-lx106-elf
ENV PATH /opt/xtensa-lx106-elf/bin:$PATH
The second one, esp-rtos, starts from the first one and adds ESP-Open-RTOS. It also sets SDK_PATH:
# Download base image ubuntu 20.04
FROM ubuntu:20.04 as builder

# Update Ubuntu Software repository and install prerequisites
RUN apt-get update && apt-get install -y git

# Clone ESP-OPENRToS
RUN git clone --recursive https://github.com/Superhouse/esp-open-rtos.git /opt/esp-open-rtos

# Set base image ESP-SDK
FROM esp-sdk:latest

# Copy
COPY --from=builder /opt/esp-open-rtos /opt/esp-open-rtos

# Set PATH
ENV SDK_PATH /opt/esp-open-rtos
Save both as text files, esp-sdk-dockerfile and esp-rtos-dockerfile, in one folder. The files in the releases of the repository have a few extra label lines. Build the images in that order, since the second one needs the first:
docker build . -f esp-sdk-dockerfile -t esp-sdk
docker build . -f esp-rtos-dockerfile -t esp-rtos
The first build takes a long time, since it builds a whole toolchain.
Get the HomeKit examples
Make a folder for the projects and clone the HomeKit demo, with its submodules:
mkdir ~/esp
cd ~/esp
git clone --recursive https://github.com/maximkulkin/esp-homekit-demo.git
cd esp-homekit-demo
Copy wifi.h.sample to wifi.h and put your own network in it:
#define WIFI_SSID "mywifi"
#define WIFI_PASSWORD "mypassword"
Settings for your module
Depending on your module, set these environment variables before you build:
| Variable | When |
|---|---|
FLASH_SIZE=8 and HOMEKIT_SPI_FLASH_BASE_ADDR=0x7a000 | For a module with 1 MB of flash. With 4 MB (32 Mbit) of flash the defaults are fine |
HOMEKIT_DEBUG=1 | To see debug output, for example when you file an issue |
FLASH_MODE=dout | Some modules need this flash mode |
The build for the LED example with over-the-air updates in the screenshots uses FLASH_SIZE=8 and HOMEKIT_SPI_FLASH_BASE_ADDR=0x8c000.
Build the LED example
Run the build inside the esp-rtos image. It mounts the current folder as /project:
docker run -it --rm -v "$(pwd)":/project -w /project esp-rtos
  make -C examples/led FLASH_SIZE=8 HOMEKIT_SPI_FLASH_BASE_ADDR=0x8c000 all
The result is examples/led/firmware/main.bin. A shorter way to type it is a helper function in your shell profile:
docker-run() {
  docker run -it --rm -v "$(pwd)":/project -w /project "$@"
}

docker-run esp-rtos make -C examples/led all
To flash and start the serial monitor straight from the build, find the name of your USB device first. Run ls /dev/tty.* before and after you connect the ESP8266 and note the new device. Then:
make -C examples/led flash monitorSign it and publish it for updates
For over-the-air updates through Life Cycle Manager, the firmware has to be a release on GitHub with a signature file next to it. Make the signature from main.bin:
openssl sha384 -binary -out firmware/main.bin.sig firmware/main.bin
printf "%08x" $(cat firmware/main.bin | wc -c) | xxd -r -p >> firmware/main.bin.sig- Make a repository on GitHub, for example a repository with the name of your project and an MIT licence.
- Make a release, for example
0.0.1, and attachmain.binandmain.bin.sig.
Flash the bootloader and install
Erase the module, then flash the three files of Life Cycle Manager: rboot.bin, blank_config.bin and otaboot.bin. Replace the port with the one of your adapter:
esptool.py erase_flash
esptool.py -p /dev/cu.usbserial-XXXX --baud 115200 write_flash -fs 1MB -fm dout -ff 40m 0x0 rboot.bin 0x1000 blank_config.bin 0x2000 otaboot.bin
Then join the LCM- WiFi network that the module makes and open 192.168.4.1 in a browser. Fill in your WiFi password, the pin of the led, the OTA repository (your repository on GitHub, in the form user/repository) and the binary file, main.bin. The full walkthrough is in ESP8266 HomeKit Blinds, and the newer version of the manager is in ESP32 Lifecycle Manager V2.
Add it to Apple Home
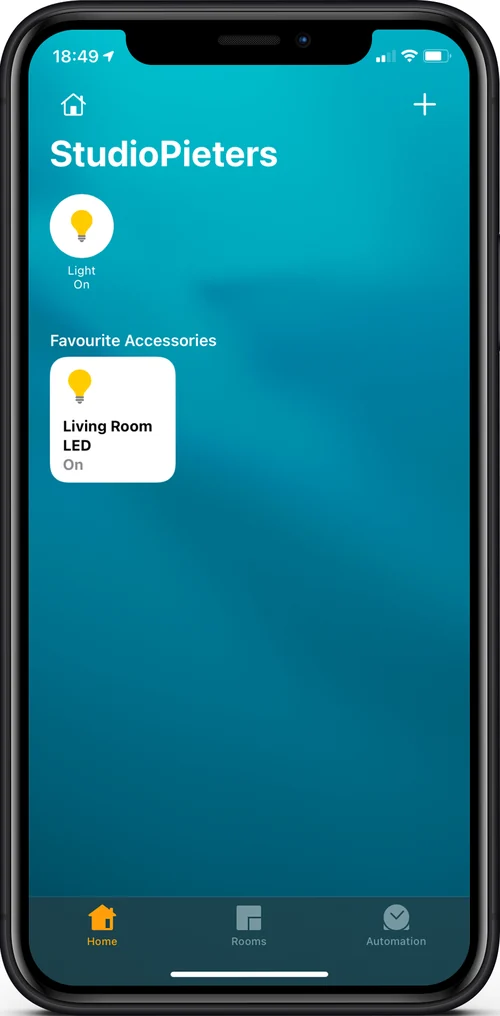
When the module has installed the firmware, open the Home app and add the accessory. The screenshots show the LED example.
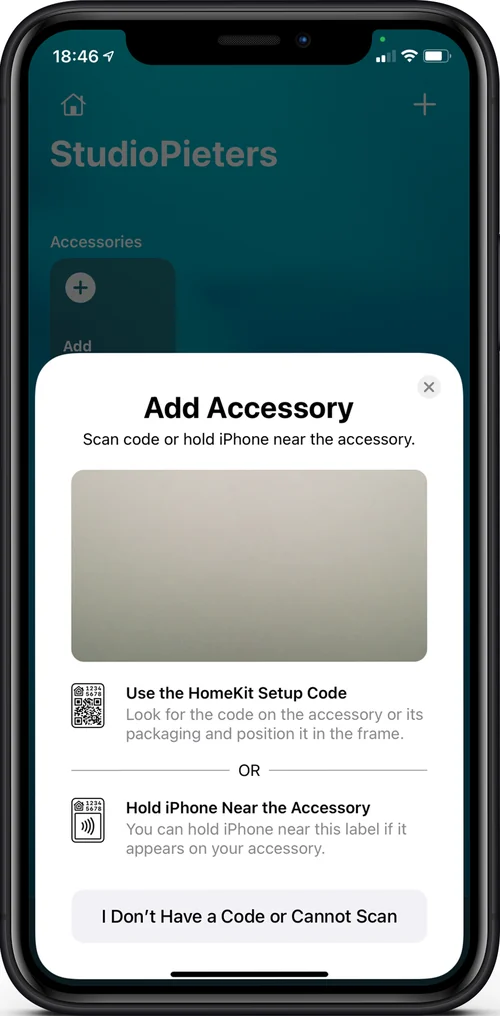
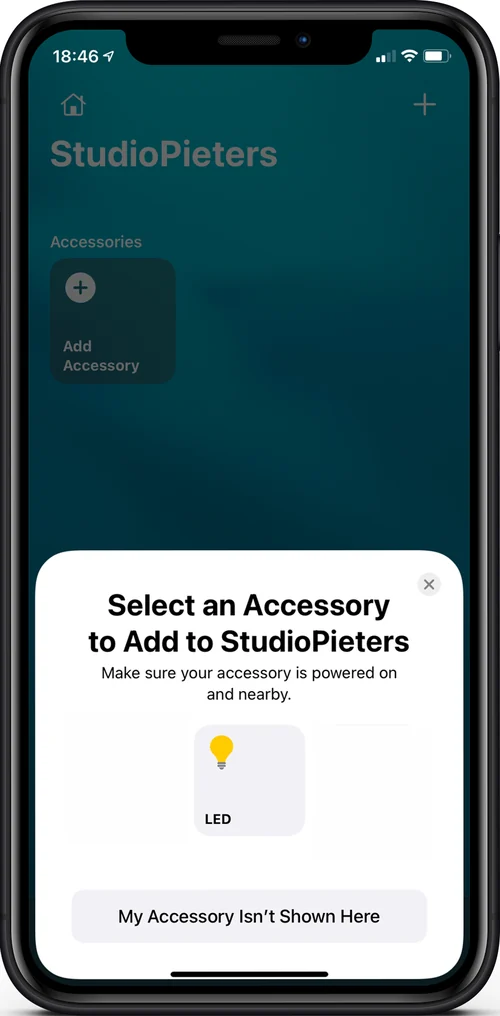
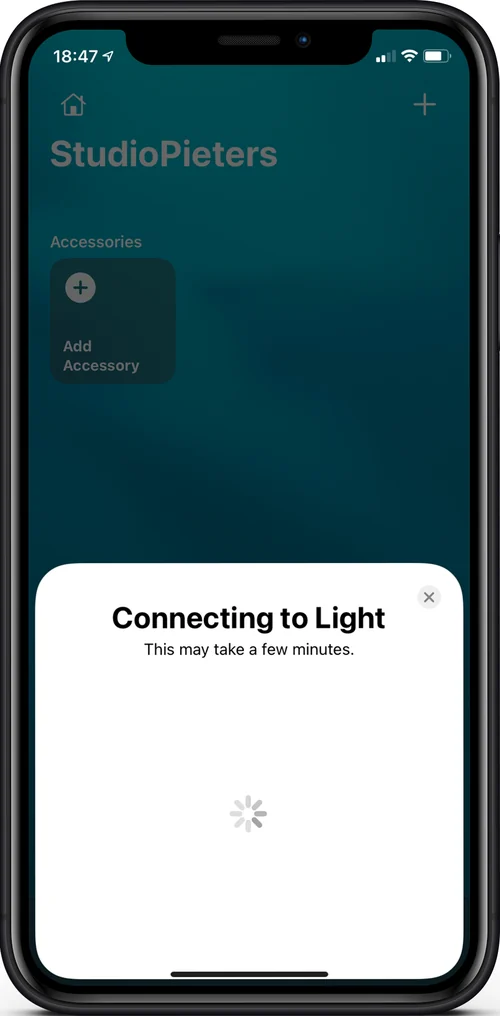
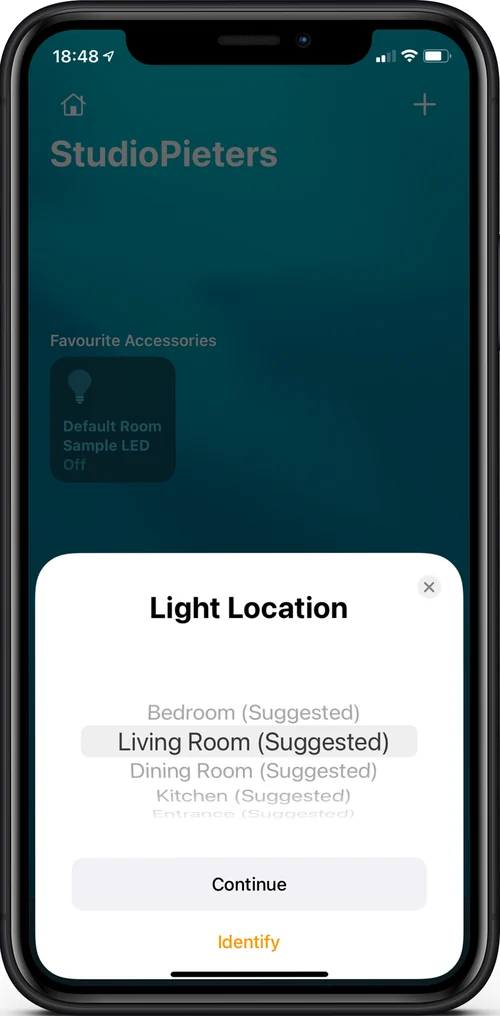
The Home app warns that the accessory is not certified. That is normal for an accessory that you build yourself. When it is added, the LED shows up as a light that you can switch on and off.
Releases of the images
| Version | Date | Changes |
|---|---|---|
| 3.5.1 | 18 May 2021 | Fixes for a toolchain download that failed: the tarball of expat-2.2.10 could not be fetched, and some minor fixes |
| 3.5.0 | 25 January 2021 | Ubuntu 20.04 as the builder, Python 3 fixes and patches, pip 3.5, a fix for the bash 3.1 or newer error, script optimisation |
| 2.7.0 | 20 October 2020 | The first version with Ubuntu 20.04 as the builder, pip 2.7 and the same fixes |
Every release has the two Dockerfiles.
Good to know
- The HomeKit library is esp-homekit by Maxim Kulkin, the operating system is ESP-Open-RTOS by SuperHouse and the toolchain is esp-open-sdk. This project only packages them.
- The setup code in the examples is a default. Change it for your own accessories.
- The HomeKit Accessory Protocol specification the firmware follows is the non-commercial version, for accessories you build yourself and do not distribute or sell.
- The repository holds the wiki, the images and the releases, and is under the MIT licence.
The project is in the ESP-HomeKit-SDK-Revised-Installation repository on GitHub.
Related
 Opinion
The ESP32 Family, Explained Honestly
A plain-language walkthrough of every real ESP32 family (and the ESP8266), what each is actually good at, and which one to reach for depending on what you're building.
Read more
Opinion
The ESP32 Family, Explained Honestly
A plain-language walkthrough of every real ESP32 family (and the ESP8266), what each is actually good at, and which one to reach for depending on what you're building.
Read more
 Papercraft
The Stormtrooper Helmet: Pepakura Files for a Star Wars Fan
A Star Wars fan's papercraft collection, built around the First Order Stormtrooper helmet and the full armour, with more helmets and figures.
Read more
Papercraft
The Stormtrooper Helmet: Pepakura Files for a Star Wars Fan
A Star Wars fan's papercraft collection, built around the First Order Stormtrooper helmet and the full armour, with more helmets and figures.
Read more
 Electronics
NeoPixel Light with an ESP8266 and Homebridge
An ESP8266-12E that drives a 144-pixel NeoPixel strip and answers the requests of a Homebridge plugin.
Read more
Electronics
NeoPixel Light with an ESP8266 and Homebridge
An ESP8266-12E that drives a 144-pixel NeoPixel strip and answers the requests of a Homebridge plugin.
Read more
More projects
Keep building.
Electronics, 3D printing and CNC builds, documented from the first idea to the last screw.
All projects