In a addition to my Nest thermostat, I bought three Nest Protect smoke and carbon monoxide (CO) detector’s. For each floor one detector. Nothing then the best for my Kid’s and wife as they are priceless to me!
Design Protection
Many consumers will still happily settle for the € 25,00 puck of white plastic that functions as the traditional smoke detector. Like its predecessor, the second-generation Nest Protect elevates the aesthetic of the standard issue detector, but its balances that appeal with a set of connected features that let you control the Protect remotely via your mobile device or your account on the Nest Web page.
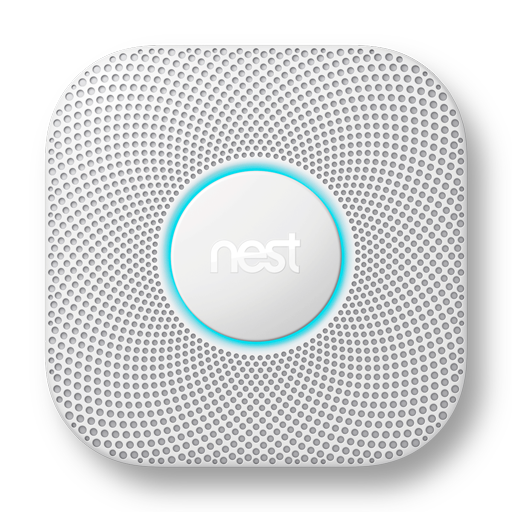
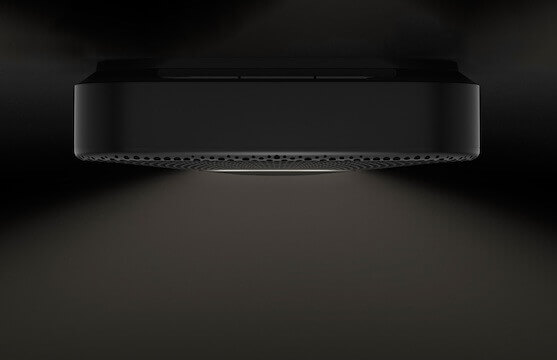
As before, Nest nails the aesthetic upgrade, thanks to the Protect’s white or black finish, square design with rounded edges, and a stainless-steel mesh cover that looks neat and gives smoke and CO a bunch of access points. You might not install it in a place at home where you will often get to admire its looks, but at least when you do, you’ll appreciate seeing it.
A ring of colourful LEDs surround the central on-off button, alerting you to the Protect’s current status. It goes blue during setup or testing mode, green when everything’s fine, white as (my favourite) an optional night light that illuminates when you walk underneath it, yellow/orange to warn that there’s a potential smoke or CO emergency and red when there’s a real smoke or CO event.
More than Design
You can use the second-gen Nest Protect even if you don’t have Wi-Fi (or temporarily lose your Wi-Fi connection for some reason). Whether or not you have Wi-Fi, the Protect unit will issue a loud warning if it senses increasing smoke or CO levels (specifically, it will flash yellow/orange and say, “Heads up. There’s smoke/CO.”) And, if there’s an emergency, it will flash red and say, “Emergency, smoke/CO detected.”
The Protect will also test itself for low batteries or any other concerns regularly, communicate with any other Protects in the house (if one Protect alarm detects smoke, all of the Protects in the house sound) and display a faint white light when you walk underneath it in the dark — presumably on your way to get a late night snack, a feature it calls Pathlight.
To allow for of all of this functionality, the Protect has built-in sensors to detect electrochemical CO, heat, humidity, occupancy and ambient light, as well as a microphone. Nest also upgraded its smoke sensor with a split-spectrum sensor that’s exclusive to the Protect 2.0. This new sensor claims to be better at detecting both slow- and fast-burning fires.
With Wi-Fi, you can do a lot more, including naming your Nest Protect(s) hallway/basement/bedroom, etc., opting out of the Pathlight feature, receiving alerts and auto-updates to software, using the Nest Android or iOS mobile apps and Web app, pairing your Protect with the Nest Learning Thermostat.
The problem
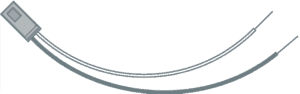
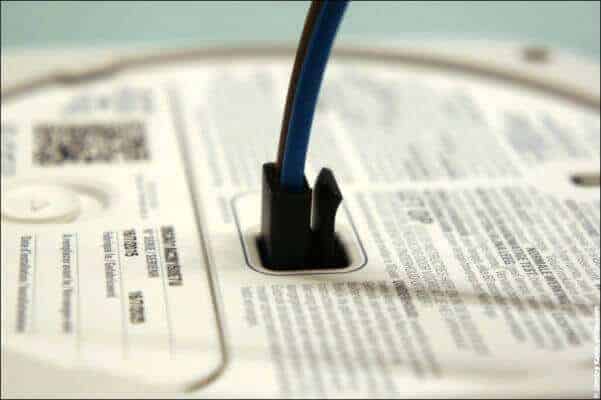
So now you know what I’m talking about, I soon run into a problem as I bought the Nest Protect (Wired) version, be course I wanted to be able to connect them to 230V AC (The Netherlands) power grid. And here is the problem, I want to place them, at a place where I don’t have wiring box in the ceiling. The Nest Protect (Wired) version has a Connector and it sticks out.
Creating a solution
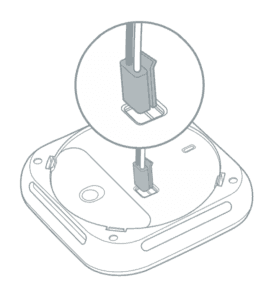
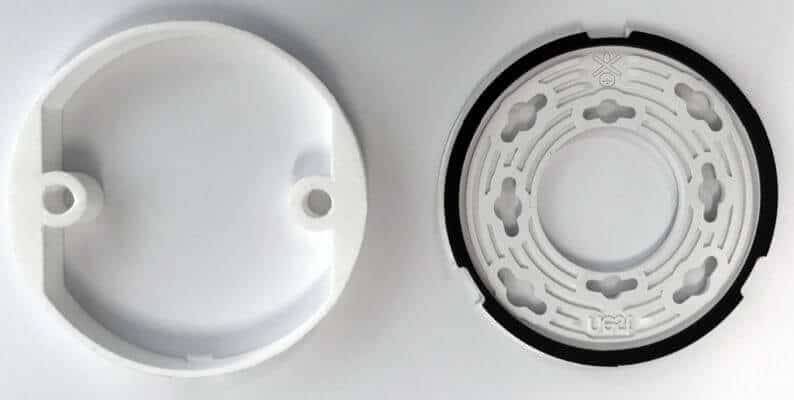
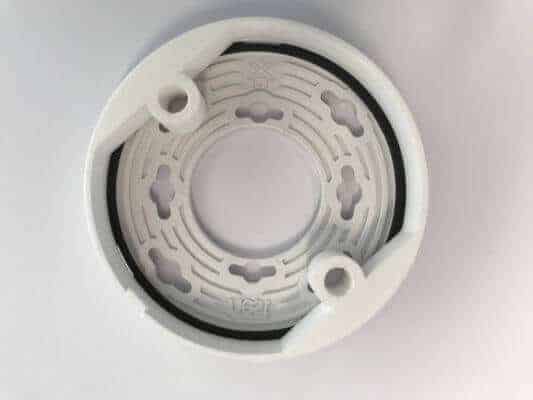
For those that read my blog they know I recently got a 3D Printer from my wife. So let’s see if we can make a Solution for this problem. First we need to measure the height of the connector.
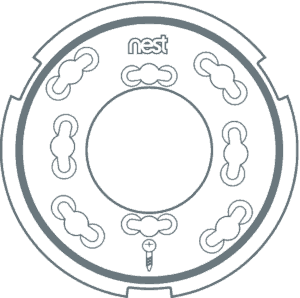
The Nest protect needs to be mounted on the mounting plate.
Now I have everything I need to create a solution.
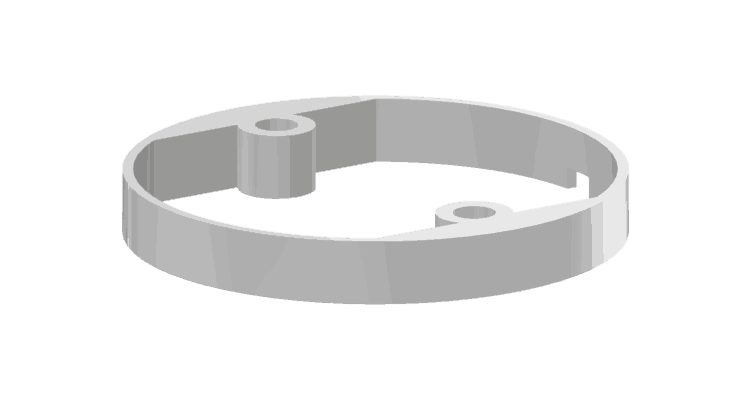
I all sow added a opening for a cable tray so I can connect the Nest Protect to the 230V AC (The Netherlands) power grid.
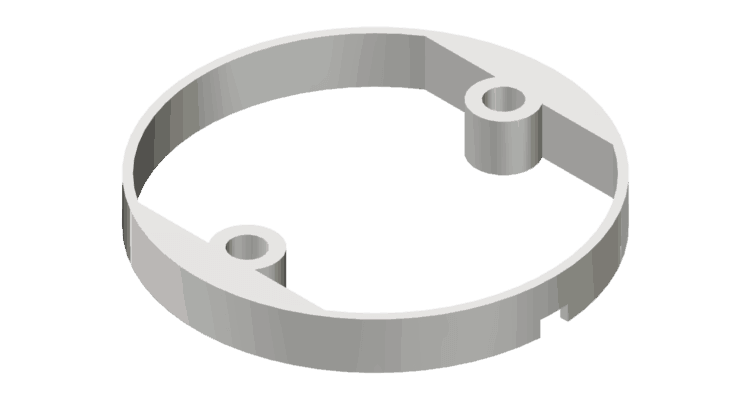
After 20 minutes of designing and this is the end product!
Time to Mount the Nest Protect.
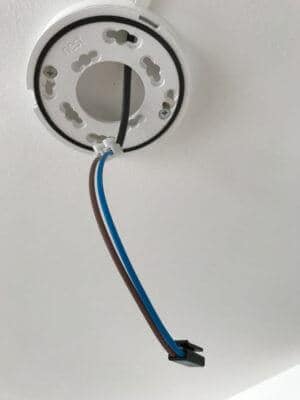

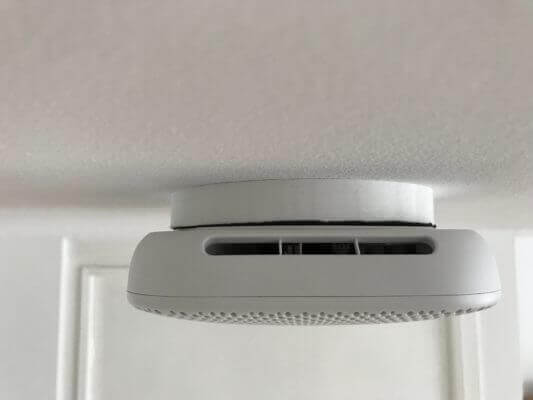
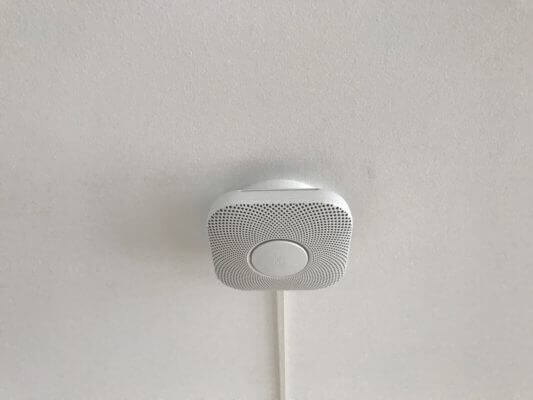
It all fit’s perfectly!