Well after my last successes to make a accessory for my HomeBridge, I want to see if I can make a controllable RGB Light accessory. First, you must install HomeBridge on a Raspberry Pi, and configure it as a HomeKit bridge device.How to do that, you can read here. Then I need a RGB Light, so I found this one, a RGB LED strip .
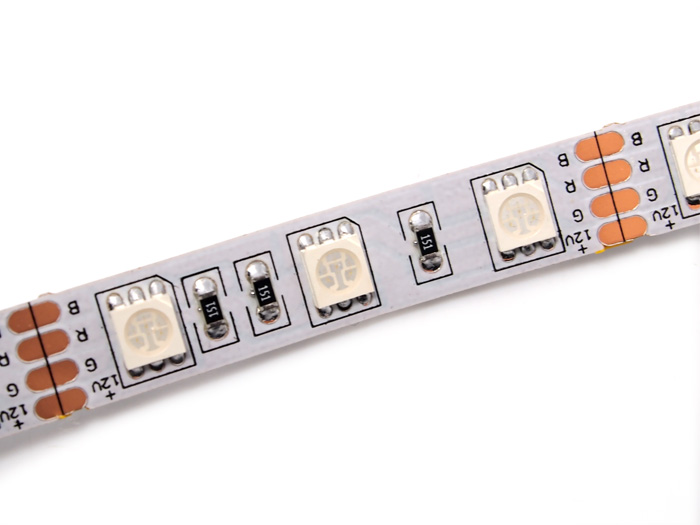
RGB LED strip
The LED strip Uses trinity-SMD LED as lighting source, low voltage with resistance and IC constant current made the shining stable, bright and uniform. FPC circuit board made it easily to bend, with a RGB Controller, you can control the color and brightness easily! Besides, self adhesive back makes it convenient to stick them to any flat surface. These LED strips are sold by standard ( 1m , 2m, 3m .. ) lengths and comes with connectors. the Specification of the strips are: 10.0mm wide, 2mm thick, 50mm long per segment (3 LED’s). 0.24w per LED. Maximum 12V per strip segment. Max 1.2 Amps per meter (all LED’s lit full brightness). 3 common-anode RGB LED’s per segment, 20 segments per meter. No micro controller or chip controller (‘analog’ only!)
Installing the Plugin on your HomeBridge
When you have installed the HomeBridge you need to install the better-http-RGB package in order to let the HomeBridge communicate with your ESP8266 over HTTP
sudo npm install -g homebridge-better-http-rgb --unsafe-perm
Edit the HomeBridge /var/homebridge/config.json file on the Raspberry Pi HomeBridge. the file may alternatively be in /home/.homebridge or /root/home/./homebridge.
sudo nano ~/.homebridge/config.json
Add this code to the config.json file. Mind the last comma, you may or may not need it if you have other accessories, or Homebridge is crashing on load.
{
   "bridge": {
      "name": "Homebridge",
      "username": "CC:22:3D:E3:CE:30",
      "port": 51826,
      "pin": "031-45-154"
   },

   "description": "Example configuration file for NodeMCU-RGB-Controller and better-http-rgb plugin",

   "platforms": [

    ],

   "accessories": [
   {    "accessory": "HTTP-RGB",
        "name": "RGB Strip",

        "switch": {
           "status": "http://192.168.1.10:80/status",
           "powerOn": "http://192.168.1.10:80/on",
           "powerOff": "http://192.168.1.10:80/off"
      },

        "color": {
           "status": "http://192.168.1.10:80/color",
           "url": "http://192.168.1.10:80/set/%s"
      },

        "brightness": {
           "status": "http://192.168.1.10:80/bright",
           "url": "http://192.168.1.10:80/set/%s"
      }
   }

   ]
}
The Hardware
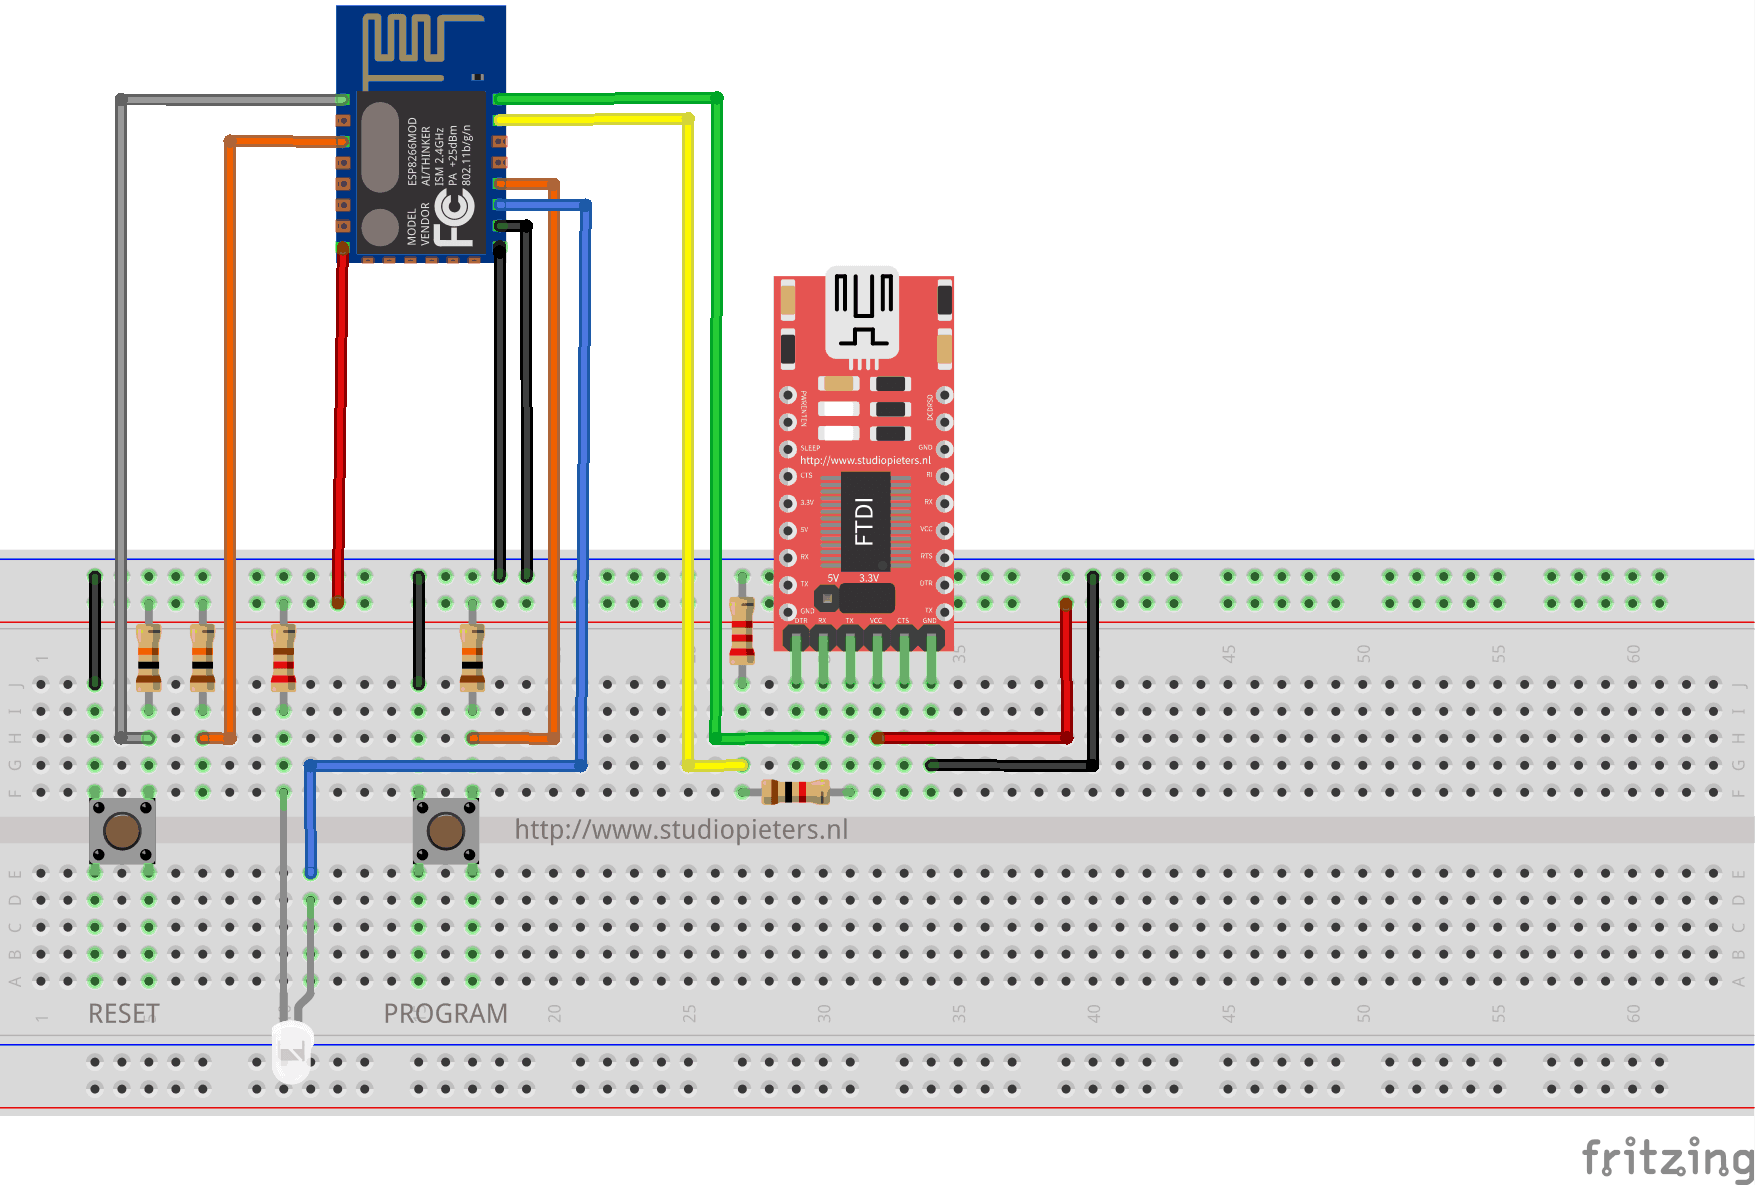
Once you have HomeKit / HomeBridge working on your Pi and your iPhone, we can build a Temperature & Humidity sensor that can be read by Siri and the HomeKit app. At first we need to setup the FTDI programmer to program the ESP8266-E12 with the Arduino IDE.
The Code
The we can upload the program below to your ESP8266. (Update: 11 march 2021, special thanks to XavBart )
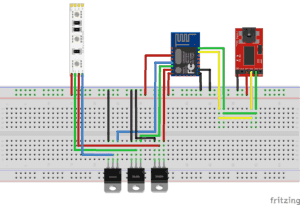
Now we can modify our setup so we can see if everything is working. In the fritting digram below you can see that now I have added a LED Strip plus three TIP122 (The TIP120 is an NPN Power Darlington Transistor. It can be used with an Arduino to drive motors, turn lights on, and drive other high power gadgets.) and keeping the RX and TX connected so we can see in the monitor from the Arduino IDE if everything is working as we want to.
Now we have to connect our iPhone to the home bridge and add the new accesoires.
Yes! It works!

![]()
Download all Files for this project on github.

Do you have any questions? Leave a comment down here.
Reference
Nick Farina (Nov 14 2017), Homebridge, Homebridge is a lightweight NodeJS server you can run on your home network that emulates the iOS HomeKit API., https://github.com/nfarina/homebridge Justin J. Novack ( Dec 17 2017), homebridge-better-http-rgb, Supports RGB http(s) devices on the HomeBridge Platform, https://github.com/jnovack/homebridge-better-http-rgb