After a while all software will be updated or there will be some bug fix releases. So does the software that is needed for the Installation (or setup) of the HomeKit SDK (including perquisites and updates), is the act of making the program ready for execution. Because the process varies for each program and each computer, programs (including operating systems) often come with a custom installation script. A specialised script responsible for installing whatever is needed for the compiling of your code. So it’s time for a revised installation manual.
Prerequisites Installation
Before we can start the Installation of the the software we need to install some software. Because I using a MacBook Pro with macOS 10.15.6 (Catalina) at this time of writing. I’m using Docker to install some docker files. You can also use Oracle Virtual Box and install Ubuntu, but this is a little more complicated, because you need to switch between the two OSes. When you install the docker files you can compile your code directly on your Mac.
Docker Installation
Okay let’s get started go to https://www.docker.com and press “Get Started”.

Under Docker Desktop press on “Download for Mac“.
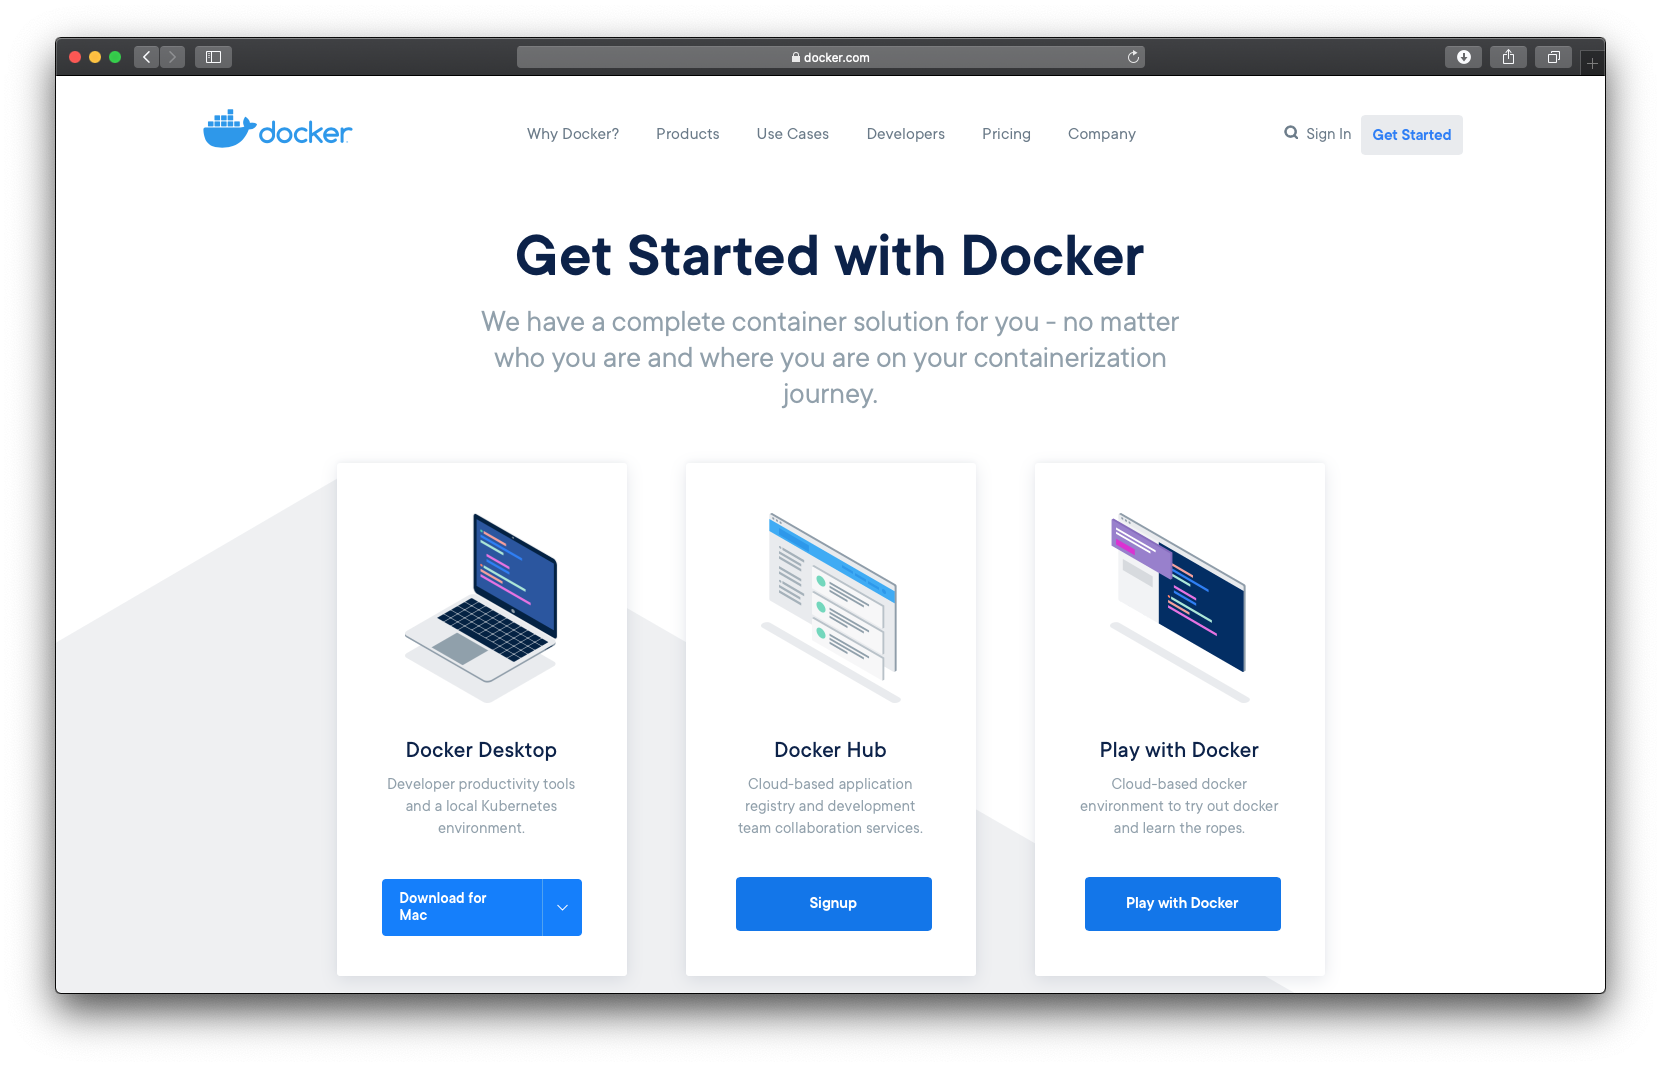
Now you only need to make an account. Under “Docker HUB” press on “Signup“. Be sure to write it down because you will need it later.
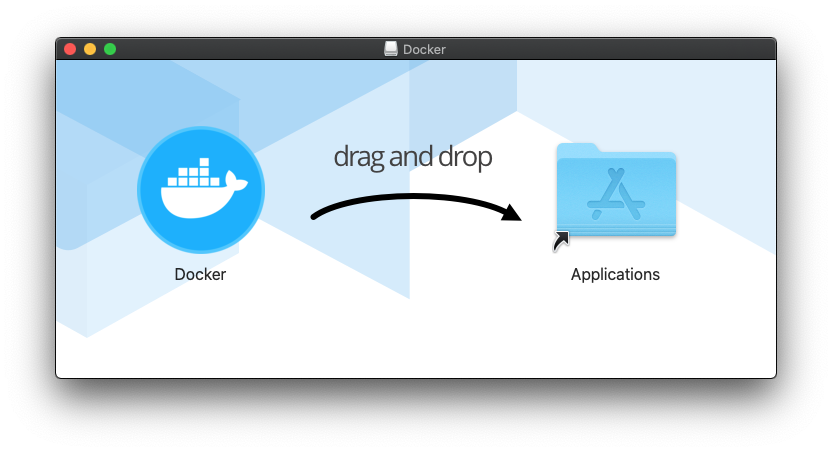
Double-click Docker.dmg to start the install process. When the installation completes and Docker starts. The whale in the top status bar shows that Docker is running, and accessible from a terminal.
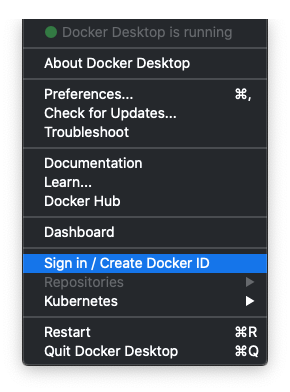
Once you have docker installed, “start” docker for the first time. When docker is started “Sign in”.
After we have installed this part we can install some docker containers.
Atom Installation
Atom is a free and open-source text and source code editor for macOS, Linux, and Microsoft Windows with support for plug-ins written in Node.js, and embedded Git Control, developed by GitHub. Atom is a desktop application built using web technologies. Most of the extending packages have free software licenses and are community-built and maintained. You can download your free copy here.

Build container with Dockerfile
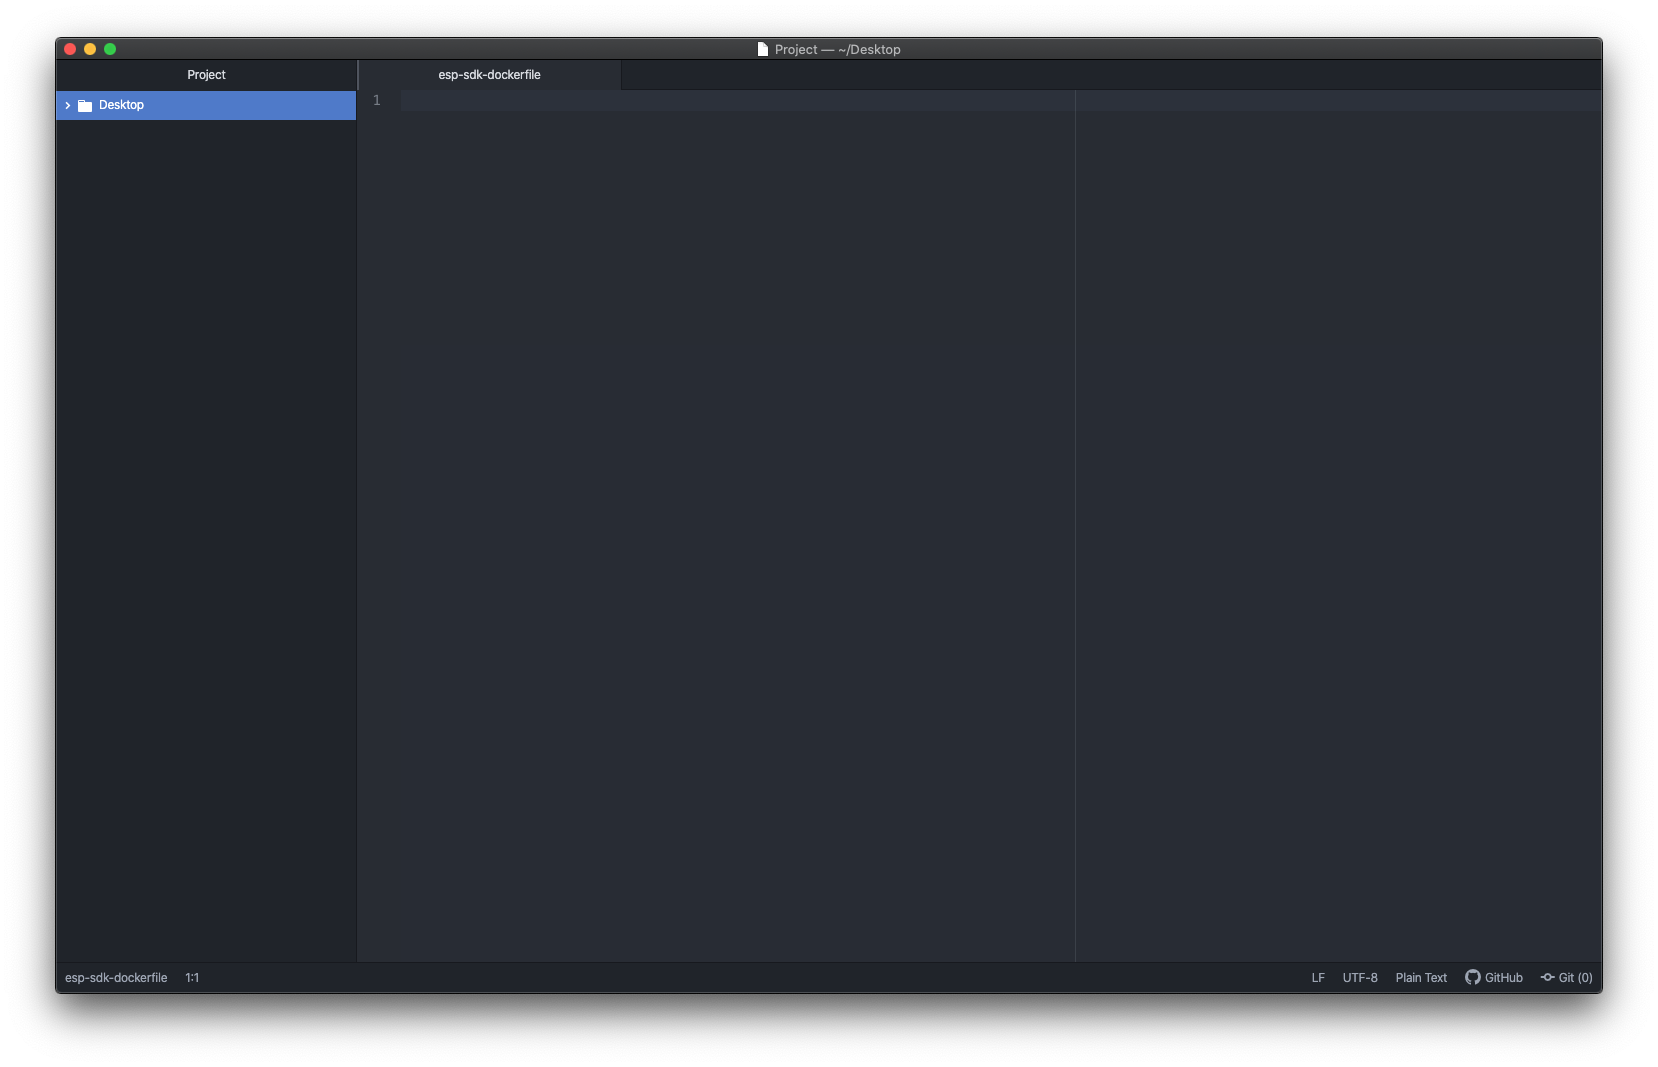
Now that you’ve set up your development environment, you can begin to develop containerised applications. Writing a Dockerfile is the first step to containerising an application. You can think of these Dockerfile commands as a step-by-step recipe on how to build up your image. Create a new file in Atom and save it to your desktop and call it: esp-sdk-dockerfile
Copy the code below into esp-sdk-dockerfile the file you create file in Atom and save it.
NOTE: As you can see I used Ubuntu 20.04 the latest version (at time of writing). I choose thus Release to ensure a long lifetime, but also to make it work under this release and releases to come. Every LTS release is supported for 5 years on the desktop and server and this one is no exception: Ubuntu 20.04 is supported until 2025.
Create a new file in Atom and save it to your desktop and call it: esp-rtos-dockerfile.
Copy the code below into esp-rtos-dockerfile the file you create file in Atom and save it.

You can also download these files from my GitHub here for esp-sdk-dockerfile and here for esp-rtos-dockerfile
Open the Terminal app. In your dock, Click the Finder icon . Then click Go. Select Utilities. Double-click Terminal. To build esp-sdkDocker container, run this command:
cd desktop
and then:
docker build . -f esp-sdk-dockerfile -t esp-sdk

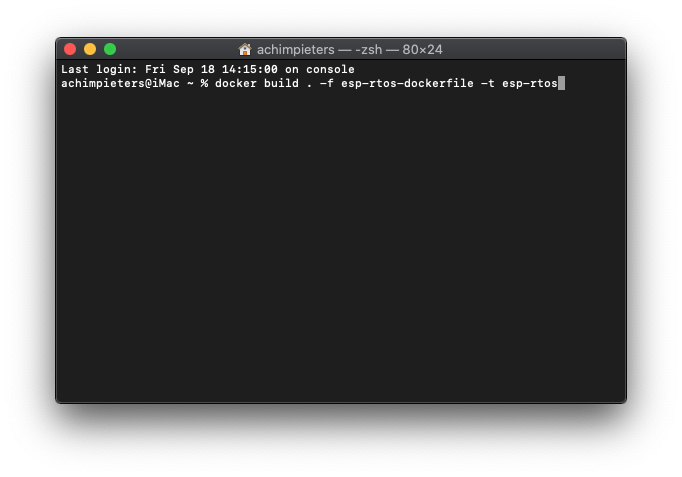
Open the Terminal app. Go to the Finder icon in your dock. Then click Go. Select Utilities. Double-click Terminal. To build esp-rtos Docker container, run this command:
docker build . -f esp-rtos-dockerfile -t esp-rtos
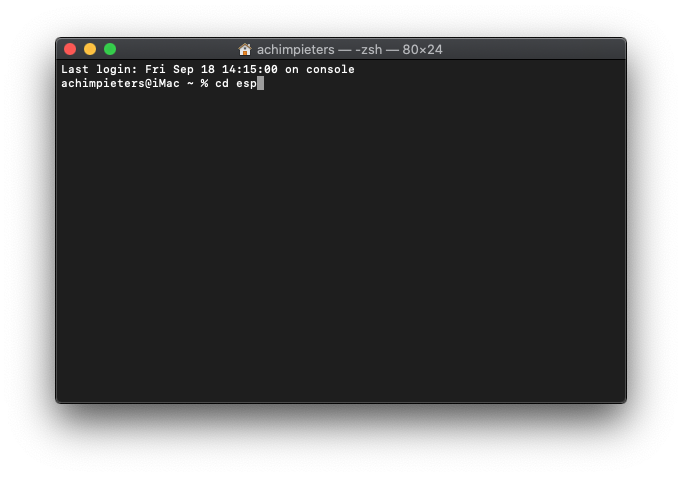
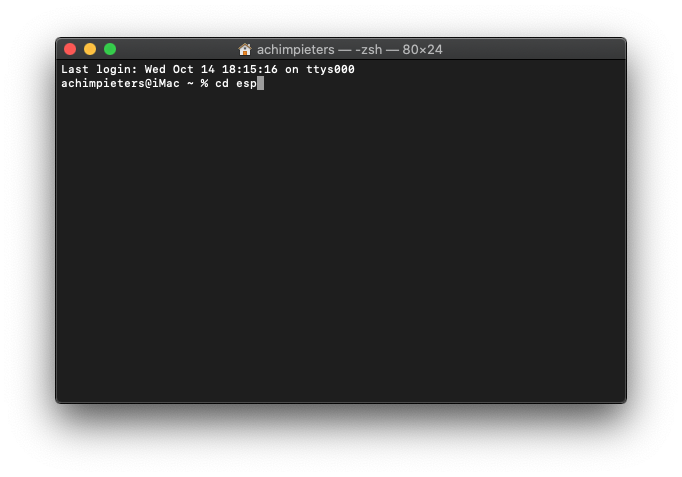
Make a new folder called ESP. Run this command:
mkdir esp

Change into the directory by typing:
cd esp
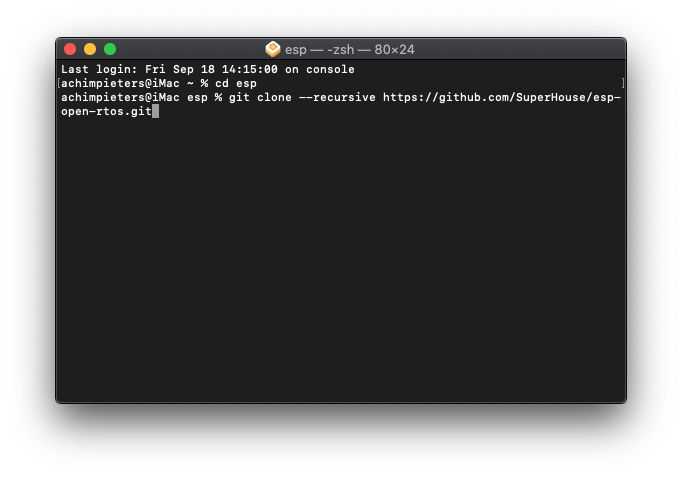
Now you can clone esp-open-rtos repository within this directory
git clone --recursive https://github.com/SuperHouse/esp-open-rtos.git
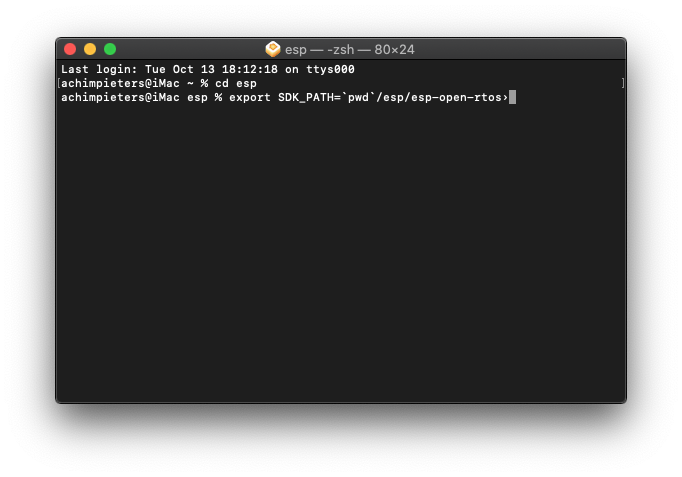
Now we only have to setup the environment variables:
export SDK_PATH=`pwd`/esp/esp-open-rtos
Python Installation
Before installing Python, you’ll need to install GCC. GCC can be obtained by downloading Xcode, the smaller Command Line Tools (must have an Apple account) or the even smaller OSX-GCC-Installer package.
Note: If you already have Xcode installed, do not install OSX-GCC-Installer. In combination, the software can cause issues that are difficult to diagnose.
Note: If you perform a fresh install of Xcode, you will also need to add the command line tools by running xcode-select --install on the terminal.
While OS X comes with a large number of Unix utilities, those familiar with Linux systems will notice one key component missing: a package manager. Homebrew fills this void. To install Homebrew, open Terminal or your favourite OS X terminal emulator and run:
ruby -e "$(curl -fsSL https://raw.githubusercontent.com/Homebrew/install/master/install)"

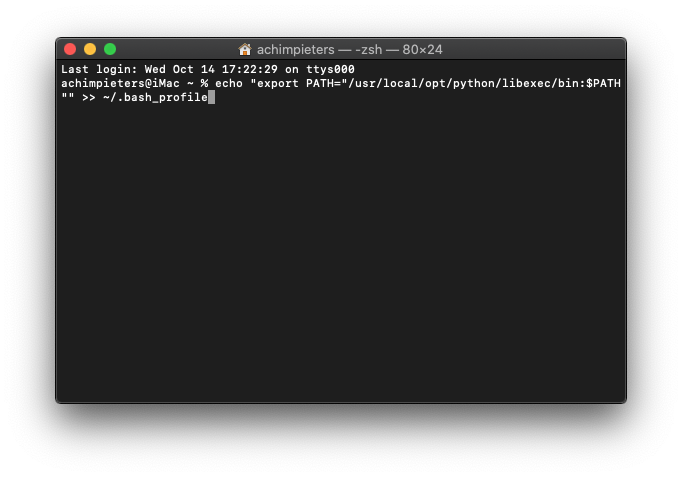
The script will explain what changes it will make and prompt you before the installation begins. Once you’ve installed Homebrew, insert the Homebrew directory at the top of your PATH environment variable. You can do this by adding the following line at the bottom of your ~/.profile file
echo "export PATH="/usr/local/opt/python/libexec/bin:$PATH"" >> ~/.bash_profile
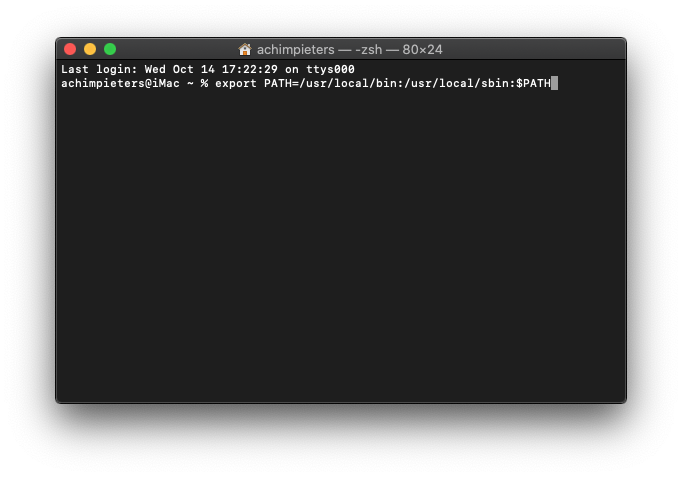
If you have OS X 10.12 (Sierra) or older use this line instead
export PATH=/usr/local/bin:/usr/local/sbin:$PATH
Now, we can install Python 3:
brew install python

This will take a minute or two.

esptool Installation
Esptool is a Python-based, therefor we needed to install Python first. Esptool is a open source, platform independent, utility to communicate with the ROM bootloader in Espressif ESP8266 & ESP32 chips. esptool.py is Free Software under a GPLv2 license.
You will need either Python 2.7 or Python 3.4 or newer installed on your system.
DEPRECATION: Python 2.7 will reach the end of its life on January 1st, 2020. Please upgrade your Python as Python 2.7 won’t be maintained after that date. A future version of pip will drop support for Python 2.7. More details about Python 2 support in pip, can be found at https://pip.pypa.io/en/latest/development/release-process/#python-2-support
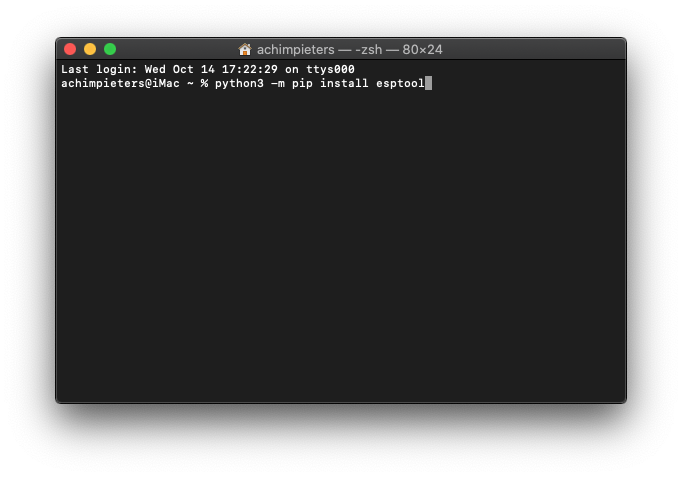
The latest stable esptool.py release can be installed from pypi via pip:
python3 -m pip install esptool --user
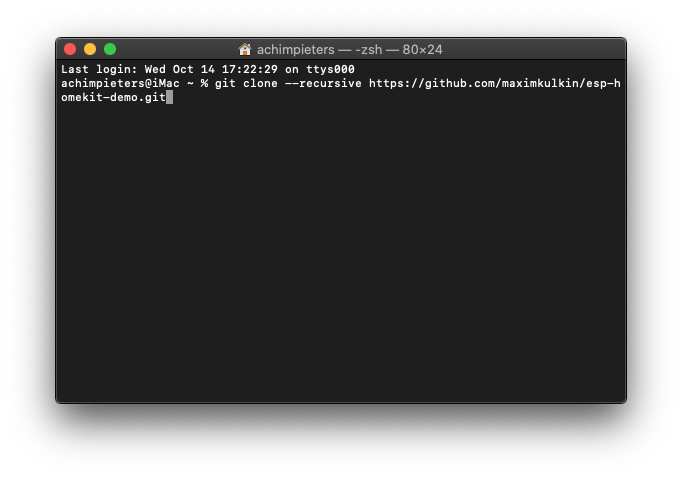
we also have to clone esp-homekit-demo repository because this is the main repository:
git clone --recursive https://github.com/maximkulkin/esp-homekit-demo.git
Configuring esp-homekit-demo
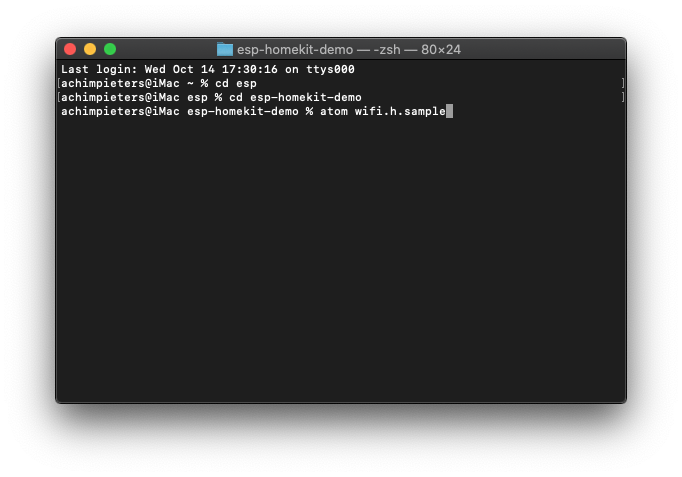
Copy wifi.h.sample and save it as wifi.h.
cd esp-homekit-demo

Open the Atom editor.
atom wifi.h.sample
Edit it with correct WiFi SSID and PASSWORD. Save the file as ‘Wifi.h‘.

Note: The Wifi.h.sample part is not necessary when you use Life Cycle Manager. You can leave the SSID and PASSWORD blank. Just follow these steps for good practice.
Compiling the code
Now its time to compile the code by default it is done by typing:
docker run -it –rm -v `pwd`:/project -w /project esp-rtos make -C examples/led all
If you use ESP8266 with 4MB of flash (32m bit), then you’re fine. If you have 1MB chip, you need to add the following:
FLASH_SIZE=8
Because I use Life Cycle Manger (more about this later) to distribute my Binary files you have to change the default address 0x7a000 to 0x8c000 so you need to add the following:
HOMEKIT_SPI_FLASH_BASE_ADDR=0x8c000Then build example you want (e.g. Led) by running
docker run -it --rm -v `pwd`:/project -w /project esp-rtos make -C examples/led FLASH_SIZE=8 HOMEKIT_SPI_FLASH_BASE_ADDR=0x8c000 all
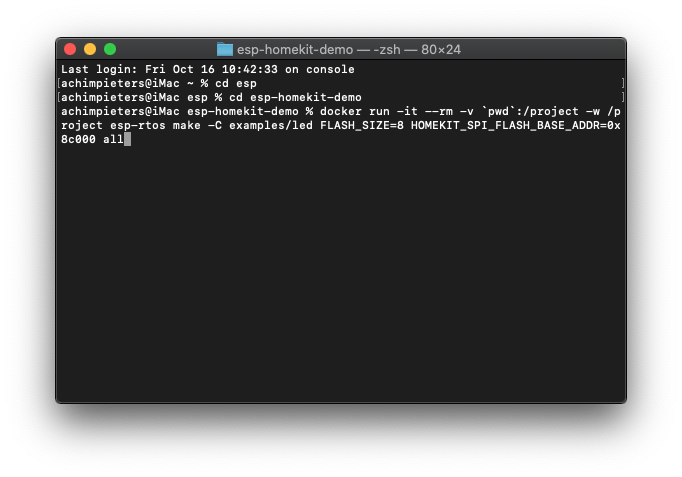
Wait until the compiling is done.

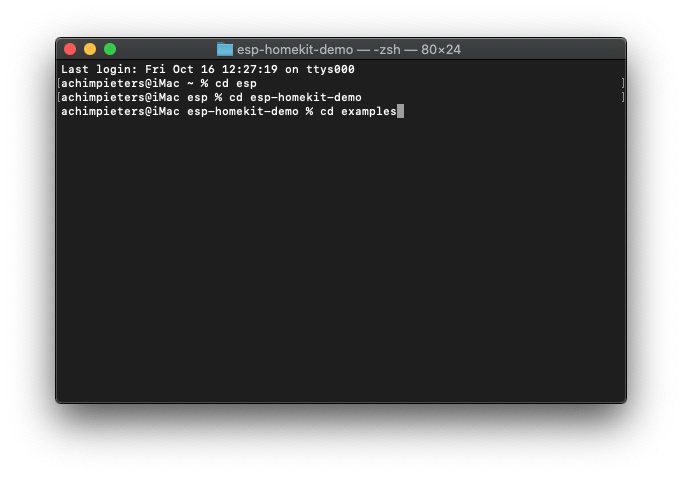
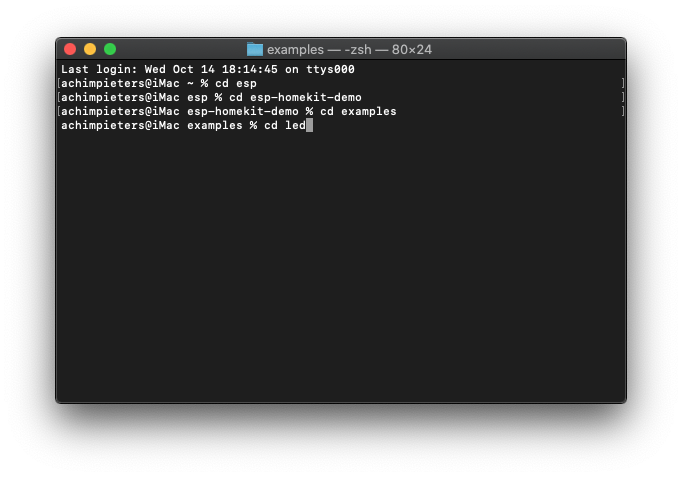
Now when you change to the examples directory
examples
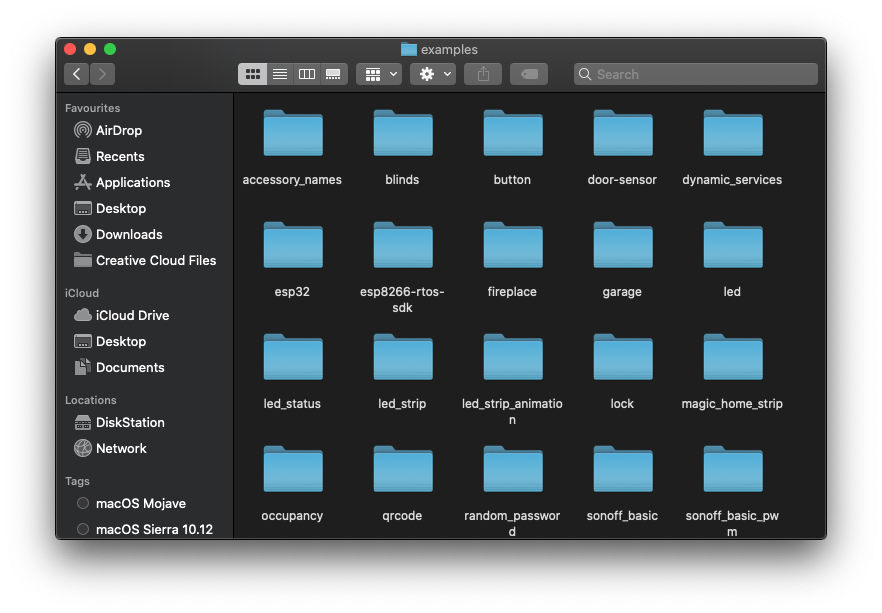
and the to the led directory
led
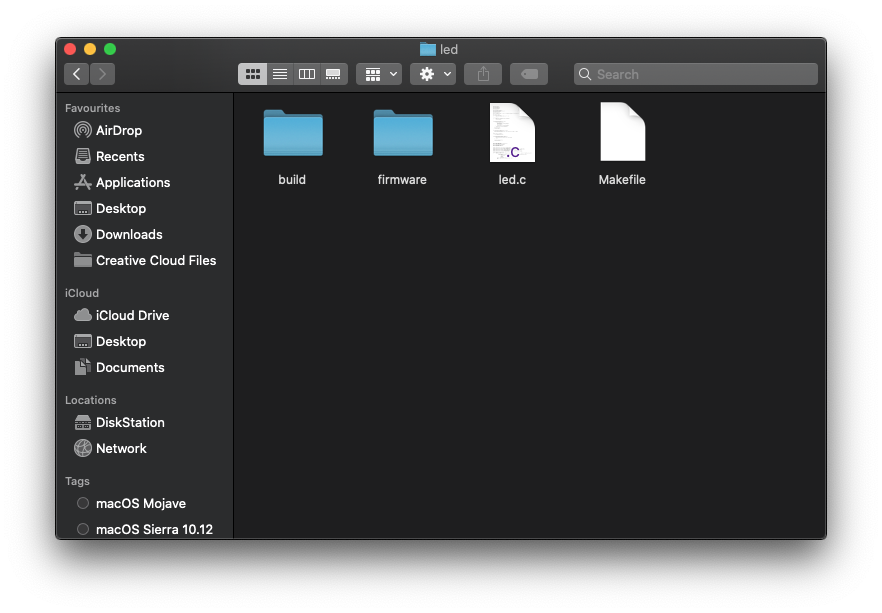
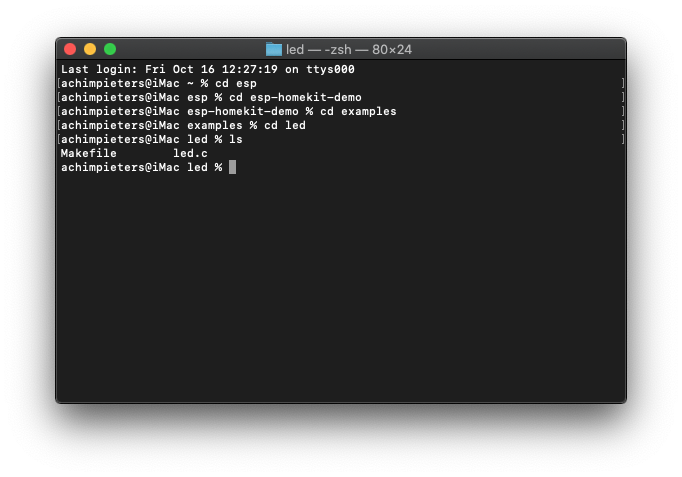
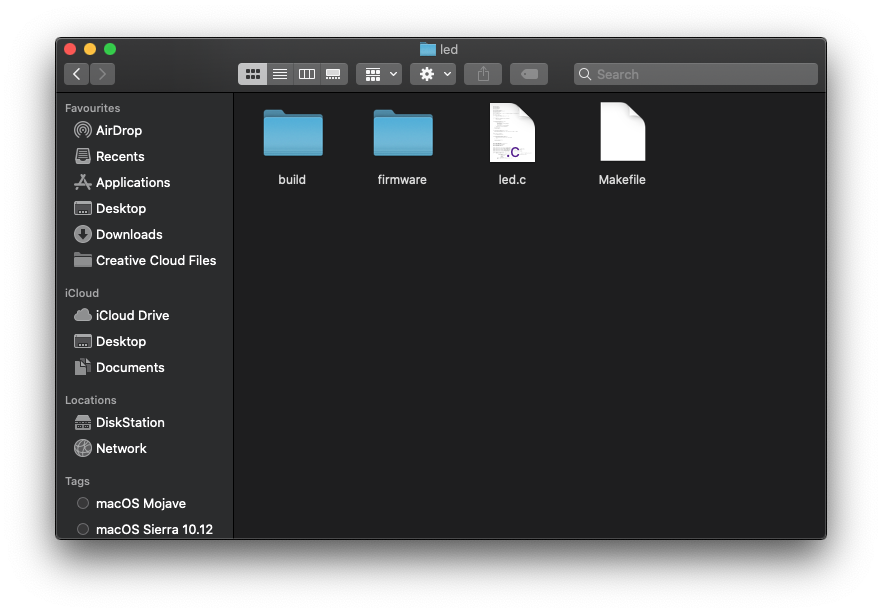
you will see two new folders called Build and Firmware open the Firmware directory.
Firmware
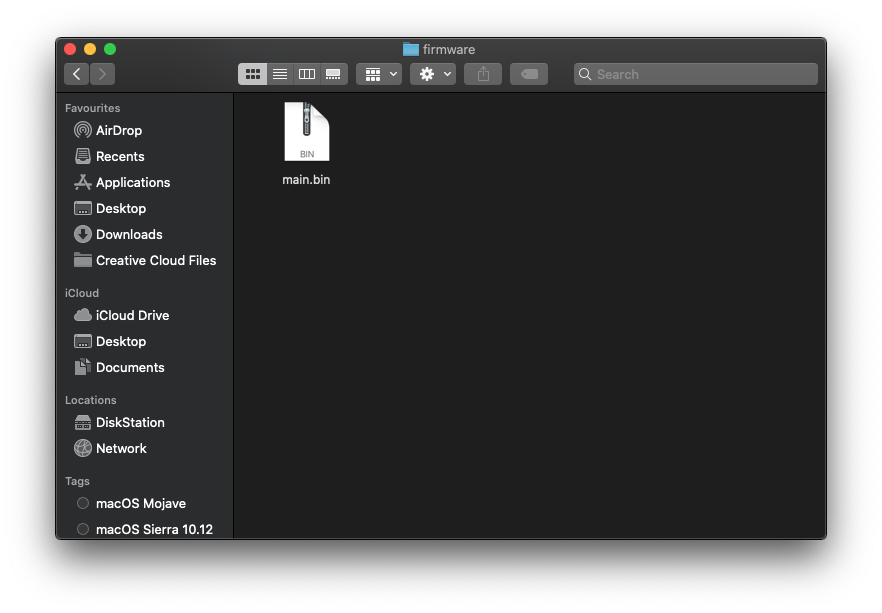
Here you will see the main.bin file. Theoretically you are finished now. you can Upload the bin File to your ESP and it should work. But for now delete the folders ‘build‘ and ‘firmware‘.
But of course I don’t stop here, let’s go further with a tool that makes our life a little bit easier.
Firmware Installation
Before we go to the part where we actually upload the firmware to your ESP we first need to get some other software. The Software we need is the Open Source FreeRTOS-based ESP8266 Software Framework, or sort ESP Open RTos. Furthermore we need a distribution system in this case we use GitHub as our online distribution system. And a smart manger that can install our Firmware, here fore we use Life Cycle Manager. We also need a good code editor like Atom.
ESP open RToS
The ESP Open RTos is a community developed open source FreeRTOS-based framework for ESP8266 WiFi-enabled micro-controllers. Intended for use in both commercial and open source projects. Originally based on, but substantially different from, the Espressif IOT RTOS SDK.
You need two files to install the ESP Open RTos. You can download them here:
File name: rboot.bin
Version: 1.4.2
File name: blank_config.bin
Version: 1.4.2
Life Cycle Manger 2 Installation
Life Cycle manger will Initial install, configure your WiFi settings and preform over the air firmware upgrades for any esp-open-rtos repository on GitHub. This is a program that allows any simple repository based on esp-open-rtos on ESP8266 to solve its life cycle tasks. You can find more information about Life Cycle Manager here. You can download the binary file down here from my GitHub.
File name: OTABoot.bin
Version: 2.1.2
Prepairing your code for Life Cycle Manger 2
At first we have to change a few lines of code, why you ask? Do you remember the Copy wifi.h.sample and save it as wifi.h. step? This step is necessary for your ESP to connect to your network. Only we don’t want to hard-code it into our bin file. Therefor we use Life Cycle Manager. So we need to change a few lines.
Open the Terminal app. Click the Finder icon in your dock. Click Go. Click Utilities. Double-click Terminal. then type:
cd esp
Change into folder esp-homekit-demo
cd esp-homekit-demo
Then change into the examples folder.
cd examples
Then open a accecory (e.g. Led)
cd led

Now you will see two files:
led.c
makefile
Open Led.c with Atom and change the following lines:
to
then we have to adjust this lines:
to
That’s It now we are done with your led.c code. Now we have to change the make file. Open makefile in Atom and change the following lines:
docker run -it --rm -v `pwd`:/project -w /project esp-rtos make -C examples/led FLASH_SIZE=8 HOMEKIT_SPI_FLASH_BASE_ADDR=0x8c000 all
Wait until the compiling is done.

Open the Terminal app. Click the Finder icon in your dock. Click Go. Click Utilities. Double-click Terminal. Now change to the newly made firmware directory by typing:
cd esp
change into the esp-homekit-demo directory:
cd esp-homekit-demo
then type:
cd examples

and the to the led directory
cd led
you will see two new folders called Build and Firmware open the Firmware directory.
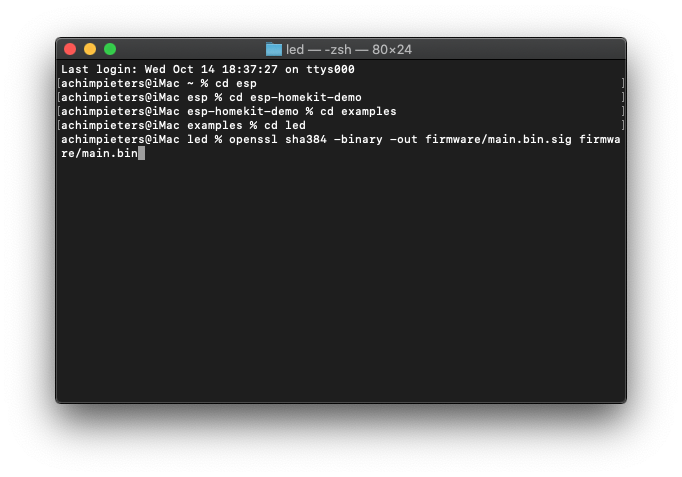
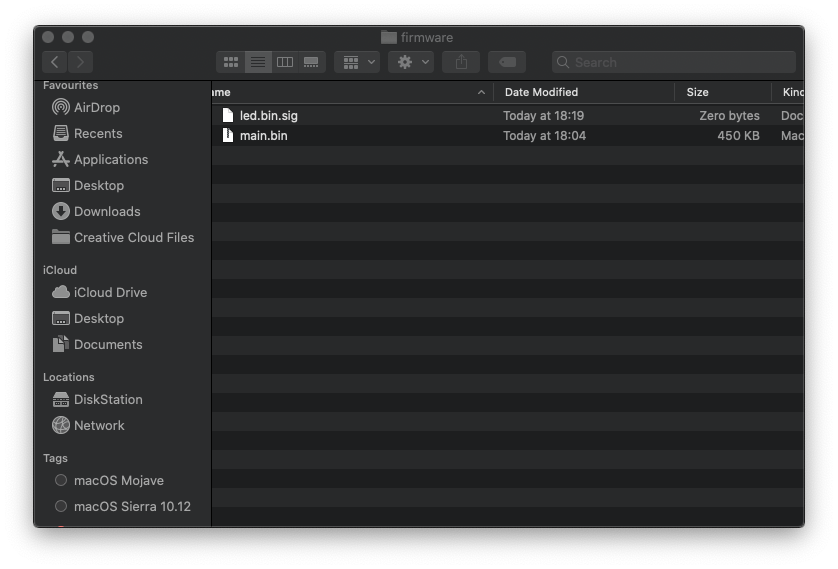
Once in the Firmware directory you will see a file called main.bin. This is the final bin file we are going to use. Before we are going upload it to our ESP we have to add some security measures with OpensSSL.
OpenSSL is a robust, commercial-grade, and full-featured toolkit for the Transport Layer Security (TLS) and Secure Sockets Layer (SSL) protocols. This is a perquisite by Life Cycle Manager to be sure there is no tampering with you files. So basically the .sig files are only to verify/confirm .bin file identity. For more information read more here.

Type the following to create this bin file:
openssl sha384 -binary -out firmware/led.bin.sig firmware/led.bin
and to write/make the actual file:
printf "%08x" `cat firmware/led.bin | wc -c`| xxd -r -p >>firmware/led.bin.sig
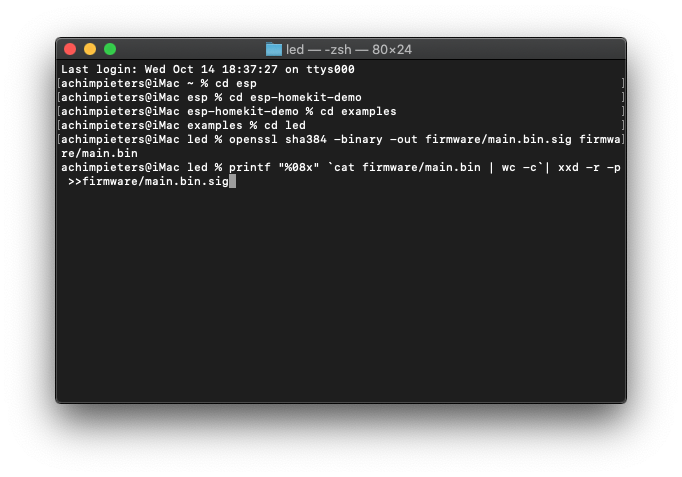
Now you have created a file called main.bin.sig. Next step is to make a GitHub repository.
GitHub
What Is GitHub, and What Is It Used For?
GitHub is a website and service that we hear geeks rave about all the time, yet a lot of people don’t really understand what it does. Want to know what all the GitHub hubbub is about? Read on to find out.
To understand GitHub, you must first have an understanding of Git. Git is an open-source version control system that was started by Linus Trovalds—the same person who created Linux. Git is similar to other version control systems—Subversion, CVS, and Mercurial to name a few.
So, Git is a version control system, but what does that mean? When developers create something (an app, for example), they make constant changes to the code, releasing new versions up to and after the first official (non-beta) release.
Version control systems keep these revisions straight, storing the modifications in a central repository. This allows developers to easily collaborate, as they can download a new version of the software, make changes, and upload the newest revision. Every developer can see these new changes, download them, and contribute.
Similarly, people who have nothing to do with the development of a project can still download the files and use them. Most Linux users should be familiar with this process, as using Git, Subversion, or some other similar method is pretty common for downloading needed files—especially in preparation for compiling a program from source code (a rather common practice for Linux geeks).
Git is the preferred version control system of most developers, since it has multiple advantages over the other systems available. It stores file changes more efficiently and ensures file integrity better. If you’re interested in knowing the details, the Git Basics page has a thorough explanation on how Git works.

So eventually you have to make a repository to distribute you firmware.
Github Repository
A repository (usually abbreviated to ‘repo‘) is a location where all the files for a particular project are stored. Each project has its own repo, and you can access it with a unique URL.
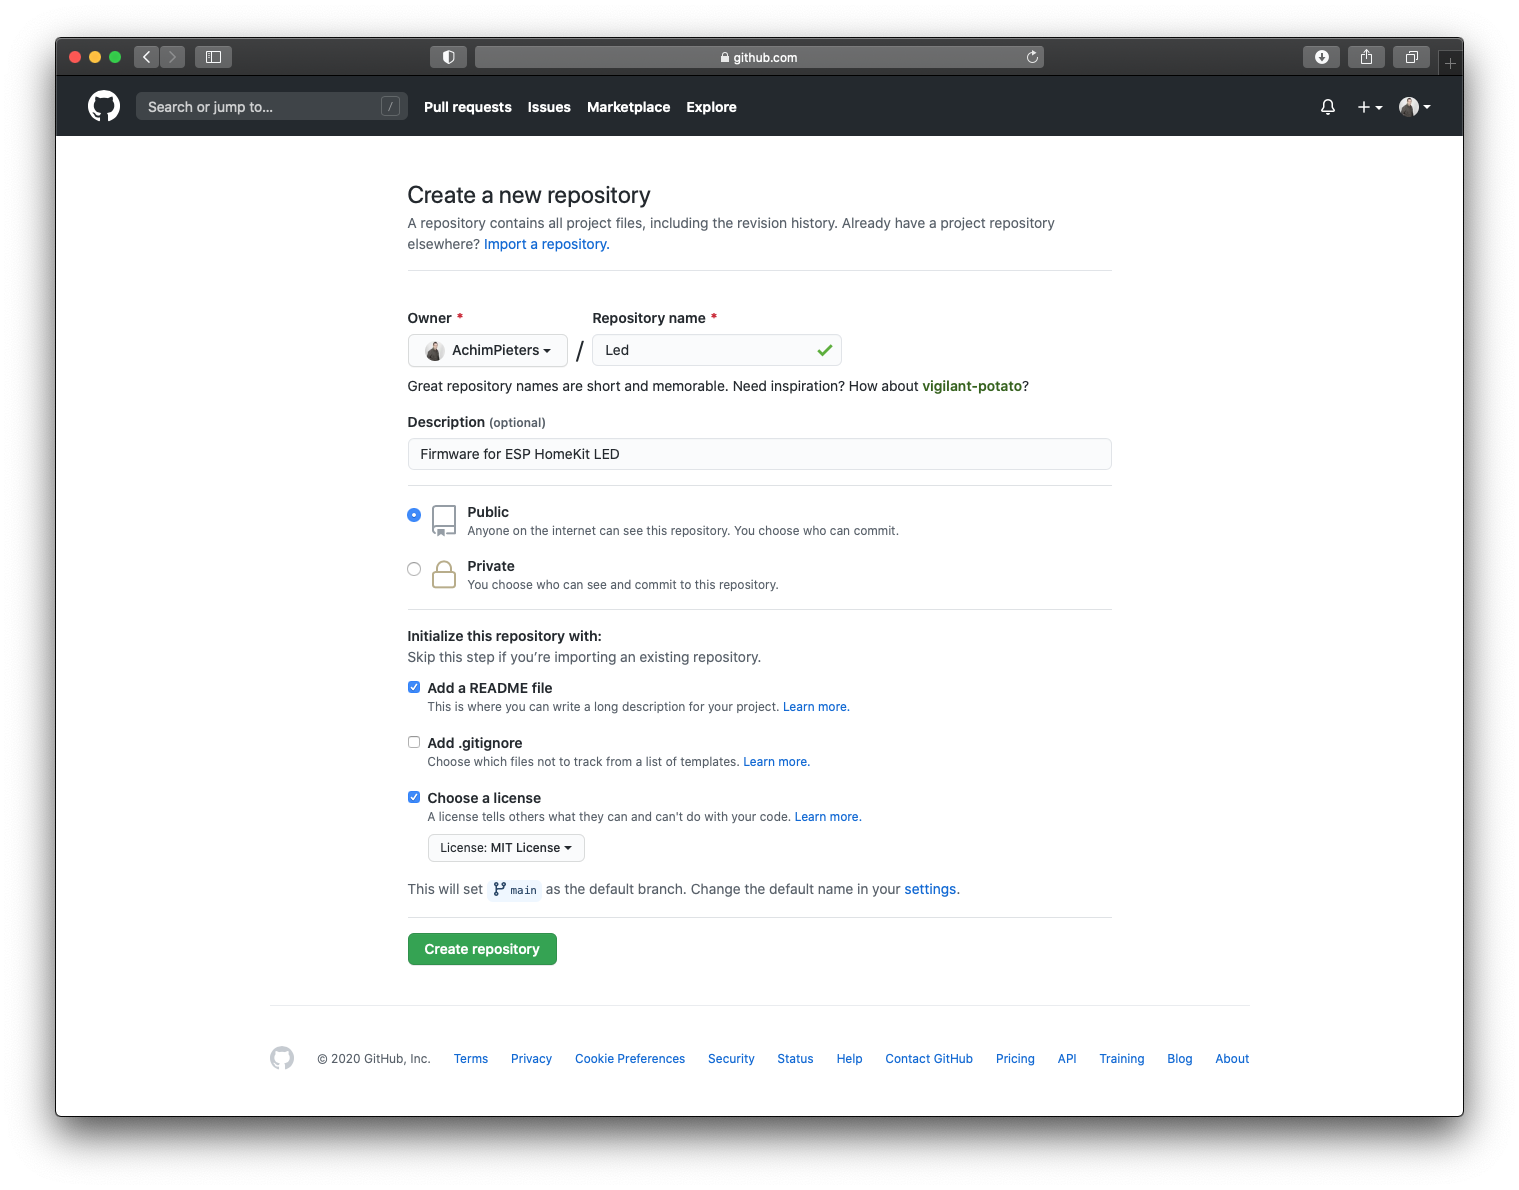
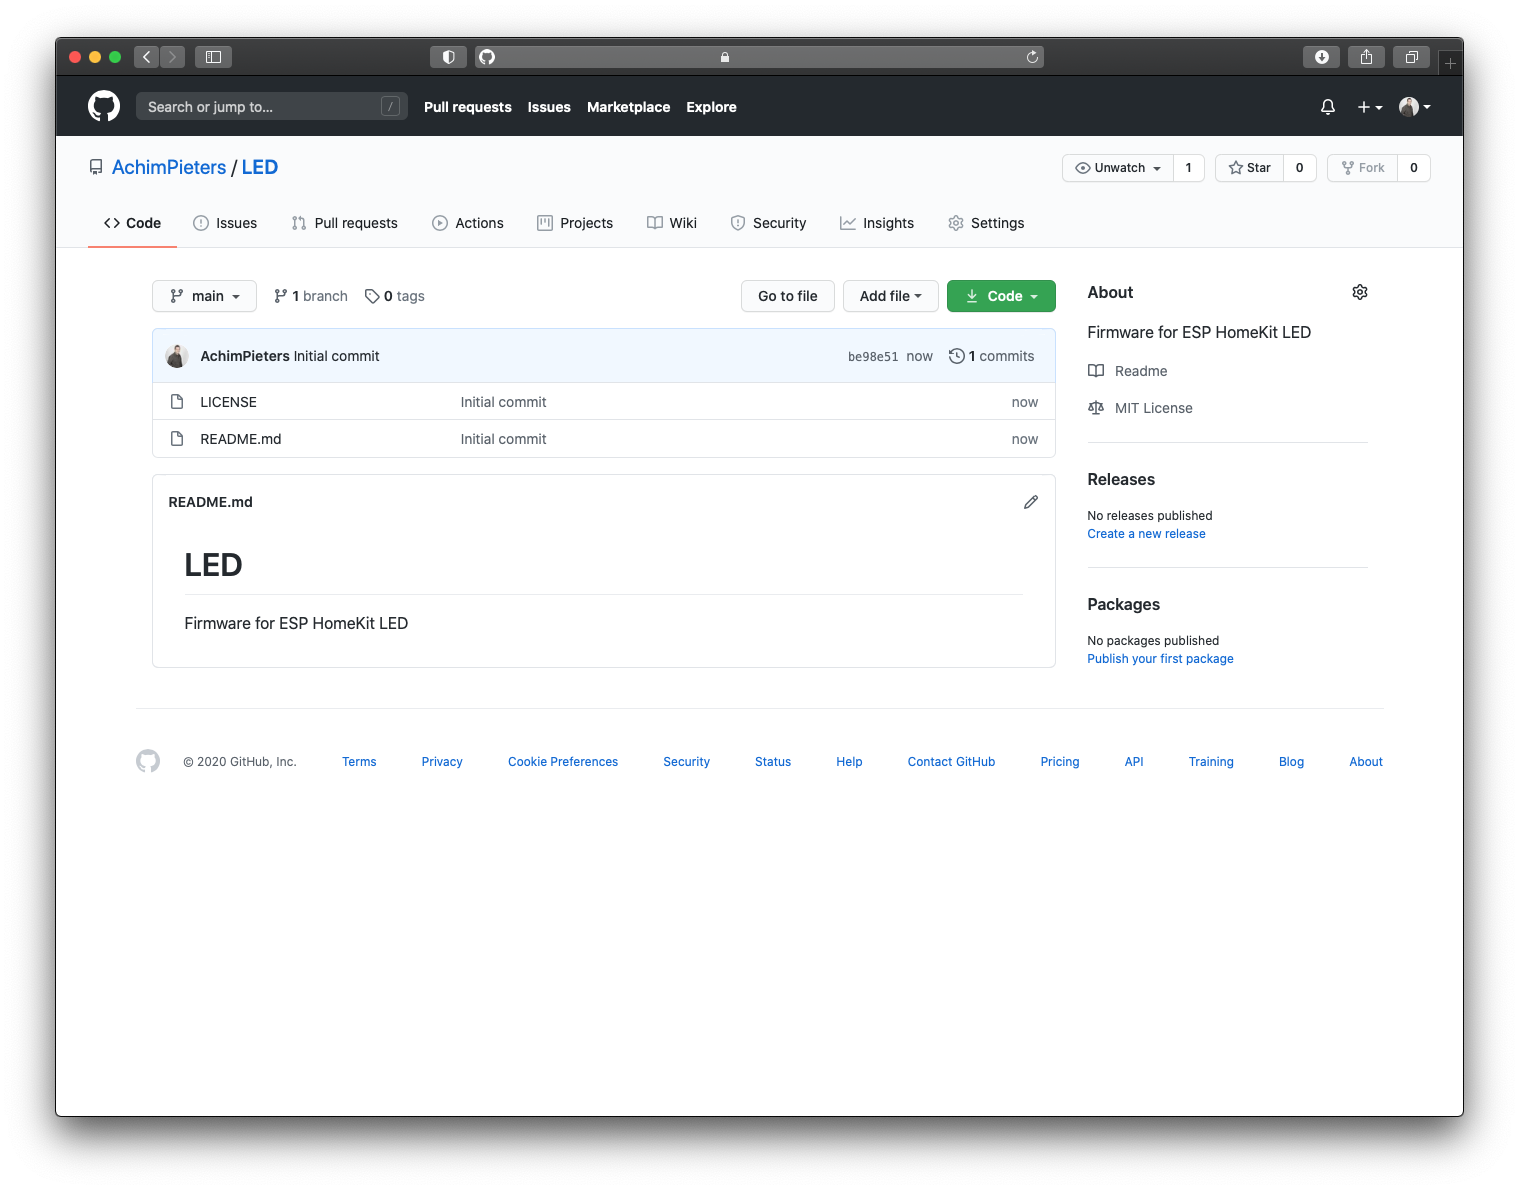
In a nutshell go to GitHub.com and make a account create a new Repository and give it a name (e.g LED). file in the Description (e.g. Firmware for ESP HomeKit LED) and place a tick at “Initialise this repository with a README“. Select your licence type (e.g MIT Licence). Now click on Create Repository.
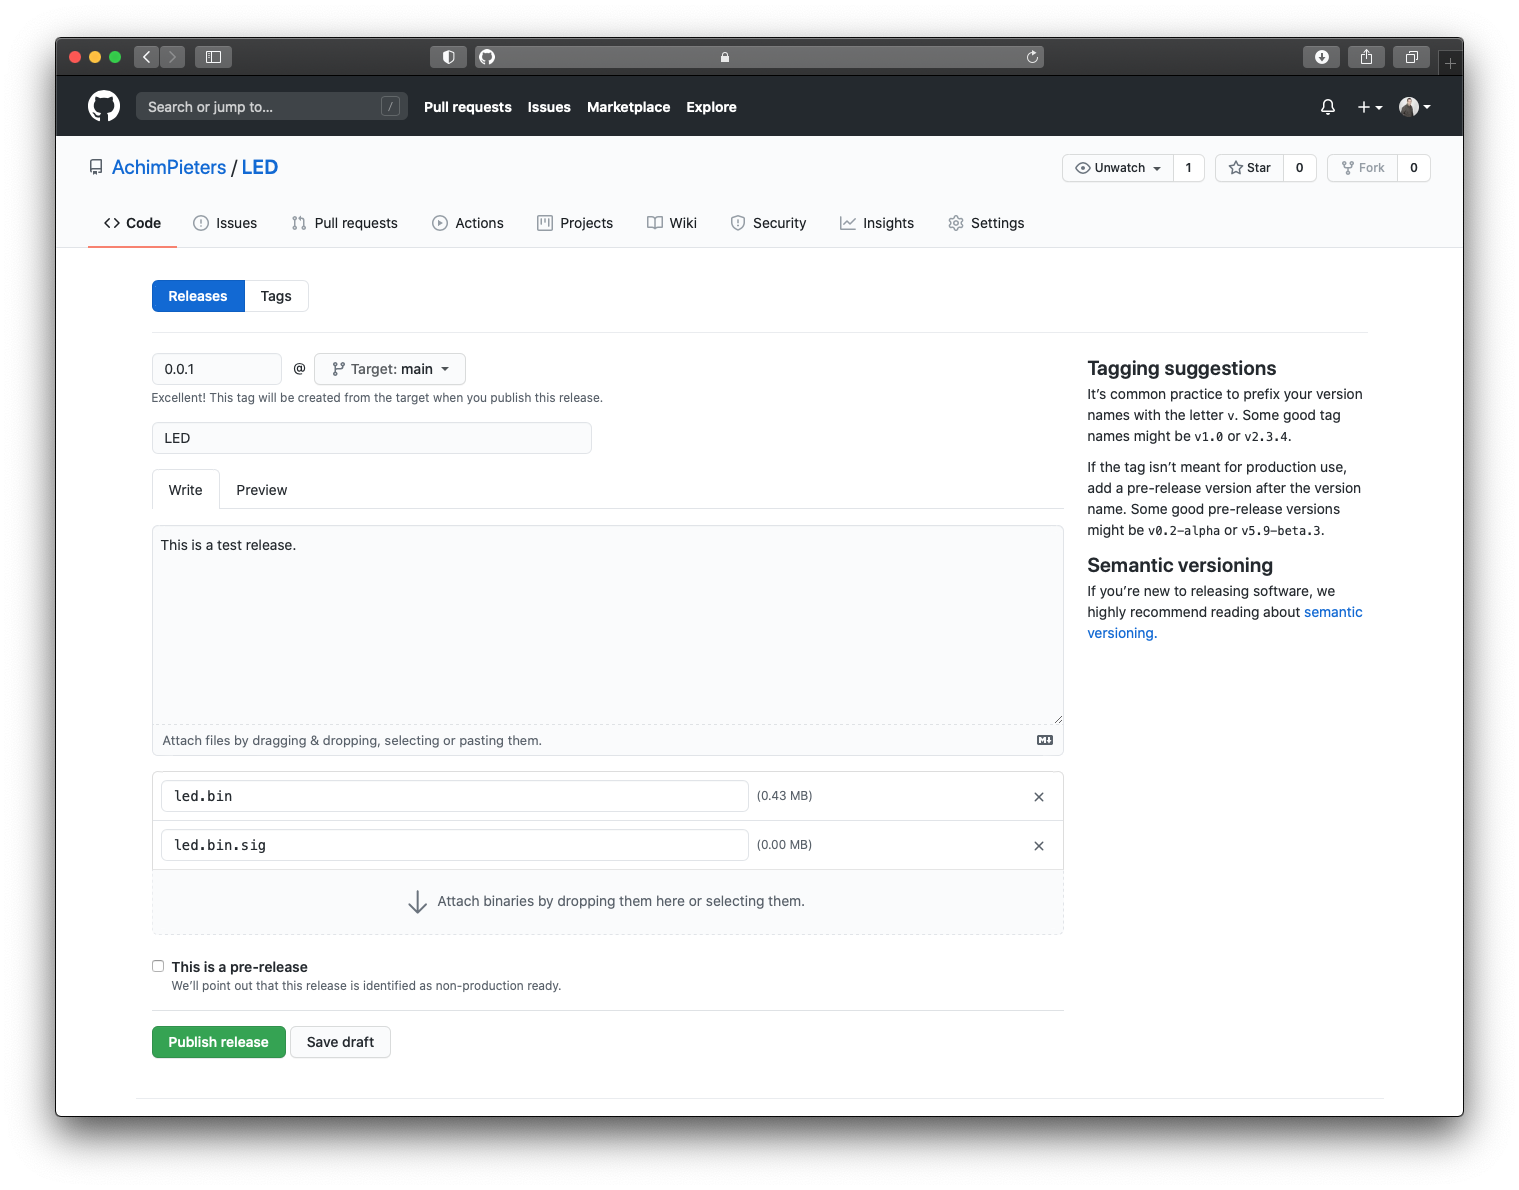
Now click on Releases and the Create a new release.
Note: the version number always has to be in x.y.z format. On the GitHub page you will find this text” It’s common practice to prefix your version names with the letter v. Some good tag names might be v1.0 or v2.3.4.” DO NOT USES V0.0.1 But only use the digits e.g. 0.0.1 otherwise it will not work!

Now you have to fill in the version number (e.g. 0.0.1). Give your realise a name (e.g LED) and fill in a description if you want to. Then upload the Led.Bin and Led.Bin.Sig file to you new release, and click on Publish release.
Writing the ESP8266
Flashing a program to the ESP8266 is a bit more annoying than flashing an Arduino. When flashing the Arduino, all you have to do is press the reset button and release while you upload a program (or even not doing anything if you have FTDI such as in Arduino UNO, NANO, MICRO, etc.) and the Arduino will start uploading. With the ESP8266 you have to reset the micro-controller and start it in flashing mode using the GPIO0-to-Ground.
ESP8266-01 Scheme
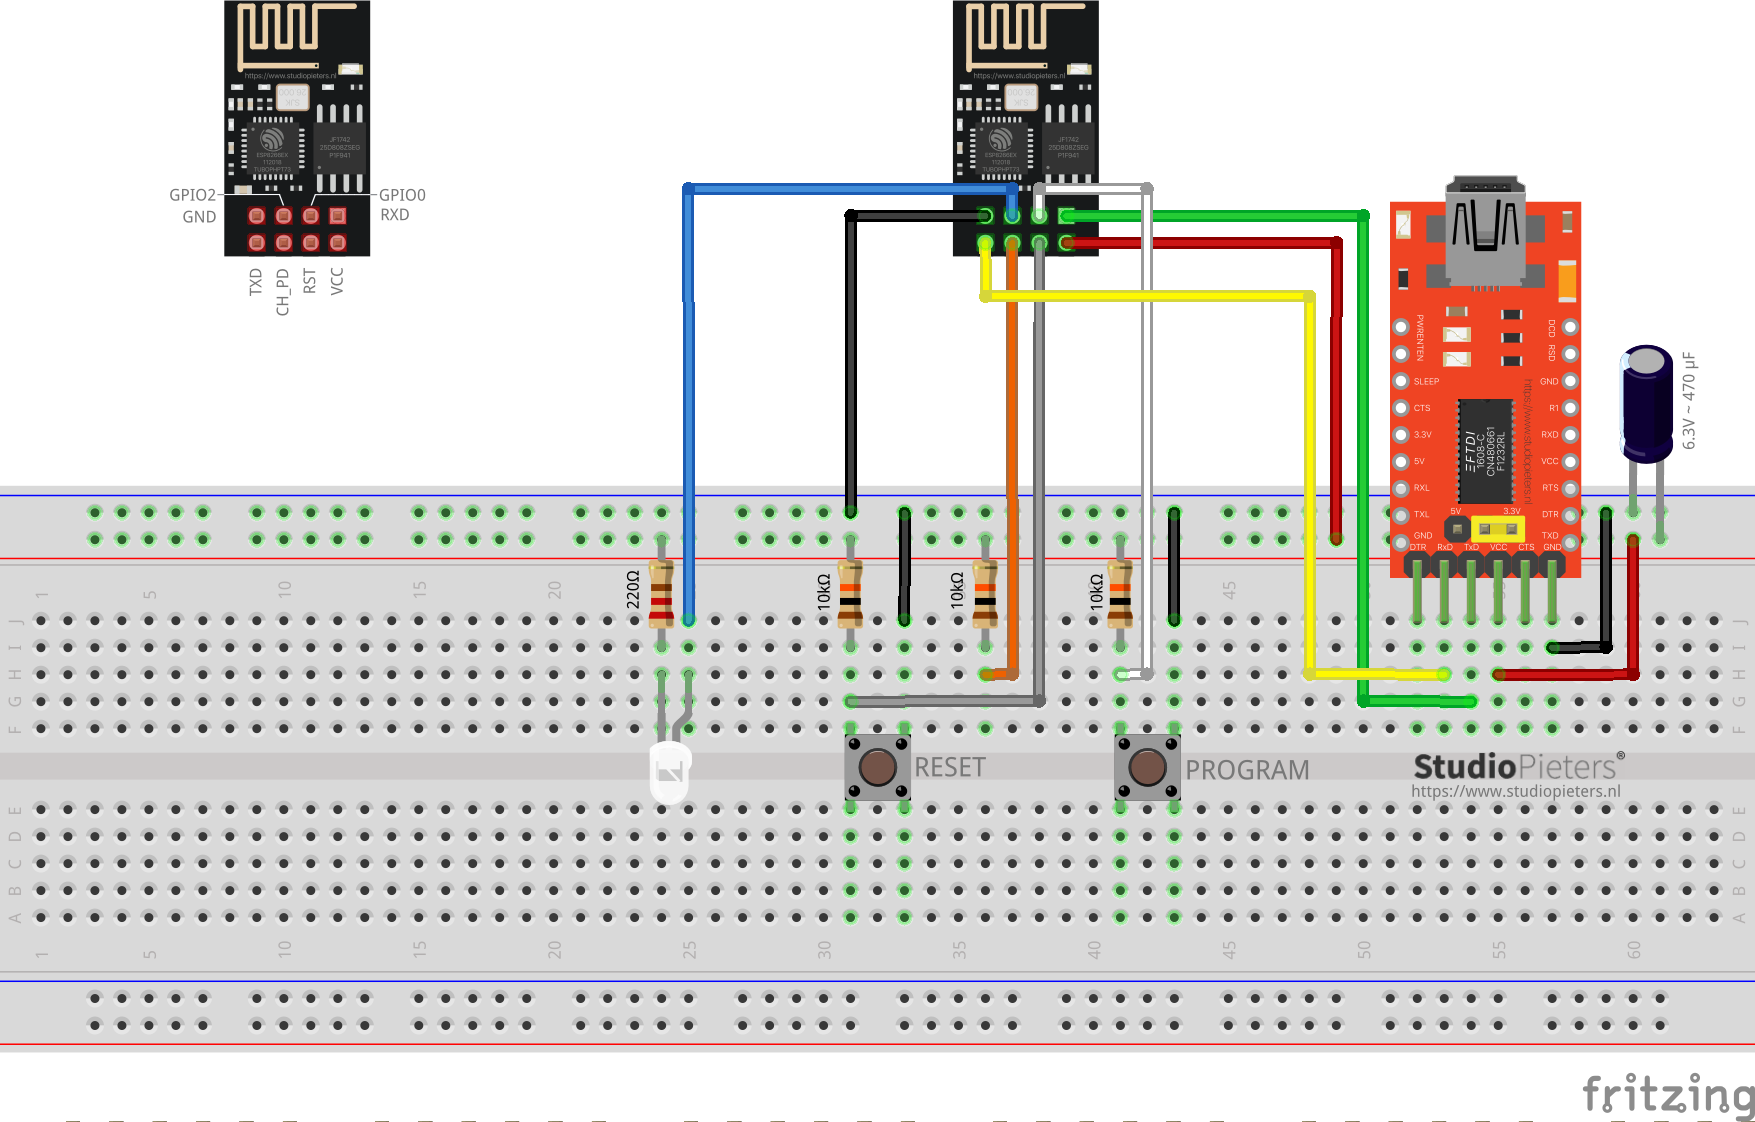
ESP8266-12F Scheme
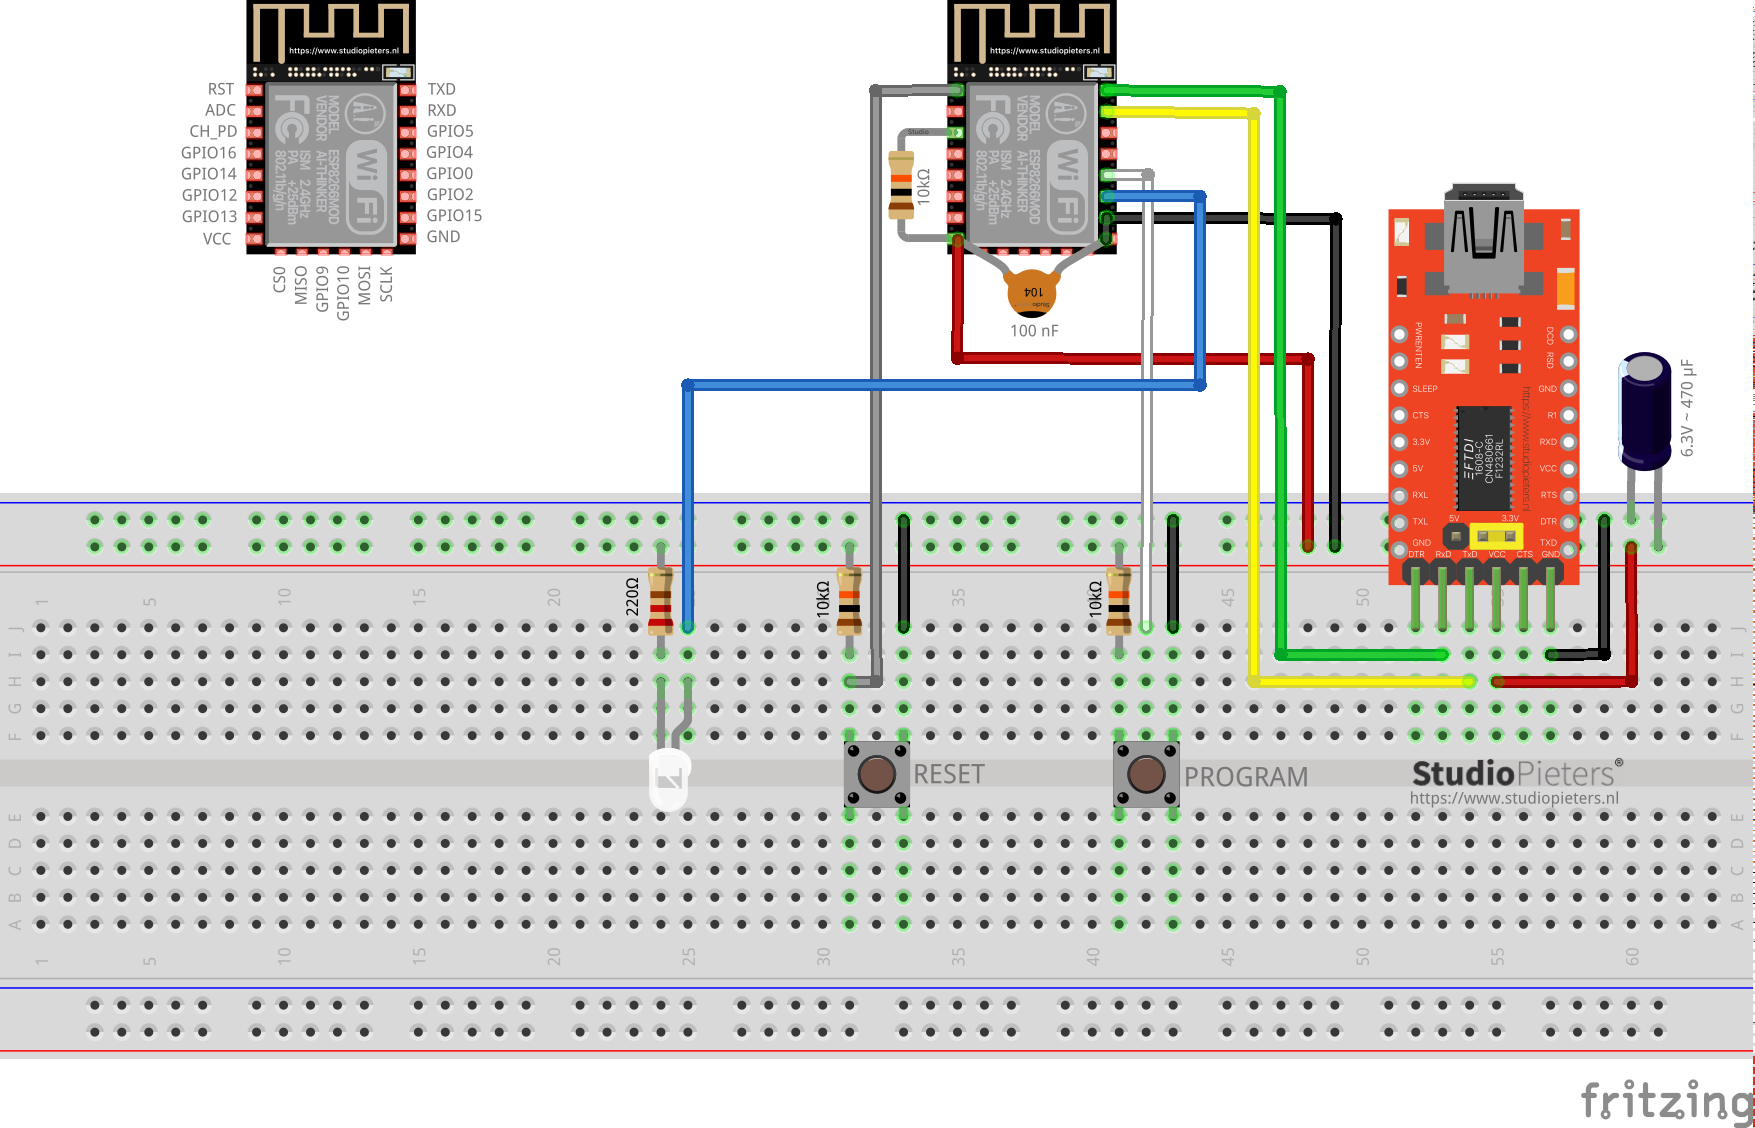
The sketch shows the ESP8266 connected to FTDI Programmer with a voltage regulator onboard.
NOTE: Be Sure that you have the Jumper placed on the 3.3V setting and not the 5V setting because this will destroy your ESP module!

As you can see two buttons have been added. The Left button, when pressed, connects the RESET pin to the ground and when it is released, connects the RESET pin to the VCC through a pull-up resistor.
Installing Life Cycle Manger 2
The Right button, when pressed, connects the PROGRAM pin to the ground and when it is released, connects the PROGRAM pin to the VCC through a pull-up resistor.
I also added A LED when the ESP is in PROGRAMMING STATE state the LED is ON. When The ESP is in “NORMAL” state the LED is OFF. Using this two buttons you can do all the tasks you need with the ESP8266:
- Working on NORMAL mode – Both buttons are released.
- RESETTING the ESP8266 – Press the RESET button and release.
- Start in FLASH MODE – Press both buttons, release the RESET button and then release the PROGRAM button.
PUTTING DEVICE INTO FLASH MODE
To enable ESP8266 firmware flashing GPIO0 pin must be pulled low before the device is reset. Conversely, for a normal boot, GPIO0 must be pulled high or floating. Start in FLASH MODE – Press both buttons, release the RESET button and then release the PROGRAM button.
Go to the directory you made where you put the previously downloaded (e.g. Downloads) Root.bin, Blank_config.bin and Otaboot.bin files.
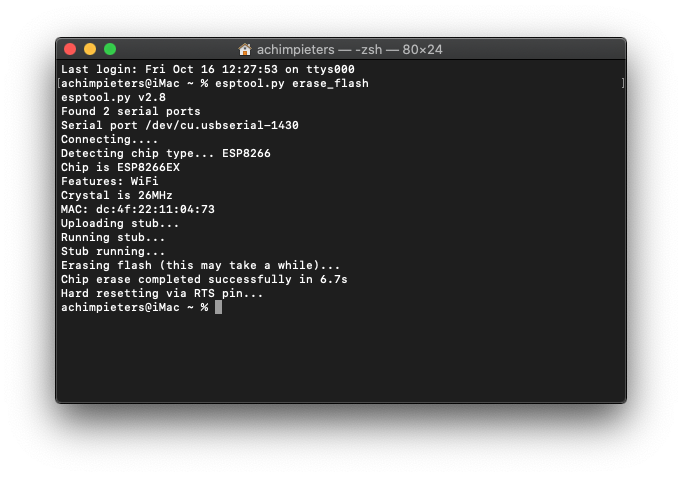
Use esptool.py to flash it in your device. First, erase flash memory from your ESP module:
esptool.py erase_flash

Normally, your ESPPort will be something like (e.g /dev/cu.usbserial-A50285BI). Then, set your device in flash-mode again, and flash the new firmware:
esptool.py -p /dev/cu.usbserial-A50285BI --baud 115200 write_flash -fs 1MB -fm dout -ff 40m 0x0 rboot.bin 0x1000 blank_config.bin 0x2000 otaboot.bin
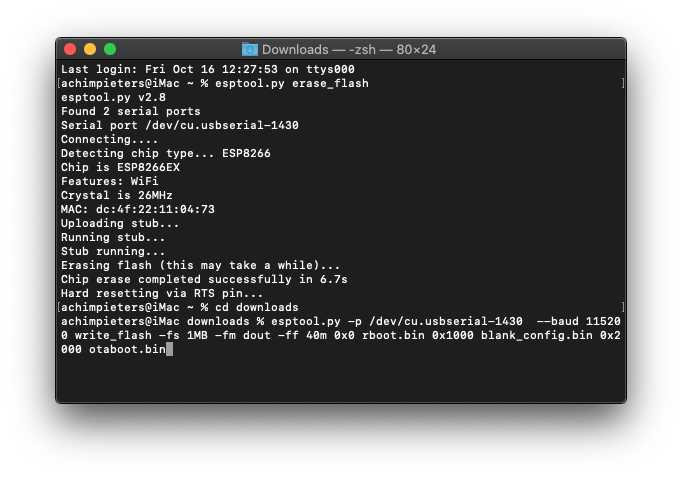

Note: If you use an old version of esptool, you must change -fs 1MB to -fs 8m.
Connecting to Life Cycle Manger 2
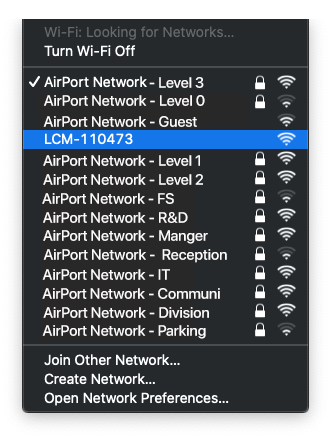
You must configure WiFi network and OTA repository. To configure WiFi settings, device generates its own WiFi in AP mode. You must connect to it in order to setup your WiFi network. Before you connect to Life Cycle Manger 2, reset your module by pressing the reset button.
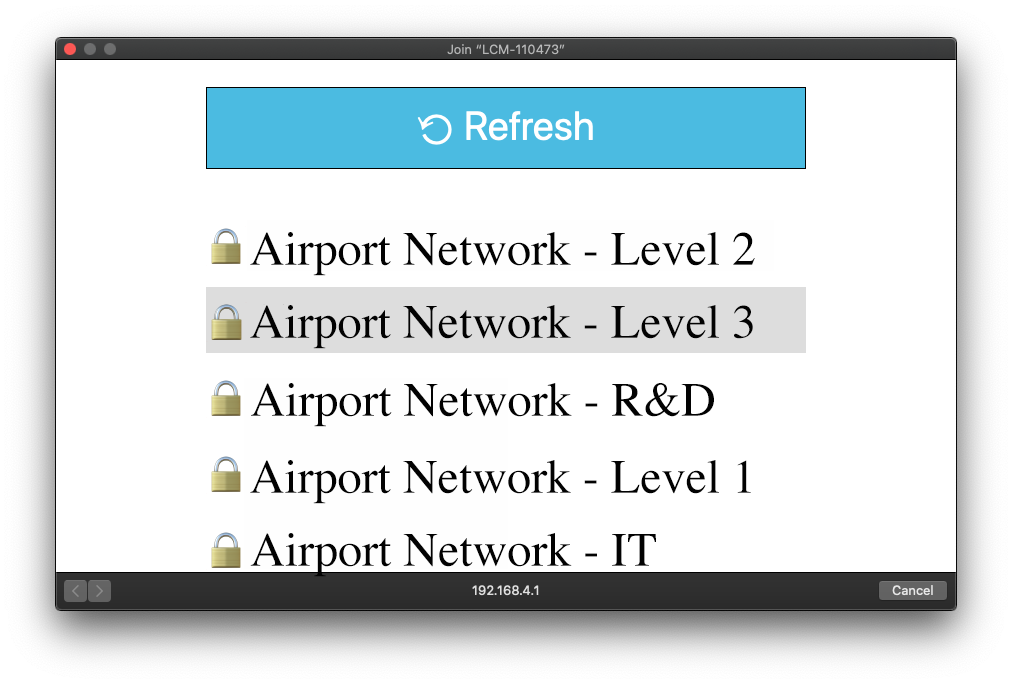
Simply click the Wifi Icon on your Mac, and search a SSID with LCM-XXXXXX , connect to it, and wait a few seconds until a captive portal appears showing you all WiFi networks that the device has found.
Then select your WiFi Network you want to connect to.
Then enter your WiFi password. Do not click Join yet!
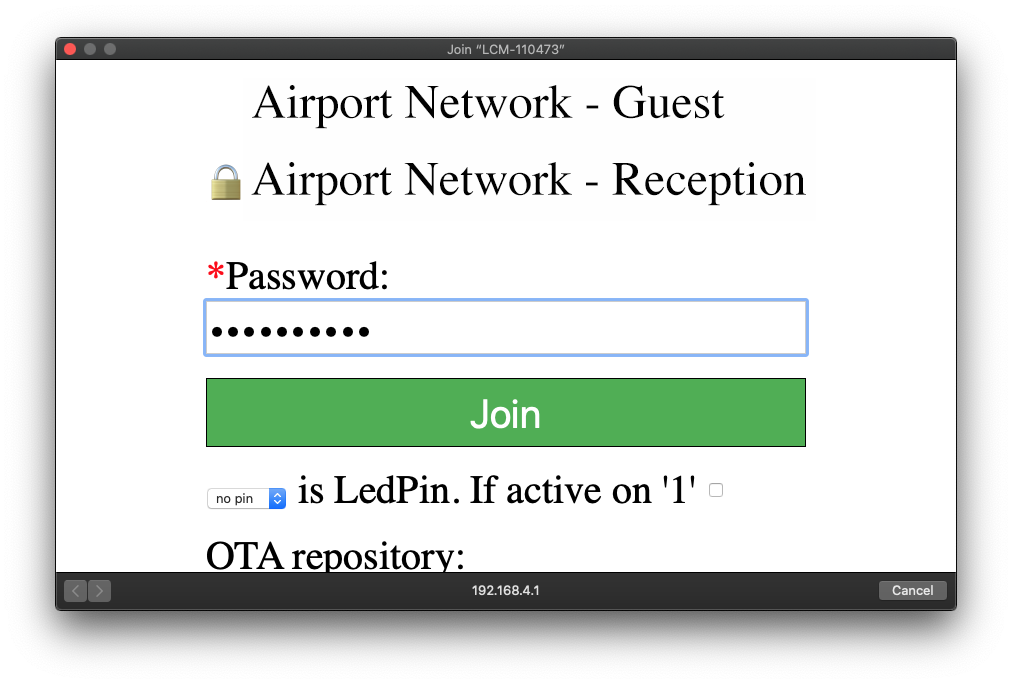
Setting a value for a led_pin visual feedback is possible. This is done by selecting in the pulldown menu a GPIO pin, where your led is connected (Default 2 on your ESP Chip).
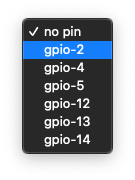
Then place a tick after If active on ‘1’.
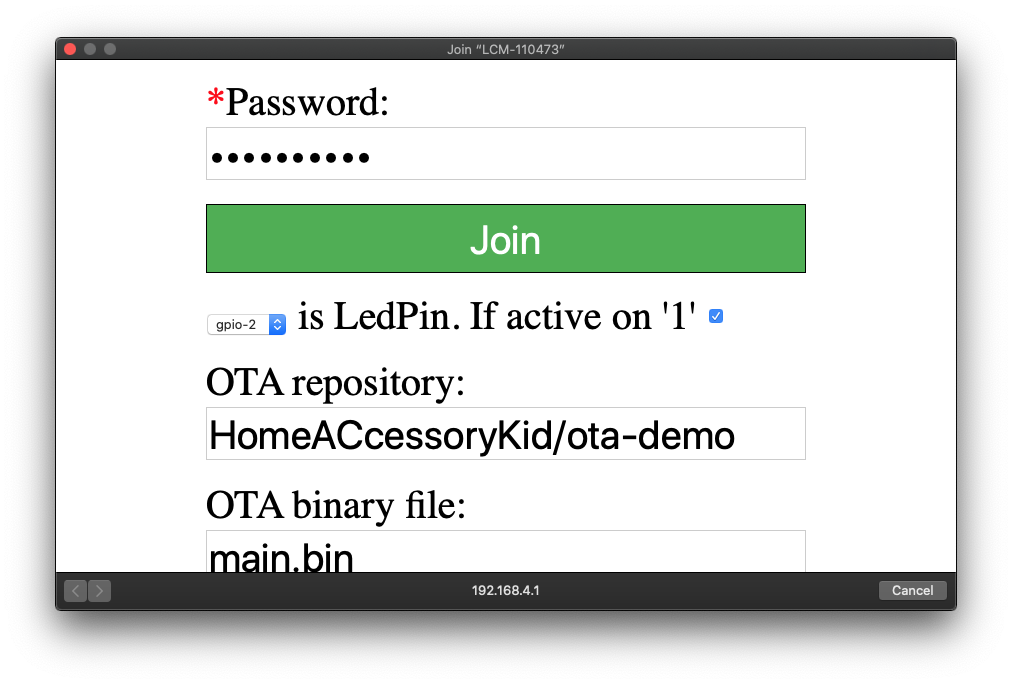
Now you can enter the OTA repository ( this is your previously made GitHub name followed by your repository name):
Your_Name/led
OTA binary file:
led.bin
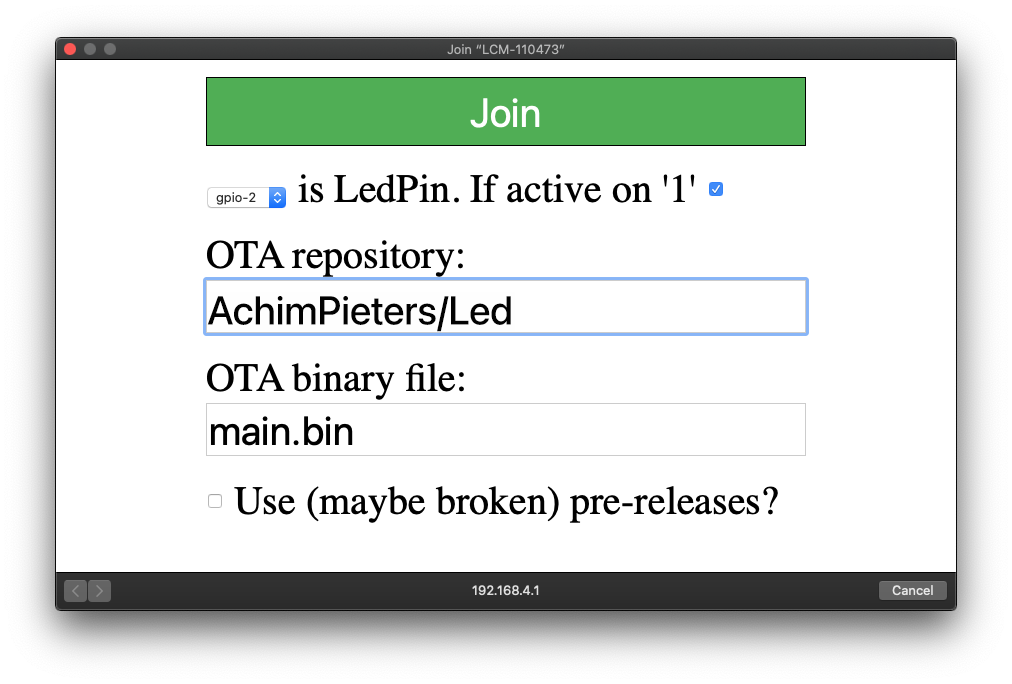
To finish initial setup, click Join button and wait about 7 minutes until process finish (While installation is working, device doesn’t show anything, and buttons don’t work). After that, LED turns on for a couple of seconds and you will be able to add your accessory to your HomeKit ecosystem using Home App. Life Cycle Manger 2 will install your HomeKit device on your ESP.

TIP: Open your Arduino IDE and then the serial monitor. now you can see the whole installation process!
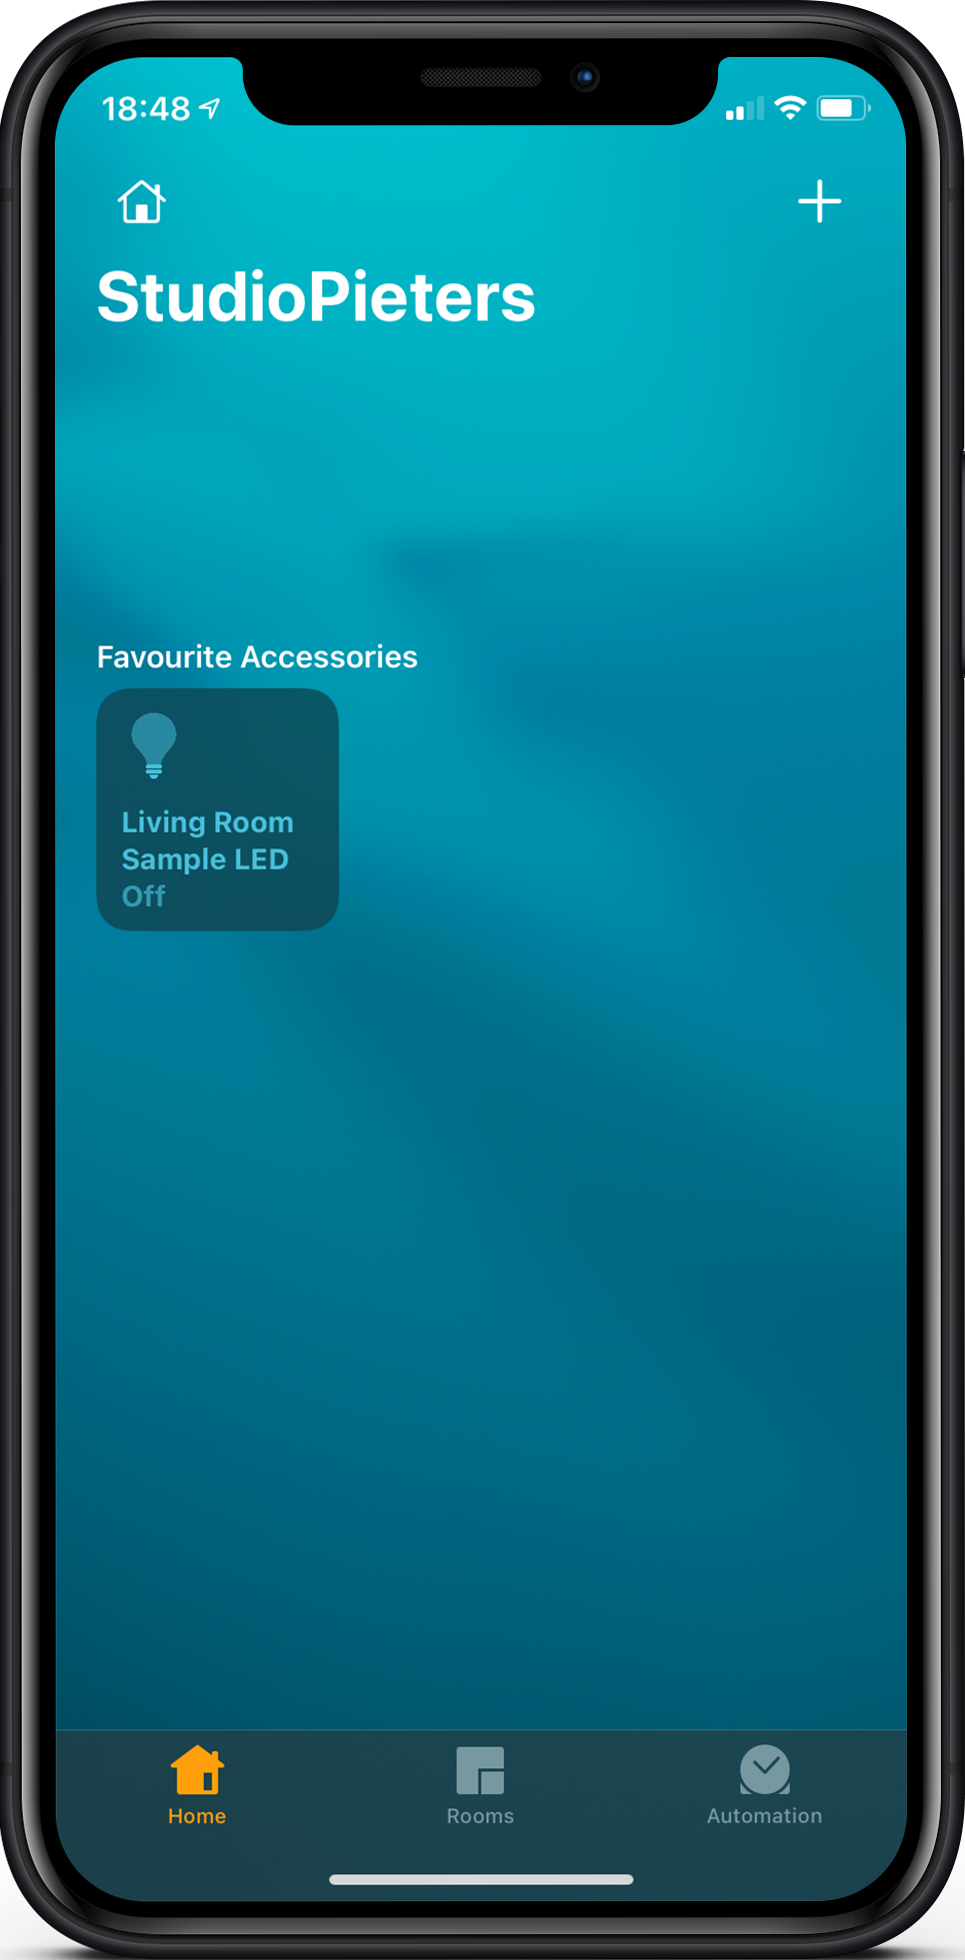
HomeKit Setup
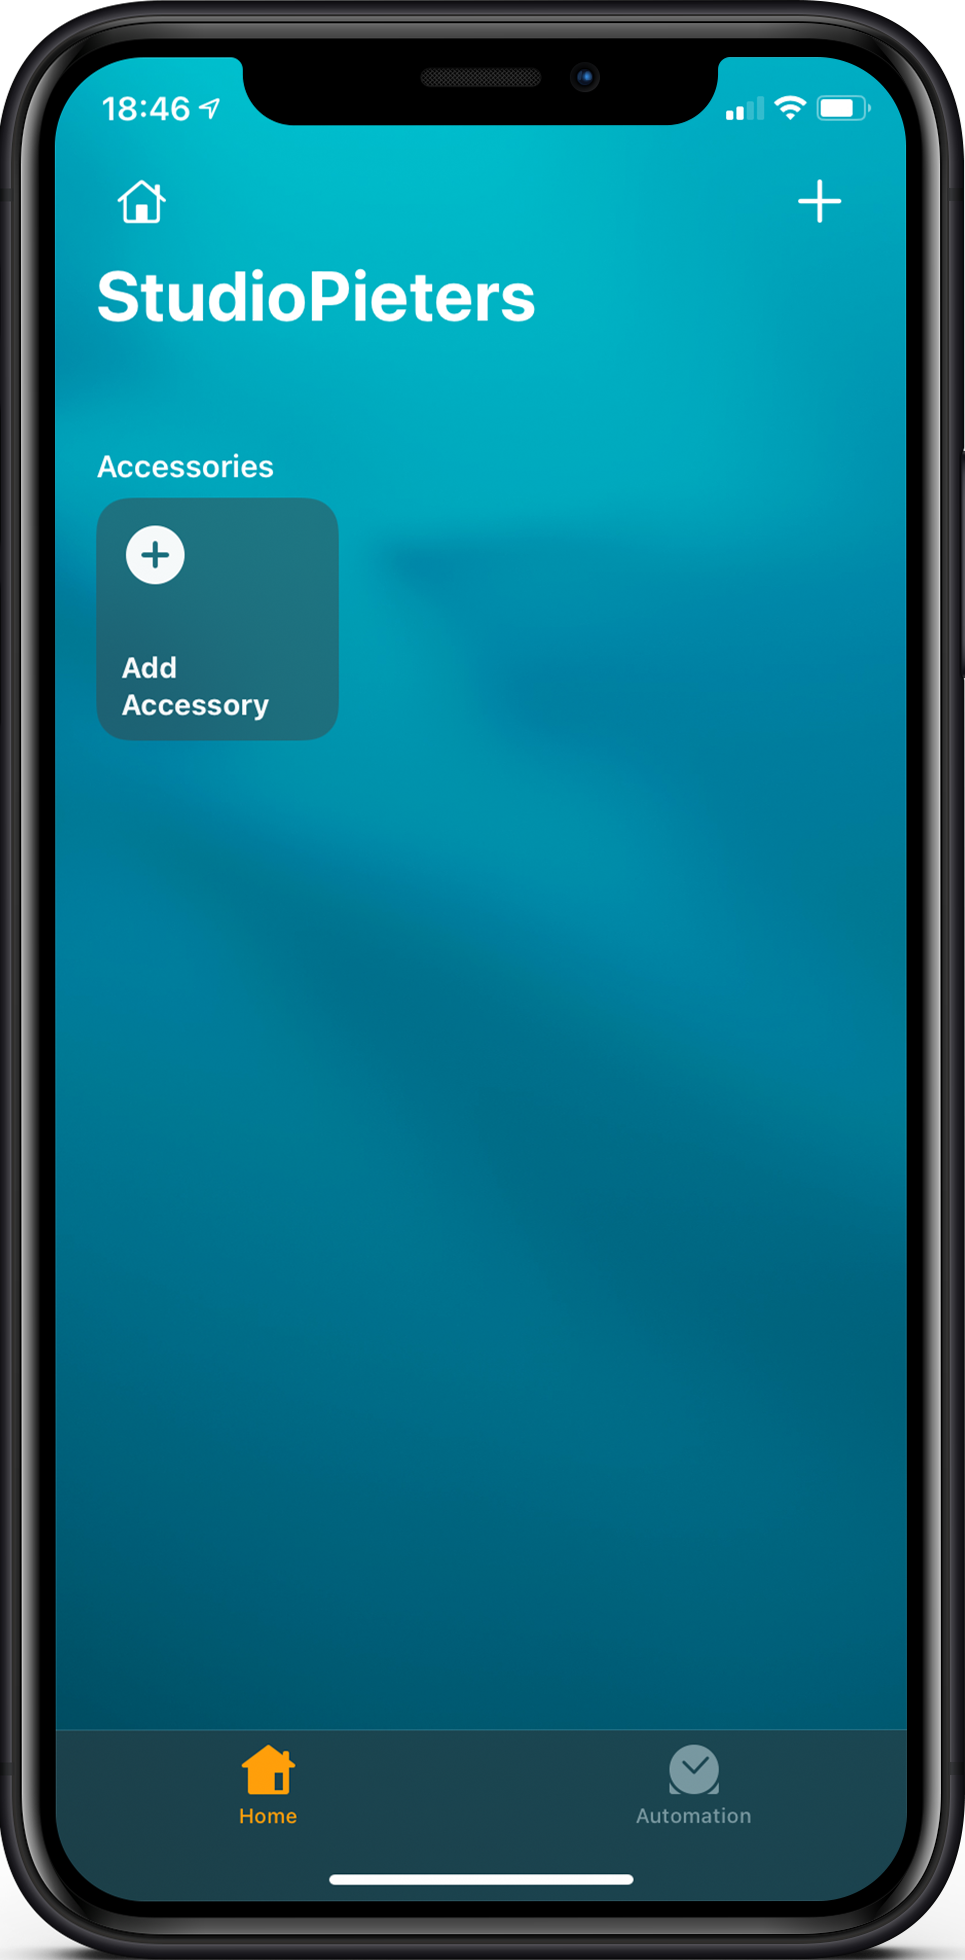
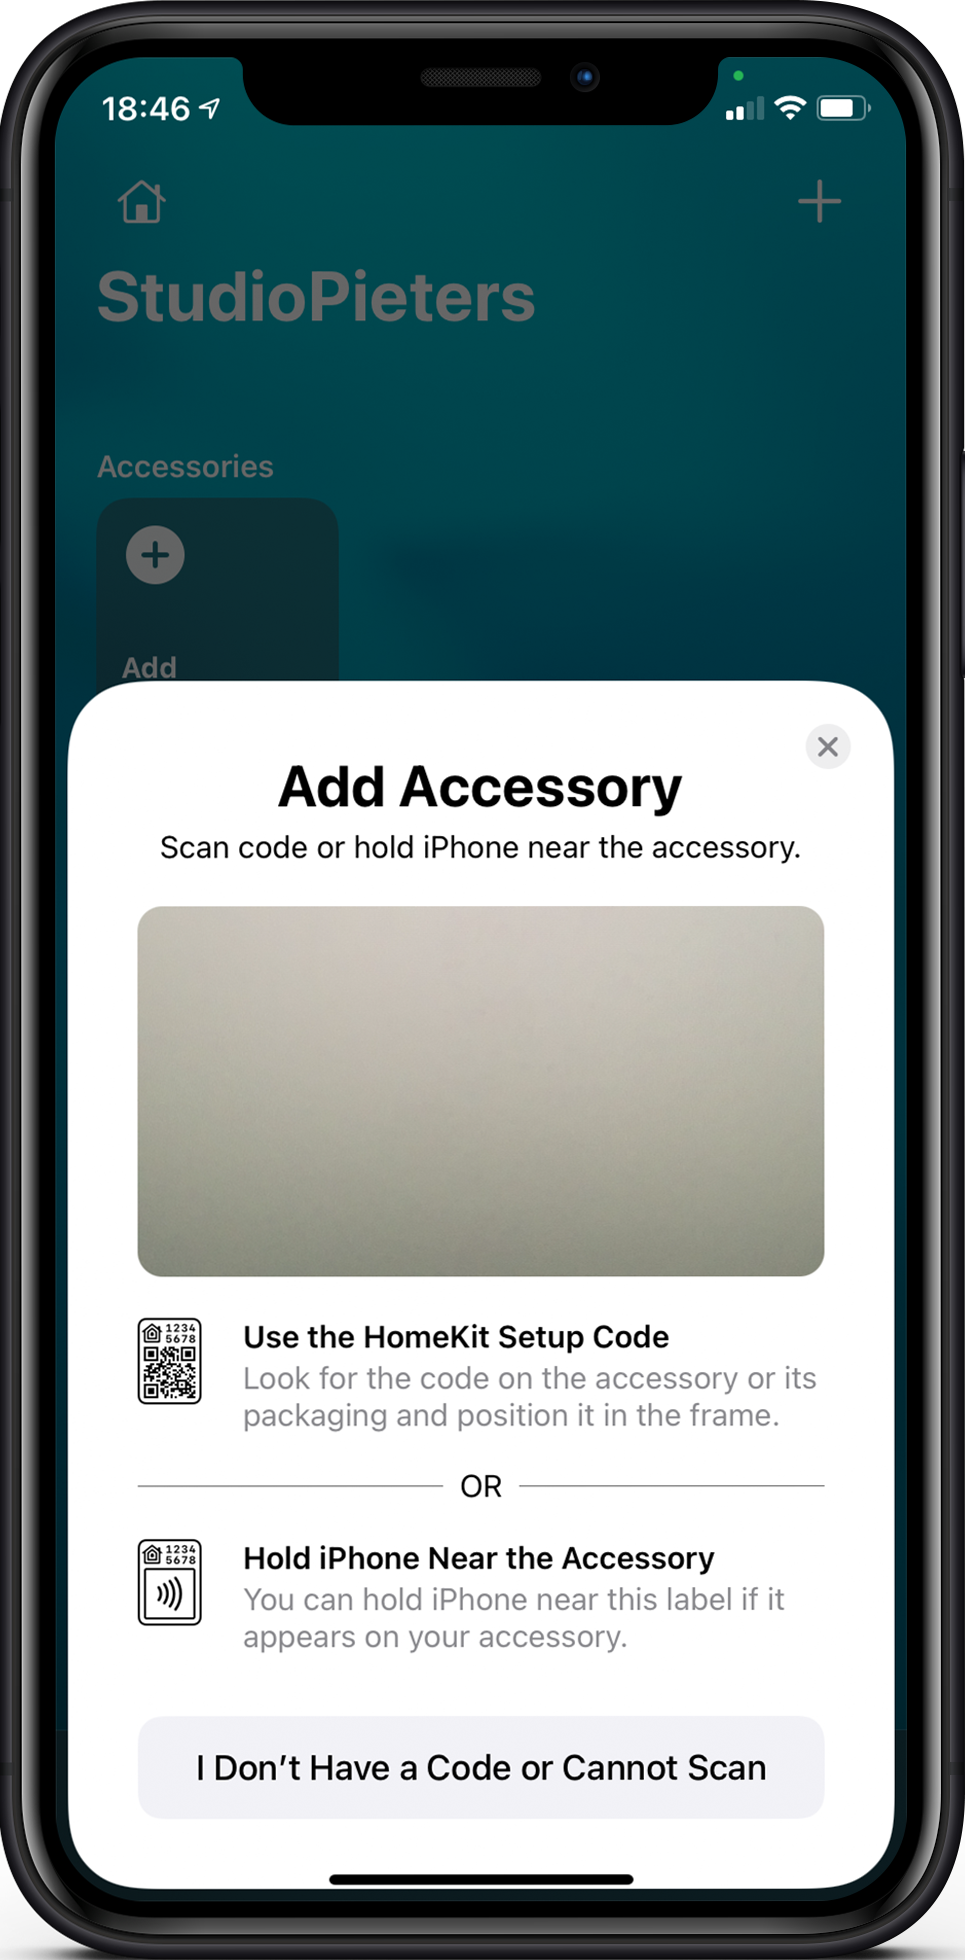
Now it’s time to add your HomeKit accessory.
Open the Home app on your iPhone. Tap Add Accessory. (If you already have other HomeKit accessories paired, tap + in the top-right corner to add an accessory.) Then click I don’t have a Code or Cannot Scan. If you want to add a QR code to scan you can read this blog.
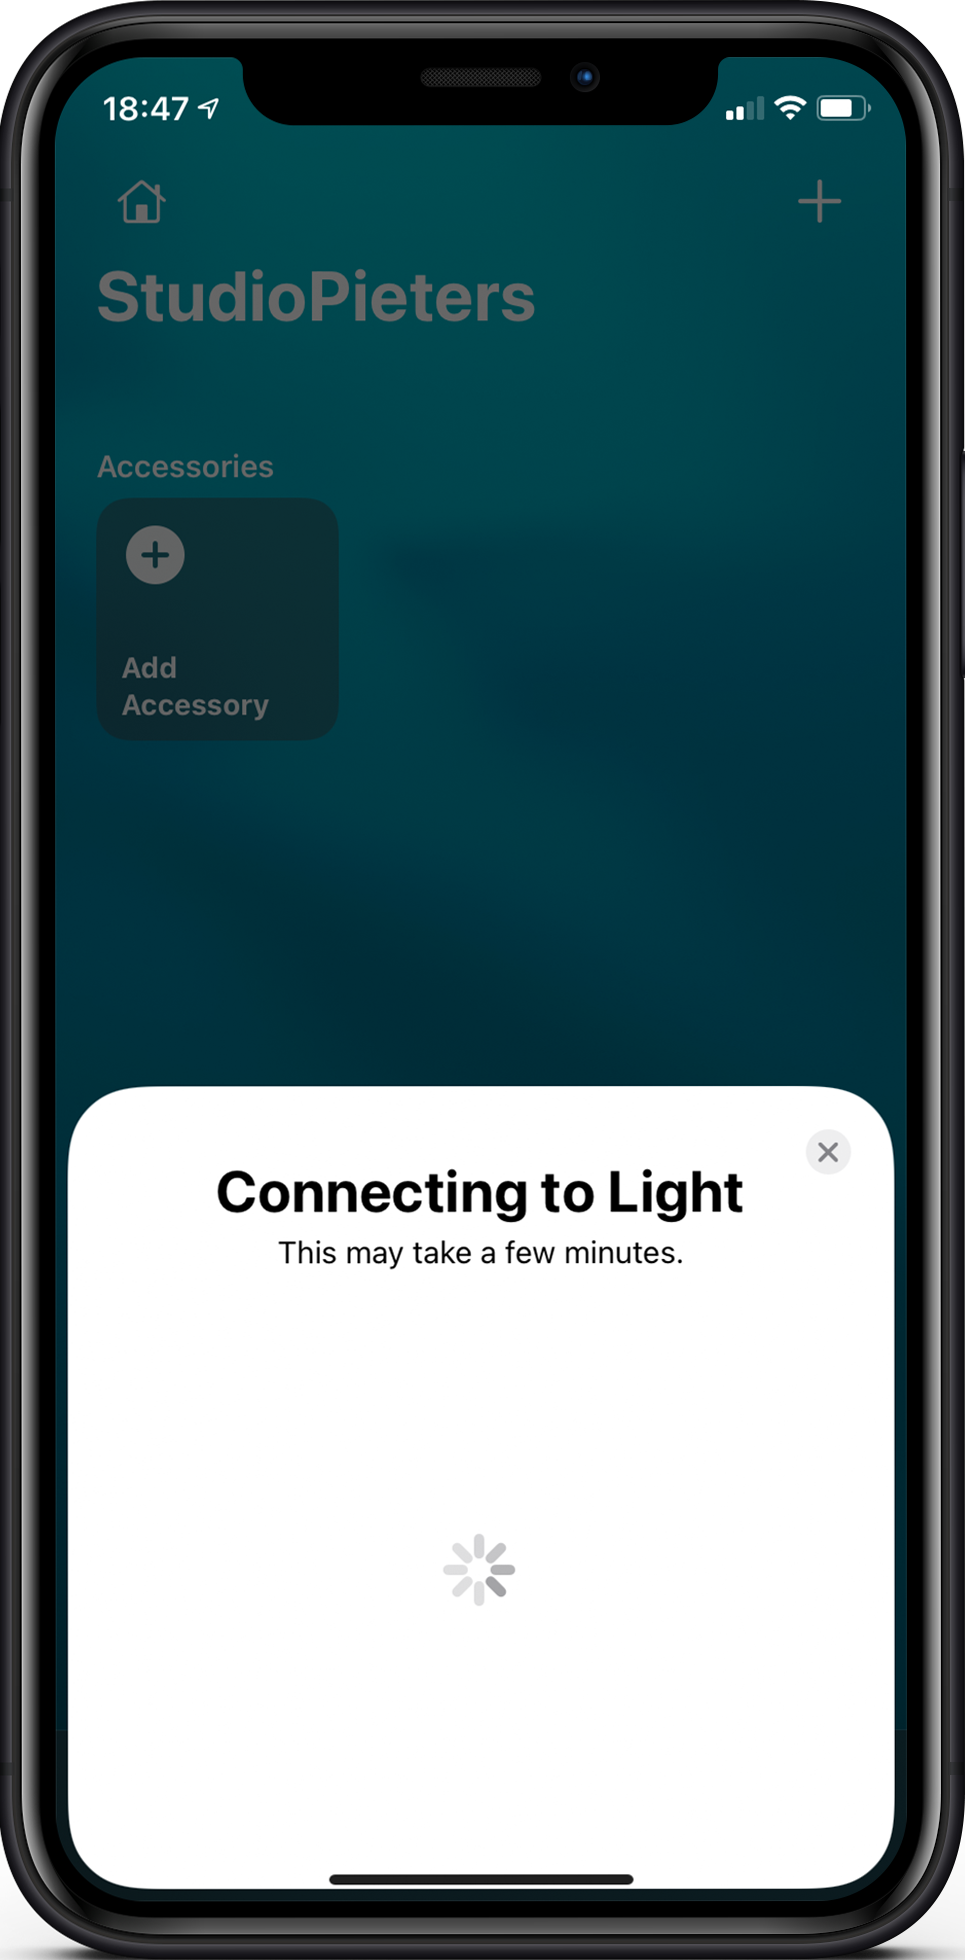
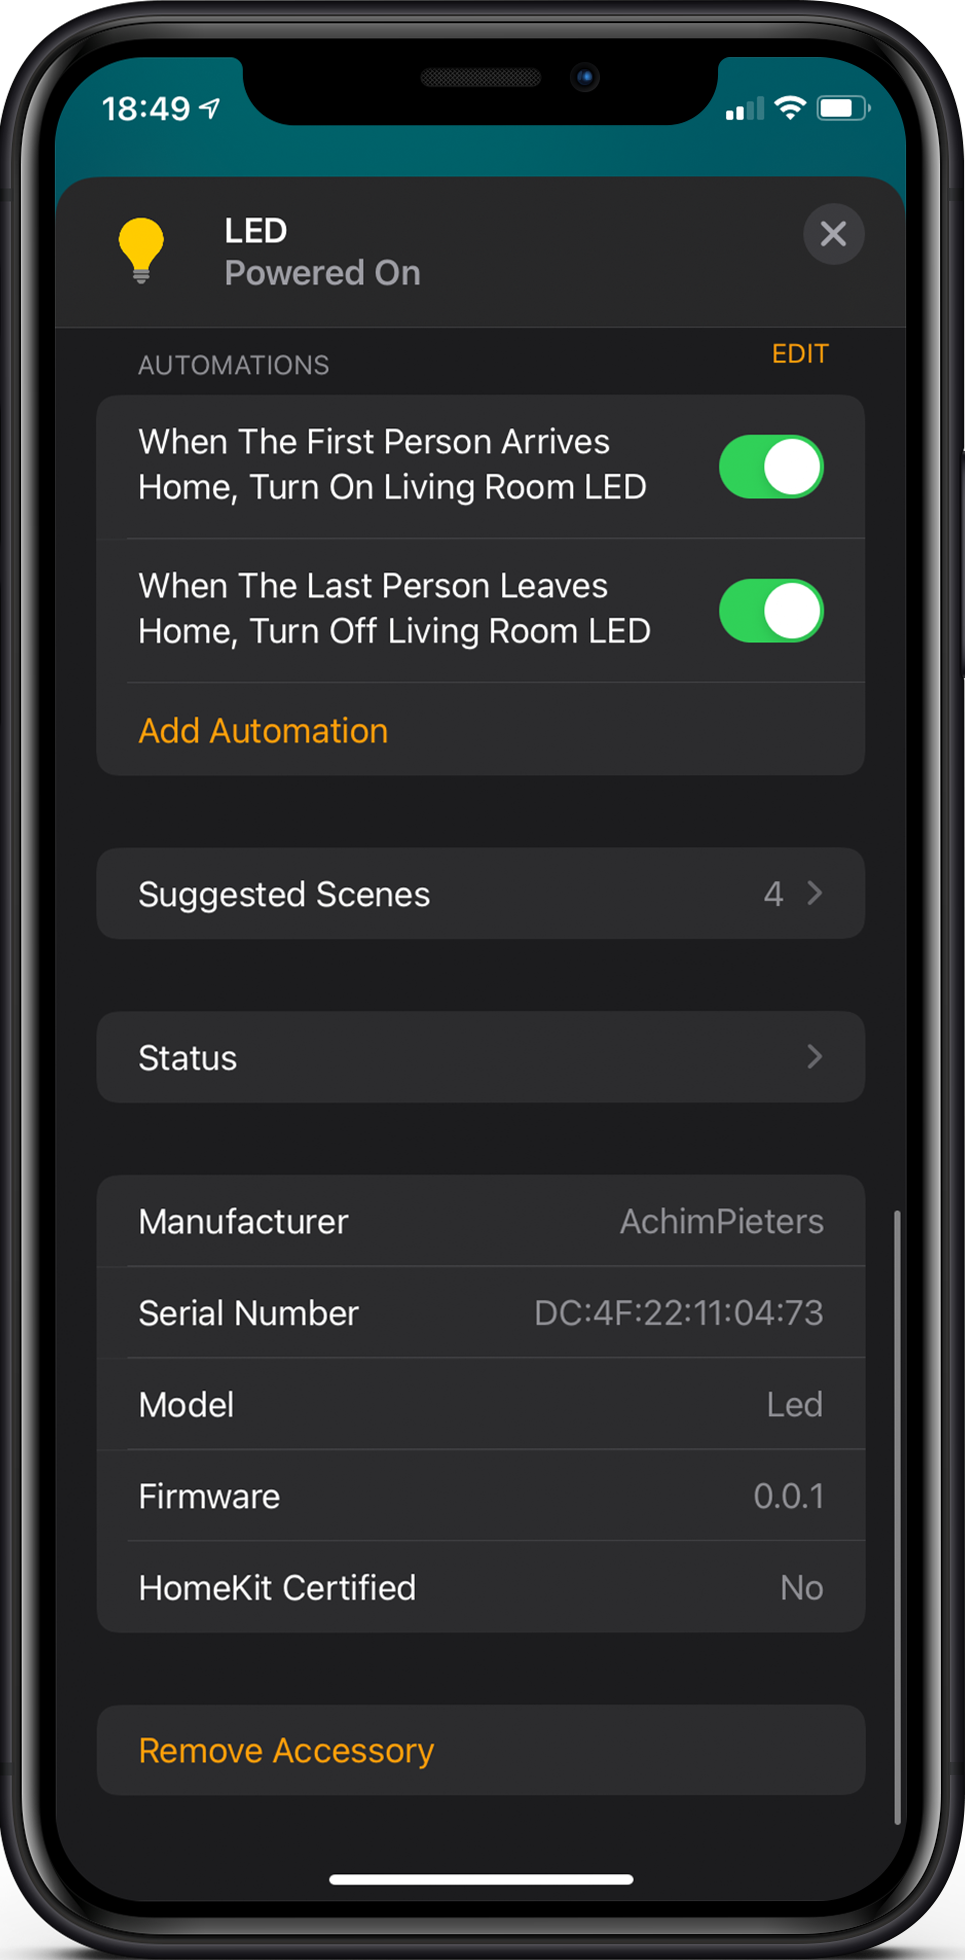
Now you will get a popup that say’s it’s a “Uncertified Accessory” just click “Add Anyway” Here after you will be asked for the “HomeKit Setup Code” this code is “111-11-111” and press “Continue“. Connecting to the device will take only a little time.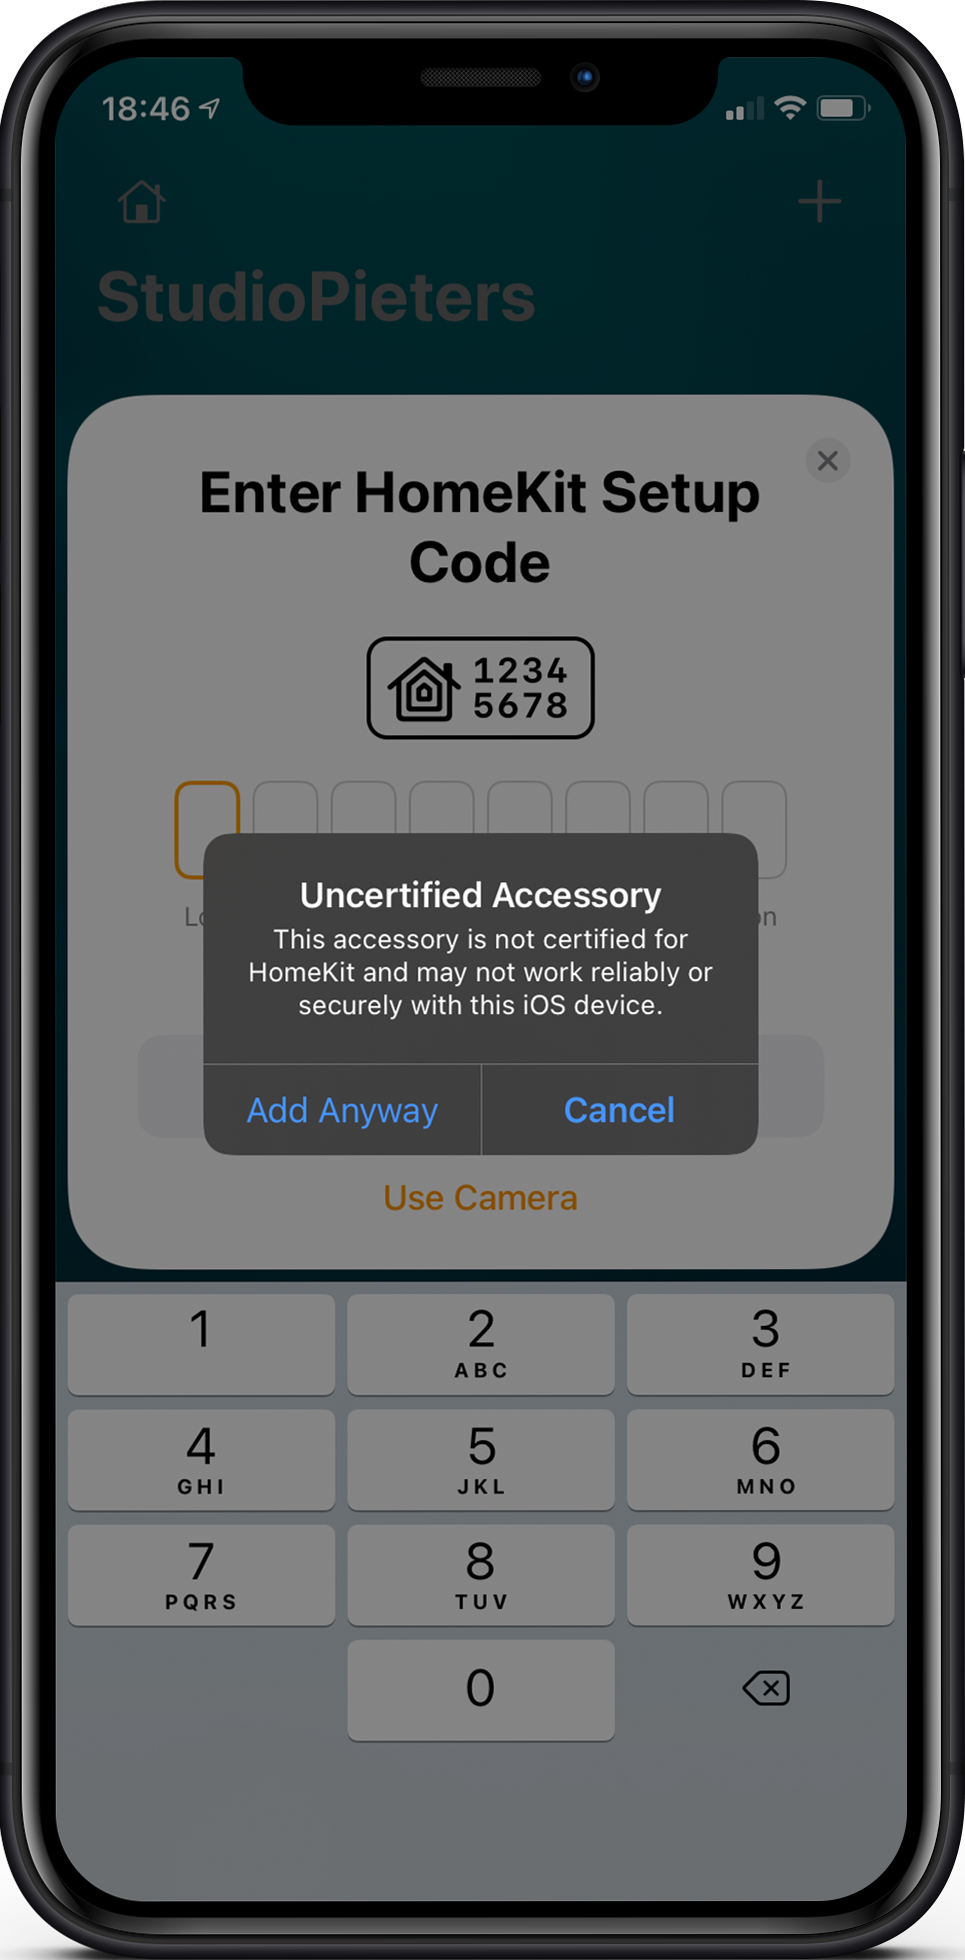

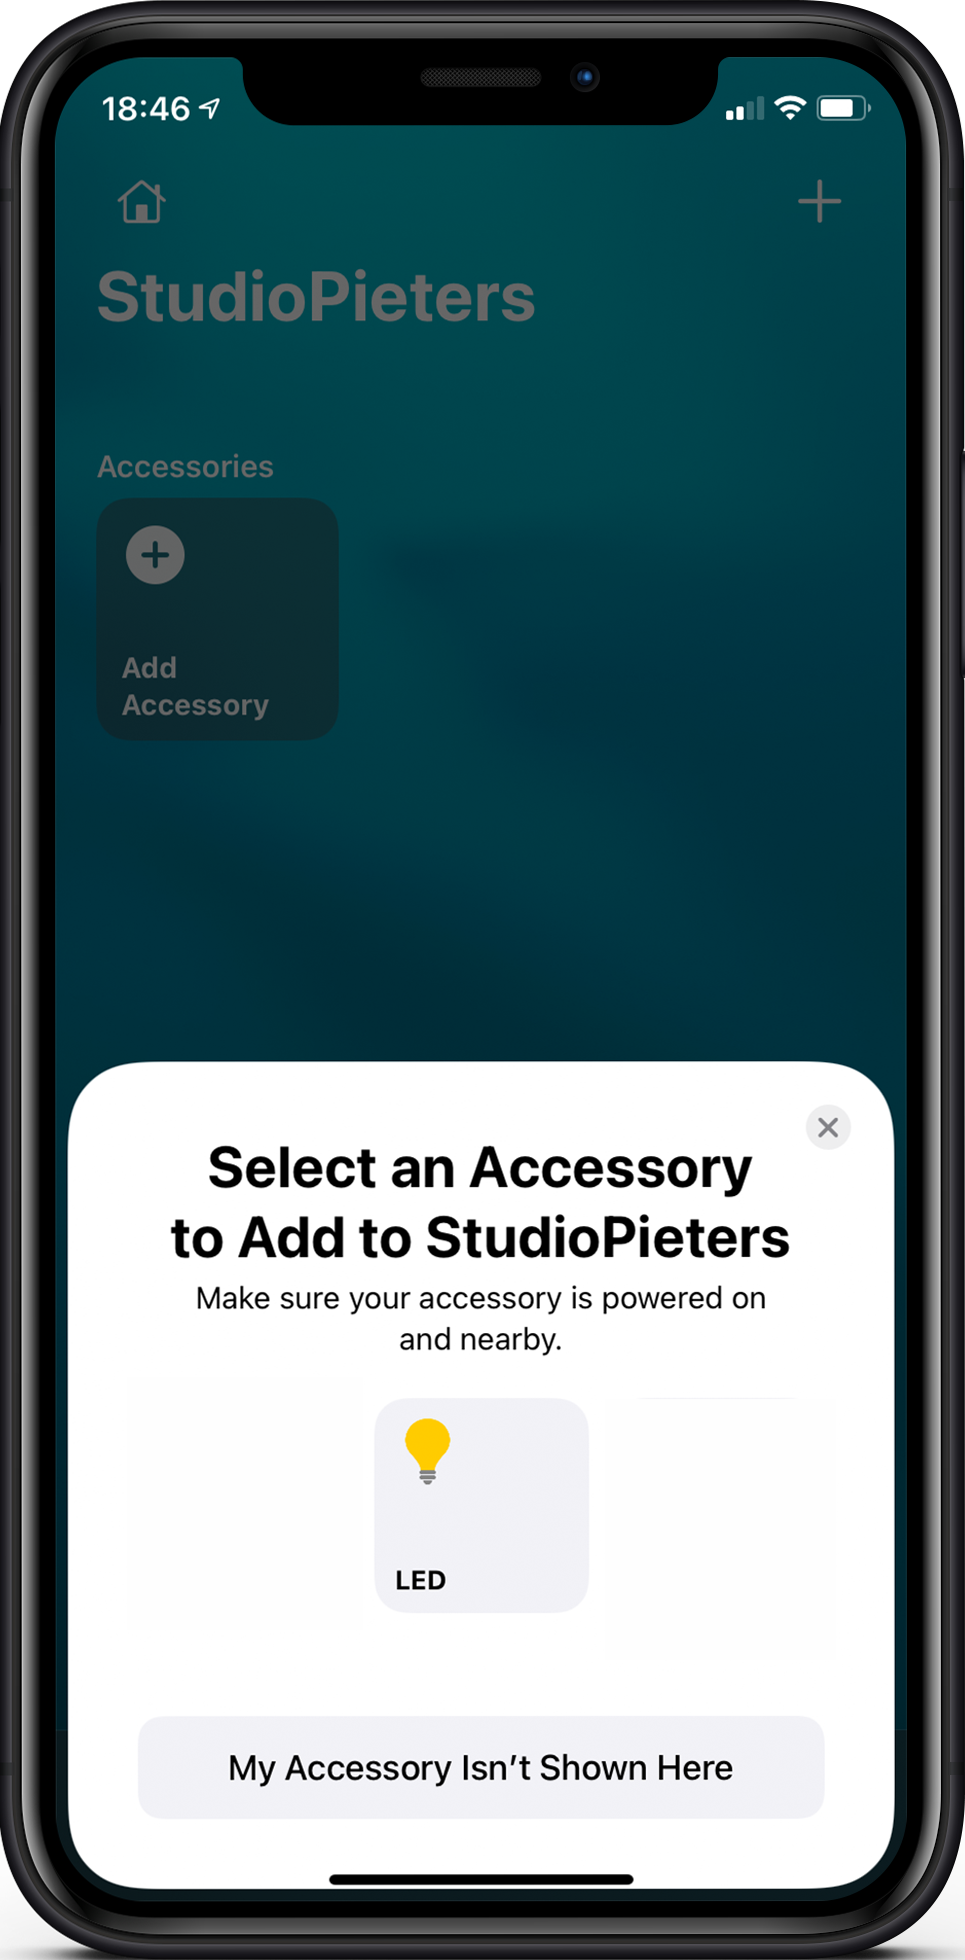
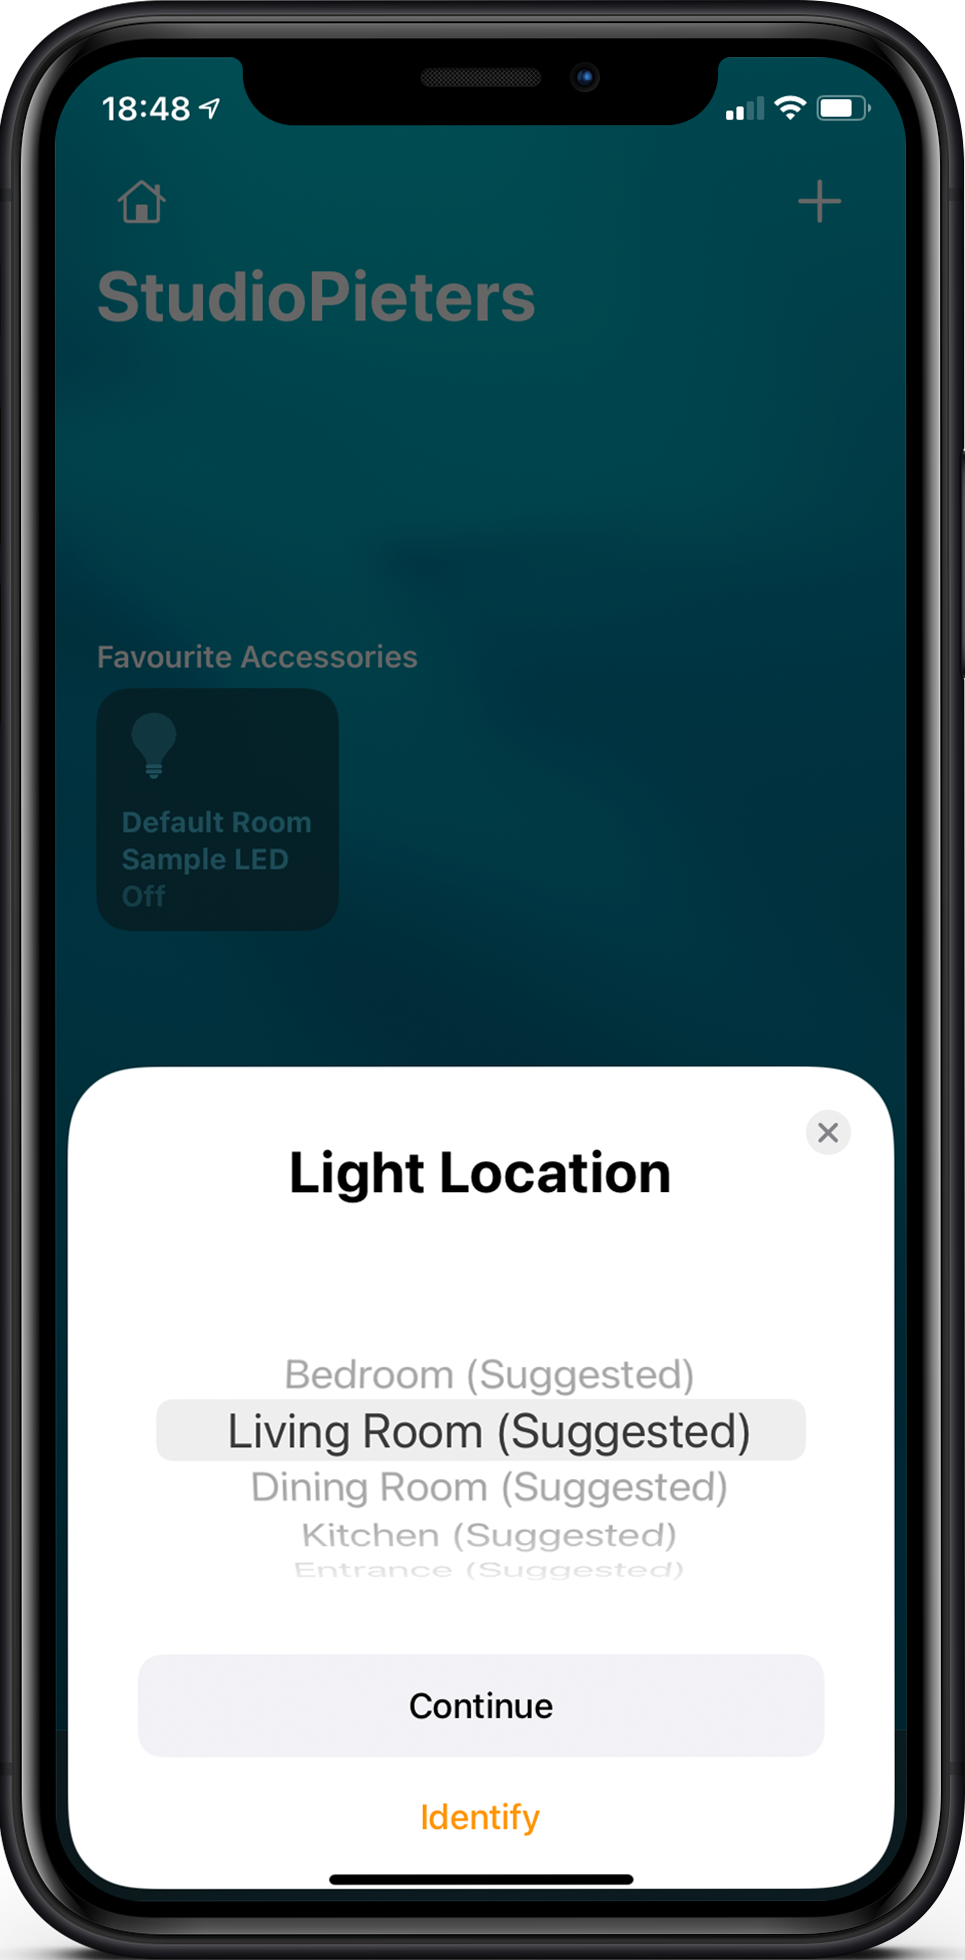
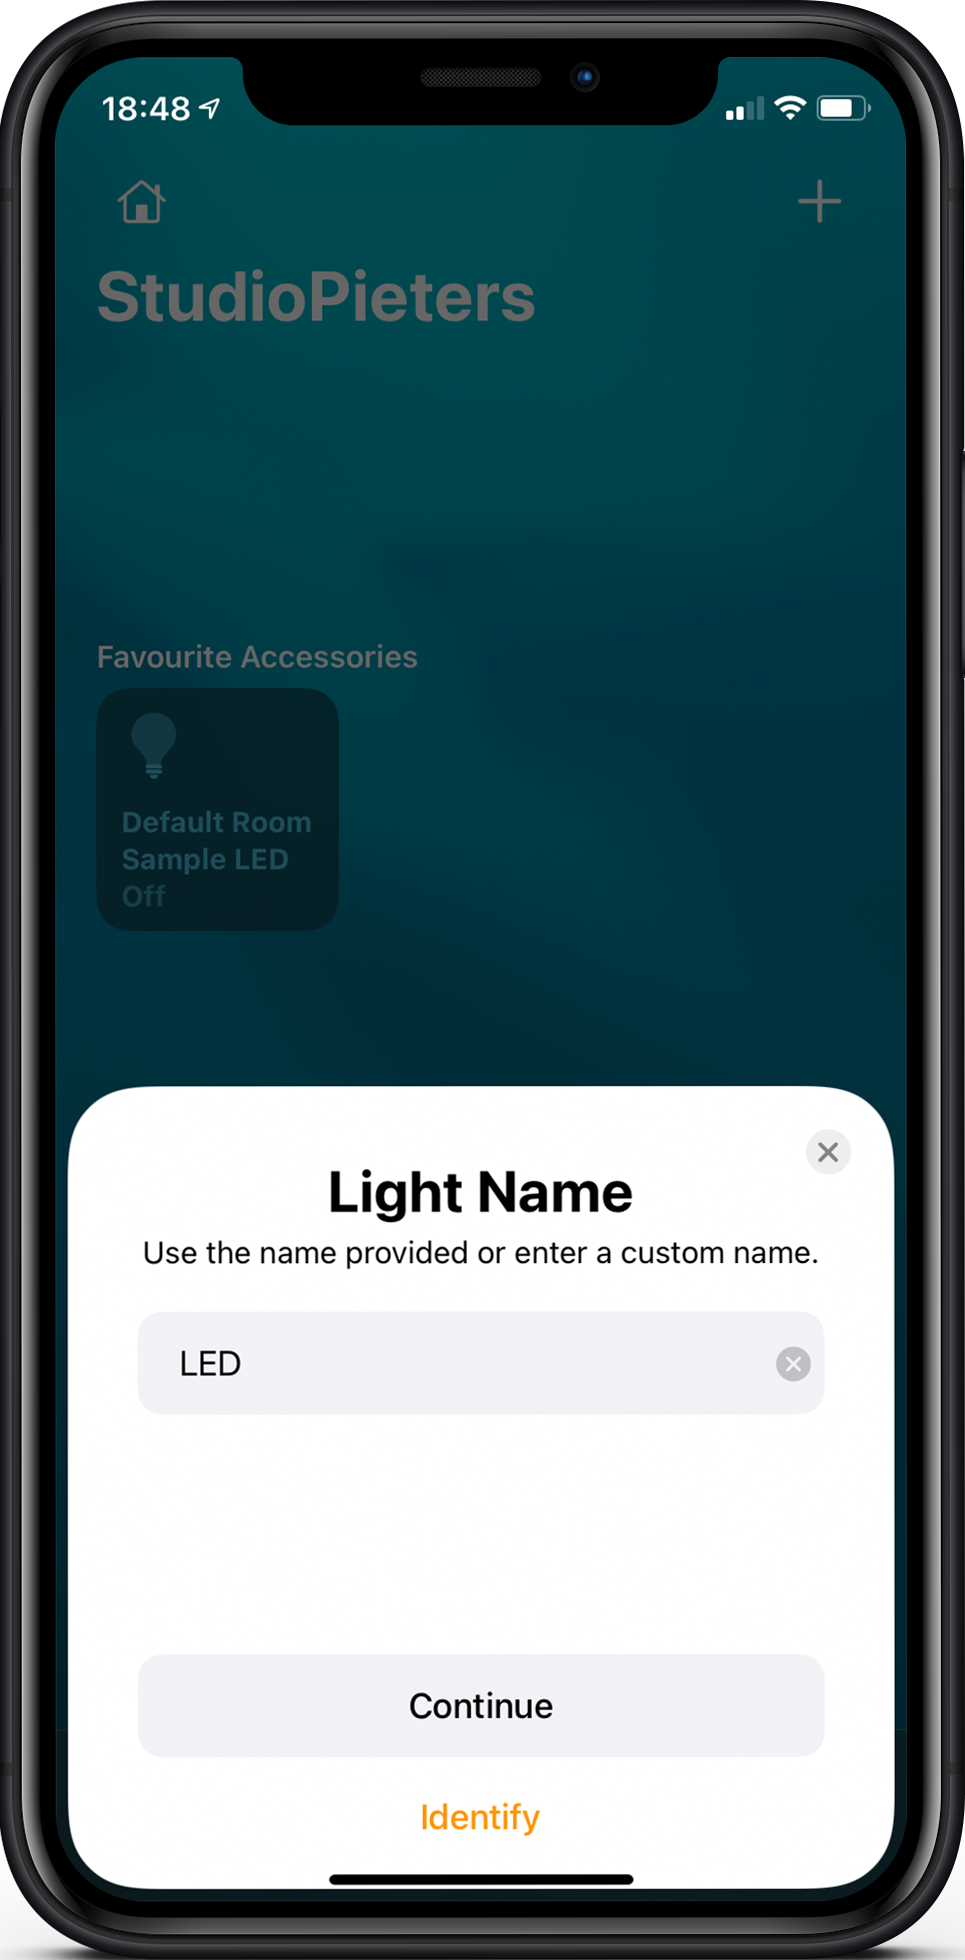
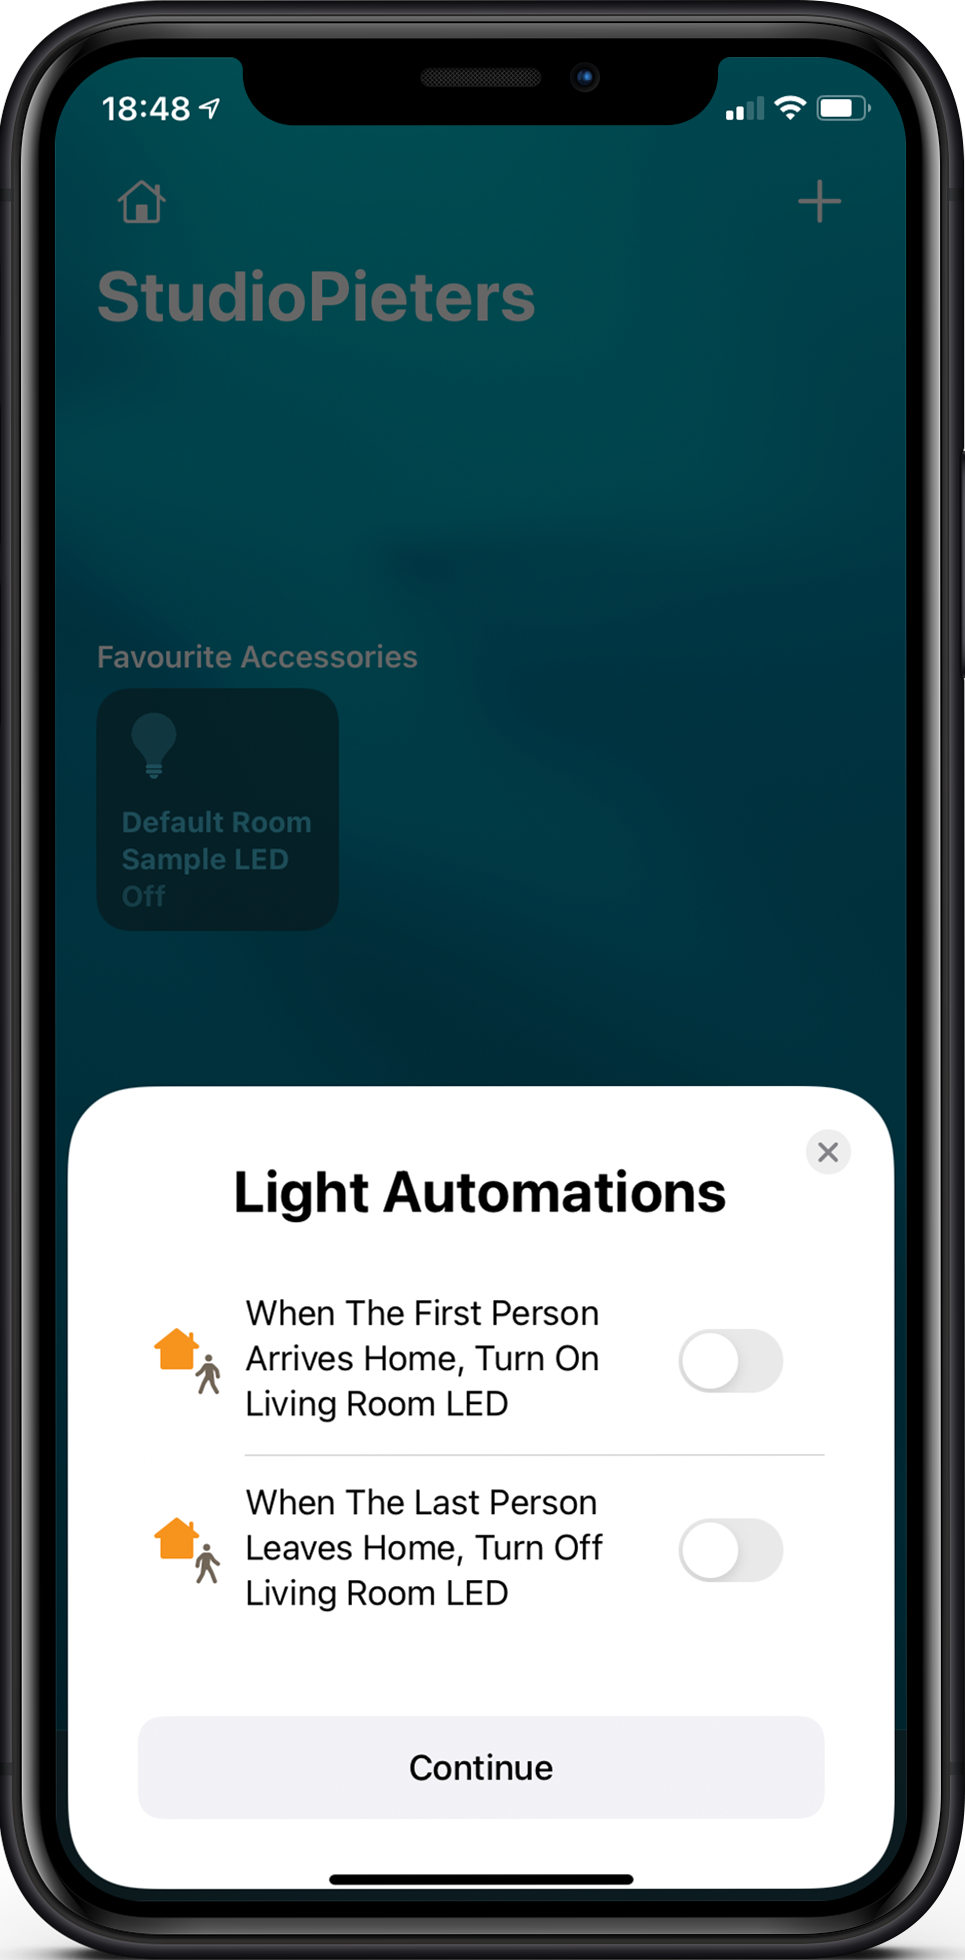
You will be asked to select the “Light Location” select here one and click “Continue“. Hereafter you will be asked to enter a “Light Name” you can type a name (eg LED). The next question is a automation example, if you want to use one of these automatons examples select them and click “Continue“.
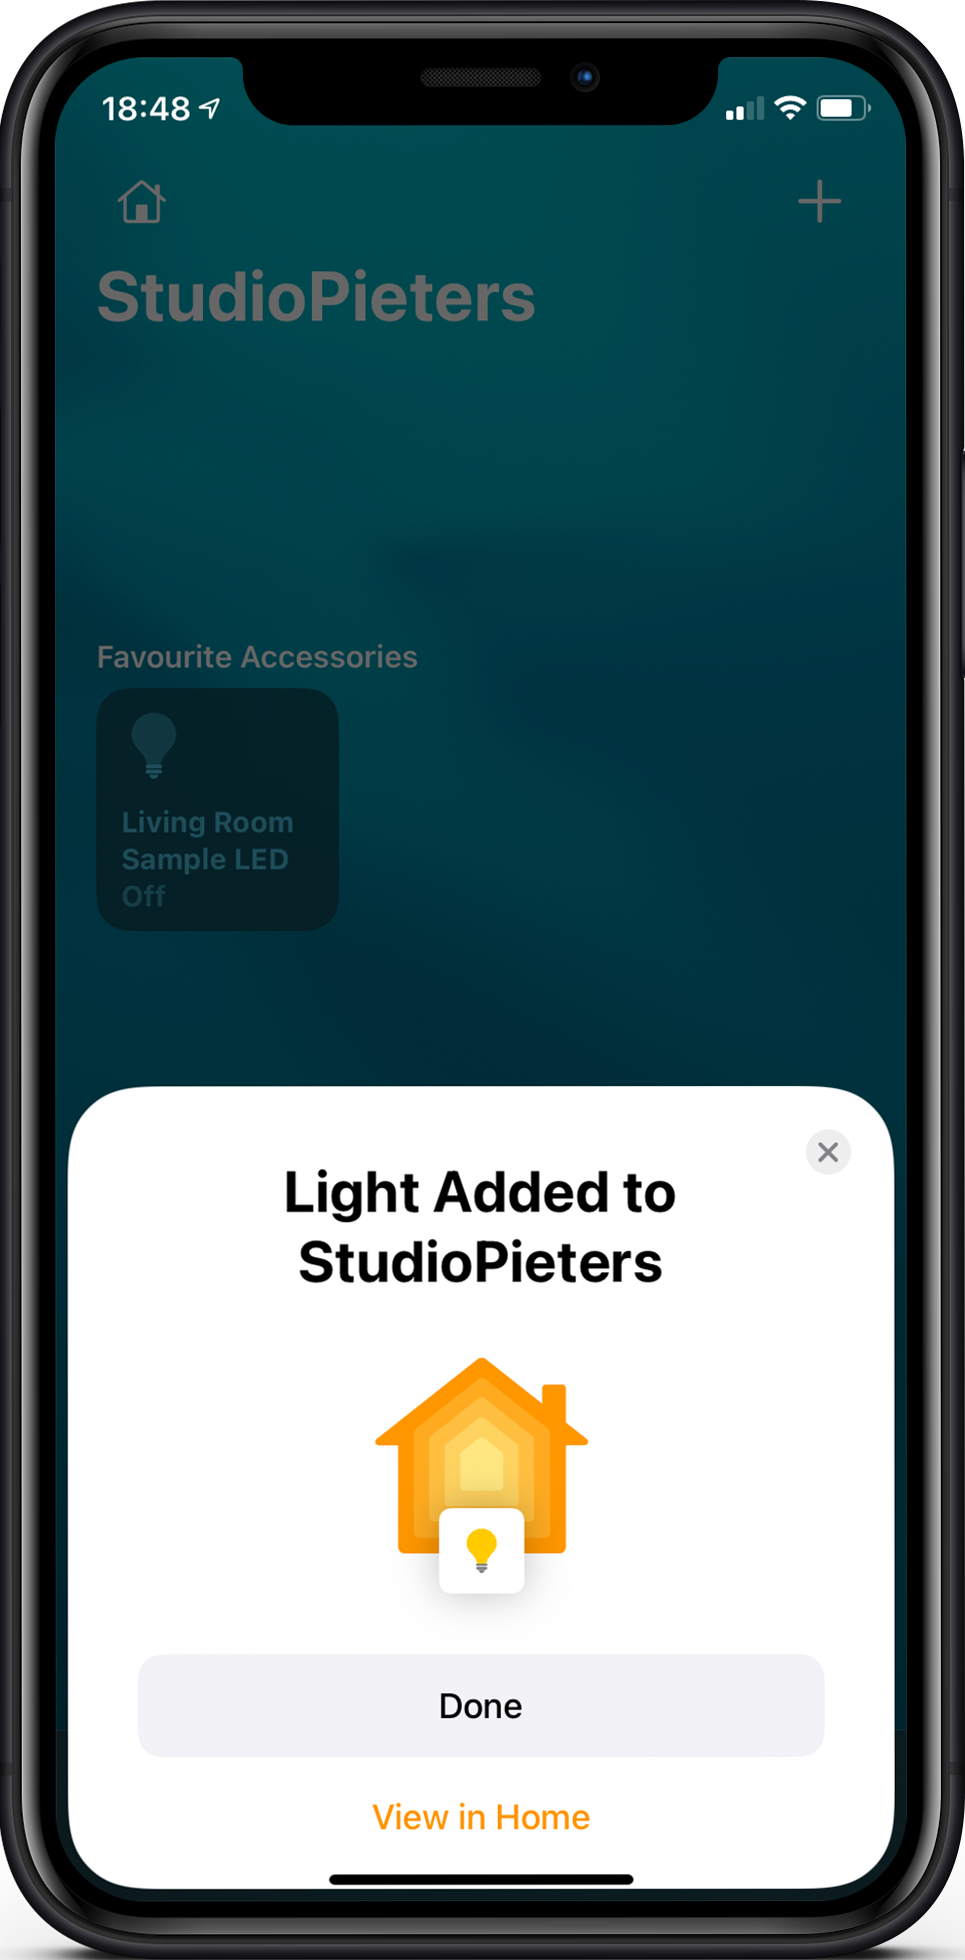
Now you see that the installation wizard is completed and press “Done“. You see that your added device is added and red out. When you press the tile you turn it on and the LED on your ESP will turn on.
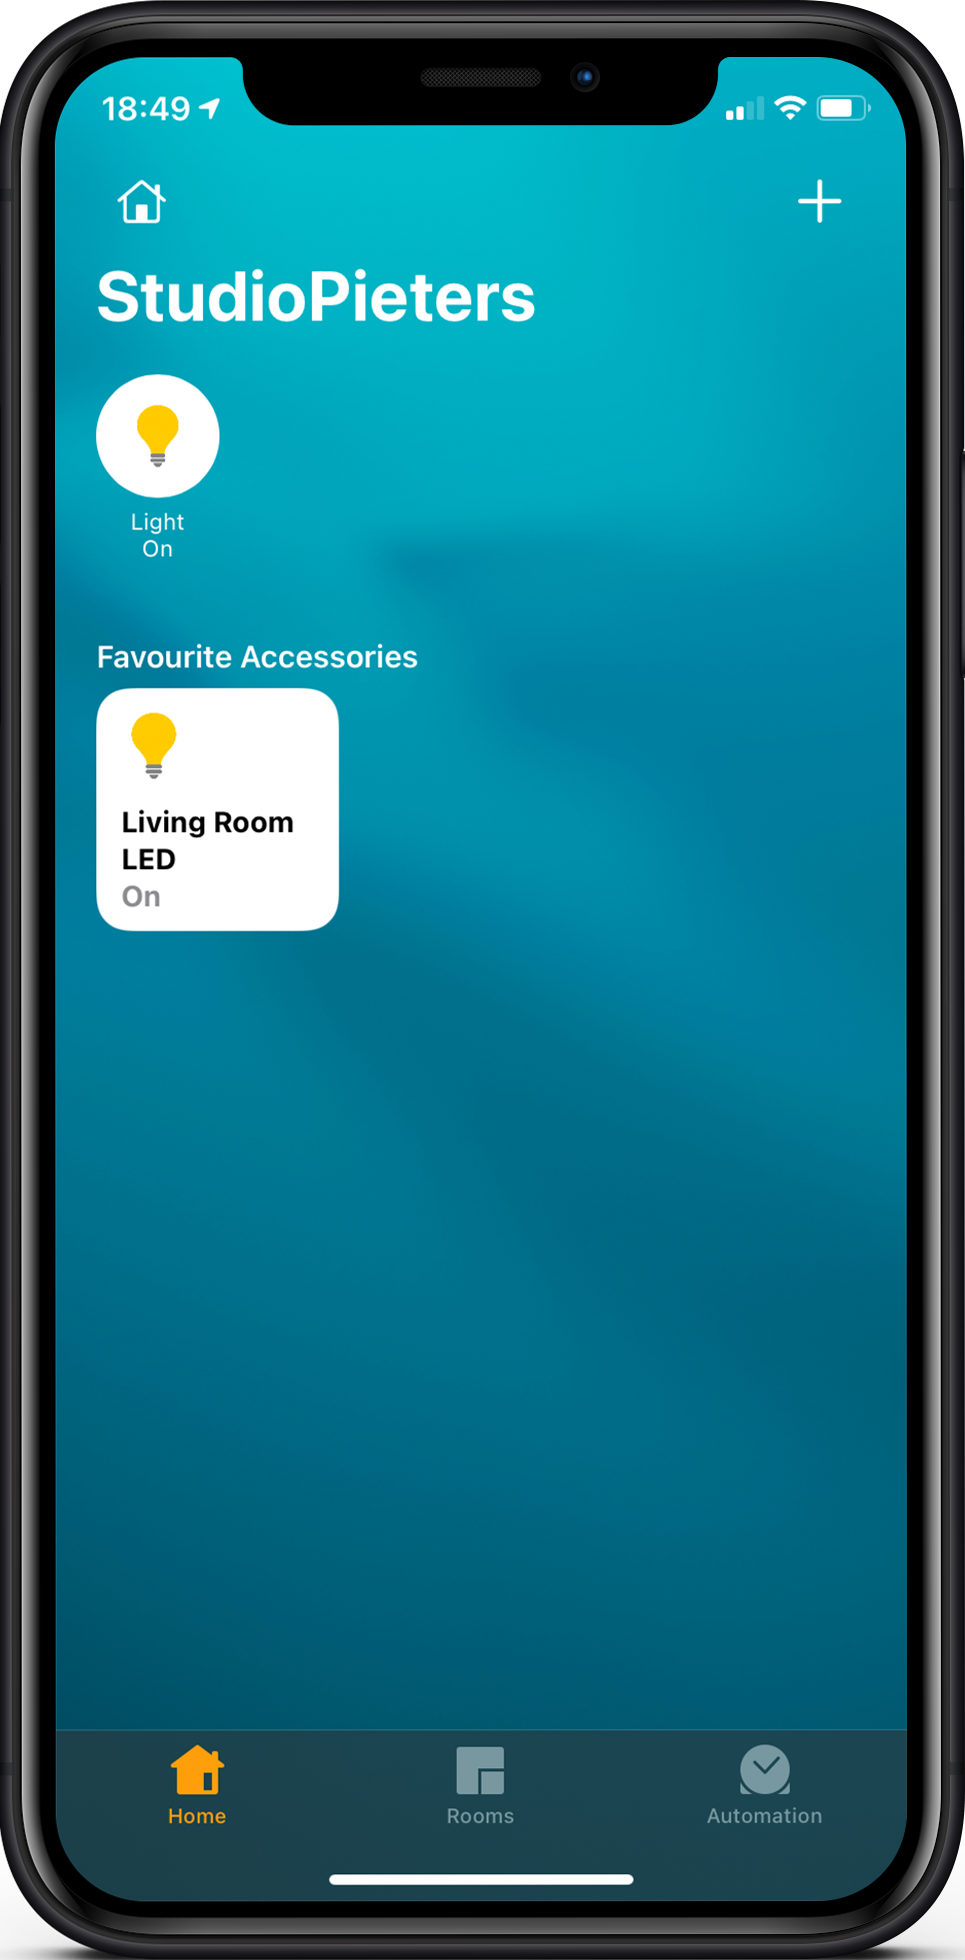
When you press the tile again it will turn off the LED on your ESP. When you hold your finger on the tile it will open a screen with a slide switch. when you slide it up it will turn on the LED on your ESP.

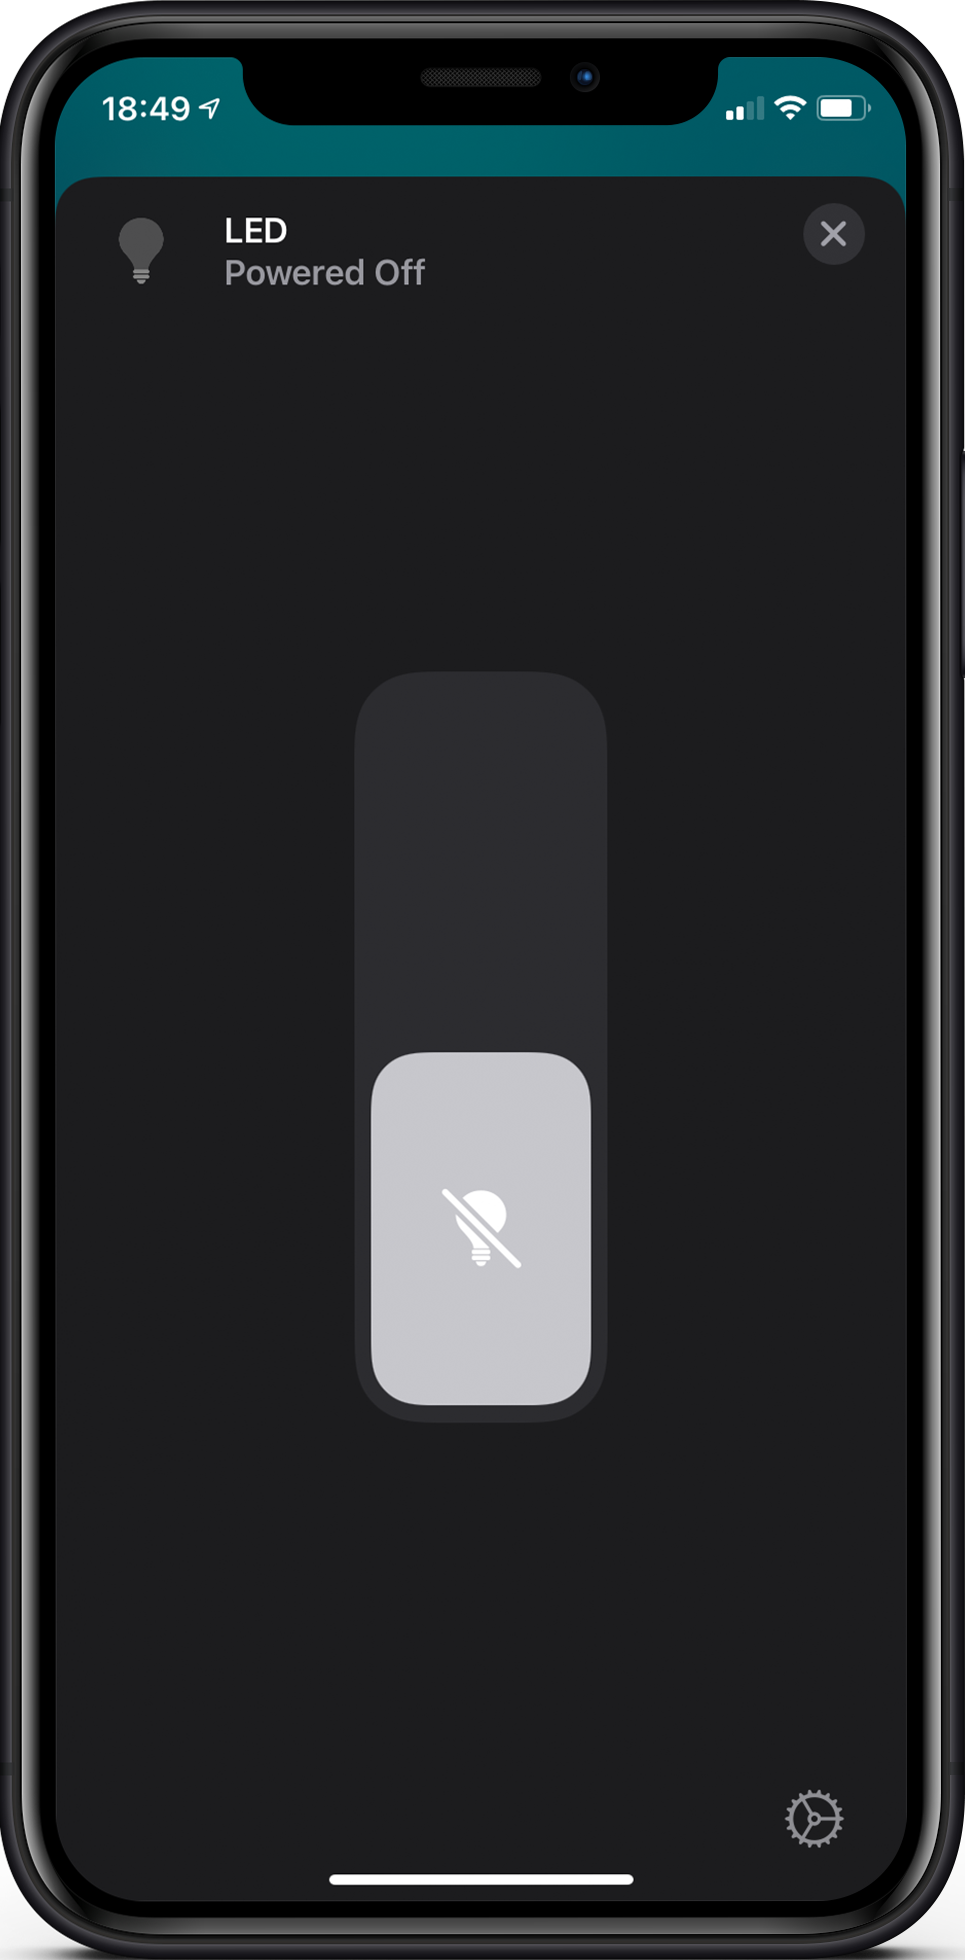
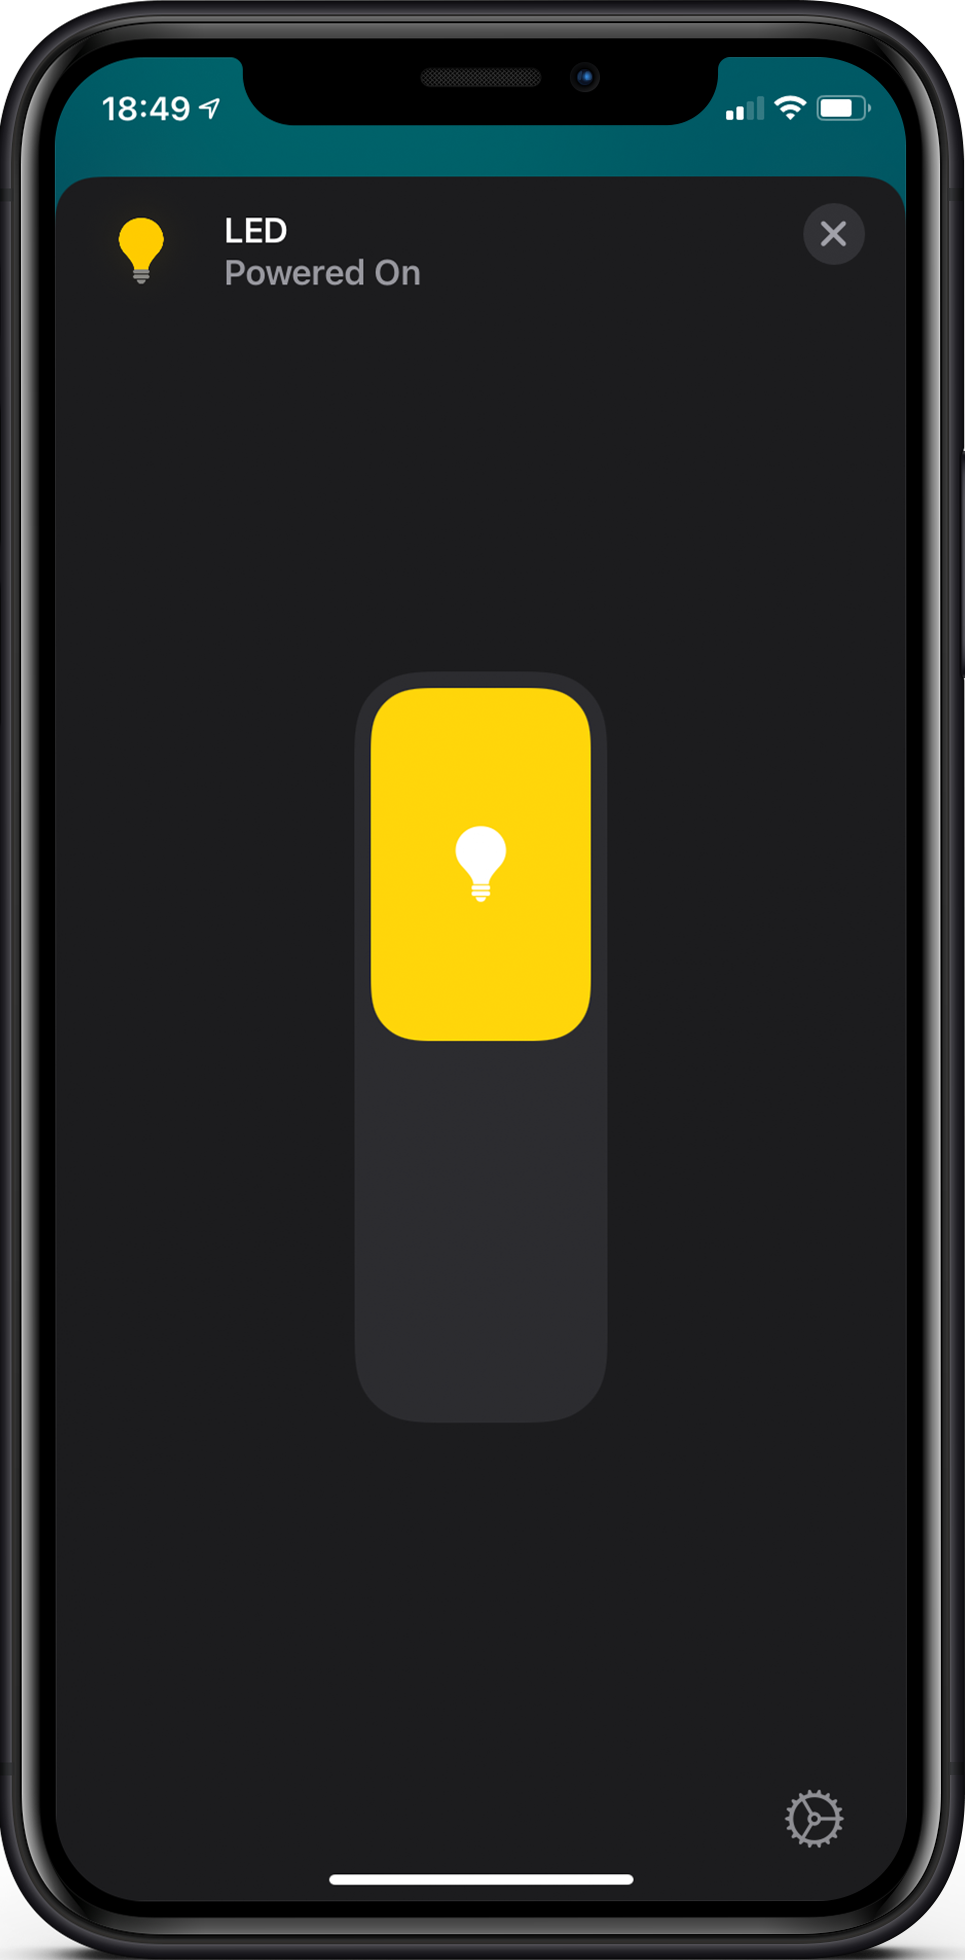
In the left bottom corner you will see a gear icon. When you press it you see the specifications of your device.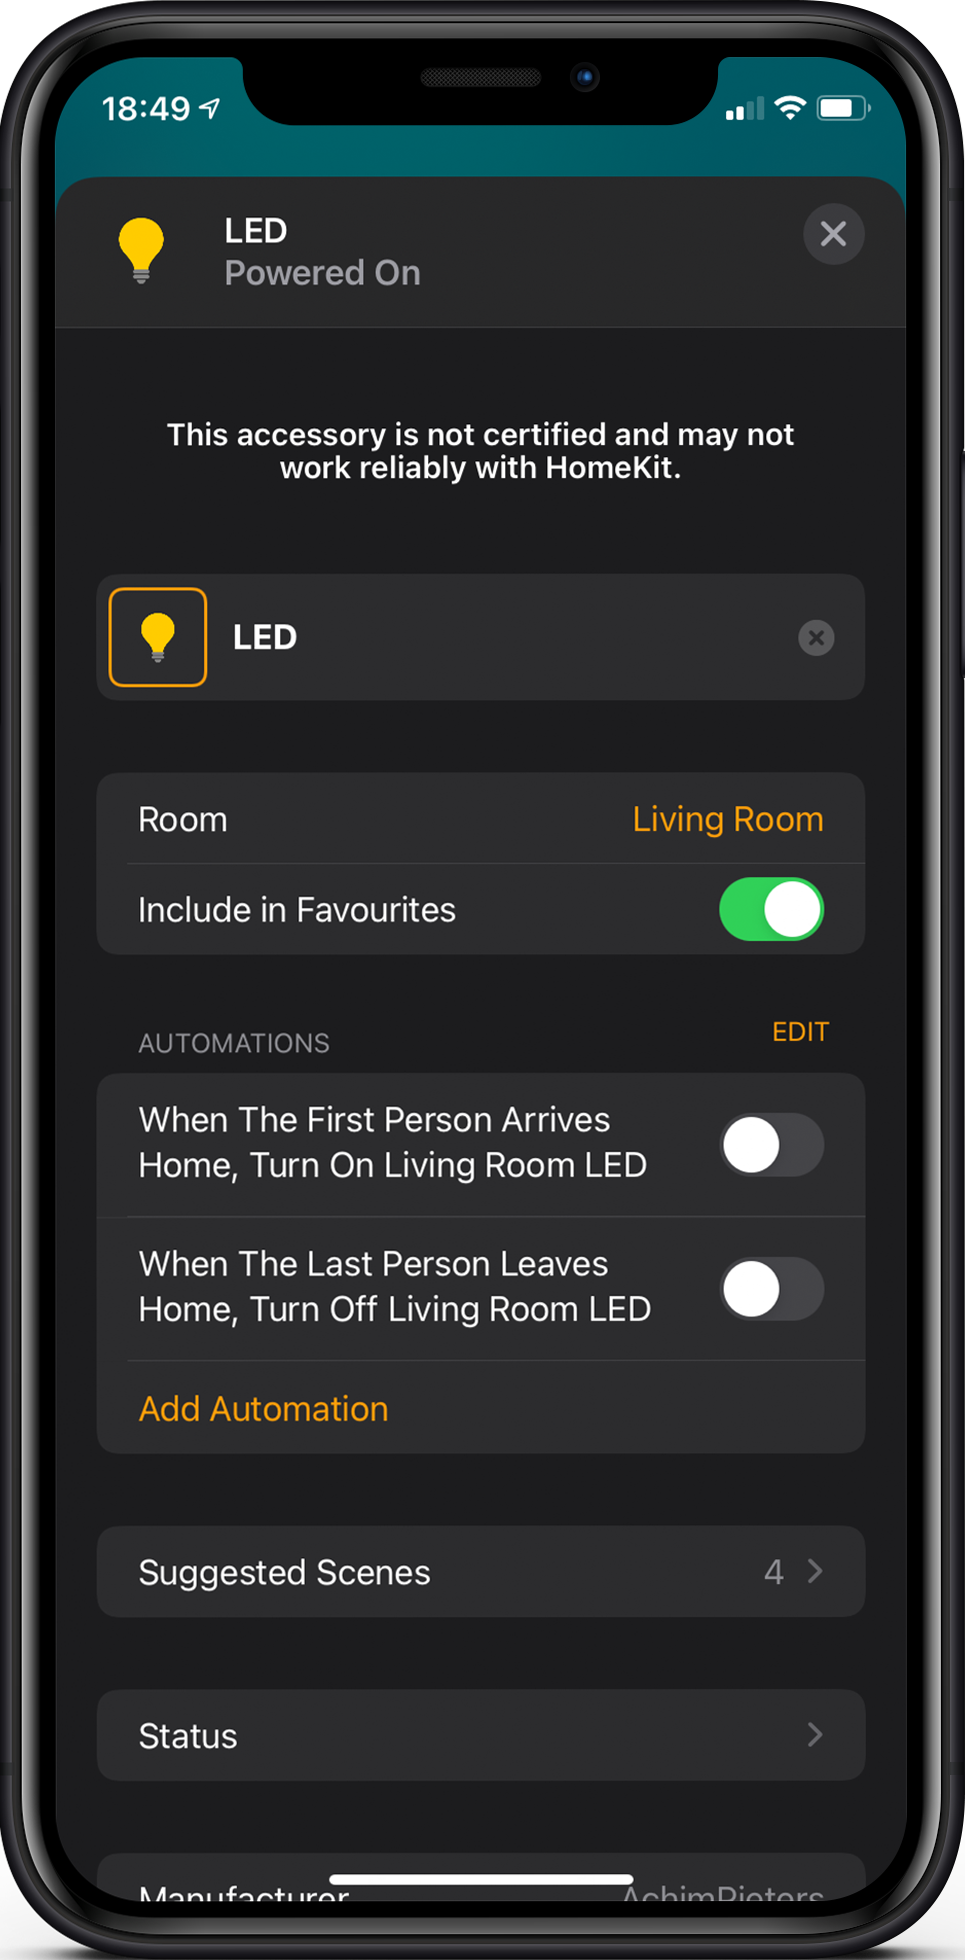
The test
It takes about 30 seconds for HomeKit to make a connection. After setting up your device we are ready to test ! Now simply press the reset button in your to turn on and off your LED light. Here in the little movie where I test my setup.
So there it is the whole compiling and installation! This was even hard for me because there are some next level skills and knowledge needed to do this. That’s why in my articles I work with pre-built binary files, so that also people with less skills can enjoy this project.
Note: To produce and sell HomeKit compatible accessories, your company need to be certified for that (https://developer.apple.com/homekit/, If you’re interested in developing or manufacturing a HomeKit accessory that will be distributed or sold, your company must enroll in the MFi Program.) Espressif have their implementation of HomeKit framework, but it will give you it only if you have MFi certification (notice this text at the bottom of page you mentioned: Please note that the Espressif HomeKit SDK is available to MFi licensees only, and you need to provide the Account Number for verification purposes when requesting the SDK.).This project is a non-commercial implementation of HAP protocol, not meant for commercial use.
REFERENCE
Maxim Kulkin, esp-wifi-config (2019), Library to bootstrap WiFi-enabled accessories WiFi config, https://github.com/maximkulkin/esp-wifi-config Paul Sokolovsky, esp-open-sdk (2019), Free and open (as much as possible) integrated SDK for ESP8266/ESP8285 chips, https://github.com/pfalcon/esp-open-sdk Espressif Systems, esptool (2019), ESP8266 and ESP32 serial bootloader utility, https://github.com/espressif/esptool HomeACcessoryKid, life-cycle-manager (2019), Initial install, WiFi settings and over the air firmware upgrades for any esp-open-rtos repository on GitHub, https://github.com/HomeACcessoryKid/life-cycle-manager