Well after a long time I’ve picked up where I left my HomeBridge project. Its time to go to the next level; accessories! The first logical step is in my opinion switching a light ( or relay ) on and off though the HomeBridge with Siri. First, you must install HomeBridge on a Raspberry Pi, and configure it as a HomeKit bridge device.How to do that, you can read all about it here.
Installing the Plugin on your HomeBridge
When you have installed the HomeBridge you need to install the homebridge-http package in order to let the HomeBridge communicate with your ESP8266 over HTTP.
sudo npm install -g homebridge-http --unsafe-perm
Edit the HomeBridge /var/homebridge/config.json file on the Raspberry Pi HomeBridge. the file may alternatively be in /home/.homebridge or /root/home/./homebridge.
sudo nano ~/.homebridge/config.json
Add this code to the config.json file. Mind the last comma, you may or may not need it if you have other accessories, or Homebridge is crashing on load.
{
    "bridge": {
        "name": "Homebridge",
        "username": "CC:22:3D:E3:CE:30",
        "port": 51826,
        "pin": "031-45-154"
    },

    "description": "This is an example configuration file with all supported devices. You can use this as a template for creating your own configuration file containing devices you actually own.",

    "platforms": [

    ],

    "accessories": [
        {    "accessory": "Http",
            "name": "PowerTail",
            "on_url": "http://192.168.1.110/gpio/1",
            "off_url": "http://192.168.1.110/gpio/0",
            "http_method": "GET"
        },

    ]
}
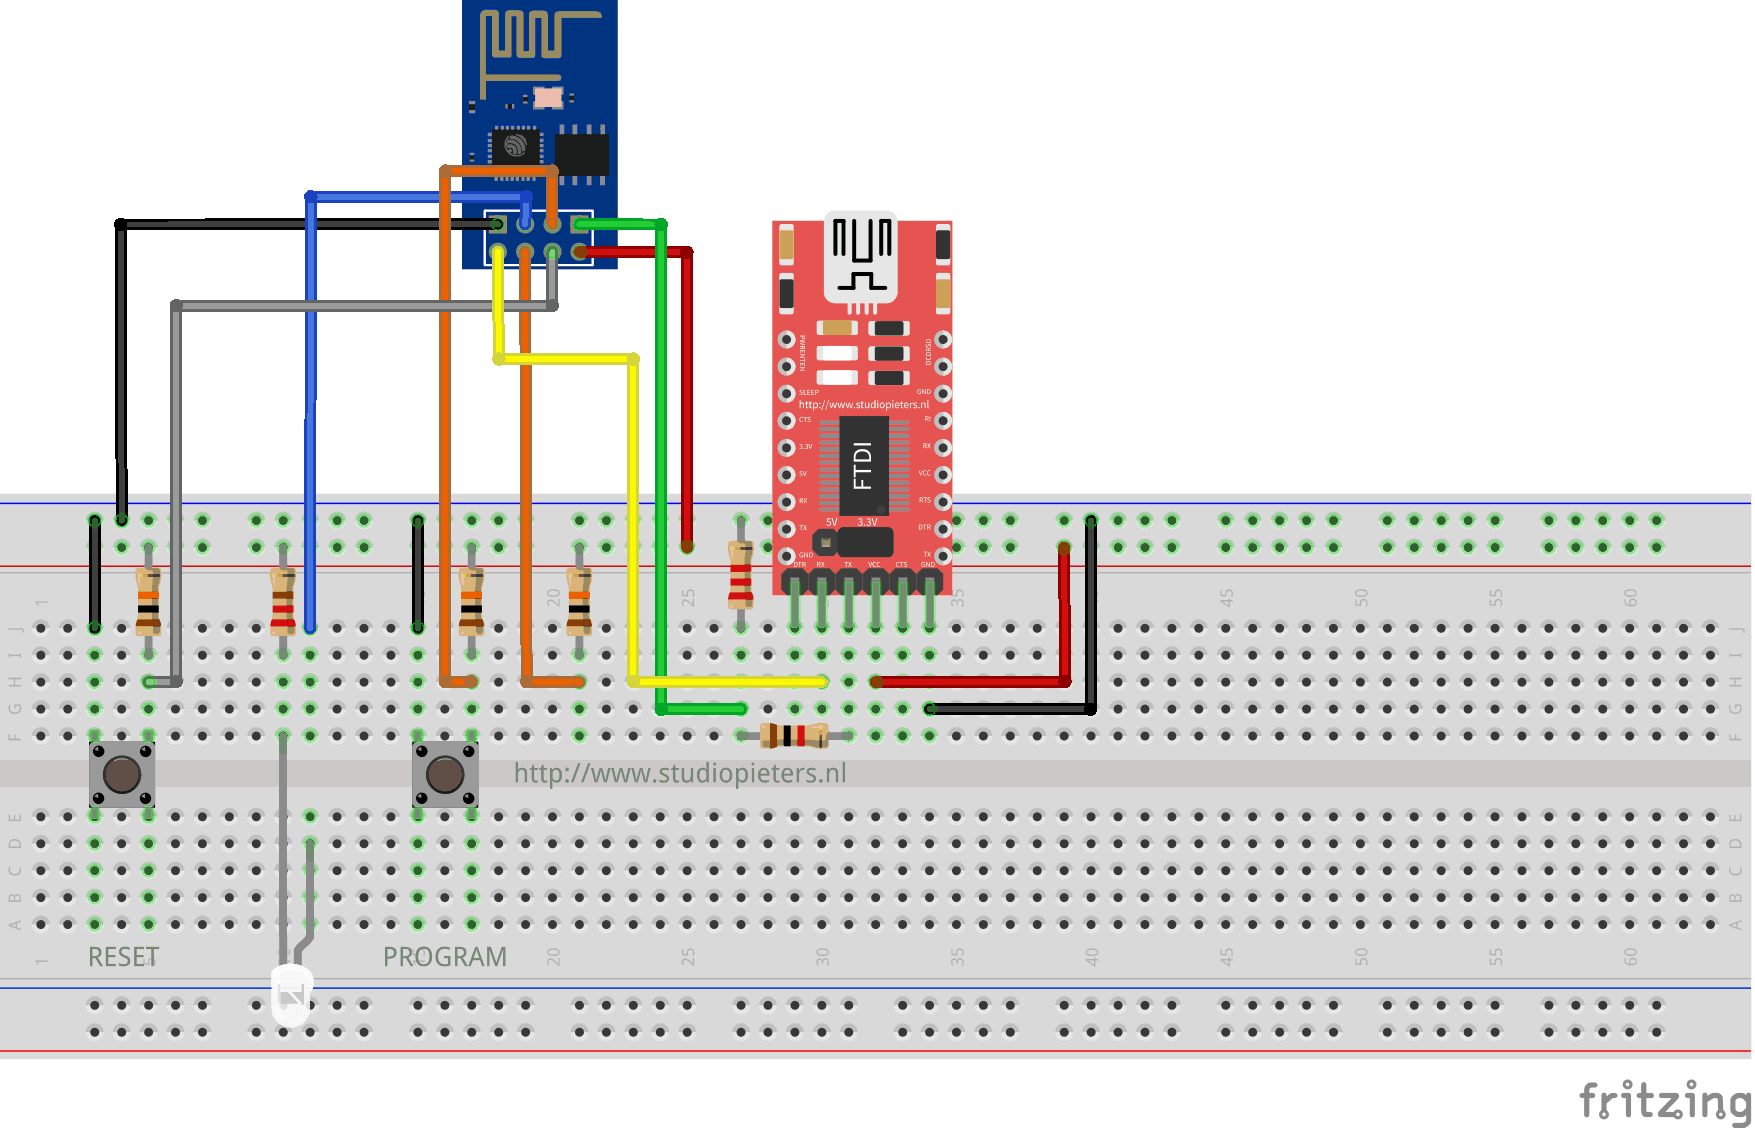
The Hardware
Once you have HomeKit / HomeBridge working on your Pi and your iPhone, we can build a wireless power switch that can be controlled by Siri and the HomeKit app. At first we need to setup the FTDI programmer to program the ESP8266 with the Arduino IDE.
The Code
The we can upload the program below to your ESP8266.
/*
    Project name: Apple Homebridge - Relays & Lights
    Project URI:  https://www.studiopieters.nl/apple-homebridge-relays-lights/
    Description: Apple Homebridge - Relays & Lights
    Version: Apple homebridge - Relays & Lights 3.2.3
    License: GNU General Public License V2 or later
*/

#include <ESP8266WiFi.h>

const char* ssid = "your-ssid";
const char* password = "your-password";

// Create an instance of the server
// specify the port to listen on as an argument
WiFiServer server(80);

void setup() {
  Serial.begin(115200);
  delay(10);

  // prepare GPIO2
  pinMode(2, OUTPUT);
  digitalWrite(2, 0);

  // Connect to WiFi network
  Serial.println();
  Serial.println();
  Serial.print("Connecting to ");
  Serial.println(ssid);

  WiFi.begin(ssid, password);

  while (WiFi.status() != WL_CONNECTED) {
    delay(500);
    Serial.print(".");
  }
  Serial.println("");
  Serial.println("WiFi connected");

  // Start the server
  server.begin();
  Serial.println("Server started");

  // Print the IP address
  Serial.println(WiFi.localIP());
}

void loop() {
  // Check if a client has connected
  WiFiClient client = server.available();
  if (!client) {
    return;
  }

  // Wait until the client sends some data
  Serial.println("new client");
  while (!client.available()) {
    delay(1);
  }

  // Read the first line of the request
  String req = client.readStringUntil('\r');
  Serial.println(req);
  client.flush();

  // Match the request
  int val;
  if (req.indexOf("/gpio/0") != -1)
    val = 0;
  else if (req.indexOf("/gpio/1") != -1)
    val = 1;
  else {
    Serial.println("invalid request");
    client.stop();
    return;
  }

  // Set GPIO2 according to the request
  digitalWrite(2, val);

  client.flush();

  // Prepare the response
  String s = "HTTP/1.1 200 OK\r\nContent-Type: text/html\r\n\r\n<!DOCTYPE HTML>\r\n<html>\r\nGPIO is now ";
  s += (val) ? "high" : "low";
  s += "</html>\n";

  // Send the response to the client
  client.print(s);
  delay(1);
  Serial.println("Client disonnected");

  // The client will actually be disconnected
  // when the function returns and 'client' object is destroyed
}
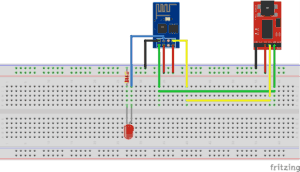
Now we can modify our setup so we can see if everything is working. In the fritzing digram below you can see that now I have added a LED and keeping the RX and TX connected so we can see in the monitor from the Arduino IDE if everything is working as we want to.
Now we have to connect our iPhone to the home bridge and add the new accesoires.
it works!

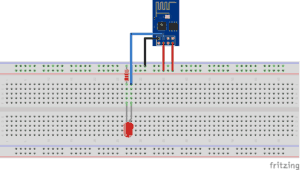
Now you can remove the FTDI programmer and you have a stand alone Apple HomeKit accesoirs.
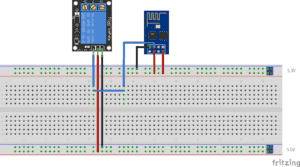
To switch a high power (230V) Light you need to replace the LED with a Relay module.
![]()
Download all Files for this project on github.

Do you have any questions? Leave a comment down here.
Reference
Nick Farina (Nov 14 2017), Homebridge, Homebridge is a lightweight NodeJS server you can run on your home network that emulates the iOS HomeKit API., https://github.com/nfarina/homebridge Adrian Rudman (Jun 27 2017) ,homebridge-http, Supports https devices on the HomeBridge Platform and provides a readable callback for getting the “On” and brightness level characteristics to Homekit. https://github.com/rudders/homebridge-http