In my previous blog here I tested the ESP HomeKit Software Development Kit. I am so enthusiastic about this Software Development Kit, that I going to write a few blogs about this genius software. In each Blog I will address a other accessory that you can add to your HomeKit without the need of a bridge. We will start off with a HomeKit Camera build upon a ESP32.
HomeKit Camera
Whilst the smart home is still in its infancy, there are many different types of HomeKit accessory on the market. The HomeKit camera help control other HomeKit accessories like lights or anything you like. This HomeKit Camera will create a simple smart home control for the whole family: anyone in the home can control multiple smart home devices wirelessly on a smartphone with HomeKit.

Under construction
The ESP32 HomeKit camera is still a work in progress (at time of writing), It’s works, but there still has to be done some work.
Software preparation
To make this camera, there is a lot more to it than you have seen in my previous blogs regrading HomeKit devices. Here you have to build it from the ground up! So this can be tricky for the people that do not have the knowledge to do this. First you have to follow these instructions: ESP HomeKit SDK – Full Installation.
Install the ESP32-IDF
I made two bash files to install the ESP tool chain, so I will be easier for others that struggle with the installation. but first we need some software.
Atom
Atom is a free and open-source text and source code editor for macOS, Linux, and Microsoft Windows with support for plug-ins written in Node.js, and embedded Git Control, developed by GitHub. Atom is a desktop application built using web technologies. Most of the extending packages have free software licenses and are community-built and maintained. You can download your free copy here.
Download
Create an empty directory and change into it. Create a file in Atom one.sh with following content:
one.sh
#!/usr/bin/env bash

#Install Prerequisites
sudo easy_install pip;
cd ~/ ;
touch .zshrc;

# Setup Toolchain
mkdir -p ~/esp32;
cd ~/esp32;

curl -O https://dl.espressif.com/dl/xtensa-esp32-elf-osx-1.22.0-80-g6c4433a-5.2.0.tar.gz;
tar -xzf xtensa-esp32-elf-osx-1.22.0-80-g6c4433a-5.2.0.tar.gz;

#update PATH environment variable
echo 'export PATH=$HOME/esp32/xtensa-esp32-elf/bin:$PATH' >> ~/.zshrc;

#Get ESP-IDF
cd ~/esp32;
git clone -b v3.2 --recursive https://github.com/espressif/esp-idf.git;

#update PATH environment variable
echo 'export IDF_PATH=~/esp32/esp-idf' >> ~/.zshrc;
Then create a file in Atom two.sh with following content:
#!/usr/bin/env bash

#Install the Required Python Packages
python -m pip install --user -r $IDF_PATH/requirements.txt
Open the Terminal app. Click the Finder icon in your dock. Click Go. Click Utilities. Double-click Terminal. To run one.sh , run this command:
bash one.sh
Restart your Mac en the run part two.
Open the Terminal app. Click the Finder icon in your dock. Click Go. Click Utilities. Double-click Terminal. To build two.sh , run this command:
bash two.sh
Then you can clone the repository to your computer.
git clone --recursive https://github.com/maximkulkin/esp32-homekit-camera.git
You can download the bash files on

Hardware preparation
To Install our firmware to our esp we make our “standard” setup.
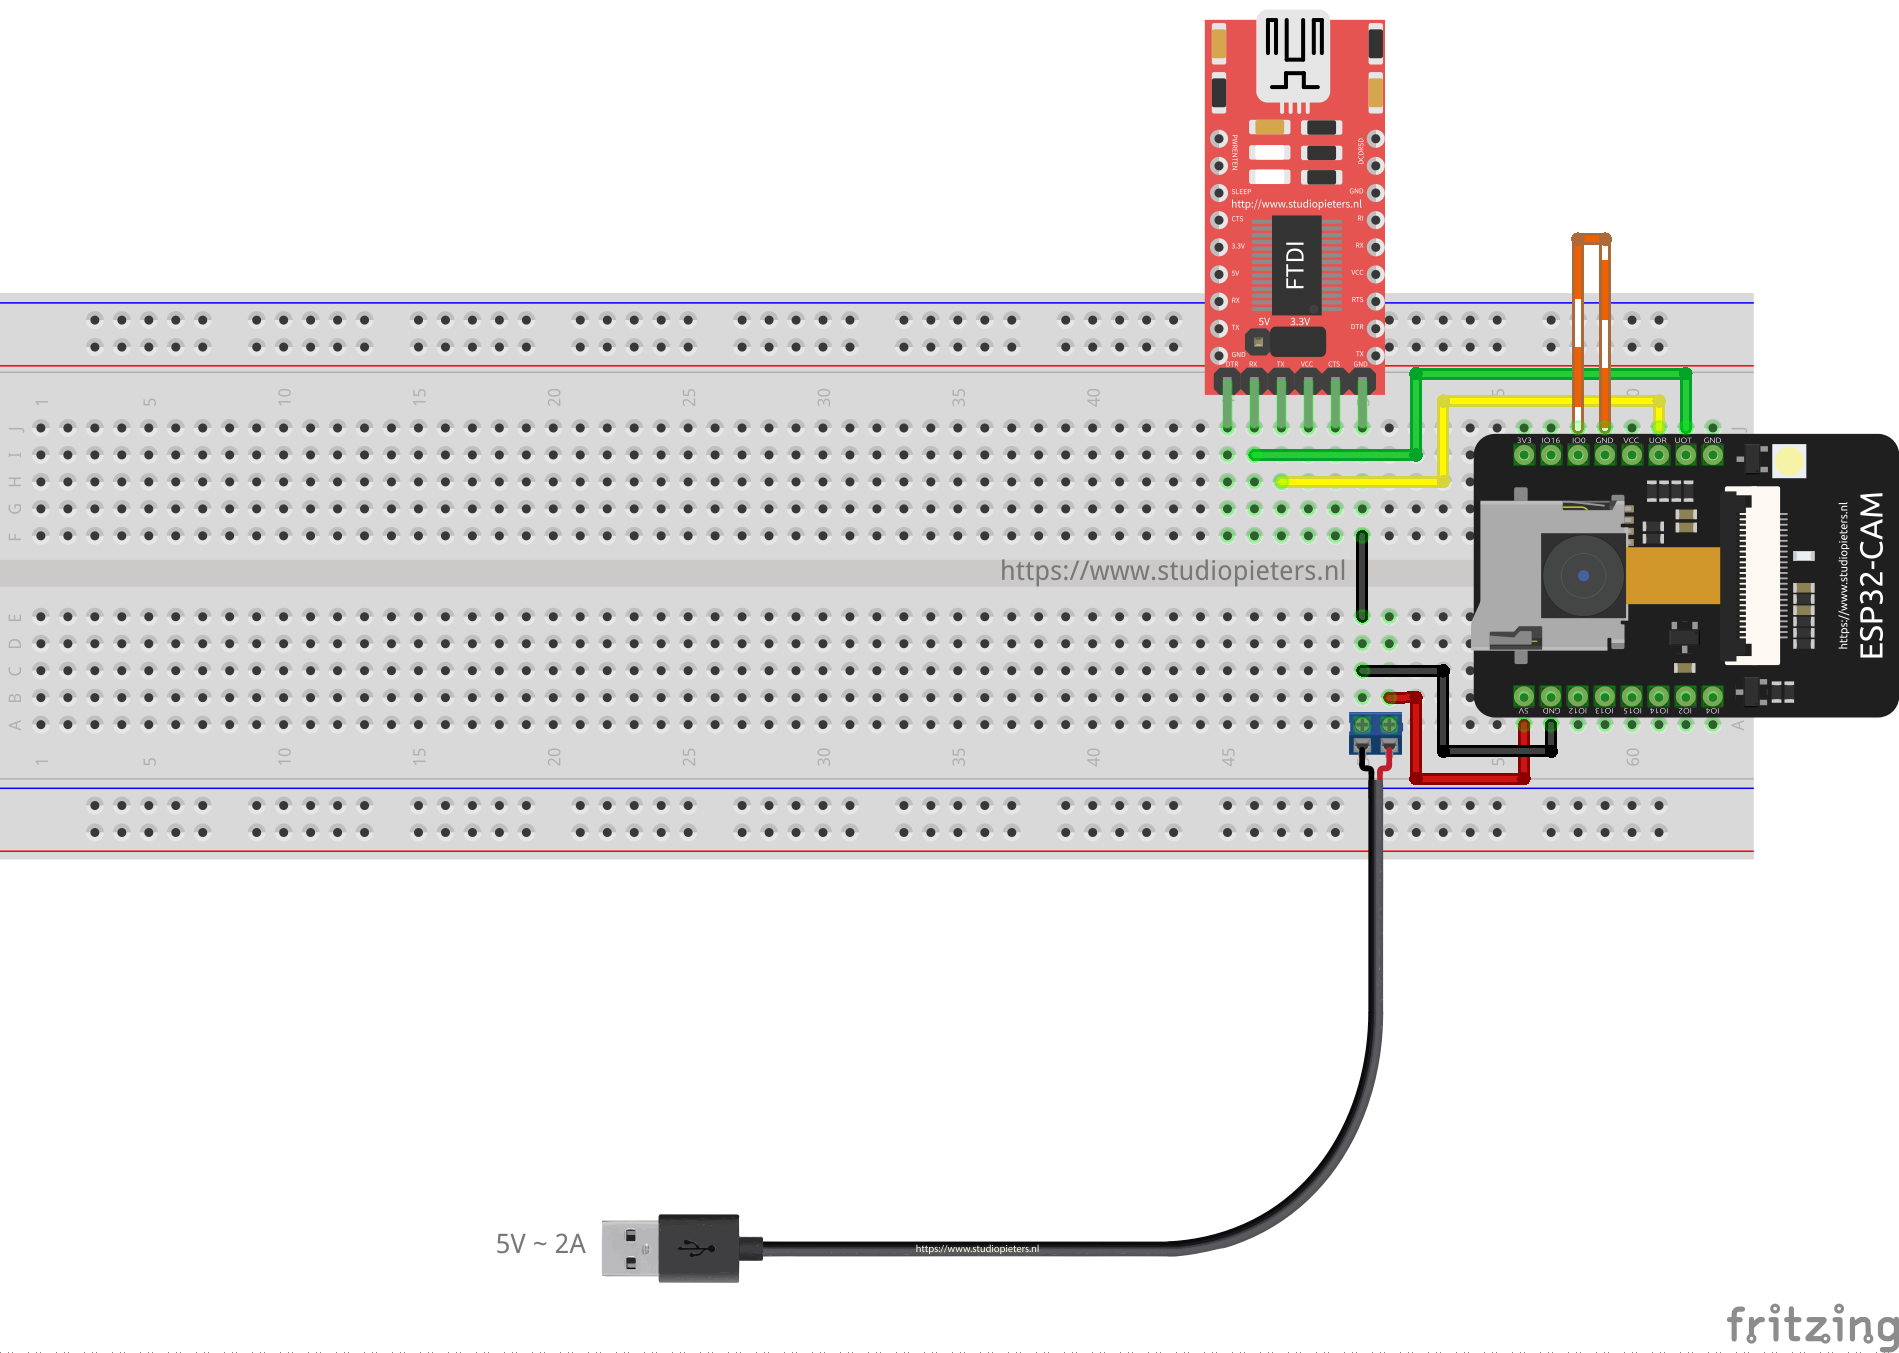
Putting Device Into Flash Mode
To enable ESP32 firmware flashing GPIO0 pin must be pulled low . Conversely, for a normal boot, GPIO0 must be pulled high or floating. Start in FLASH MODE – Press the PROGRAM button.

Go to the directory you made where you put the previously cloned the esp32-homekit-camera.git (e.g esp32-homekit-camera)
Open the Terminal app. Click the Finder icon in your dock. Click Go. Click Utilities. Double-click Terminal. Change to the downloads directory.
cd esp32-homekit-camera
flashing ESP32 is not much different from ESP8266. You can just do
make flash monitor
The, monitor starts immediately, We need to change some settings before flashing.
Software Installation
Before compiling, we need to alter several settings in menuconfig. When you excute te command make flash monitor the menuconfig will open automatically.
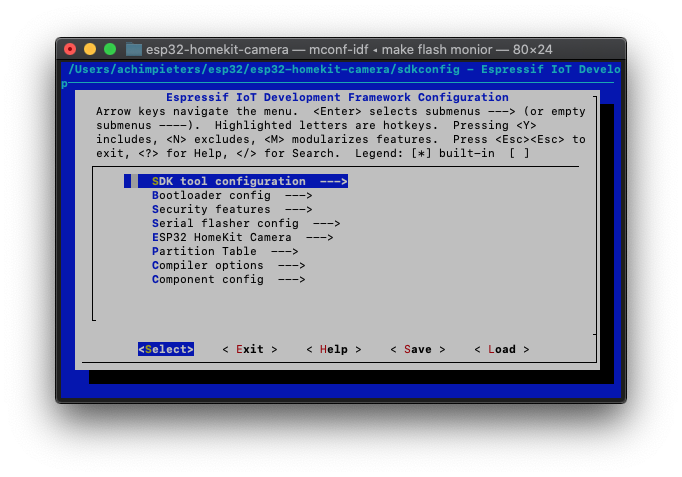 go to
go to Partition Table.
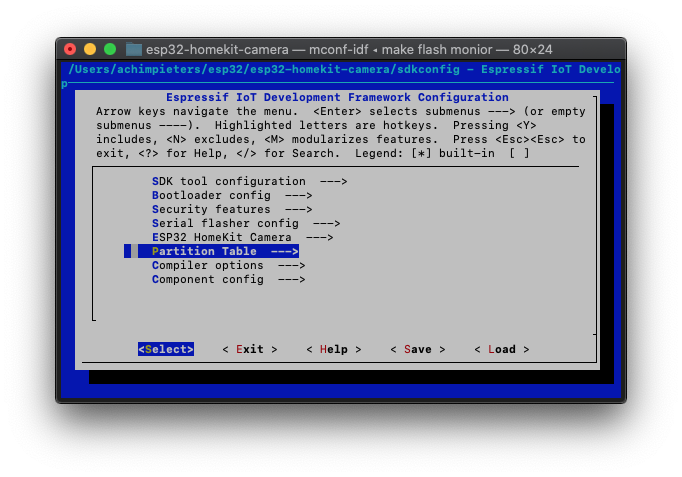 go to
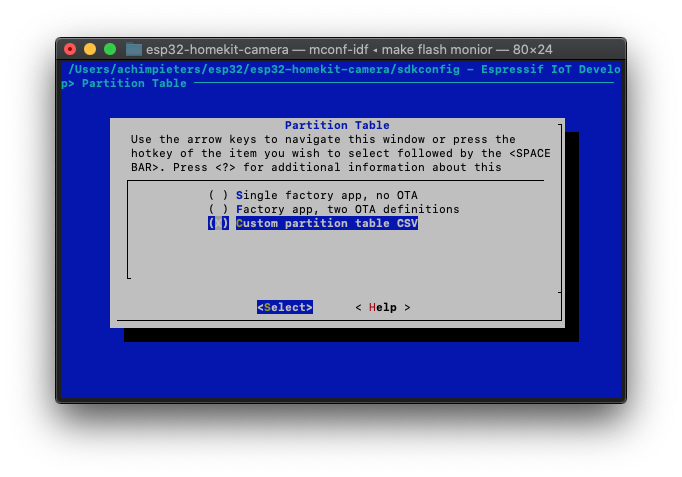
go to Partition Table (Single factory app, no OTA) --->
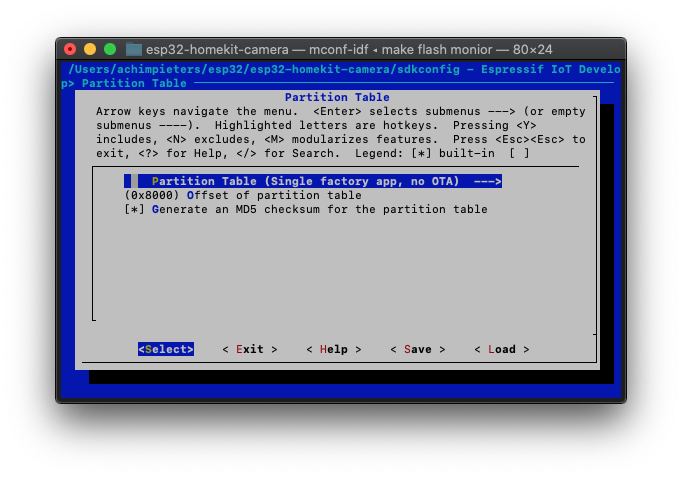
Select Custom partition table CSV
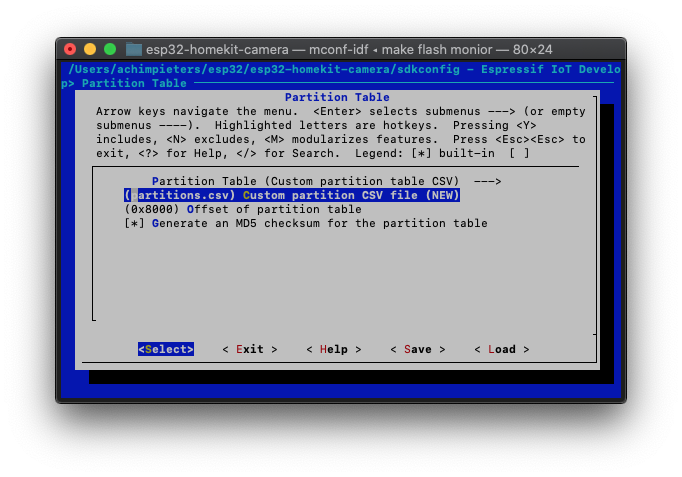
 Go one step back (ESC) and you will see an extra option
 (partitions.cvs) Custom Partition CSV file (NEW)
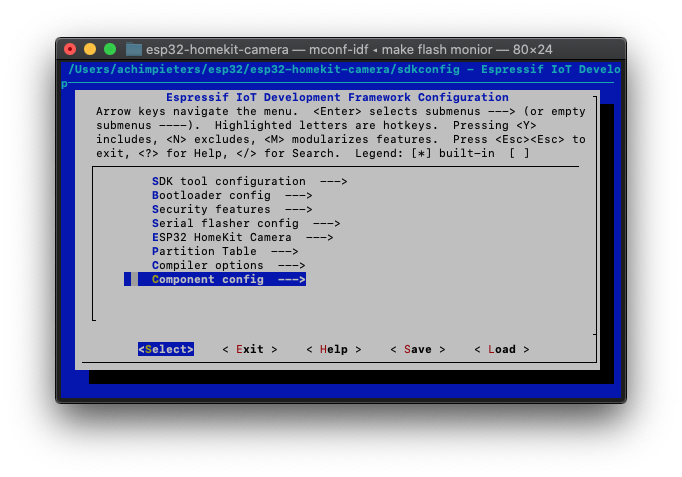
 Go one step back (ESC) and go to
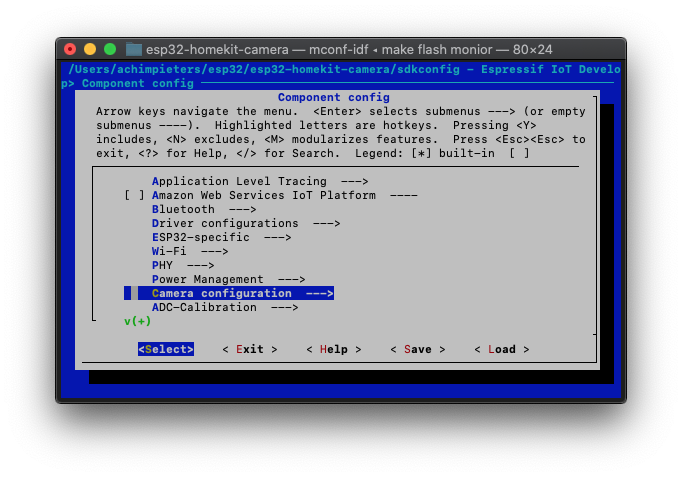
 Component config --->
 Go to
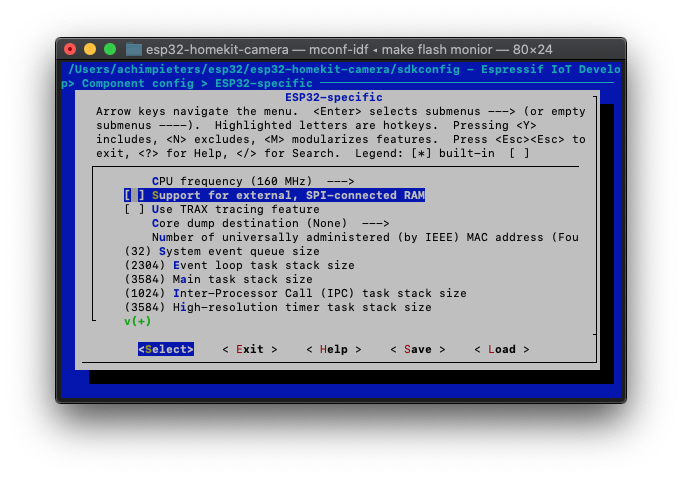
Go to ESP32-specific
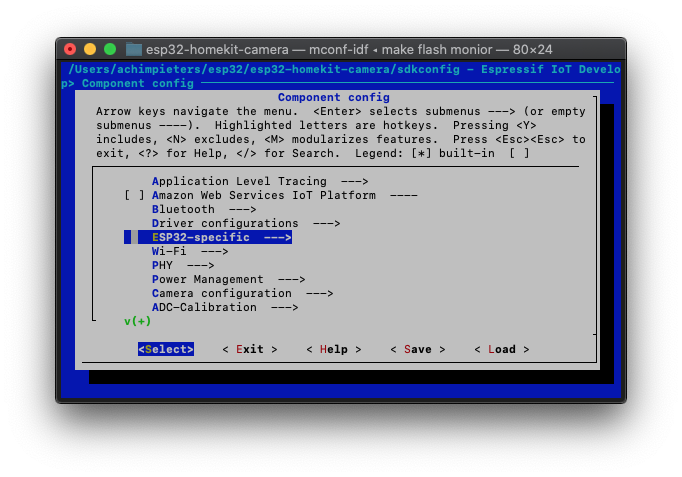
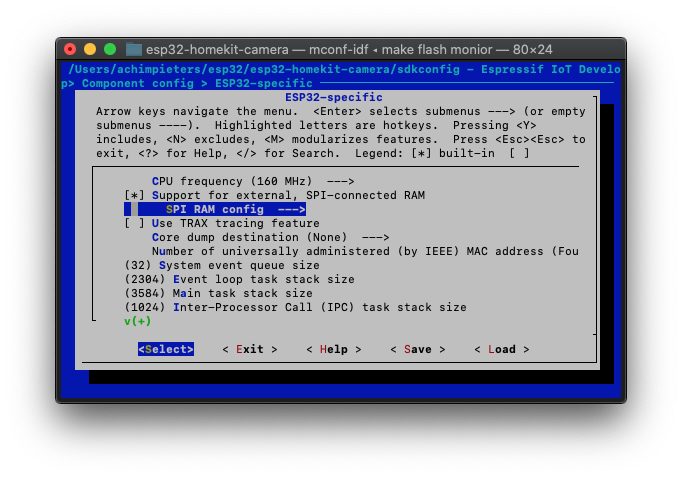
Then select (SpaceBar) Support for external, SPI-connected RAM
Now you some extra options, go to SPI RAM config
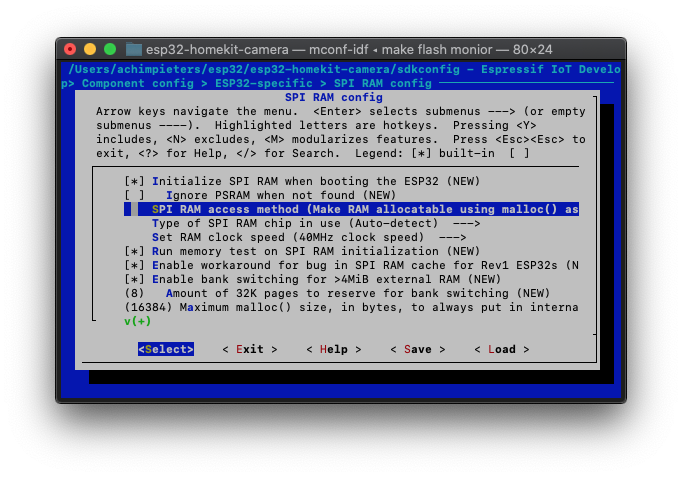
 select
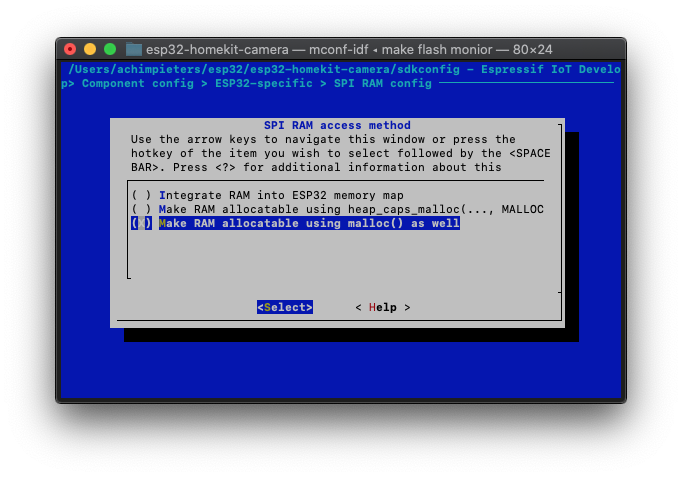
 Initialize SPI RAM when booting the ESP32 (NEW) and go to SPI RAM access method ( Make RAM allocatable using malloc() as well)
select (SpaceBar) Make RAM allocatable using malloc() as well
 Go one step back (ESC) and go to
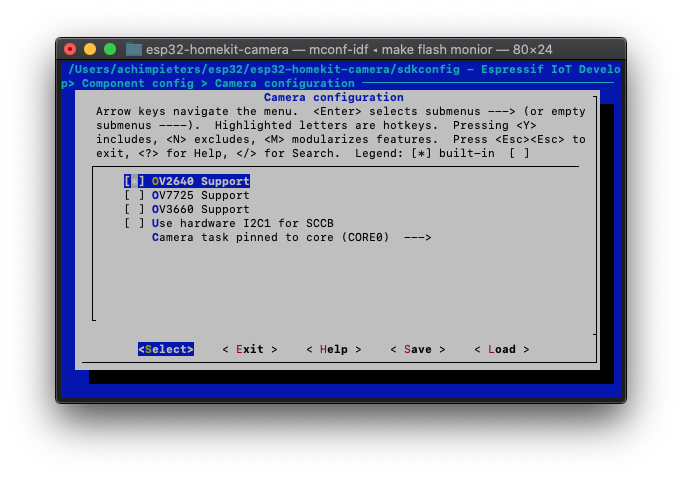
 Camera configuration --->
 Select (SpaceBar) eg.
 OV2640 Support
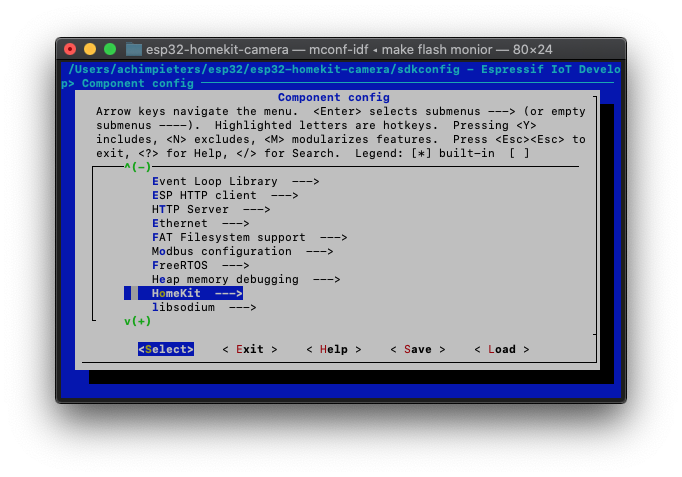
 Go one step back (ESC) and go to
 HomeKit --->
 Select
 (0x200000 SPI falsh address for storing HomeKit data
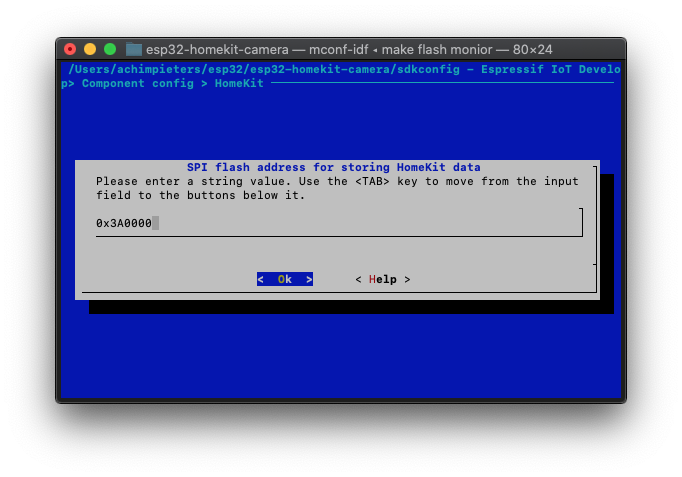
Change the address from 0x200000 to 0x3A0000
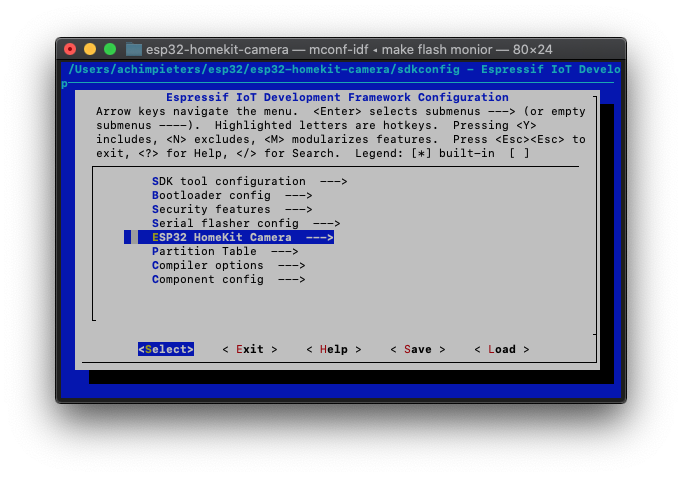 Go back to the main menu and go to
 ESP32 HomeKit Camera --->
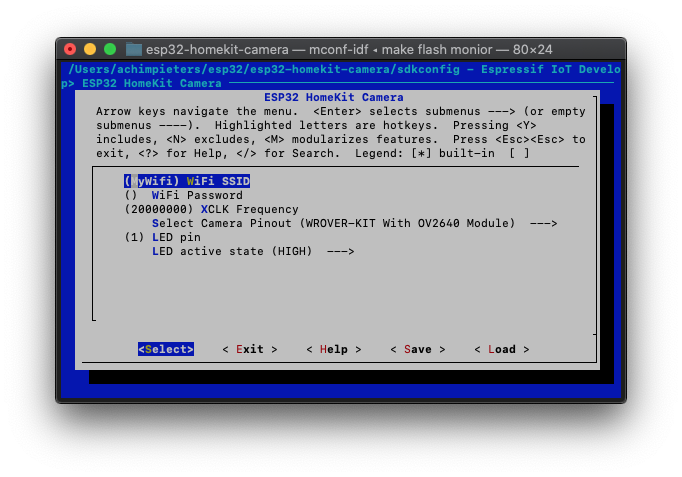
go to (MyWiFi) Wifi SSID
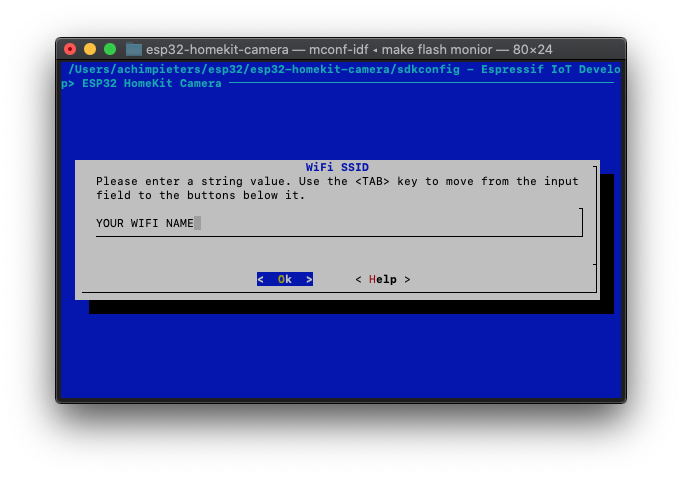
Here enter your Wifi (SSID) Name.
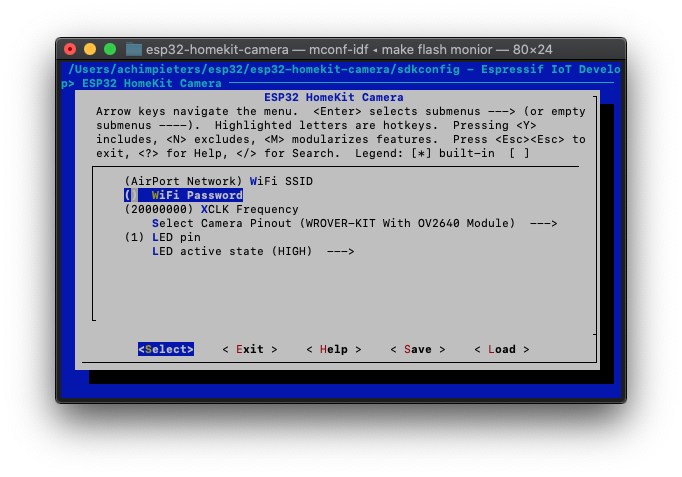
Go one step back (ESC) and go to () WifI Password
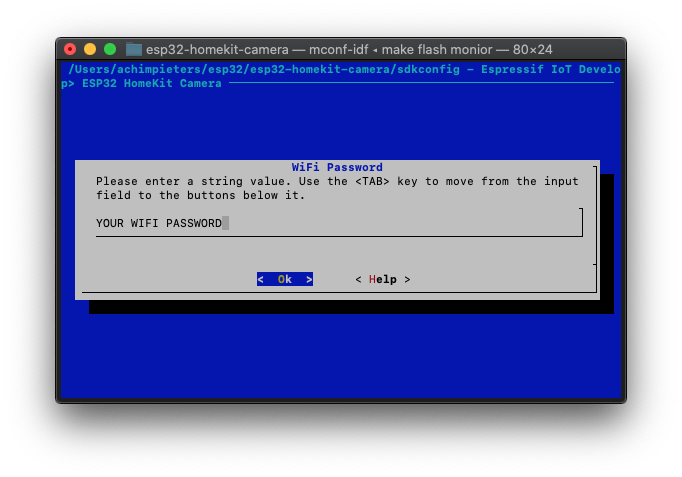 Here
Here enter your Wifi Password.
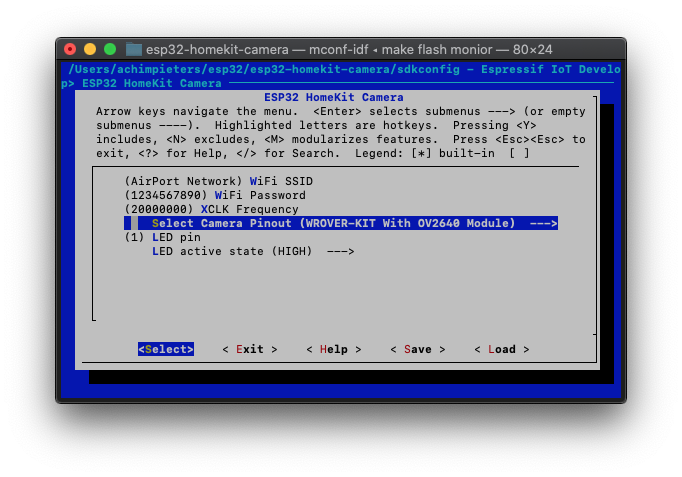 Go to Select
 Camera Pinout (WROVER-KIT with OV2640 Module) --->
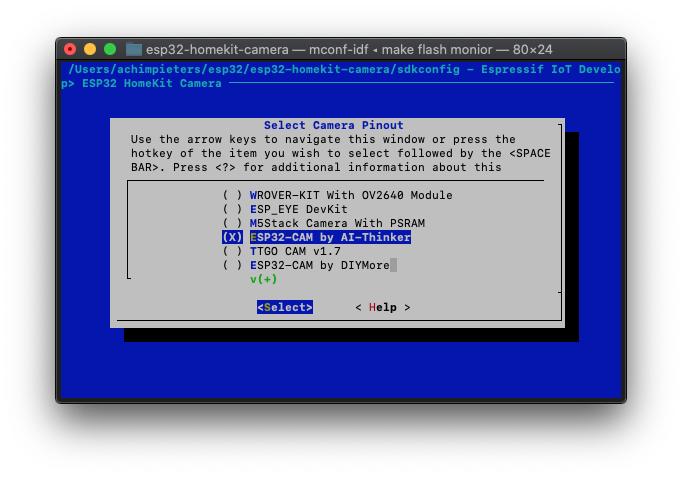 Select your Camera Pinout eg.
 ESP32-CAM by AI-Thinker
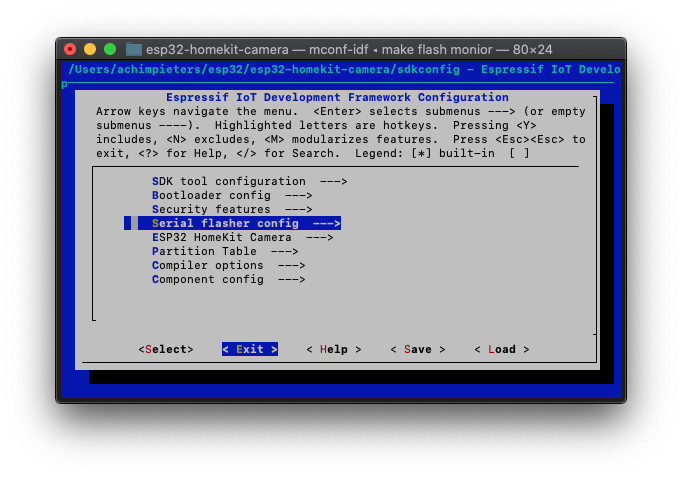 Go back to the main menu and go to
 Serial flasher config --->
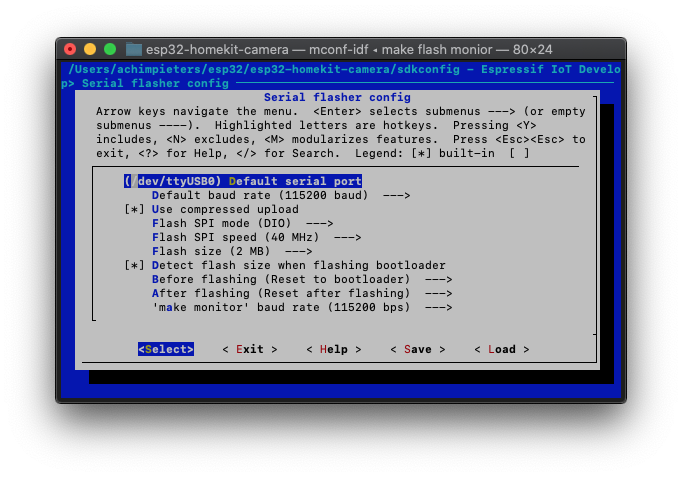
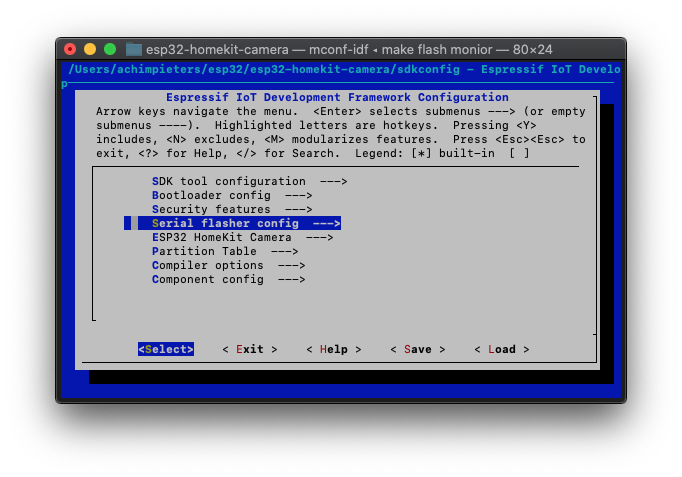 Select
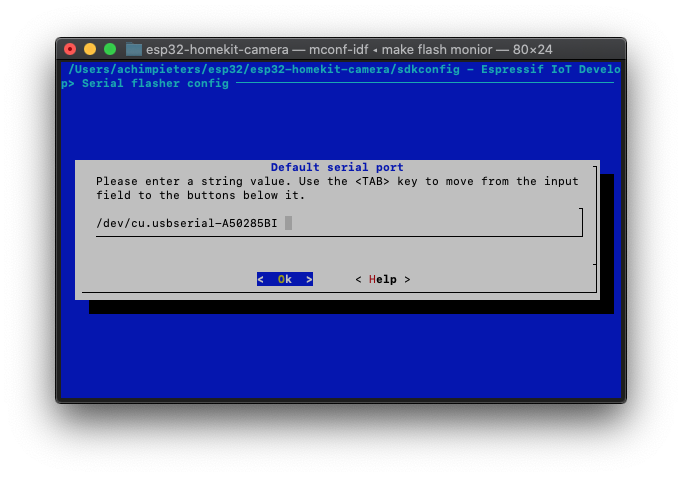
 (/dev/ttyUSB0) Default serial port
 Here enter eg.
 /dev/cu.usbserial-A50285BI this is the port where your ESP32 is connected to.
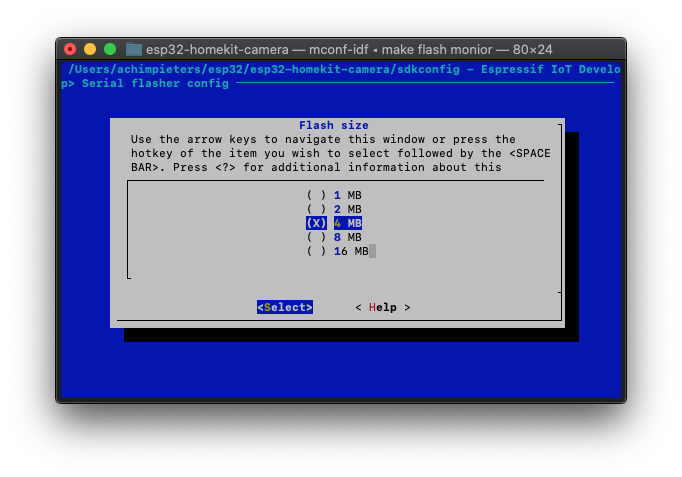
Go one step back (ESC) and go to Flash size (2 MB) --->
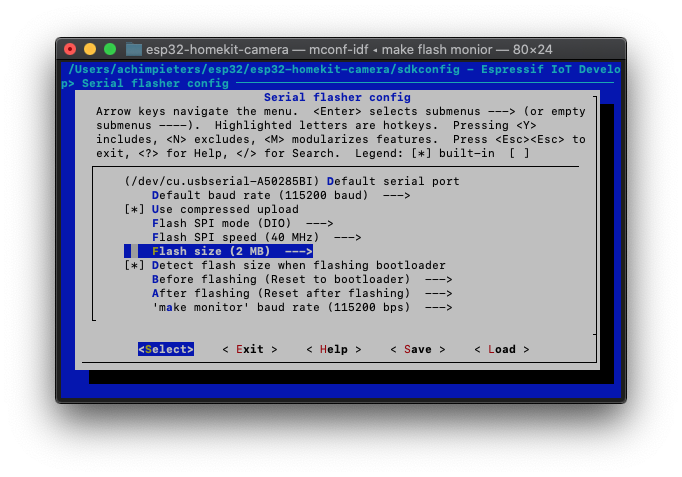 Select the available flash size eg.
 4 MB
Go back to the main menu and and save your settings, it will start compiling the code and eventually flash your ESP323.

Add accessories
To add an accessory to the Home app, use your iOS device. You can’t add accessories to the Home app on Mac.
- Now you can add your HomeKit camera by adding it manually.
- Tap the add button in the top right corner of the screen (looks like a plus sign).
- Tap Add Accessory.
- Tap on the HomeKit Camera accessory (mine’s just called Camera).
- You will see an alert that says, “This accessory is not certified and may not work reliably with HomeKit.” tap Add Anyway.
- Tap Enter Code Manually at the bottom of the screen.

- Enter the HomeKit code for your HomeKit Camera accessory.
- Add your HomeKit Camera accessory and tap Next.
Congratulations! You’ve successfully linked your HomeKit Camera accessory to HomeKit.
Testing the HomeKit Camera hardware
Under construction
The ESP32 HomeKit camera is still a work in progress (at time of writing), It’s works, but there still has to be done some work.
Troubleshooting:
If you have a issue with the path settings they should be:
export PATH=$HOME/esp32/xtensa-esp32-elf/bin:$PATH
and
export IDF_PATH=~/esp32/esp-idf
If you want to flash your ESP32 use:
make flash monitor
If you want to erase it use:
make erase_flash
DO YOU HAVE ANY QUESTIONS? LEAVE A COMMENT DOWN HERE.
Note: To produce and sell HomeKit compatible accessories, your company need to be certified for that (https://developer.apple.com/homekit/, If you’re interested in developing or manufacturing a HomeKit accessory that will be distributed or sold, your company must enroll in the MFi Program.) Espressif have their implementation of HomeKit framework, but it will give you it only if you have MFi certification (notice this text at the bottom of page you mentioned: Please note that the Espressif HomeKit SDK is available to MFi licensees only, and you need to provide the Account Number for verification purposes when requesting the SDK.).This project is a non-commercial implementation of HAP protocol, not meant for commercial use.
REFERENCE
Maxim Kulkin,esp32-homekit-camera (2019), Firmware for esp32-camera module to act as Apple Homekit IP camera., https://github.com/maximkulkin/esp32-homekit-camera