The ESP-C3-12F NodeMCU Kit is an extremely powerful board for all kind of applications. Powered by the ESP32-C3FN4 chip, this low-power, low-cost, Wi-Fi-Bluetooth-enabled board has its own unique place in the ESP32 board lineup. You can use your The ESP-C3-12F NodeMCU Kit module in different ways but the The ESP-C3-12F NodemCU Kit on Arduino IDE gives us the flexibility, compatibility and reliability of a much simpler and user-friendly user interface that also increases the programming speed. In this blog, we make a introduction on programmingThe ESP-C3-12F NodeMCU Kit with Arduino IDE.

ESP-C3-12F NodeMCU
The ESP-C3-12F-Kit development board is a core development board designed by Ai-Thinker for the ESP-C3-12F module. The development board continues the classic design of the NodeMCU development board, leading all I/O to the With pin headers, developers can connect peripherals according to their needs. When using the breadboard for development and debugging, the standard headers on both sides can make the operation easier and more convenient.
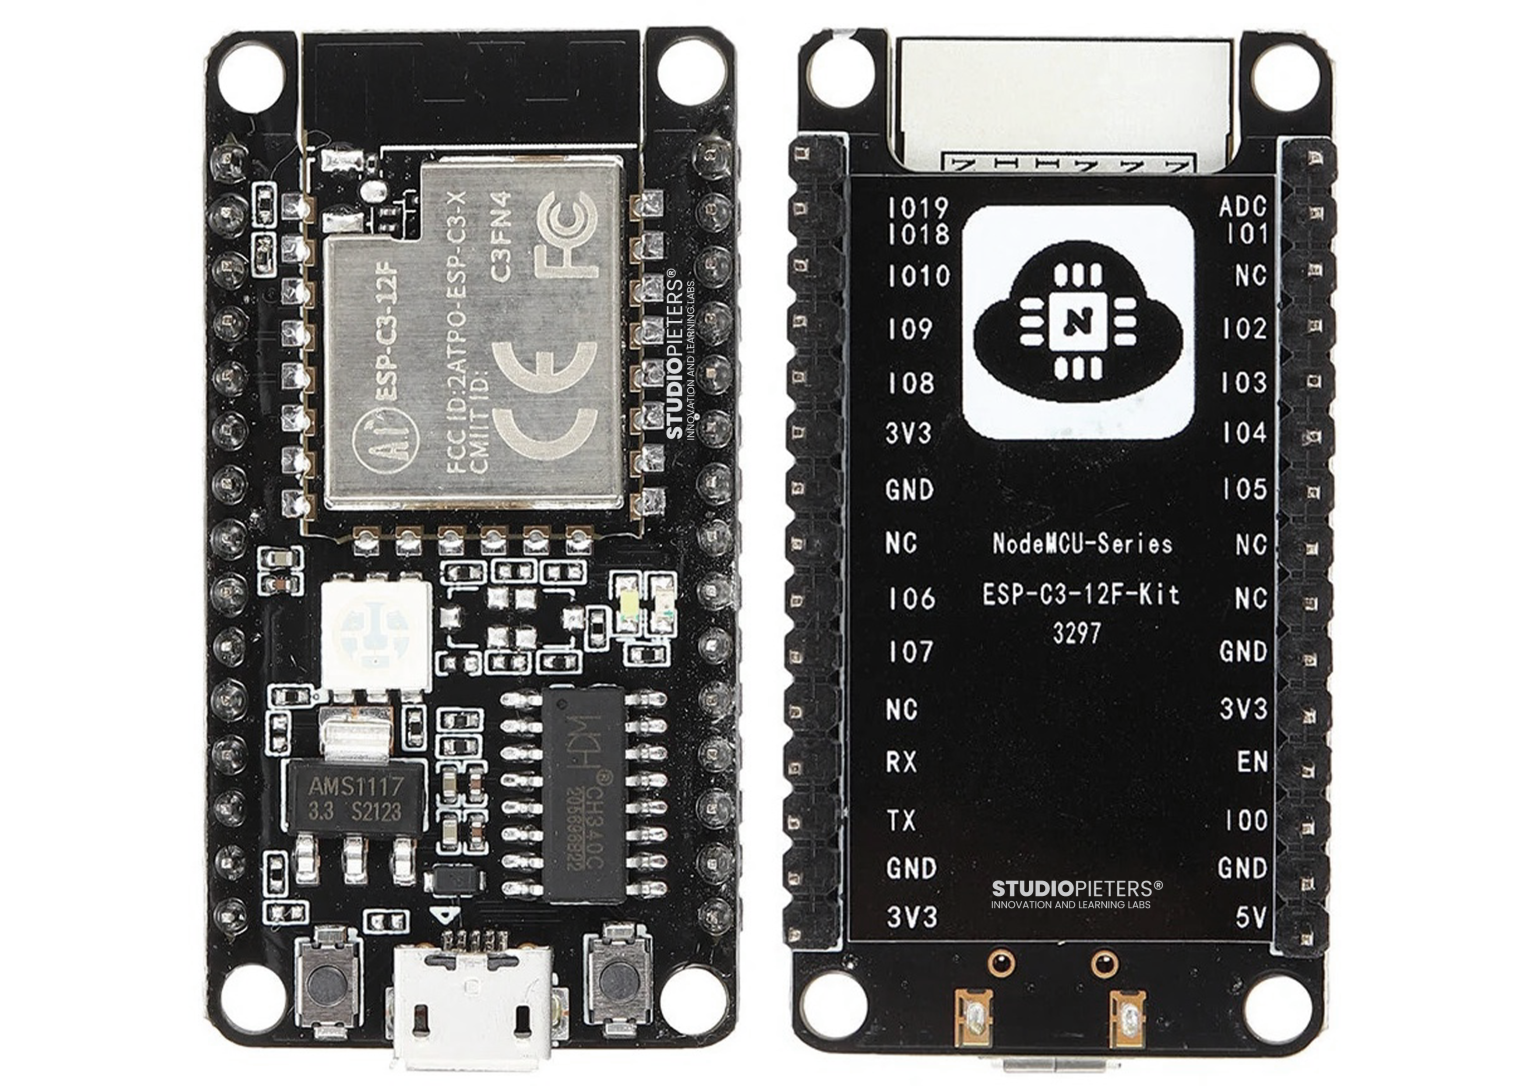
The module’s core processor chip ESP32-C3 is a highly integrated low-power Wi-Fi and Bluetooth system-on-chip (SoC), designed for the Internet of Things (IoT), mobile devices, wearable electronic devices, smart homes, etc. Designed for various applications.
Details
The ESP32-C3 chip has industry-leading low-power performance and radio frequency performance, and supports Wi-Fi IEEE802.11b/g/n protocol and BLE 5.0. The chip is equipped with a RISC-V 32-bit single-core processor with an operating frequency of up to 160 MHz. Support secondary development without using other microcontrollers or processors. The chip has built-in 400 KB SRAM, 384 KB ROM, 8 KB RTC SRAM, built-in 4 MB Flash also supports external Flash. The chip supports a variety of low power consumption working states, which can meet the power consumption requirements of various application scenarios. The chip’s unique features such as fine clock gating function, dynamic voltage clock frequency adjustment function, and RF output power adjustable function can achieve the best balance between communication distance, communication rate and power consumption.

The ESP-C3-12F module provides a wealth of peripheral interfaces, including UART, PWM, SPI, I²S, I²C, ADC, temperature sensor and up to 15 GPIOs.
Features
- Support Wi-Fi 802.11b/g/n, 1T1R mode data rate up to 150 Mbps
- Support BLE5.0, does not support classic Bluetooth, rate support: 125 Kbps, 500 Kbps, 1 Mbps, 2 Mbps
- RISC-V 32-bit single-core processor, supports a clock frequency of up to 160 MHz, has 400 KB SRAM, 384 KB ROM, 8 KB RTC SRAM
- Support UART/PWM/GPIO/ADC/I²C/I²S interface, support temperature sensor, pulse counter
- The development board has RGB three-in-one lamp beads, which is convenient for the second development of customers.
- Support multiple sleep modes, deep sleep current is less than 5 uA
- Serial port rate up to 5 Mbps
- Support STA/AP/STA+AP mode and promiscuous mode
- Support Smart Config (APP)/AirKiss (WeChat) of Android and iOS, one-click network configuration
- Support serial port local upgrade and remote firmware upgrade (FOTA)
- General AT commands can be used quickly
- Support secondary development, integrated Windows and Linux development environment
- About Flash configuration ESP-C3-12F uses the built-in 4 MB Flash of the chip by default, and supports the external Flash version of the chip.
RGB LED
On of the things that pop-out is the RGB LED. The RGB LED (standard LED SMD 5050 – RGB), driven by three PIO’s which can be configured to glow in different colors based on the RGB value of the color given. In addition to RGB LED, there are also two LED’s installed, namely a Cold white LED and a Warm white LED. These LED’s are of course perfect for testing this development board. The LED’s are connected according to the table below.
| RED | GPIO3 |
| GREEN | GPIO4 |
| BLUE | GPIO5 |
| WARM WHITE | GPIO18 |
| COLD WHITE | GPIO19 |

Before we can start programming we need to install Arduino IDE.
Installing Arduino
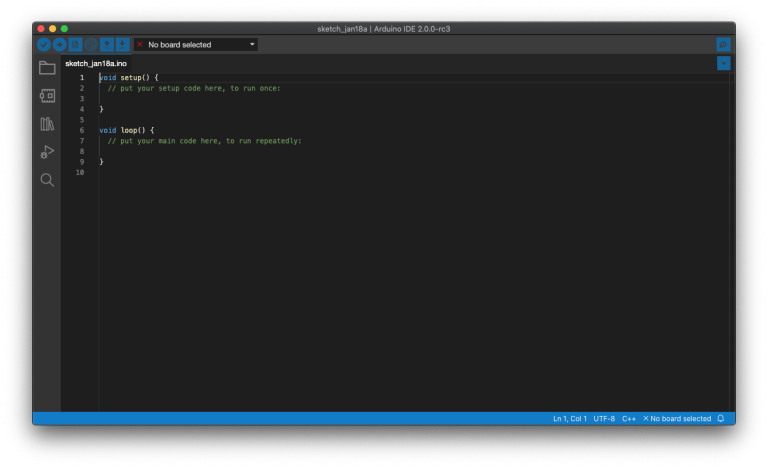
Arduino IDE being highly popular and convenient to most programmers also has support for ESP boards. For that, you need to add the board’s Github repository to the IDE. First download and install Arduino IDE. The Arduino IDE software is free to download, and installing it is really easy. Once installed start the Arduino IDE.
Before we can make our program we need to install the official Espressif ESP Development Kit for Arduino. This kit contains all software that is needed to program your ESP modules in Arduino.
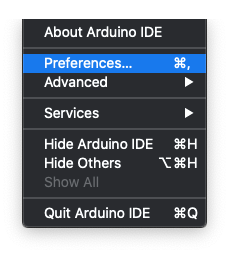
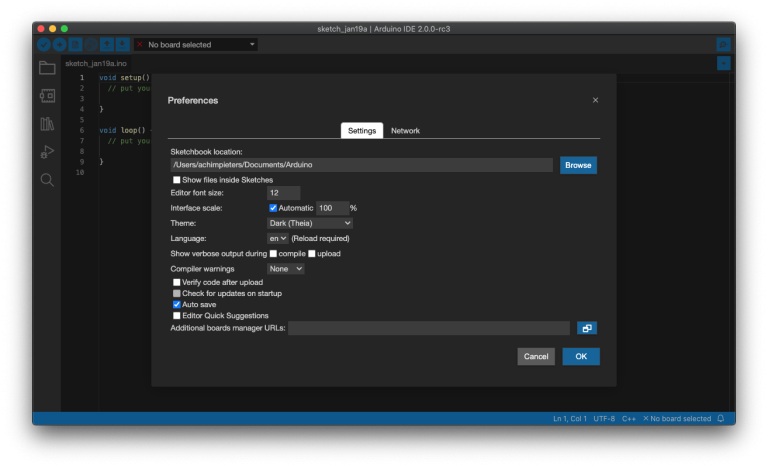
Once the Arduino IDE has started up go to Arduino IDE and then Preferences.
This will show you the Preferences window. Look for the line Additional boards manager URLs. There is a black line and button behind it. Click on the button.
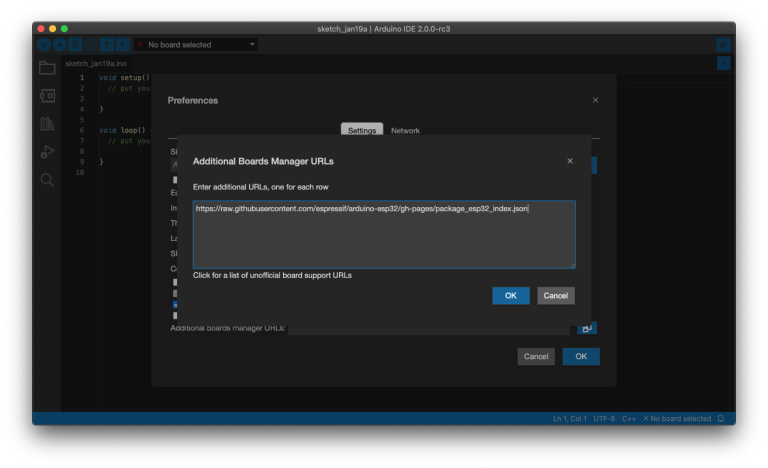
Another Window will open called Additional boards manager URLs. In the Blank file file in the Line:
https://raw.githubusercontent.com/espressif/arduino-esp32/gh-pages/package_esp32_index.json
And press OK. restart Arduino IDE so it will load the changes.
Now that Arduino IDE has restarted we go to Tools, Board and then boards manager…

The main screen of your Arduino IDE will change. In the search field type ESP32. It will immediately show you what is it finds.
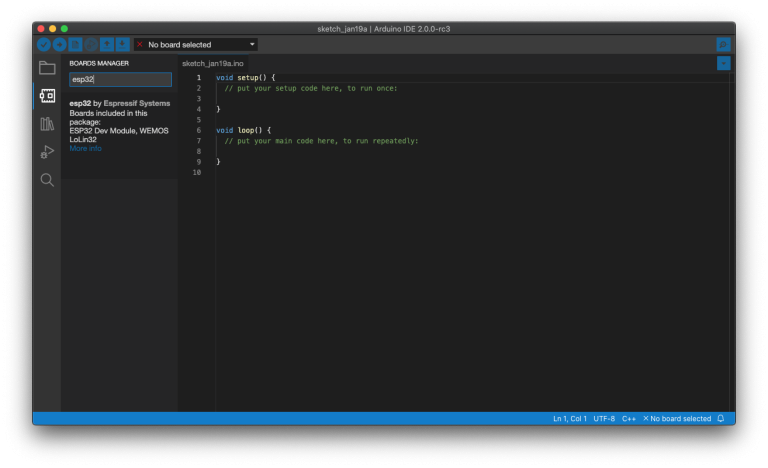
Select ESP32 by Espressif Systems and install it.

Once The Espressif ESP Development Kit for Arduino is installed connect your ESP-C3-12F Develop board. In the top of the Arduino IDE there is a red cross with the text No Board Selected. Click on it.
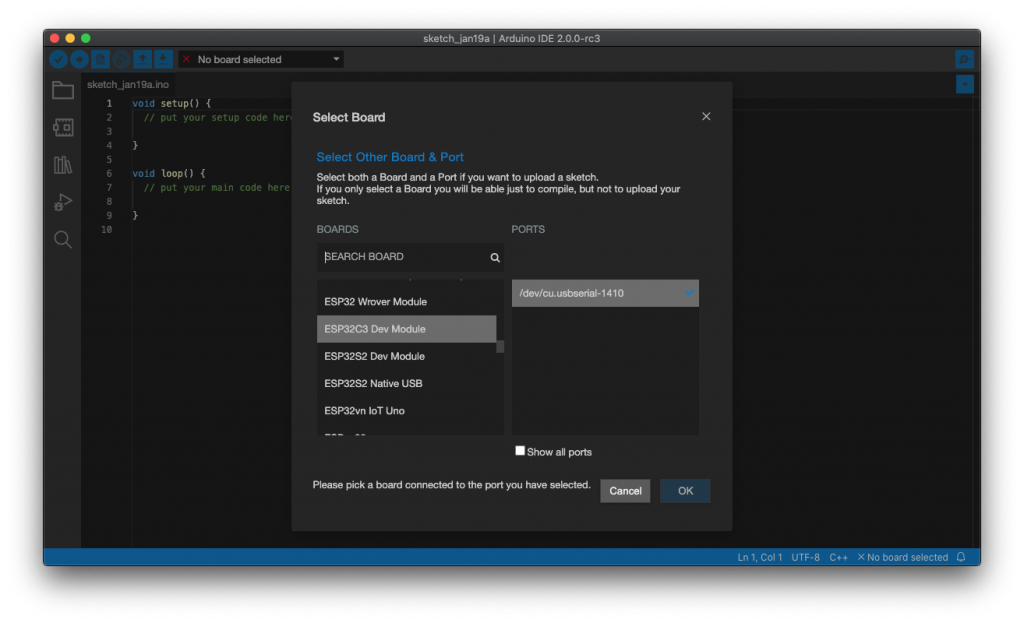
A window called Select board will open. In the left side select ESP32C3 Dev Module and in the left side the port its connect to. Click OK when you are done. Now we can start coding. to see if everything works.
Arduino Code
The code I use is very simple and for demonstration purpose. First we define the GPIO’s and the LED’s connected to it. We add a speed option for the fading effect. In the Setup we set the GPIO’s to output. Then in the loop section, we tell to fade from on color to another or to turn off completely.

Copy this code into you Arduino IDE and upload it.
Testing the Code

Reference
ESP32-C Series, 32-bit RISC-V MCU & 2.4 GHz Wi-Fi & Bluetooth 5 (LE), https://www.espressif.com/en/products/socs Espressif, UltraLowPower SoC with RISCV SingleCore CPU
Supporting IEEE 802.11b/g/n (2.4 GHz WiFi) and Bluetooth® 5 (LE), https://www.espressif.com/sites/default/files/documentation/esp32-c3_datasheet_en.pdf