Recently I was working on a new project here. For this project I need an Arduino Nano V3.0 Clone. After I had finished my code, I wanted to upload the code to the Arduino Nano with Arduino IDE. However, this did not work. After having a search on the internet, it turned out that I had to put it on “Old Bootloader” to upload the file.
What is a Bootloader?
Atmel® AVRs are great little IC’s, but they can be a bit tricky to program. You need a special programmer and some fancy .hex files, and its not very beginner friendly. The Arduino has largely done away with these issues. They’ve put a .hex file on their AVR chips that allows you to program the board over the serial port, meaning all you need to program your Arduino is a USB cable.
The bootloader is basically a .hex file that runs when you turn on the board. It is very similar to the BIOS that runs on your PC. It does two things. First, it looks around to see if the computer is trying to program it. If it is, it grabs the program from the computer and uploads it into the IC’s memory (in a specific location so as not to overwrite the bootloader). That is why when you try to upload code, the Arduino IDE resets the chip. This basically turns the IC off and back on again so the bootloader can start running again. If the computer isn’t trying to upload code, it tells the chip to run the code that’s already stored in memory. Once it locates and runs your program, the Arduino continuously loops through the program and does so as long as the board has power.
Note: Boards from January 2018 have the new bootloader, while boards manufactured before that date have the old bootloader.
The Bootloader
The behavior described above happens thanks to a special piece of code that is executed at every reset of the microcontroller and that looks for a sketch to be uploaded from the serial/USB port using a specific protocol and speed. If no connection is detected, the execution is passed to the code of your sketch.
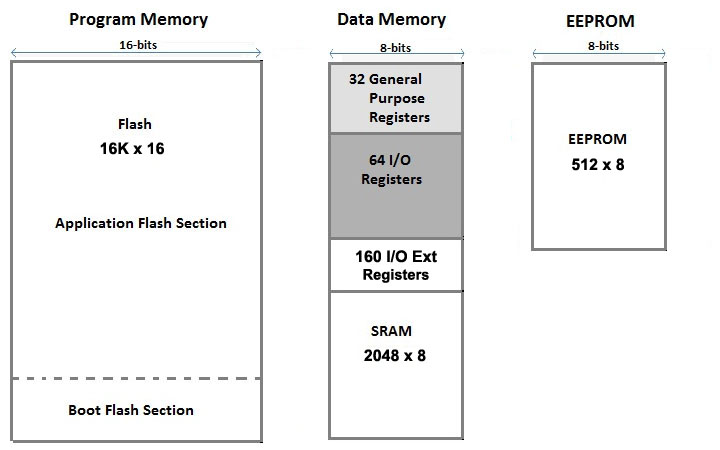
This little (usually 512 bytes) piece of code is called the “Bootloader” and it is in an area of the memory of the microcontroller – at the end of the address space – that can’t be reprogrammed as a regular sketch and had been designed for such purpose.
To program the bootloader and provide to the microcontroller the compatibility with the Arduino Software (IDE) you need to use an In-circuit Serial Programmer (ISP) that is the device that connects to a specific set of pins of the microcontroller to perform the programming of the whole flash memory of the microcontroller, bootloader included. The ISP programming procedure also includes the writing of fuses: a special set of bits that define how the microcontroller works under specific circumstances.
Use Arduino as ISP
The whole process of loading the bootloader code and burning properly the fuses to make an ATmega microcontroller an “Arduino” is managed by the Arduino Software (IDE): it provides a specific menu item and allows you to use a variety of programming devices. Among the programmers, the “Arduino as ISP” is the cheapest and most practical solution to burn a bootloader on another Arduino board with ATmega, 32U4 or ATtiny. The programming process uses VCC, GND and four data pins. Three pins connect MISO, MOSI and SCK between the programming micro and the target micro, the fourth pin from the programming micro goes to the Reset pin of the target. There are three steps you need to follow carefully
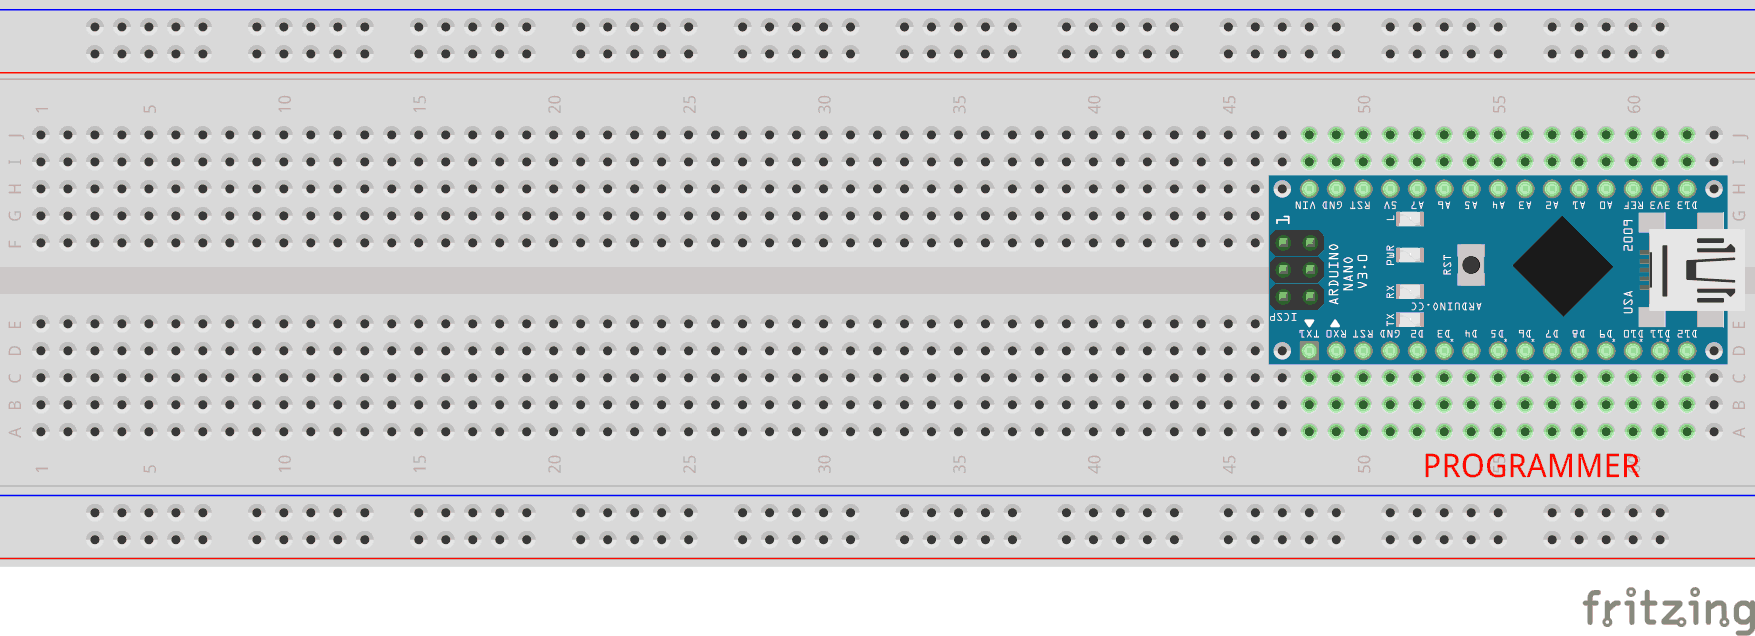
Configure the Arduino Nano board as the programmer
Attach the Arduino Nano to your computer. Go to File > Examples > ArduinoISP, and click on Arduino ISP. Then go to Tools > Boards and select Arduino Nano (or your preferred board). Go to Tools > and setup your Arduino. In my case this will be:
| Board: | “Arduino Nano” |
| Processor: | “ATMega328P (Old Bootloader)” |
| Port: | Select the port where your board is connected to. |
Upload the ArduinoISP sketch to your Arduino Nano (or your preferred board) by going to Sketch > Upload. At this stage, your Arduino Nano is ready to be used as a programmer.
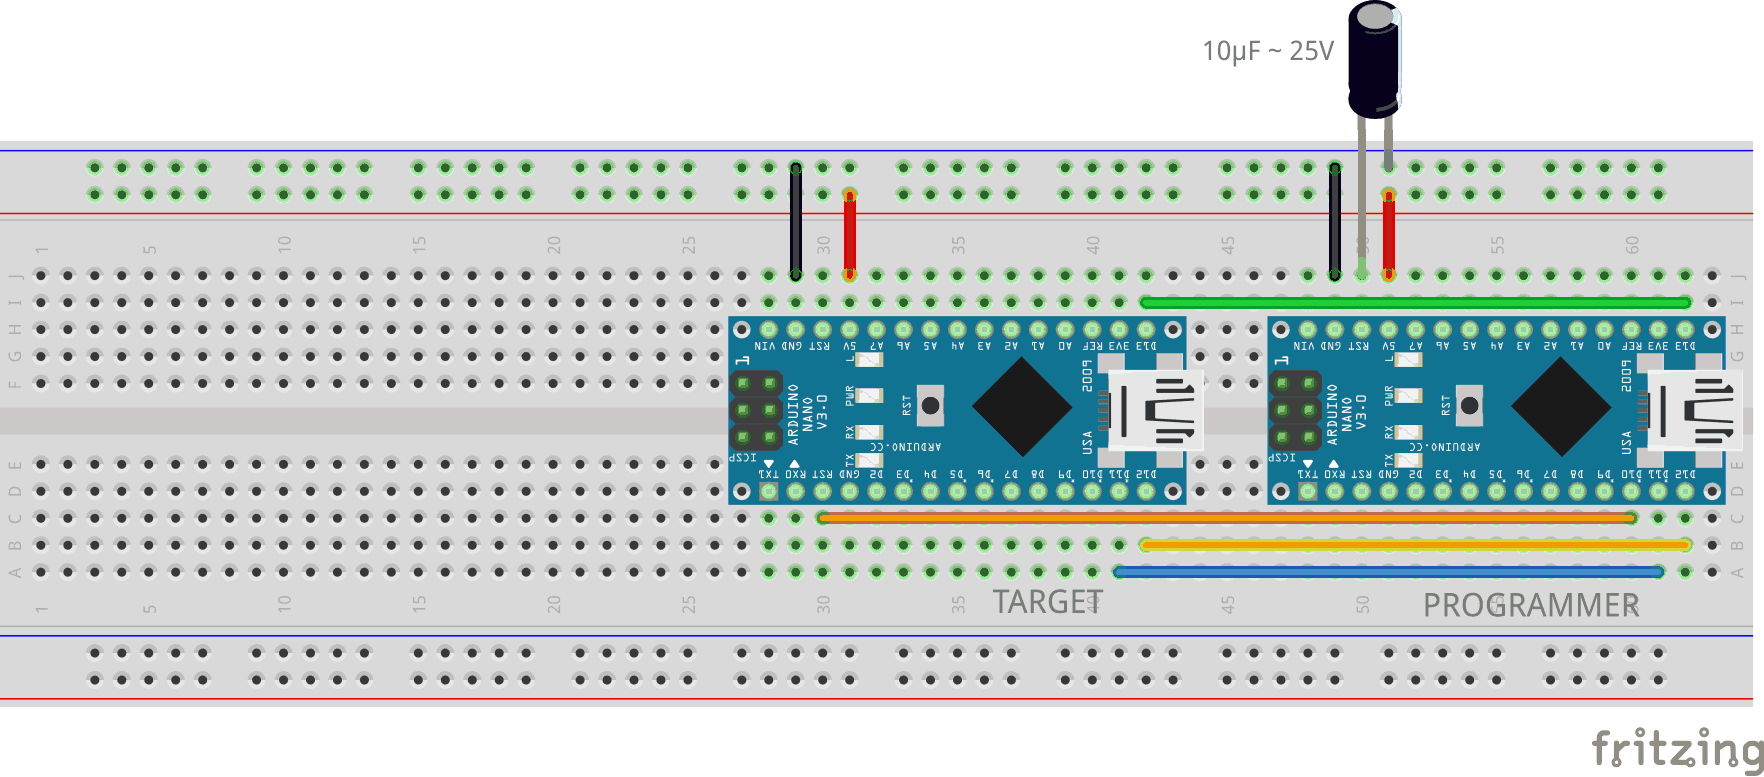
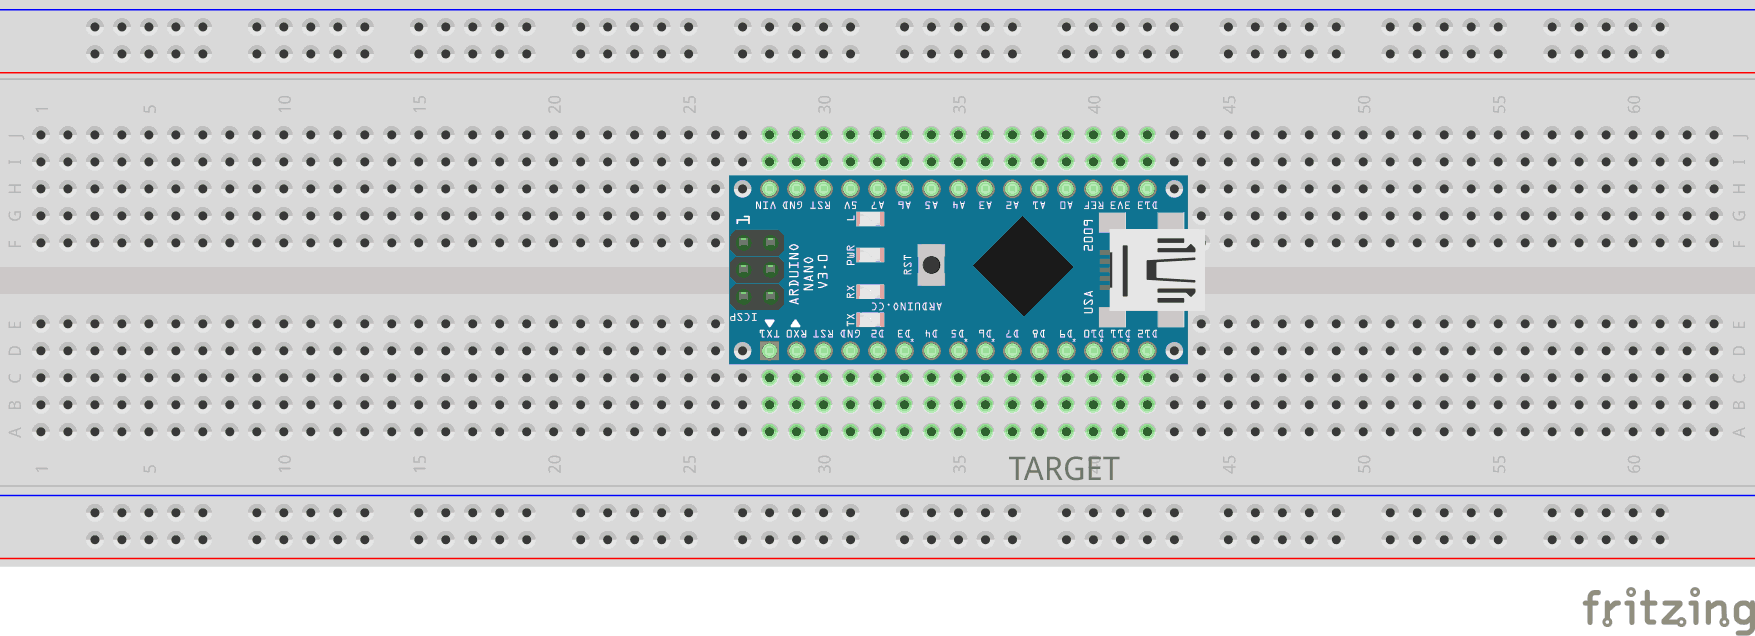
How to wire your boards
Wire the Programmer board to the target. You should turn off power to both boards while you do this. You need 6 pins of the target connected: MISO, MOSI, SCLK, RESET, GND, and Power.
| Target | Arduino as ISP | |
| VCC | 5V | 5V |
| GND | GND | GND |
| MISO | D12 | D12 |
| MOSI | D11 | D11 |
| SCK | D13 | D13 |
| RESET | RST | D10 |
Note: You need a capacitor (10-100uF) between reset and GND of the “programmer” board (added AFTER your load Arduino As ISP.)
UPLOADING SKETCH TO the Arduino BOARD
Make sure that the connections are as stated as described here above. Open the program / sketch you want uploaded to your Arduino. Go to Tool and setup the following. To program the new bootloader, you should have the “board” set to Nano rather than “nano (old bootloader)”. Then make sure Arduino as ISP is selected under Tools -> Programmer. Then select Tools -> Burn Bootloader.
| Board: | “Arduino nano” |
| Processor: | “ATMega328P” |
| Port: | Select the port where your board is connected to. |
| Programmer: | Arduino as ISP |

That’s it your done! You have the latest Bootloader on your Arduino.
Testing the “upgraded” arduino nano
Now its time to test. Disconnect the programmer and all wires. Now open the Blink example from Arduino examples and upload. When everything went well the script is uploaded using the “ATMega328P” setting and the led on your Arduino Nano board is blinking.
Extra: Download my Arduino Core HD wallpaper here for free!
DO YOU HAVE ANY QUESTIONS? LEAVE A COMMENT DOWN HERE.
REFERENCES
SM. Arduino Website. (20 jan 2018) https://www.arduino.cc/en/Tutorial/ArduinoISP; Westfw. Arduino forum. (8 Nov 2018) https://forum.arduino.cc/index.php?topic=578268.0