
Reference
BME280 Temperature, Humidity & Pressure Sensor
A combined environmental sensor that reads temperature, humidity and barometric pressure from one I2C chip. Covers the BME280 vs BMP280 mislabeling trap, the calibration/compensation maths, and estimating altitude from pressure.
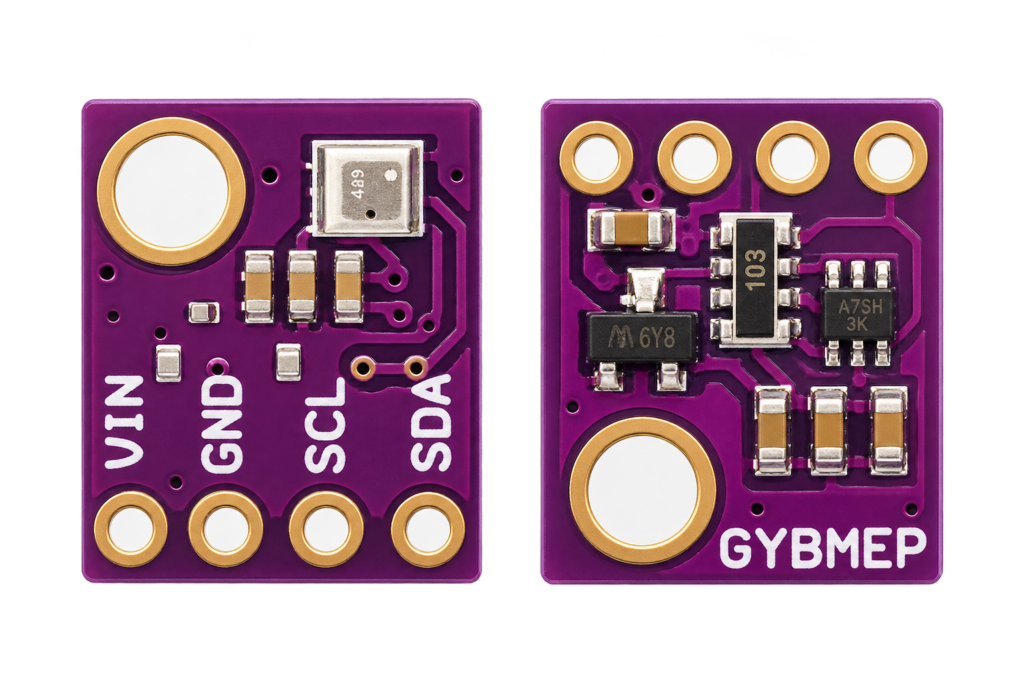
The BME280 sensor module is one of the easiest ways to add temperature, humidity and barometric pressure sensing to your ESP32 project. The module is based on the BME280 from Bosch Sensortec and gives you three environmental measurements from a single chip over a simple two-wire I²C bus. Building a smart weather station or a HomeKit climate accessory? This is the sensor to reach for.
In this complete guide we cover:
- What the BME280 is
- Technical specifications
- Pinout (BME280 breakout)
- I²C address selection
- The BME280 vs BMP280 trap
- ESP32-C6 SUPER MINI wiring
- Measurement modes and oversampling
- Register map explained
- The calibration & compensation problem
- ESP-IDF example code (temperature, humidity, pressure)
- Arduino example code
- Calculating altitude from pressure
- BME280 vs DHT22 comparison
- Practical engineering tips
What is the BME280?
The BME280 is a combined environmental sensor that measures temperature, relative humidity and barometric pressure, all in one tiny package, controlled over I²C (or SPI). It’s Bosch’s home-automation and indoor-navigation sensor, and it has become the default choice for weather stations, climate loggers and smart-home sensors.
Unlike a simple DHT-style sensor, the BME280 offers:
- Three measurements from one chip (temperature, humidity, pressure)
- High accuracy: ±1°C, ±3% RH, ±1 hPa
- Pressure resolution fine enough to detect ~1 m of altitude change
- Selectable oversampling and an internal IIR filter
- A forced mode drawing just microamps — perfect for battery projects
- I²C and SPI interfaces
- Up to 2 devices on one I²C bus
There is a nearly identical sibling — the BMP280 — which measures only temperature and pressure (no humidity). They look the same and cheap boards are often mislabelled, so this guide includes a way to tell them apart in code.
Technical Specifications
| Parameter | Value |
|---|---|
| Measurements | Temperature, humidity, pressure |
| Interface | I²C (up to 3.4 MHz) or SPI |
| I²C address | 0x76 or 0x77 (SDO pin) |
| Supply voltage | 1.71V – 3.6V (chip) |
| Temperature range | -40°C to +85°C (±1°C) |
| Humidity range | 0 – 100% RH (±3%) |
| Pressure range | 300 – 1100 hPa (±1 hPa) |
| Current (forced, 1 Hz) | ~3.6 µA (all three measurements) |
| Interfaces per bus | Up to 2 (I²C) |
| Operating temperature | -40°C to +85°C |
⚠️ The bare BME280 chip is not 5V tolerant — its maximum supply is 3.6V. Always power it from 3.3V on an ESP32. Some purple breakout boards add a regulator and level shifter so they accept 5V, but 3.3V is safe for every version.
Pinout
The common BME280 breakout exposes these pins:
| Pin | Description |
|---|---|
| VIN / VCC | 3.3V supply |
| GND | Ground |
| SCL / SCK | I²C clock (SPI clock) |
| SDA / SDI | I²C data (SPI MOSI) |
| SDO | I²C address select (SPI MISO) |
| CSB | Chip select — tie HIGH for I²C mode |
On most breakout boards CSB is already pulled high, so the sensor powers up in I²C mode automatically. The board also carries the I²C pull-up resistors.
I²C Address Selection
The SDO pin sets the least-significant address bit, allowing up to 2 modules on one bus:
| SDO connected to | I²C Address |
|---|---|
| GND | 0x76 |
| VDD | 0x77 |
⚠️ The default address varies by board: the small GY-style boards usually default to 0x76, while the classic Adafruit board defaults to 0x77. If in doubt, run an I²C scanner first.
The BME280 vs BMP280 Trap
This is the single most common surprise with this sensor, so it deserves its own section.
⚠️ Many cheap boards sold as “BME280” are actually BMP280 — the version without humidity. They are physically identical. The only reliable way to tell them apart is the chip-ID register at 0xD0:
| Chip | ID register (0xD0) | Measures |
|---|---|---|
| BME280 | 0x60 | Temperature, humidity, pressure |
| BMP280 | 0x58 | Temperature, pressure only |
The example code below reads this register first and tells you exactly which chip you have. If it reports 0x58, your board has no humidity sensor — no amount of code will change that.
Connecting to the ESP32-C6 SUPER MINI
Only four wires are needed:
| BME280 Module | ESP32-C6 SUPER MINI | Wire |
|---|---|---|
| VIN / VCC | 3V3 | Red |
| GND | GND | Black |
| SDA / SDI | GPIO6 | Green |
| SCL / SCK | GPIO7 | Yellow |
| SDO | GND (→ 0x76) | — |
| CSB | 3V3 (I²C mode) | — |
Notes:
- GPIO6 and GPIO7 are free, safe pins on the ESP32-C6 SUPER MINI — the I²C peripheral can be routed to any GPIO thanks to the ESP32 GPIO matrix.
- Avoid GPIO8: on most SUPER MINI boards the onboard RGB LED is connected there.
- On most breakout boards SDO and CSB are already tied to sensible defaults, so a 4-wire connection is usually enough.
- Keep the sensor away from the ESP32 regulator and Wi-Fi antenna — both produce heat that skews the temperature reading.
Measurement Modes and Oversampling
The BME280 has three modes:
| Mode | Behaviour |
|---|---|
| Sleep | Idle, lowest power (default at power-up) |
| Forced | Takes one measurement, then returns to sleep |
| Normal | Measures continuously at a set interval |
For a battery-powered weather sensor, forced mode is ideal: wake, take one reading, sleep. For a live dashboard, normal mode streams data automatically.
Each of the three measurements has an oversampling setting (×1 to ×16) that trades power and speed for lower noise. An internal IIR filter further smooths pressure and temperature against short-term spikes such as a door slamming.
Register Map
The key registers:
| Register | Address | Function |
|---|---|---|
| id | 0xD0 | Chip ID (0x60 = BME280, 0x58 = BMP280) |
| reset | 0xE0 | Write 0xB6 for a soft reset |
| ctrl_hum | 0xF2 | Humidity oversampling |
| status | 0xF3 | Measuring / updating flags |
| ctrl_meas | 0xF4 | Temp & pressure oversampling + mode |
| config | 0xF5 | Standby time, IIR filter, SPI enable |
| press | 0xF7 – 0xF9 | Raw pressure (20-bit) |
| temp | 0xFA – 0xFC | Raw temperature (20-bit) |
| hum | 0xFD – 0xFE | Raw humidity (16-bit) |
| calib | 0x88 – 0xA1 | Factory calibration (temp/pressure/H1) |
| calib | 0xE1 – 0xE7 | Factory calibration (humidity) |
⚠️ Write ctrl_hum (0xF2) before ctrl_meas (0xF4) — the humidity oversampling setting only takes effect after a subsequent write to ctrl_meas.
The Calibration & Compensation Problem
Here’s what makes the BME280 different from the simpler modules on this site: the raw values it returns are not usable directly. Each chip is factory-calibrated, and you must read a set of calibration coefficients (dig_T1…dig_H6) and run Bosch’s compensation formulas to turn the raw readings into real °C, %RH and hPa.
The formulas are fixed-point integer maths straight from the Bosch datasheet. They look intimidating but are copy-paste standard — the example below includes them in full. This is also exactly why most makers reach for a ready-made library (see the Arduino example).
ESP-IDF Example Code
This example verifies the chip, reads the calibration data, takes a forced-mode measurement and prints temperature, humidity and pressure, using the new ESP-IDF I²C master driver. The compensation functions come directly from the Bosch datasheet:
#include <stdio.h>
#include "freertos/FreeRTOS.h"
#include "freertos/task.h"
#include "driver/i2c_master.h"
#include "esp_log.h"
#define I2C_SDA_GPIO 6
#define I2C_SCL_GPIO 7
#define BME280_ADDR 0x76
static const char *TAG = "BME280";
static i2c_master_dev_handle_t bme;
/* Calibration data */
static uint16_t dig_T1, dig_P1;
static int16_t dig_T2, dig_T3, dig_P2, dig_P3, dig_P4, dig_P5,
dig_P6, dig_P7, dig_P8, dig_P9, dig_H2, dig_H4, dig_H5;
static uint8_t dig_H1, dig_H3;
static int8_t dig_H6;
static int32_t t_fine;
static esp_err_t rd(uint8_t reg, uint8_t *buf, size_t len)
{
return i2c_master_transmit_receive(bme, ®, 1, buf, len, -1);
}
static esp_err_t wr(uint8_t reg, uint8_t val)
{
uint8_t b[2] = { reg, val };
return i2c_master_transmit(bme, b, 2, -1);
}
static void read_calibration(void)
{
uint8_t c[26];
rd(0x88, c, 26);
dig_T1 = c[0] | (c[1] << 8); dig_T2 = c[2] | (c[3] << 8);
dig_T3 = c[4] | (c[5] << 8); dig_P1 = c[6] | (c[7] << 8);
dig_P2 = c[8] | (c[9] << 8); dig_P3 = c[10] | (c[11] << 8);
dig_P4 = c[12] | (c[13] << 8); dig_P5 = c[14] | (c[15] << 8);
dig_P6 = c[16] | (c[17] << 8); dig_P7 = c[18] | (c[19] << 8);
dig_P8 = c[20] | (c[21] << 8); dig_P9 = c[22] | (c[23] << 8);
dig_H1 = c[25];
uint8_t h[7];
rd(0xE1, h, 7);
dig_H2 = h[0] | (h[1] << 8);
dig_H3 = h[2];
dig_H4 = (h[3] << 4) | (h[4] & 0x0F);
dig_H5 = (h[5] << 4) | (h[4] >> 4);
dig_H6 = h[6];
}
/* Bosch compensation formulas (datasheet) */
static int32_t comp_temp(int32_t adc_T)
{
int32_t v1 = ((((adc_T >> 3) - ((int32_t)dig_T1 << 1))) * ((int32_t)dig_T2)) >> 11;
int32_t v2 = (((((adc_T >> 4) - ((int32_t)dig_T1)) *
((adc_T >> 4) - ((int32_t)dig_T1))) >> 12) * ((int32_t)dig_T3)) >> 14;
t_fine = v1 + v2;
return (t_fine * 5 + 128) >> 8; /* 0.01 °C */
}
static uint32_t comp_press(int32_t adc_P)
{
int64_t v1 = ((int64_t)t_fine) - 128000;
int64_t v2 = v1 * v1 * (int64_t)dig_P6;
v2 = v2 + ((v1 * (int64_t)dig_P5) << 17);
v2 = v2 + (((int64_t)dig_P4) << 35);
v1 = ((v1 * v1 * (int64_t)dig_P3) >> 8) + ((v1 * (int64_t)dig_P2) << 12);
v1 = (((((int64_t)1) << 47) + v1)) * ((int64_t)dig_P1) >> 33;
if (v1 == 0) return 0;
int64_t p = 1048576 - adc_P;
p = (((p << 31) - v2) * 3125) / v1;
v1 = (((int64_t)dig_P9) * (p >> 13) * (p >> 13)) >> 25;
v2 = (((int64_t)dig_P8) * p) >> 19;
p = ((p + v1 + v2) >> 8) + (((int64_t)dig_P7) << 4);
return (uint32_t)p; /* Pa in Q24.8 → /256 */
}
static uint32_t comp_hum(int32_t adc_H)
{
int32_t v = t_fine - 76800;
v = (((((adc_H << 14) - (((int32_t)dig_H4) << 20) - (((int32_t)dig_H5) * v)) + 16384) >> 15) *
(((((((v * ((int32_t)dig_H6)) >> 10) * (((v * ((int32_t)dig_H3)) >> 11) + 32768)) >> 10) +
2097152) * ((int32_t)dig_H2) + 8192) >> 14));
v = v - (((((v >> 15) * (v >> 15)) >> 7) * ((int32_t)dig_H1)) >> 4);
v = v < 0 ? 0 : (v > 419430400 ? 419430400 : v);
return (uint32_t)(v >> 12); /* %RH in Q22.10 → /1024 */
}
void app_main(void)
{
i2c_master_bus_config_t bus_cfg = {
.i2c_port = I2C_NUM_0, .sda_io_num = I2C_SDA_GPIO, .scl_io_num = I2C_SCL_GPIO,
.clk_source = I2C_CLK_SRC_DEFAULT, .glitch_ignore_cnt = 7,
.flags.enable_internal_pullup = true,
};
i2c_master_bus_handle_t bus;
ESP_ERROR_CHECK(i2c_new_master_bus(&bus_cfg, &bus));
i2c_device_config_t dev_cfg = {
.dev_addr_length = I2C_ADDR_BIT_LEN_7,
.device_address = BME280_ADDR, .scl_speed_hz = 400000,
};
ESP_ERROR_CHECK(i2c_master_bus_add_device(bus, &dev_cfg, &bme));
uint8_t id;
rd(0xD0, &id, 1);
ESP_LOGI(TAG, "Chip ID: 0x%02X (%s)", id,
id == 0x60 ? "BME280" : id == 0x58 ? "BMP280 - no humidity!" : "unknown");
read_calibration();
wr(0xF2, 0x01); /* humidity oversampling ×1 */
wr(0xF5, 0xA0); /* config: standby + filter */
while (1) {
wr(0xF4, 0x25); /* temp ×1, press ×1, forced mode */
vTaskDelay(pdMS_TO_TICKS(50));
uint8_t d[8];
rd(0xF7, d, 8);
int32_t adc_P = (d[0] << 12) | (d[1] << 4) | (d[2] >> 4);
int32_t adc_T = (d[3] << 12) | (d[4] << 4) | (d[5] >> 4);
int32_t adc_H = (d[6] << 8) | d[7];
float temp = comp_temp(adc_T) / 100.0f;
float hum = comp_hum(adc_H) / 1024.0f;
float pres = comp_press(adc_P) / 25600.0f; /* Pa/256 → hPa */
ESP_LOGI(TAG, "%.2f °C %.1f %%RH %.2f hPa", temp, hum, pres);
vTaskDelay(pdMS_TO_TICKS(2000));
}
}
Prefer Arduino?
The compensation is exactly why most people use the Adafruit BME280 library — it hides all of the above:
#include <Adafruit_BME280.h>

Adafruit_BME280 bme;

void setup() {
  Serial.begin(115200);
  Wire.begin(6, 7);              // SDA = GPIO6, SCL = GPIO7
  bme.begin(0x76);
}

void loop() {
  Serial.printf("%.2f C  %.1f %%  %.2f hPan",
                bme.readTemperature(),
                bme.readHumidity(),
                bme.readPressure() / 100.0);
  delay(2000);
}
Calculating Altitude from Pressure
Because the BME280 reads pressure so precisely, you can estimate altitude with the standard barometric formula, relative to sea-level pressure (1013.25 hPa):
altitude_m = 44330 × (1 − (pressure_hPa / 1013.25) ^ (1 / 5.255))
For a more accurate result, replace 1013.25 with your local sea-level pressure from a nearby weather station. This makes the BME280 great for indoor navigation, drones and stairwell/floor detection.
BME280 vs DHT22
The DHT22 is the classic starter humidity sensor. Here’s how they compare:
| Feature | BME280 | DHT22 |
|---|---|---|
| Temperature | ✅ ±1°C | ✅ ±0.5°C |
| Humidity | ✅ ±3% | ✅ ±2–5% |
| Pressure | ✅ | ❌ |
| Interface | I²C / SPI | Single-wire (custom) |
| Sampling speed | Fast (many Hz) | Slow (once every ~2 s) |
| Power (idle) | µA range | mA range |
| Multiple per bus | 2 (I²C) | 1 per data pin |
| Size | Tiny | Bulky |
When to Choose the BME280
- You want pressure or altitude, not just temperature/humidity
- You need fast readings or low power
- You want a compact, I²C-friendly sensor
When to Choose the DHT22
- You only need temperature and humidity
- You want the simplest possible wiring (one data pin)
- Absolute lowest cost matters
Practical Engineering Tips
1. Check the Chip ID First
Always read register 0xD0. If it returns 0x58 you have a BMP280 and there is no humidity reading to be had — better to know before you debug for an hour.
2. Run an I²C Scanner First
Before any application code, scan the bus. If 0x76 (or 0x77) shows up, your wiring is correct. If not, check CSB, SDO, VCC/GND and your SDA/SCL wiring.
3. Watch Out for Self-Heating
The BME280 reads a degree or two high if it sits next to the ESP32 or its regulator. Mount it away from heat sources, or use forced mode so the chip spends most of its time asleep and cool.
4. Use Forced Mode for Battery Projects
Wake, take one reading, sleep. At ~3.6 µA average, a BME280 in forced mode barely touches your battery budget.
5. Set a Local Sea-Level Reference
Altitude and weather trends are only as good as your reference pressure. Pull the current sea-level value from a nearby station for meaningful numbers.
Conclusion
The BME280 is a small module that punches far above its weight: three high-quality environmental measurements from a single chip over two wires. Combined with the ESP32-C6 SUPER MINI it’s the heart of any weather station, climate logger or HomeKit temperature and humidity accessory.
It offers:
- Temperature, humidity and pressure in one chip
- High accuracy with selectable oversampling and filtering
- A microamp forced mode for battery projects
- Altitude estimation from precise pressure readings
- Simple register-based control — or a one-line library if you prefer
Where the ADS1115 measures raw voltages and the MCP23017 adds digital pins, the BME280 gives your ESP32 a real sense of its environment. For any smart-home or weather project, it’s one of the best-value building blocks you can add to your parts drawer.
Related
 Reference
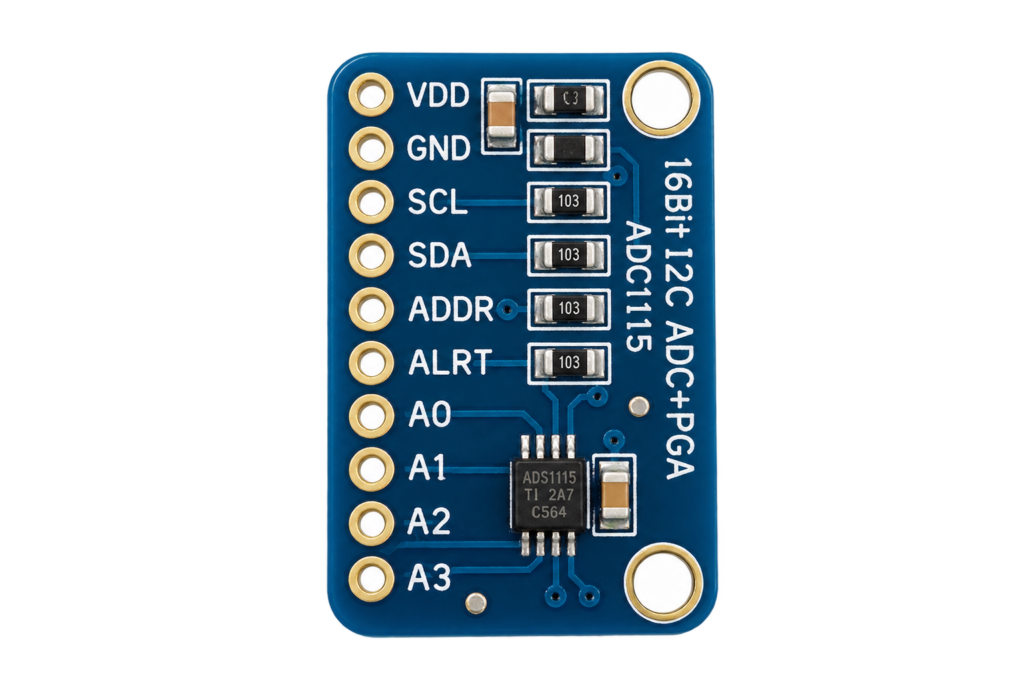
ADS1115 16-Bit ADC
A precision 16-bit I2C analog-to-digital converter for when the ESP32’s own noisy 12-bit ADC is not accurate enough. Covers single-ended and differential inputs, the programmable gain amplifier, and reading a signed conversion result correctly.
Read more
Guide
ESP32-C61 Pinout
The complete pin reference for the ESP32-C61: Espressif’s budget Wi-Fi 6 chip, and the exact pins you can safely reuse.
Read more
Reference
ADS1115 16-Bit ADC
A precision 16-bit I2C analog-to-digital converter for when the ESP32’s own noisy 12-bit ADC is not accurate enough. Covers single-ended and differential inputs, the programmable gain amplifier, and reading a signed conversion result correctly.
Read more
Guide
ESP32-C61 Pinout
The complete pin reference for the ESP32-C61: Espressif’s budget Wi-Fi 6 chip, and the exact pins you can safely reuse.
Read more
 Reference
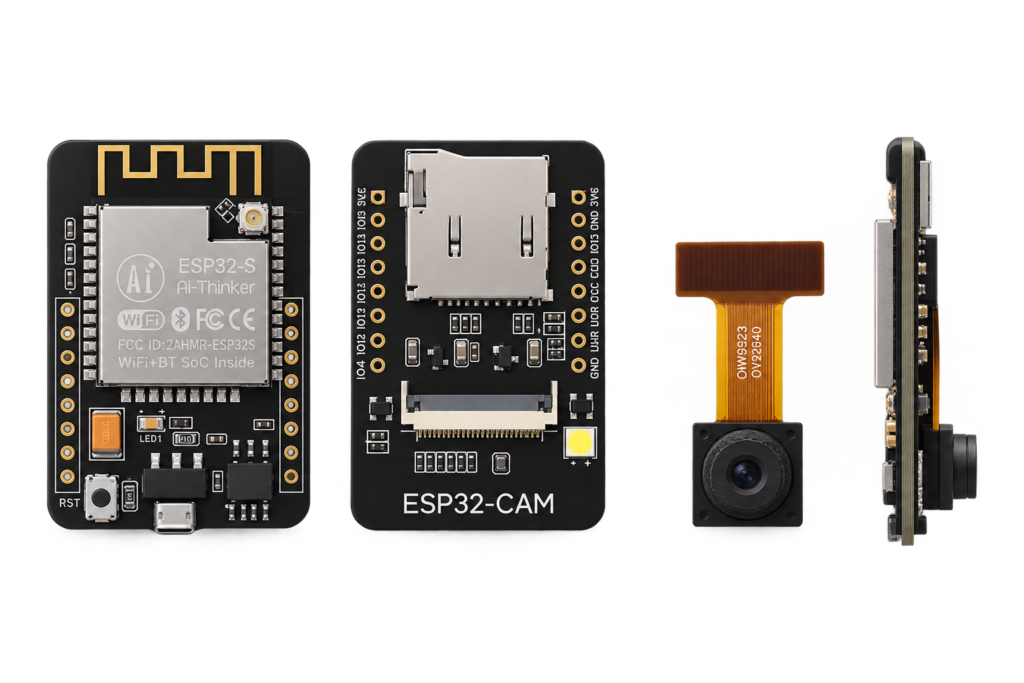
ESP32-CAM (AI-Thinker) Pinout
The real pin reference for the AI-Thinker ESP32-CAM: an ESP32 with a camera connector and microSD slot, and only 2 or 3 genuinely free GPIOs left over.
Read more
Reference
ESP32-CAM (AI-Thinker) Pinout
The real pin reference for the AI-Thinker ESP32-CAM: an ESP32 with a camera connector and microSD slot, and only 2 or 3 genuinely free GPIOs left over.
Read more
More guides
Keep building.
From ESP32 HomeKit accessories to Arduino and ATtiny reference guides, there’s more where this came from.
All guides