Now that you’re set up with OctoPrintTM , you’re ready to start printing. Turn off your Raspberry Pi®, then plug it into your 3D printer. After it has booted up, open OctoPrintTM again in your browser and take your newly WiFi-enabled printer for a spin by clicking the Connect button. After it has connected, you’ll be able to set the hot end and bed temperature, then watch as the real-time readings are updated. But I still have to add one thing, a camera!
The camera
Now we can extend our projects with a camera. You can use the camera that can be attached to your raspberry pi directly, but this means you have to put your raspberry pi extremely close to your 3D printer. I didn’t choose for that because I build a OctoPrint – Enclosure with a wallmount so I have ordered a USB camera.
the Hardware
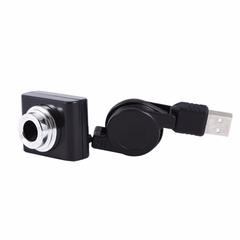
I order a Computer USB Camera wit a Video resolution of 640*480, for Raspberry Pi 2 Model B/B+/A+ Raspberry Pi 3 3B+ for only € 2,47 (US $2.64) free shipping!
Camera Installation

In the Settings tab, we can see the camera stream (if you’re using one) and the motor controls, as well as commands to home the axes. There’s a G-code file viewer to look through a cross-section of the currently loaded model, and a terminal to send custom G-code commands to your printer. The last tab is for making time-lapses; however, there is a plug-in available to help with this process.
![]()
Undoubtedly the easiest way to set up video monitoring of your prints is to use the official Raspberry Pi® Camera Module, but this Camera is equal easy in setting it up. There are dozens of awesome mounts on Thingiverse for a Raspberry Pi® Camera Module, to allow you to get the best angle of your models as they print. There are also some awesome OctoPrint-themed Raspberry Pi cases to house your new printer brains. While it isn’t officially supported by OctoPrint, you can use a USB webcam instead if you have one handy, or just want some very high-quality video streams. The OctoPrint wiki has a crowdsourced list of webcams known to work, as well as a link for the extra steps needed to get the webcam working correctly.

As mentioned earlier, our recommended way of printing a model using OctoPrint is to first use your slicer as you would if you were creating a file to save to a microSD card. Once you have the file, save it somewhere handy on your computer, and open the OctoPrint interface. In the bottom left of the screen, you will see the Upload File button — click this and upload the G-code you wish to print.
You’ll see the file/print details appear, including information on how long it’ll take for the object to print. Before you kick things off, check out the G-code Viewer tab on the right. You can not only scroll through the layers of the object, but, using the slider at the bottom, you can see the exact pattern the 3D printer will use to ‘draw’ each layer. Now click Print and watch your printer jump into action!

OctoPrint has scores of community-created plug-ins, but our favourite, Octolapse, makes beautiful hypnotic time-lapses. What makes them so special is that the plug-in alters the G-code of whatever object you are printing so that once each layer has finished, the extruder moves away from the print to let the camera take an unobstructed shot of the model. The result is an object that seems to grow out of the build plate as if by magic. You’ll not find a finer example of it than here.