As my OctoPrintTM Project extends, It’s time to give my Raspberry Pi®, that’s functioning as OctoPrint server with PSU control, a proper Enclosure. The goal is to make a casing that feels and looks like a complete product , simplifying installation and eliminating clutter. So at first I took the dimensions from the hardware that’s needed to runs my OctoPrint server.

The hardeware
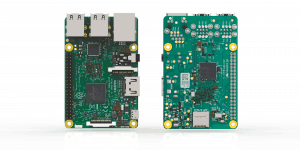
To setup the OctoPrint server we need some hardware as explained in this blog. We need A Raspberry Pi®, a power unit, a relay and one 1x Male 1x Female Power connector. this is the hardware where the enclosure will be for.
1 x Raspberry Pi® 3B (Plus)
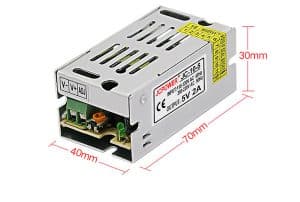
1 x PSU (Power Supply Unit) 5V ~ 2A
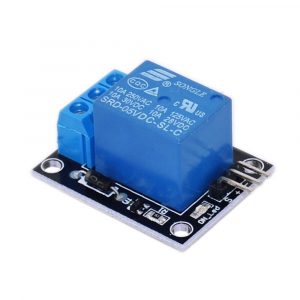
1 x Relay
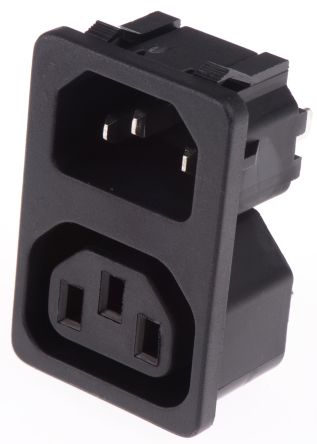
1x Male 1x Female Power connector
Prepare Your Custom Enclosure Design
If you’re a maker, designer or an engineer, chances are you’ll need to make a custom enclosure at some point. This might be a simple container to keep small items organized or a fully functional prototype as I made here.
For this project, we’re going to make a case, for my setup OctoPrint setup. I use AutoCAD Fusion 360 because of its popularity in product design and engineering, but you can use a similar 3D design software.

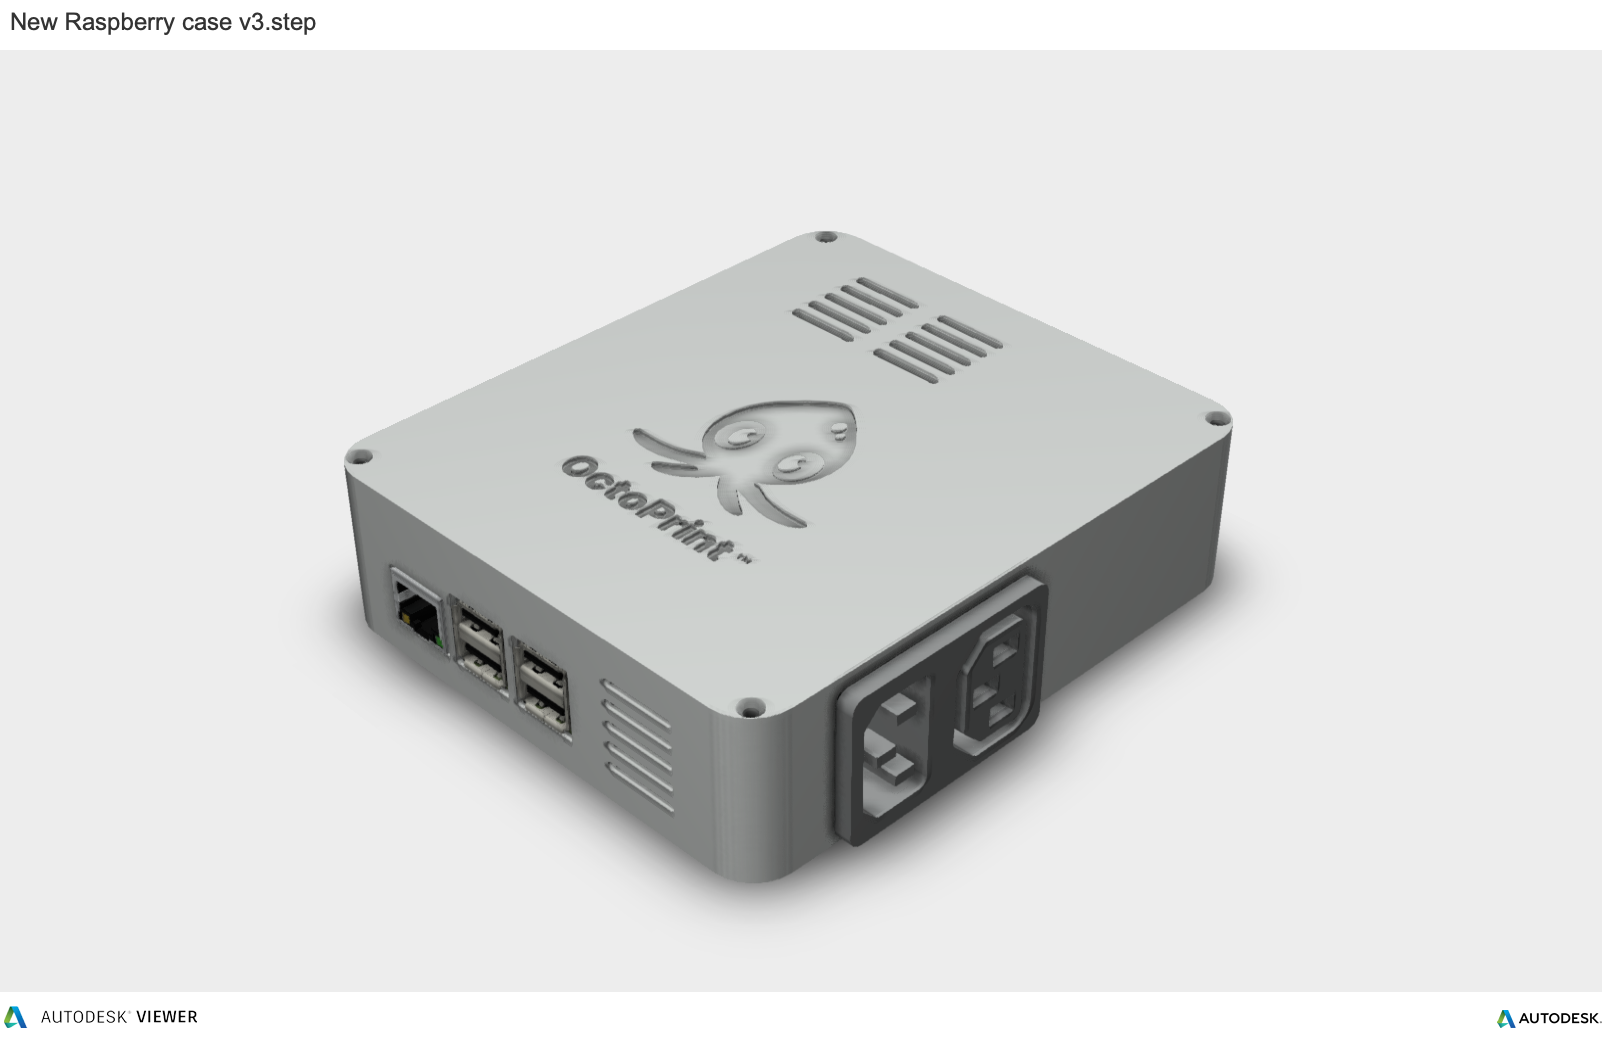
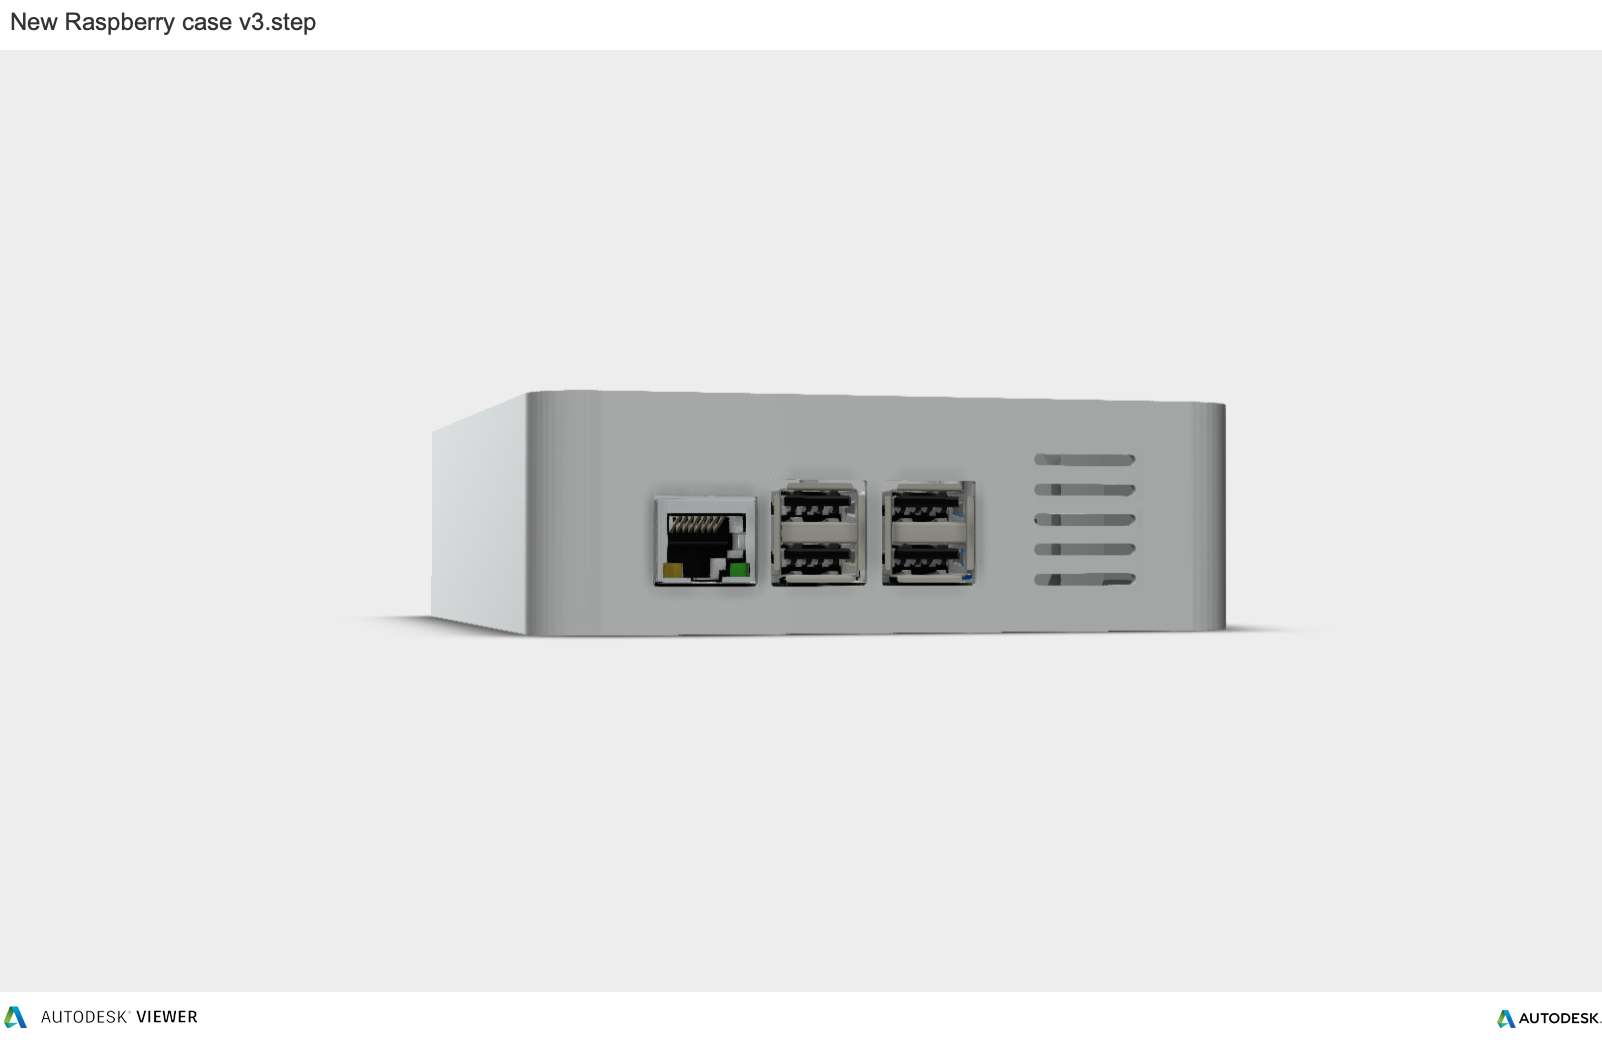
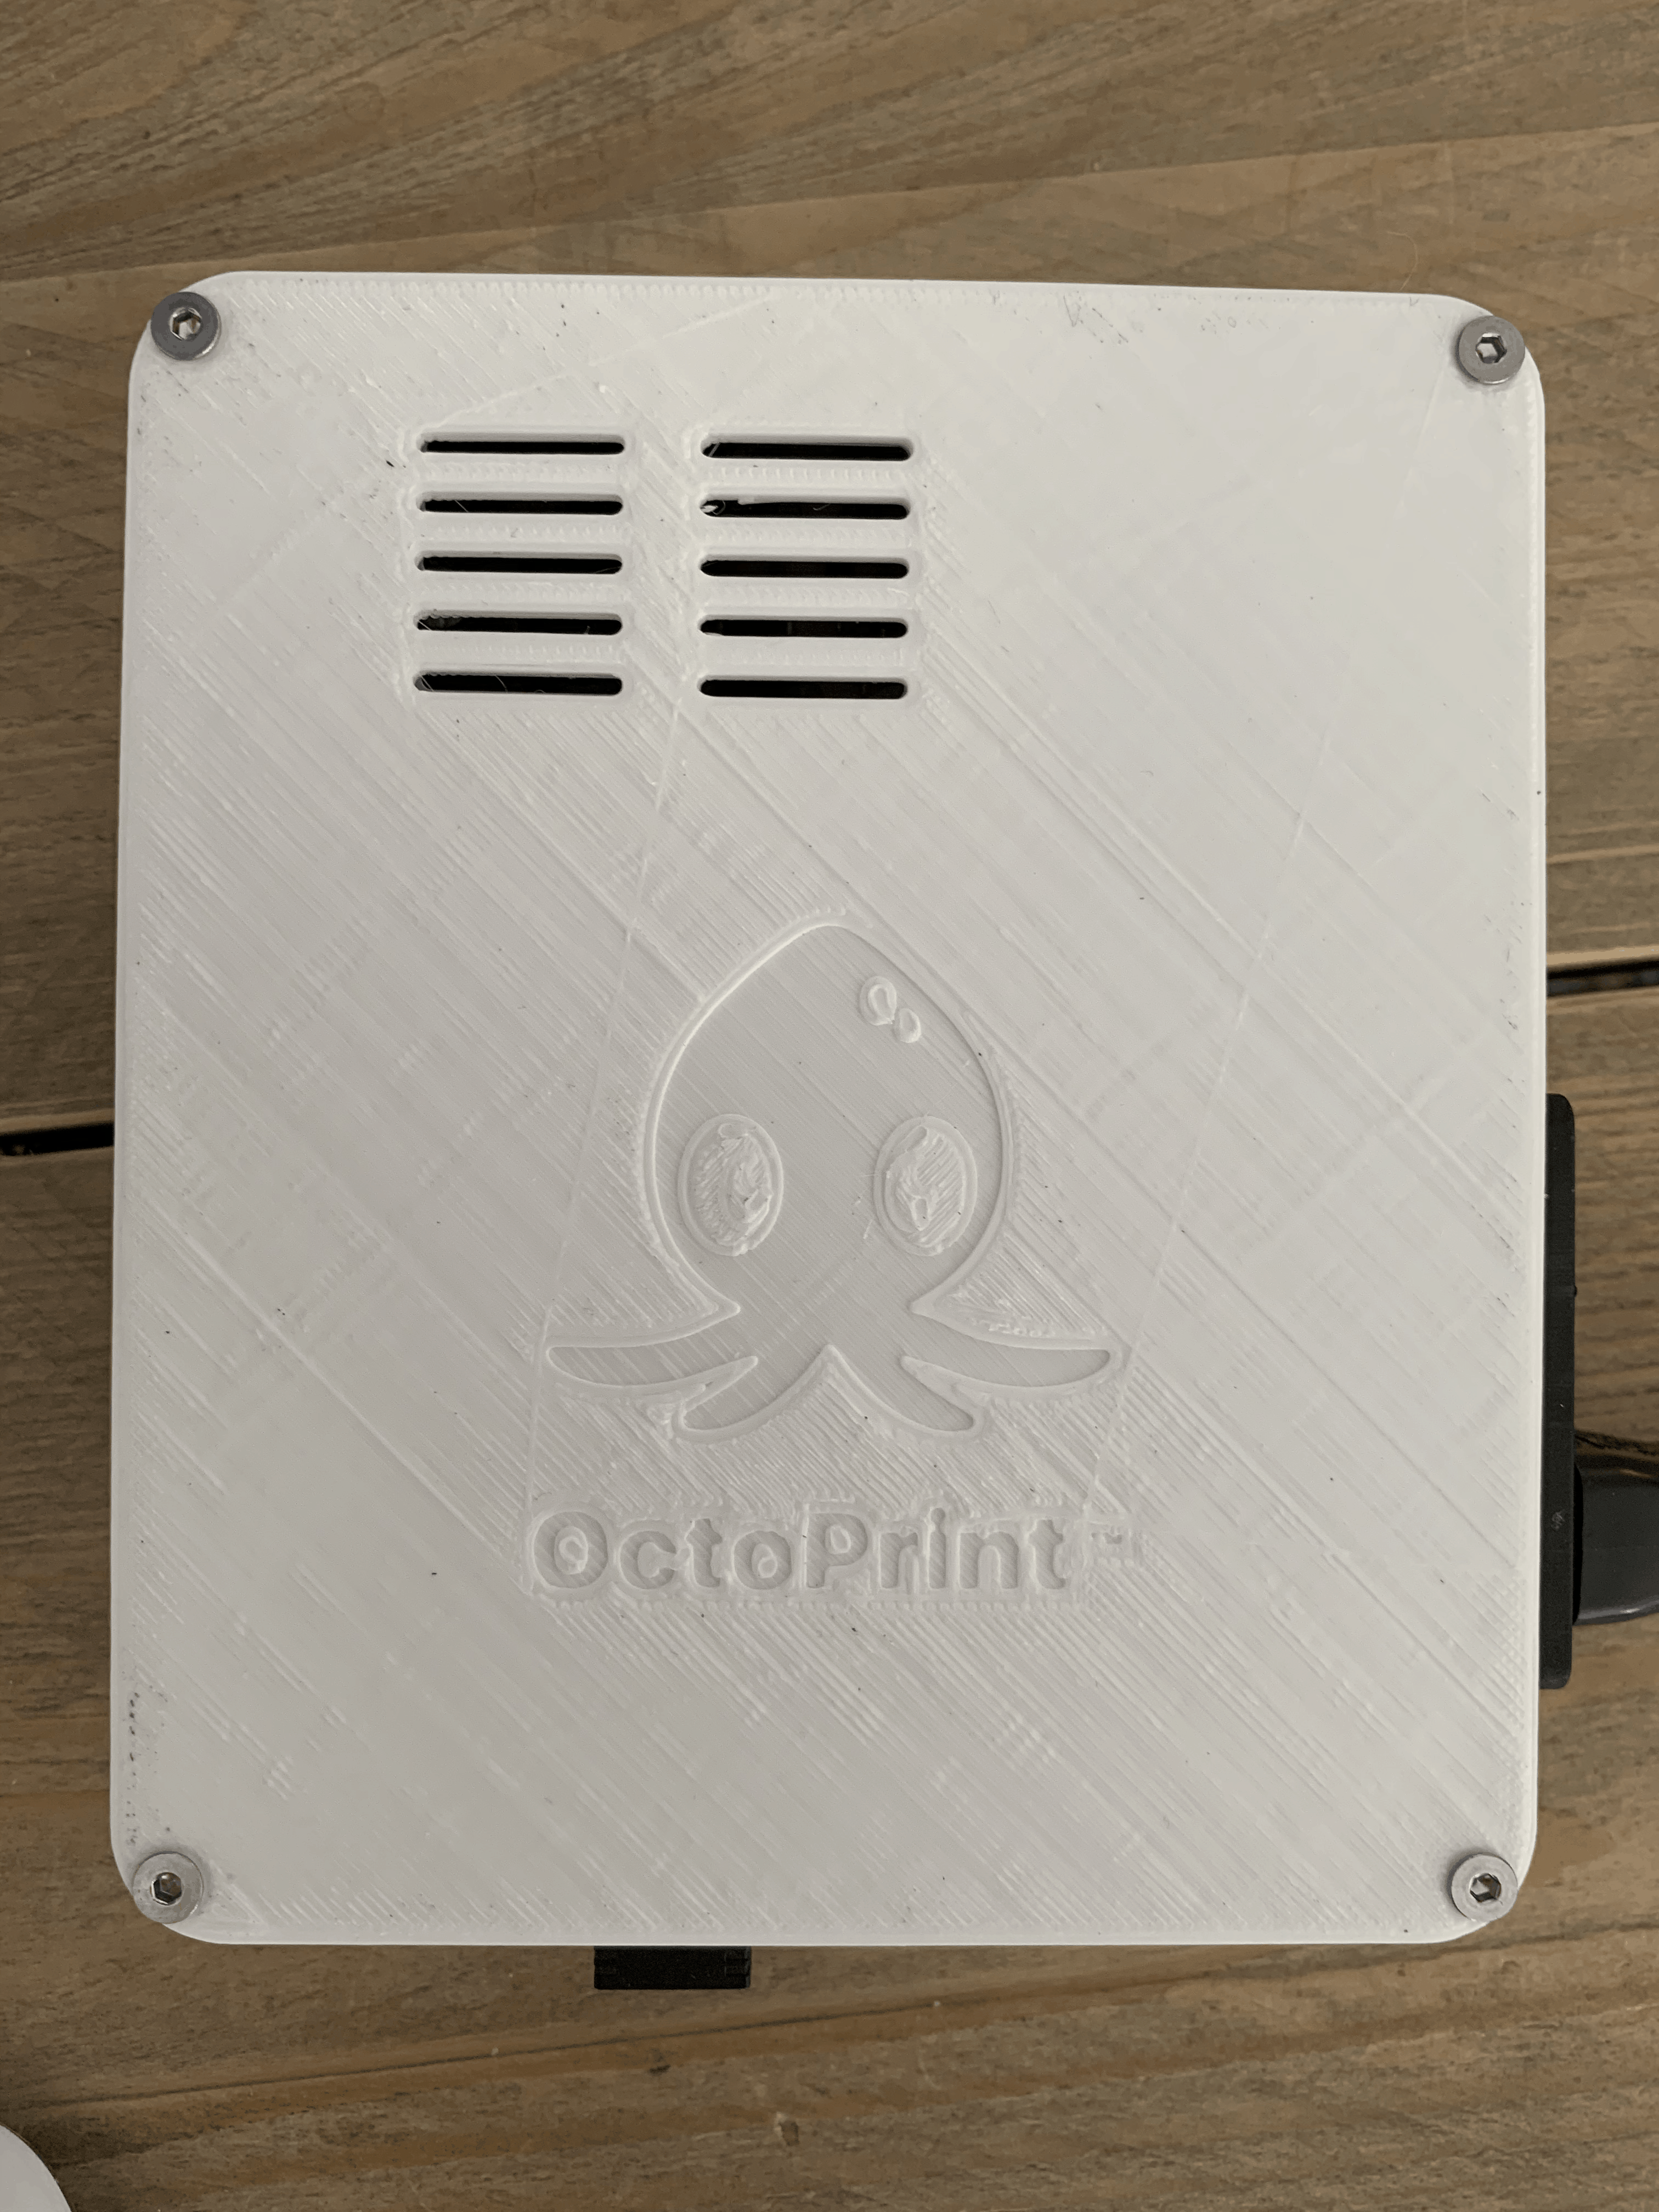
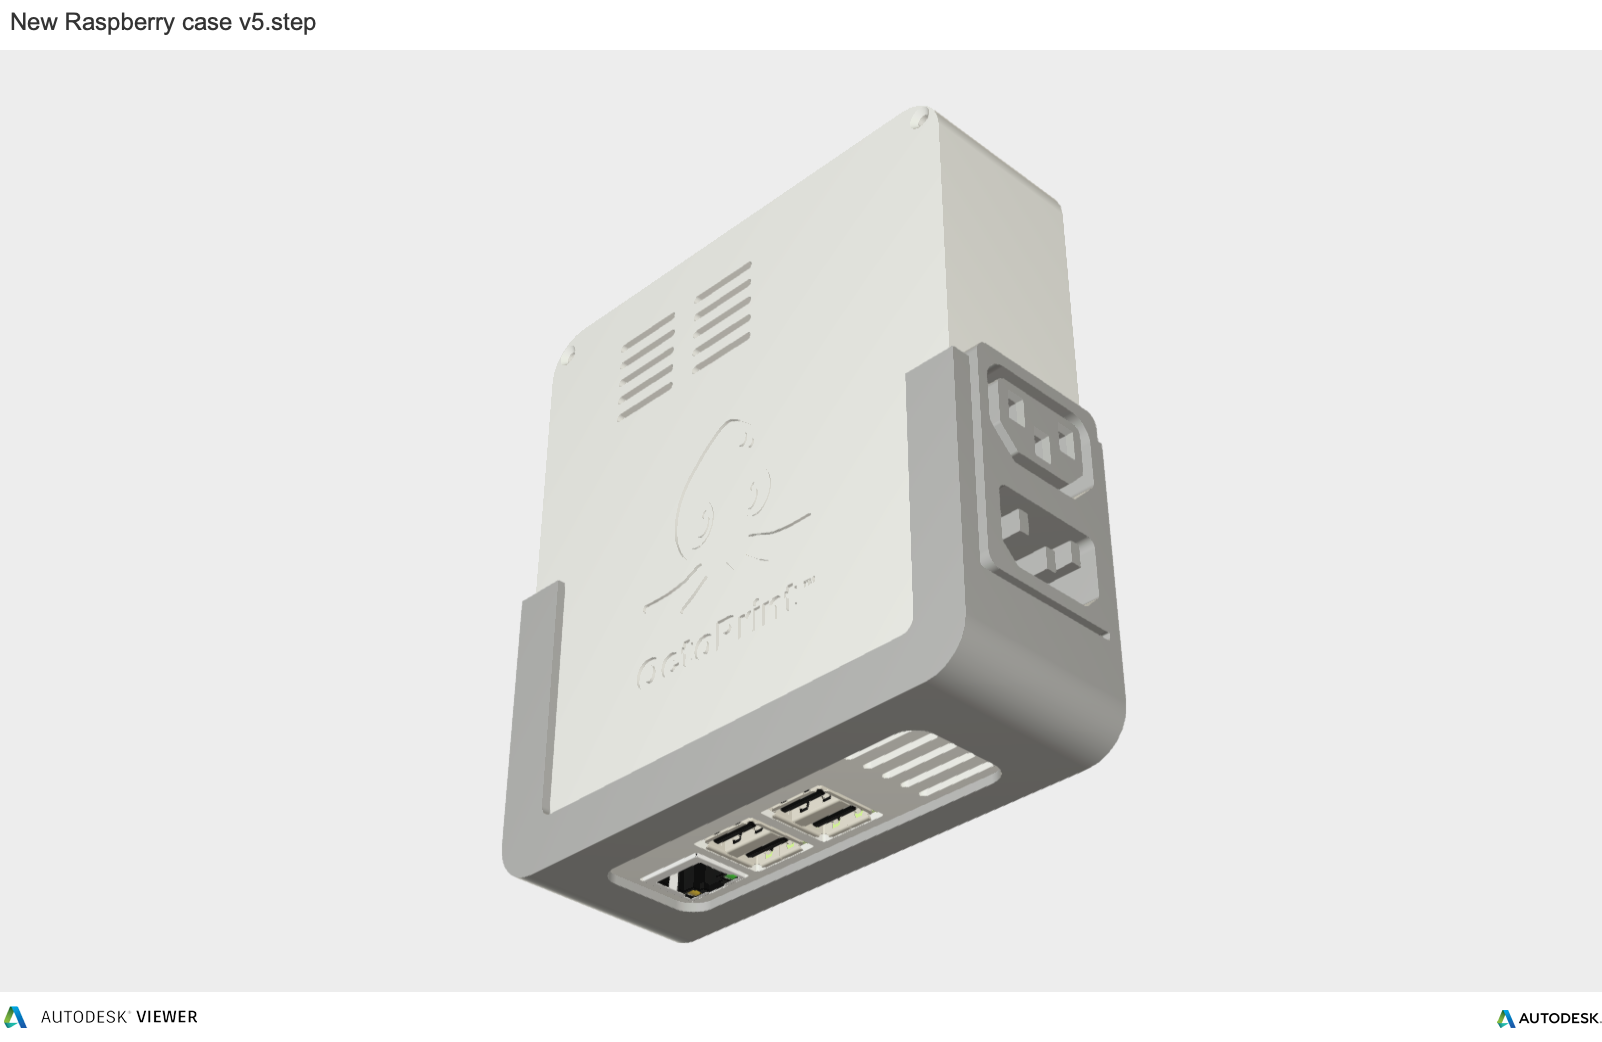
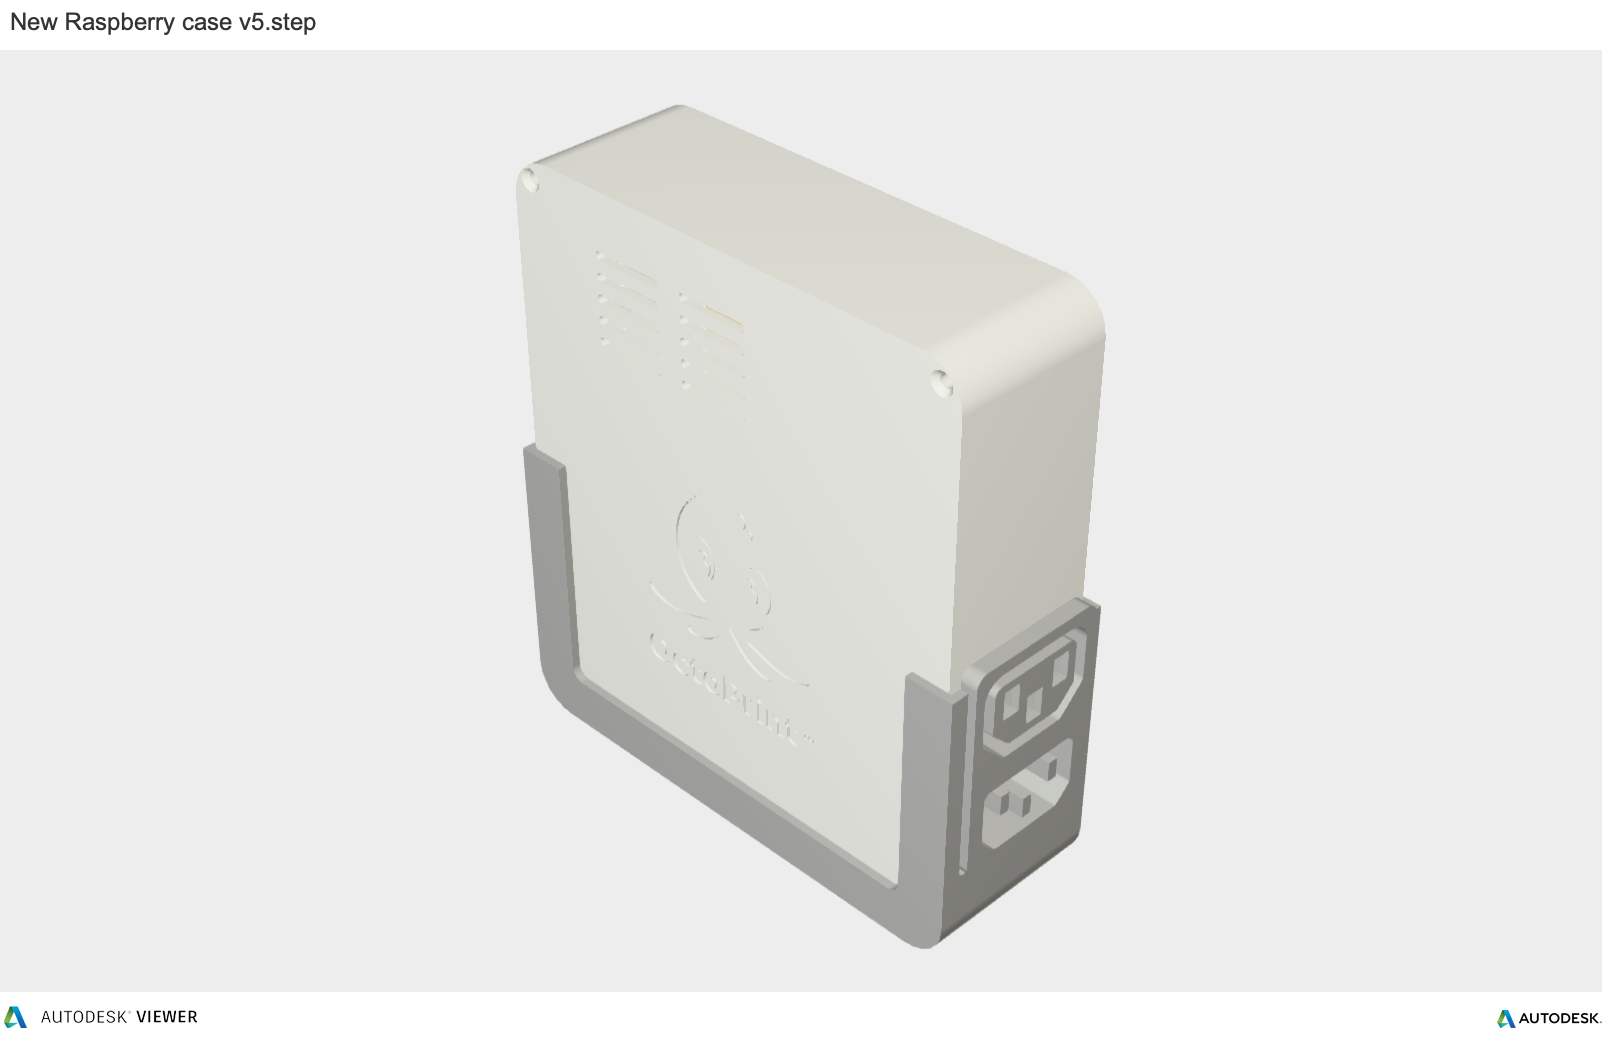
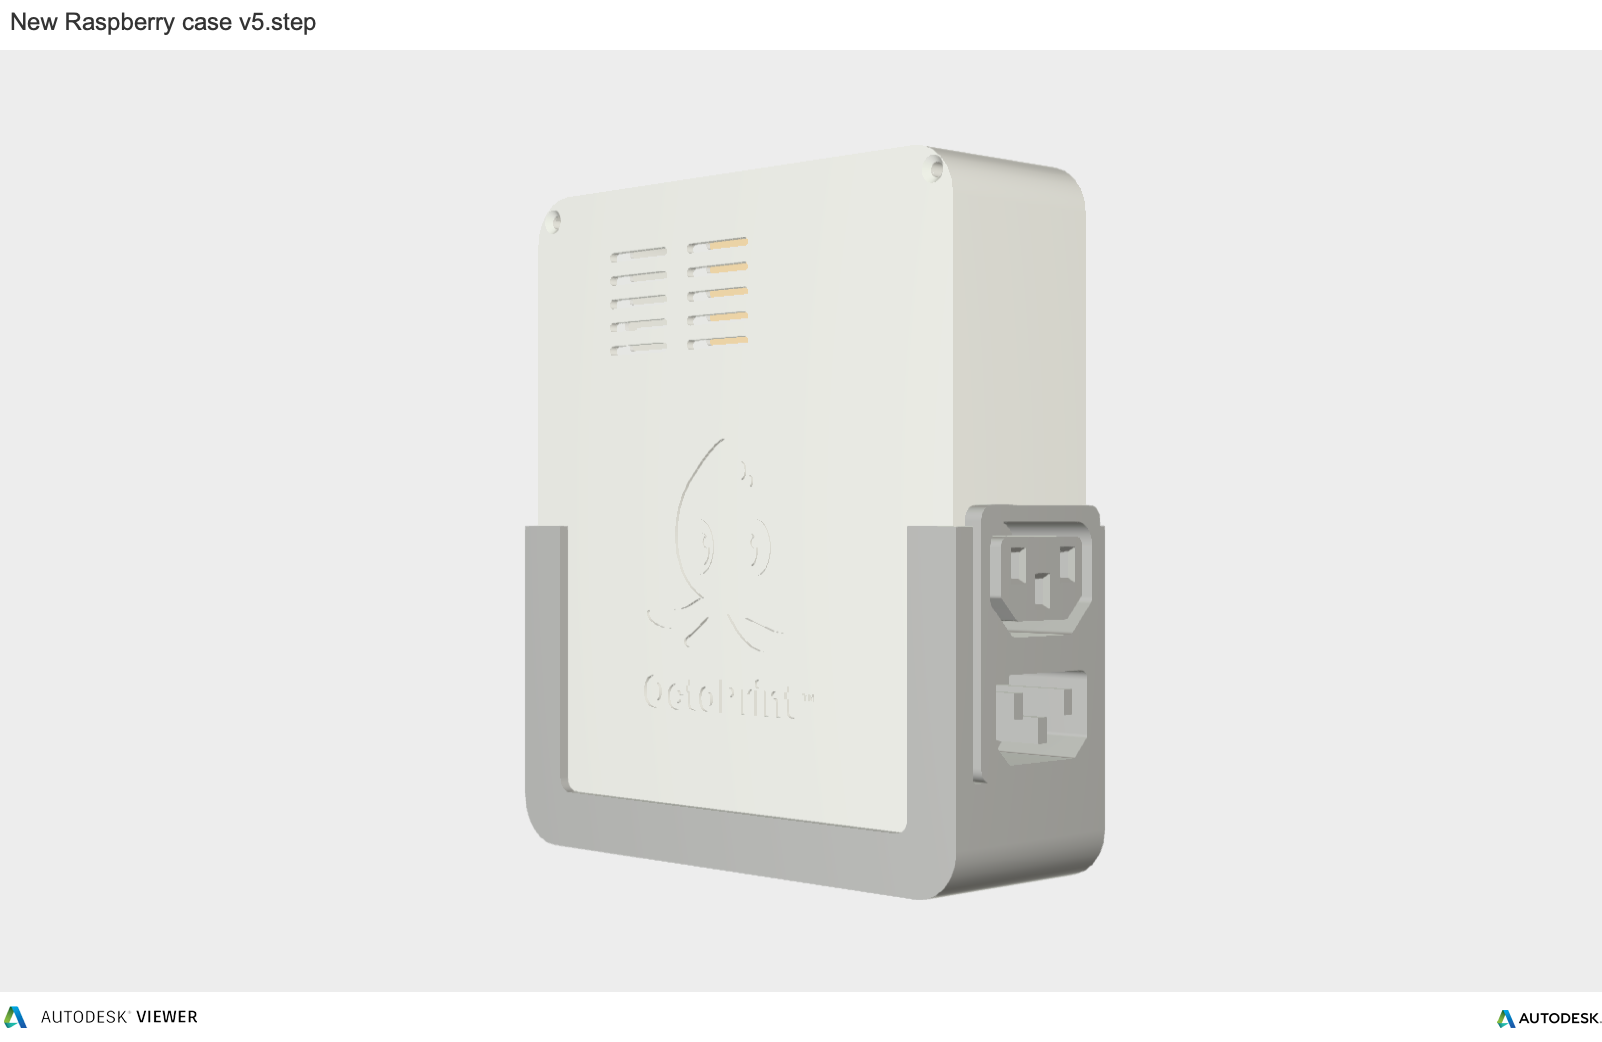
First, I use a calipers or a ruler to measure your electronic component in real life. I can then start the enclosure designs by accurately reverse-engineering the PCB, measuring the board size, the location of mounting holes, and any ports or plugs that will need to be accessed through the enclosure. Here below you can see what I came up with for my OctoPrint server.
I made and enclosure with some ventilation holes for heat dispensation, they are not really necessary because none of the hardware really heats up. But just in case.
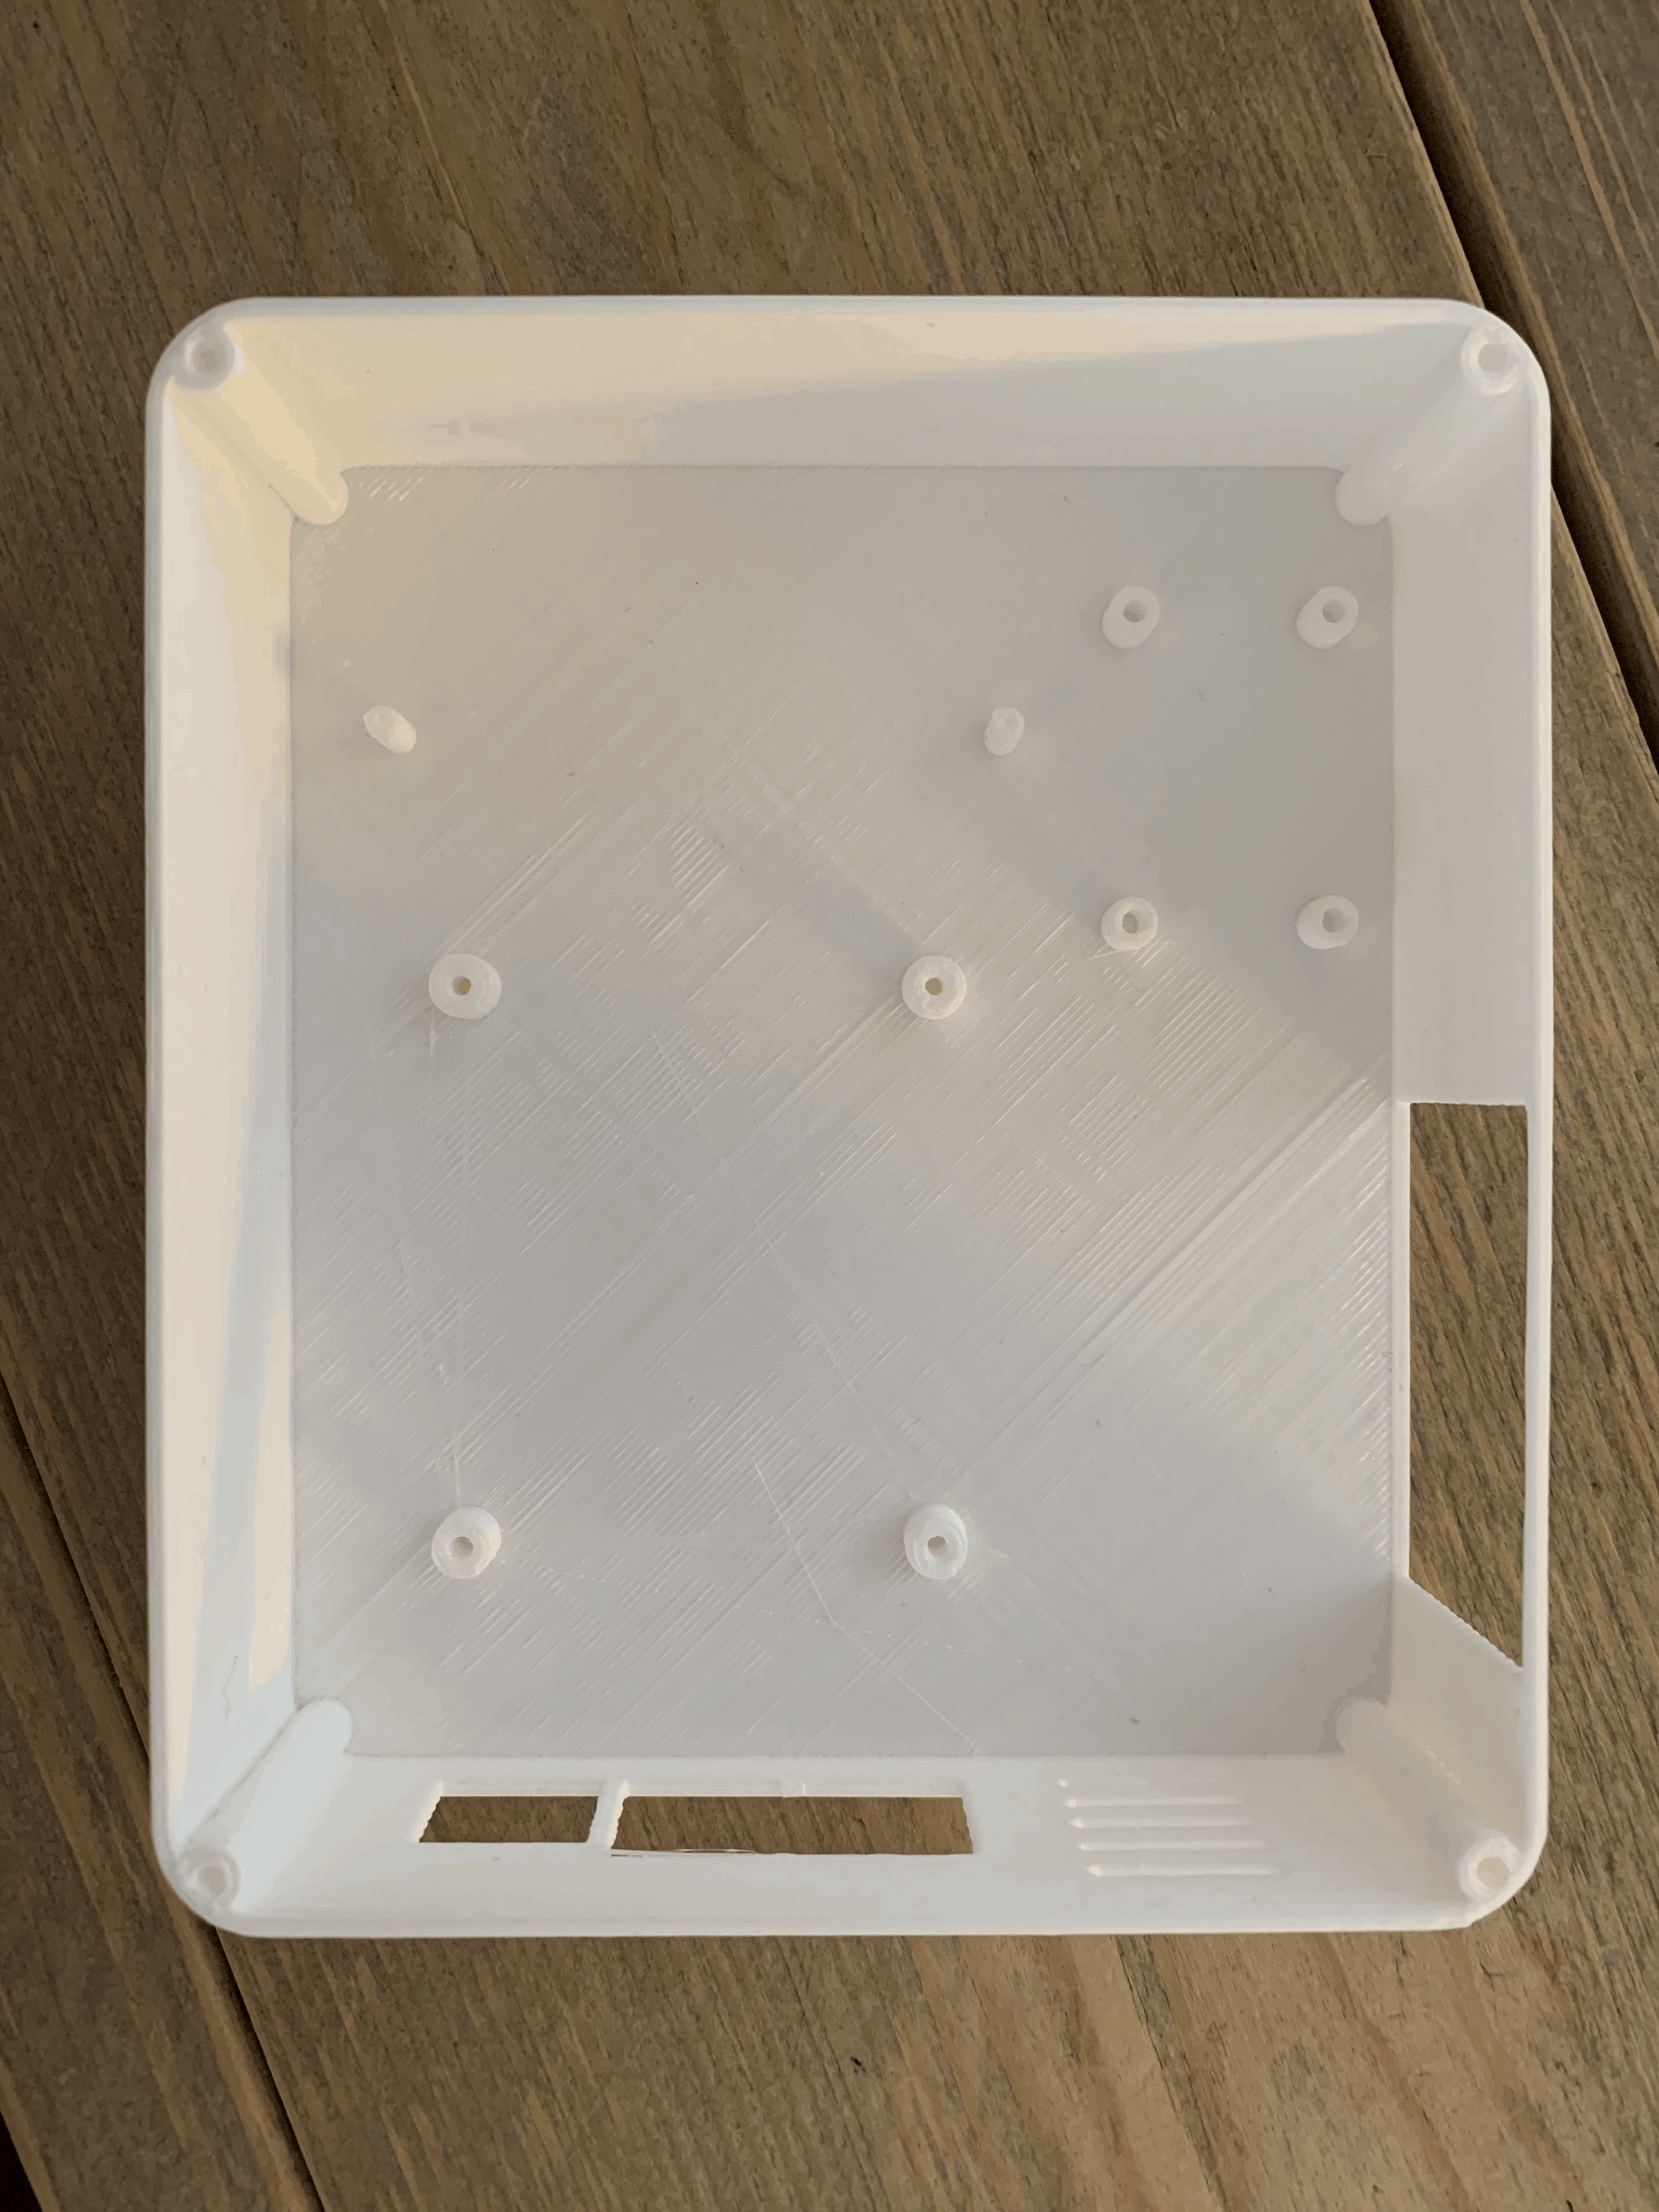
On the inside everything is needly placed and and has enough room form mounting and to make the necessary connections.
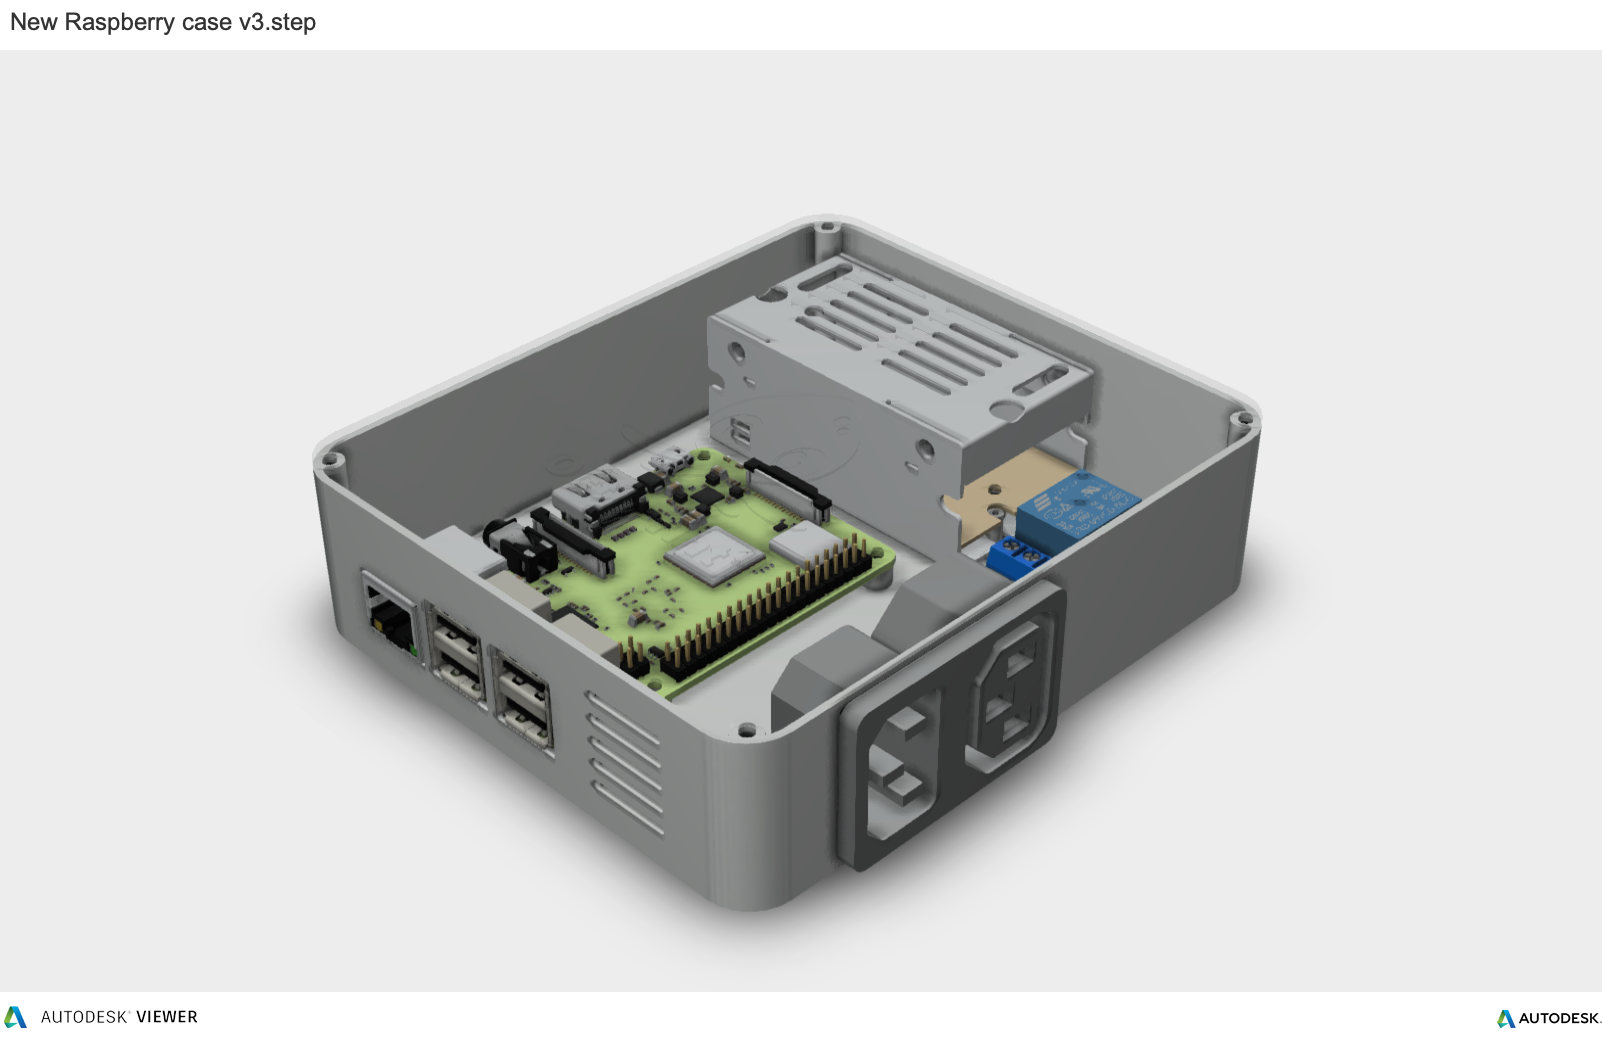
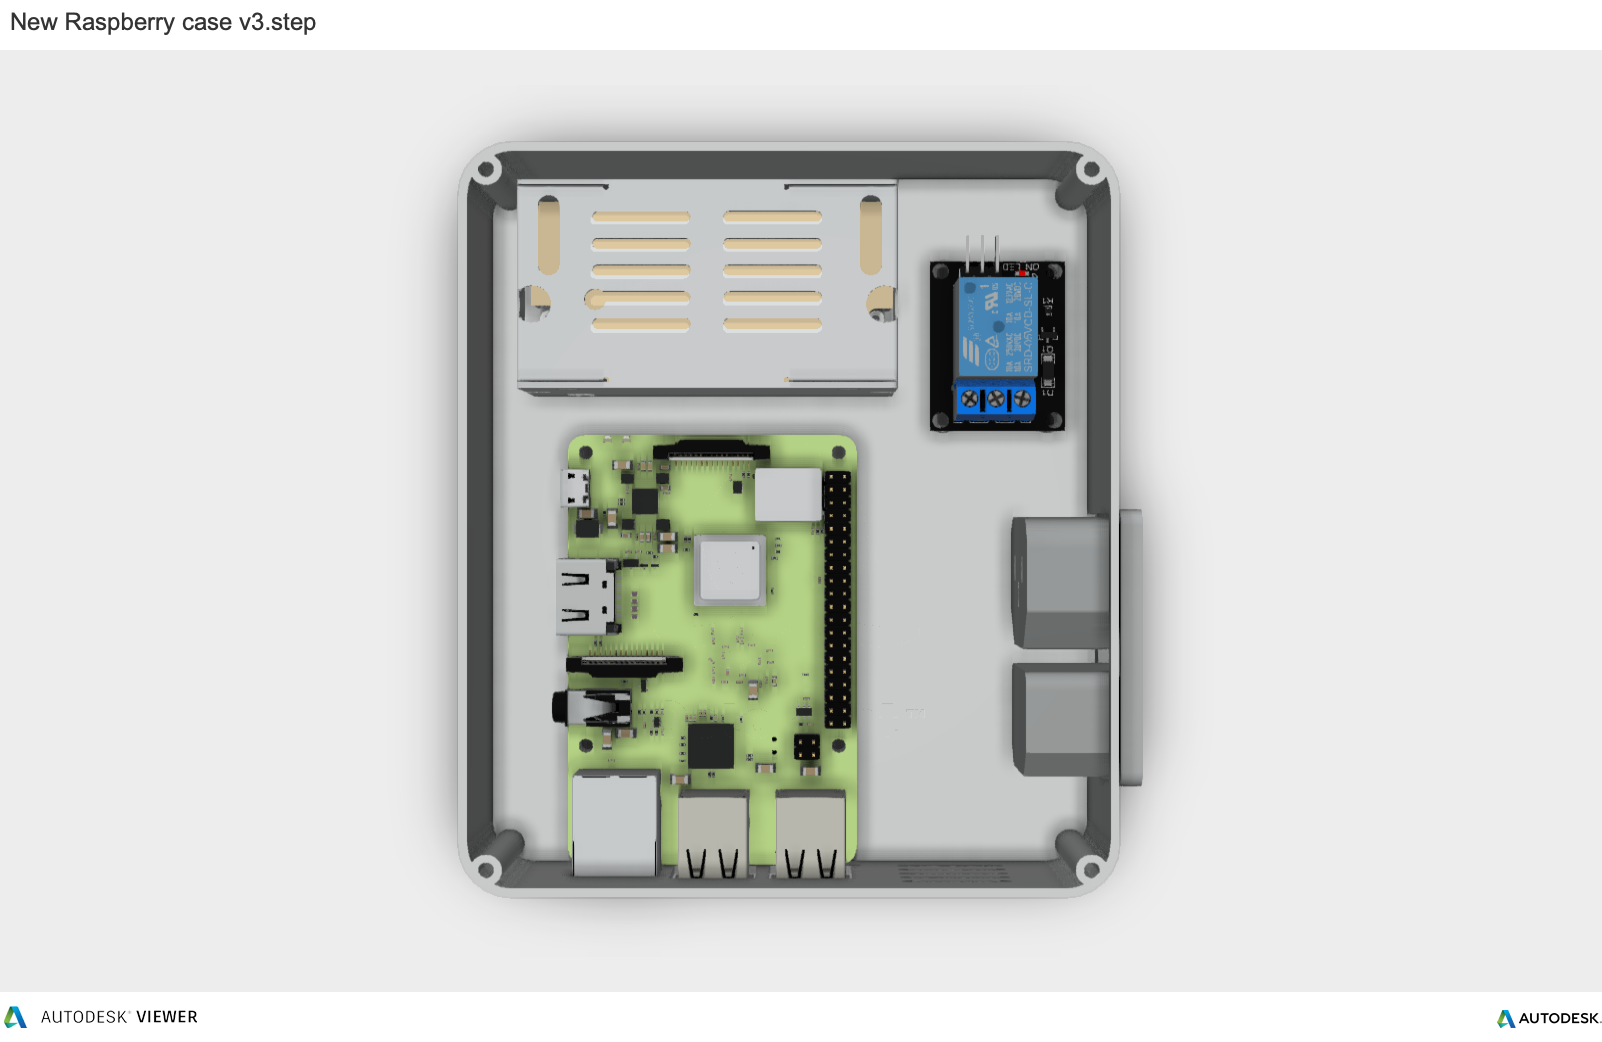
On the back there are mounting holes for your Raspberry Pi® next to that the are some ventilation holes for heat dispensation.
If you’re building this I’m sure you have a 3D printer so it shouldn’t be a problem.

3D printing
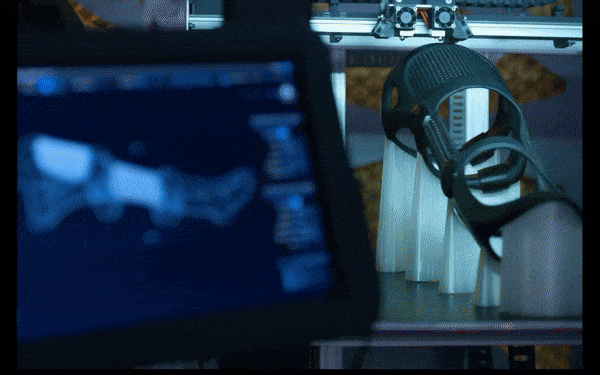
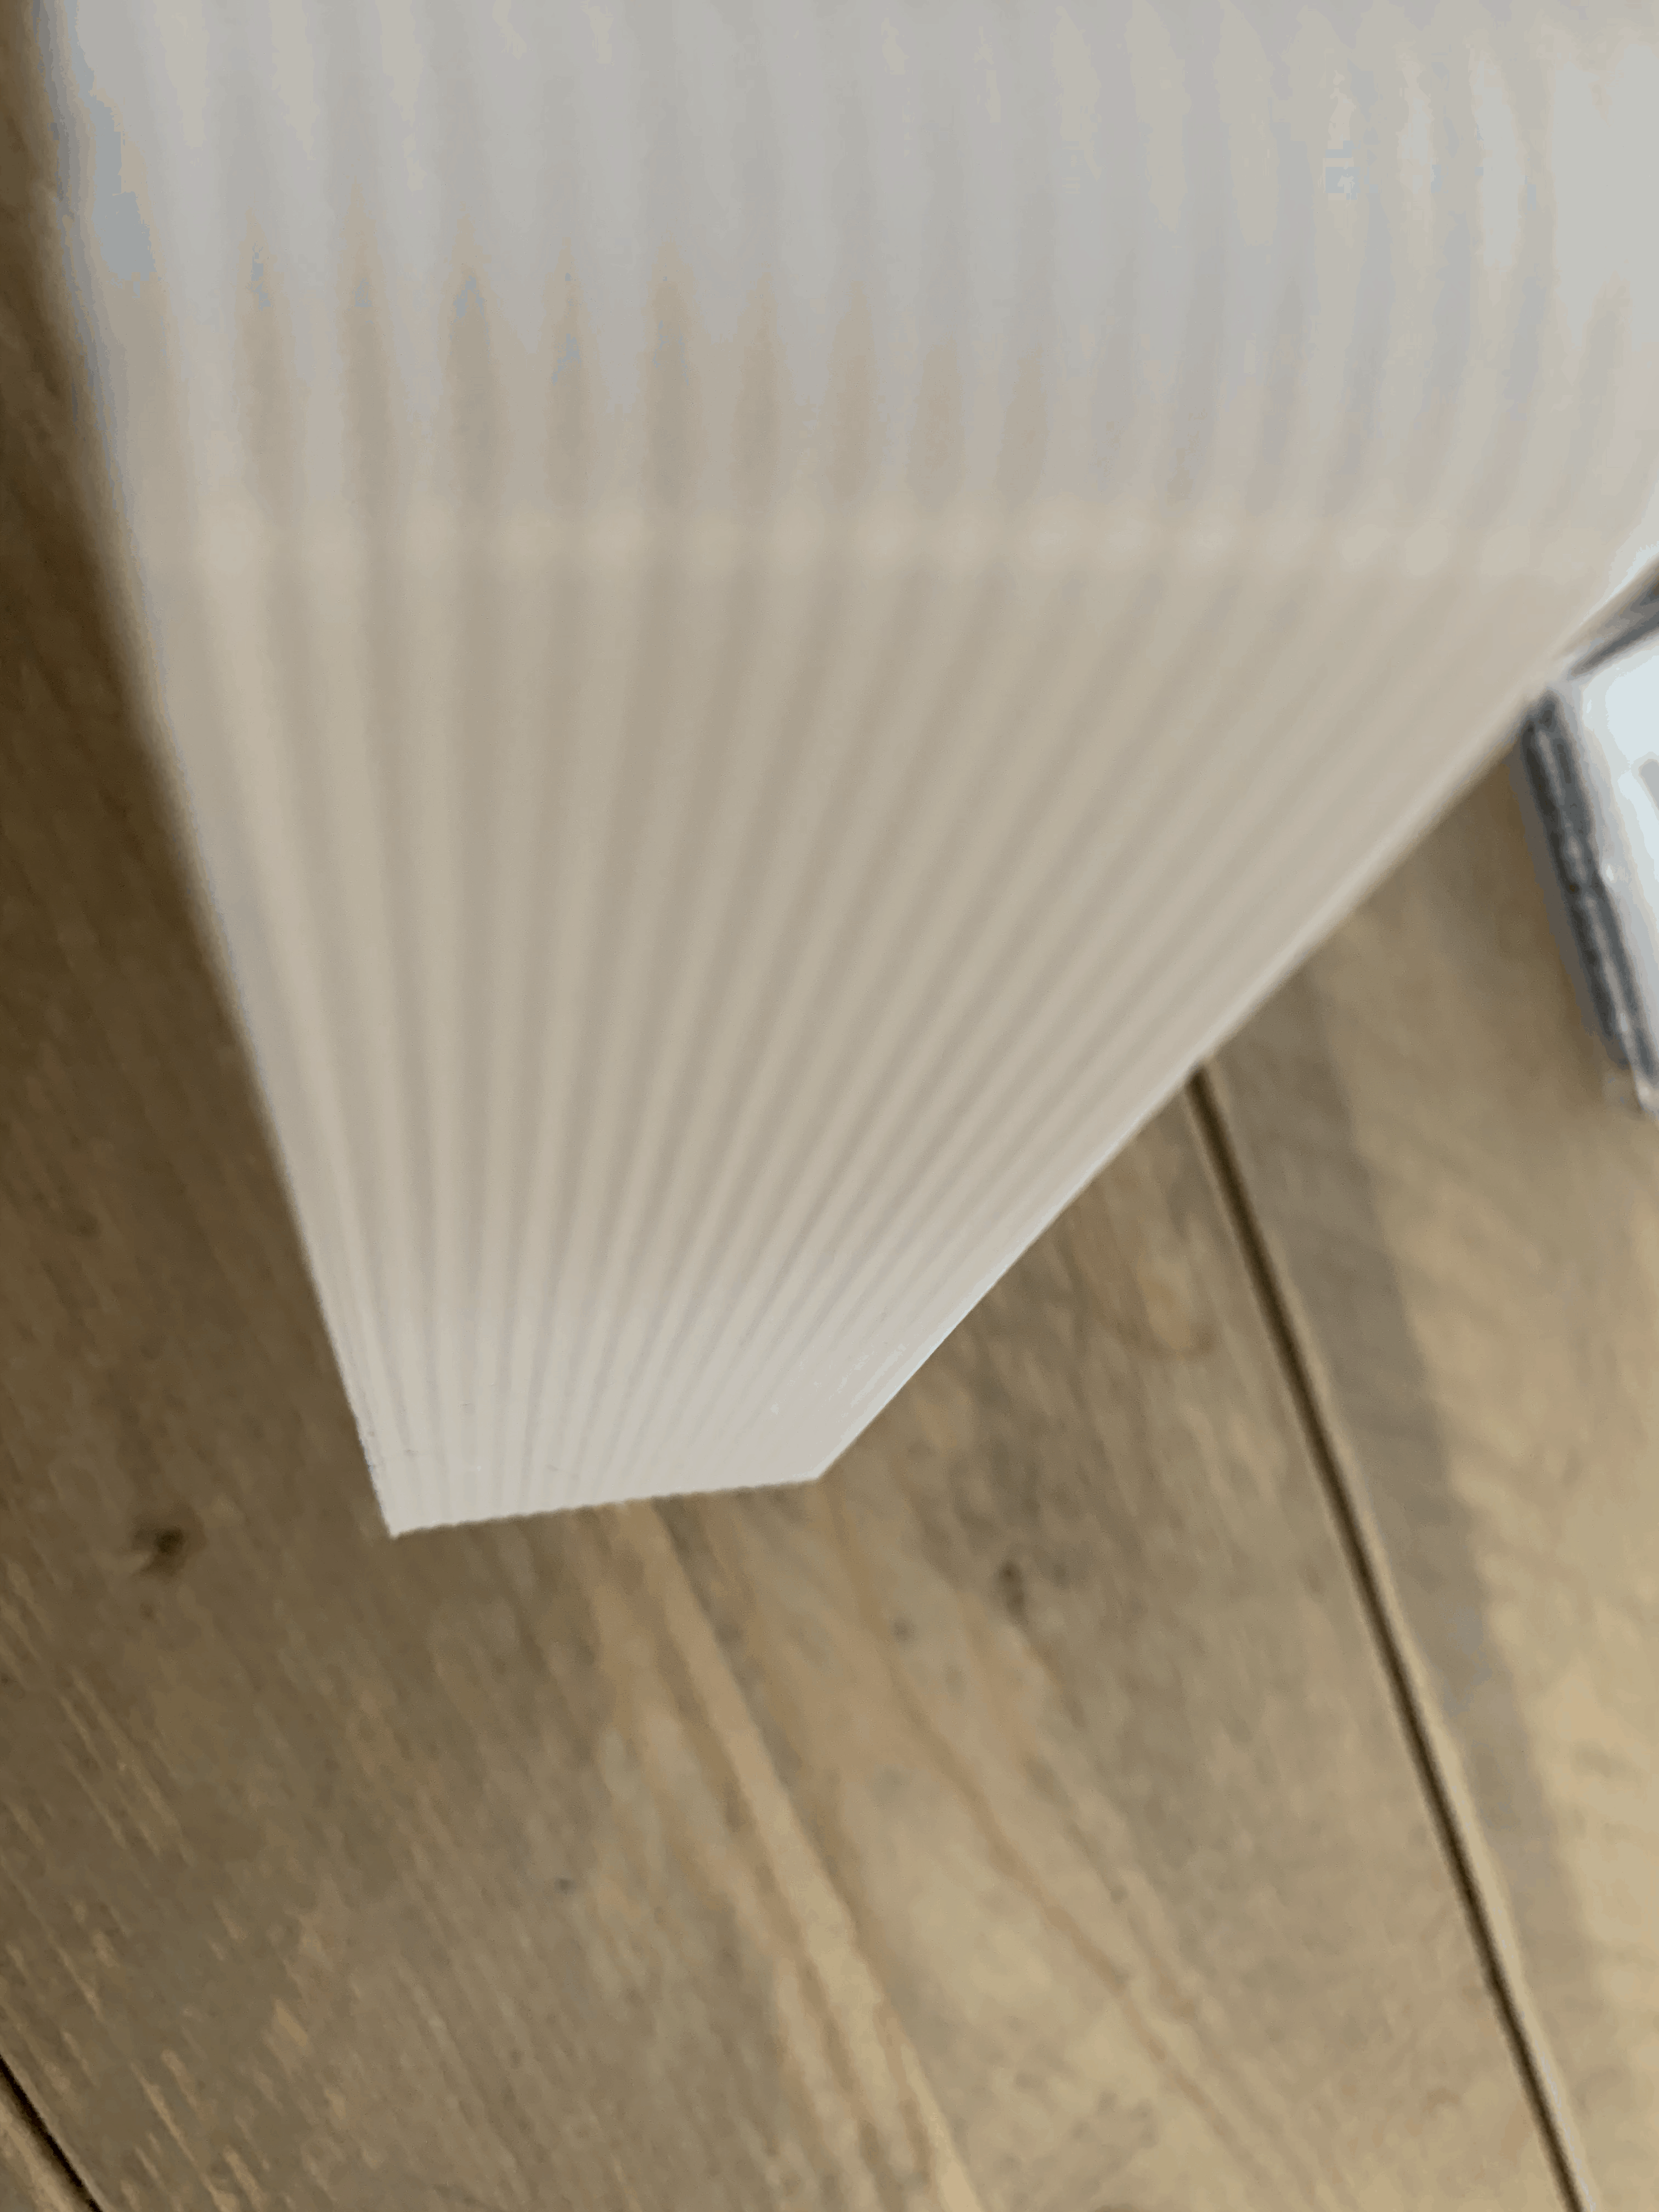
Nooooo….. and of course on this project my 3D printer has problems. As jou can see below is has lines on the side of the print.

Lines on the Side of Print
The sides of your 3D printed part are composed of hundreds of individual layers. If things are working properly, these layers will appear to be a single, smooth surface. However, if something goes wrong with just one of these layers, it is usually clearly visible from the outside of the print. These improper layers may appear to look like lines or ridges on the sides of your part. Many times the defects will appear to be cyclical, meaning that the lines appear in a repeating pattern (i.e. once every 15 layers). The section below will look at several common causes for these issues.
Common Solutions
Inconsistent extrusion
The most common cause for this issue is poor filament quality. If the filament does not have very tight tolerances, then you will notice this variation on the side walls of your print. For example, if your filament diameter varied by just 5% over the length of the spool, the width of the plastic extruded from the nozzle could change by as much as 0.05mm. This extra extrusion will create a layer that is wider than all the others, which will end up looking like a line on the side of the print. To create a perfectly smooth side wall, your printer needs to be able to produce a very consistent extrusion which requires high-quality plastic. For other possible causes of variation, please read the Inconsistent Extrusion section.
Temperature variation
Most 3D printers use a PID controller to regulate the temperature of the extruder. If this PID controller is not tuned properly, the temperature of the extruder may fluctuate over time. Due to the nature of how PID controllers work, this fluctuation is frequently cyclical, meaning that the temperature will vary with a sine wave pattern. As the temperature gets hotter, the plastic may flow differently than when it is cooler. This will cause the layers of the print to extrude differently, creating visible ridges on the sides of your print. A properly tuned printer should be able to maintain the extruder temperature within +/-2 degrees. During your print, you can use the machine’s control panel to monitor the temperature of your extruder. If it is varying by more than 2 degrees, you may need to recalibrate your PID controller. Please consult your printer manufacturer for exact instructions on how to do this.
Mechanical issues
If you know that inconsistent extrusion and temperature variation are not to blame, then there may be a mechanical issue that is causing lines and ridges on the sides of your print. For example, if the print bed wobbles or vibrates while printing, this can cause the nozzle position to vary. This means that some layers may be slightly thicker than others. These thicker layers will produce ridges on the sides of your print. Another common issue is a Z-axis threaded rod that is not being positioned properly. For example, due to backlash issues or poor motor controller micro-stepping settings. Even a small change in the bed position can have a major impact on the quality of each layer that is printed.

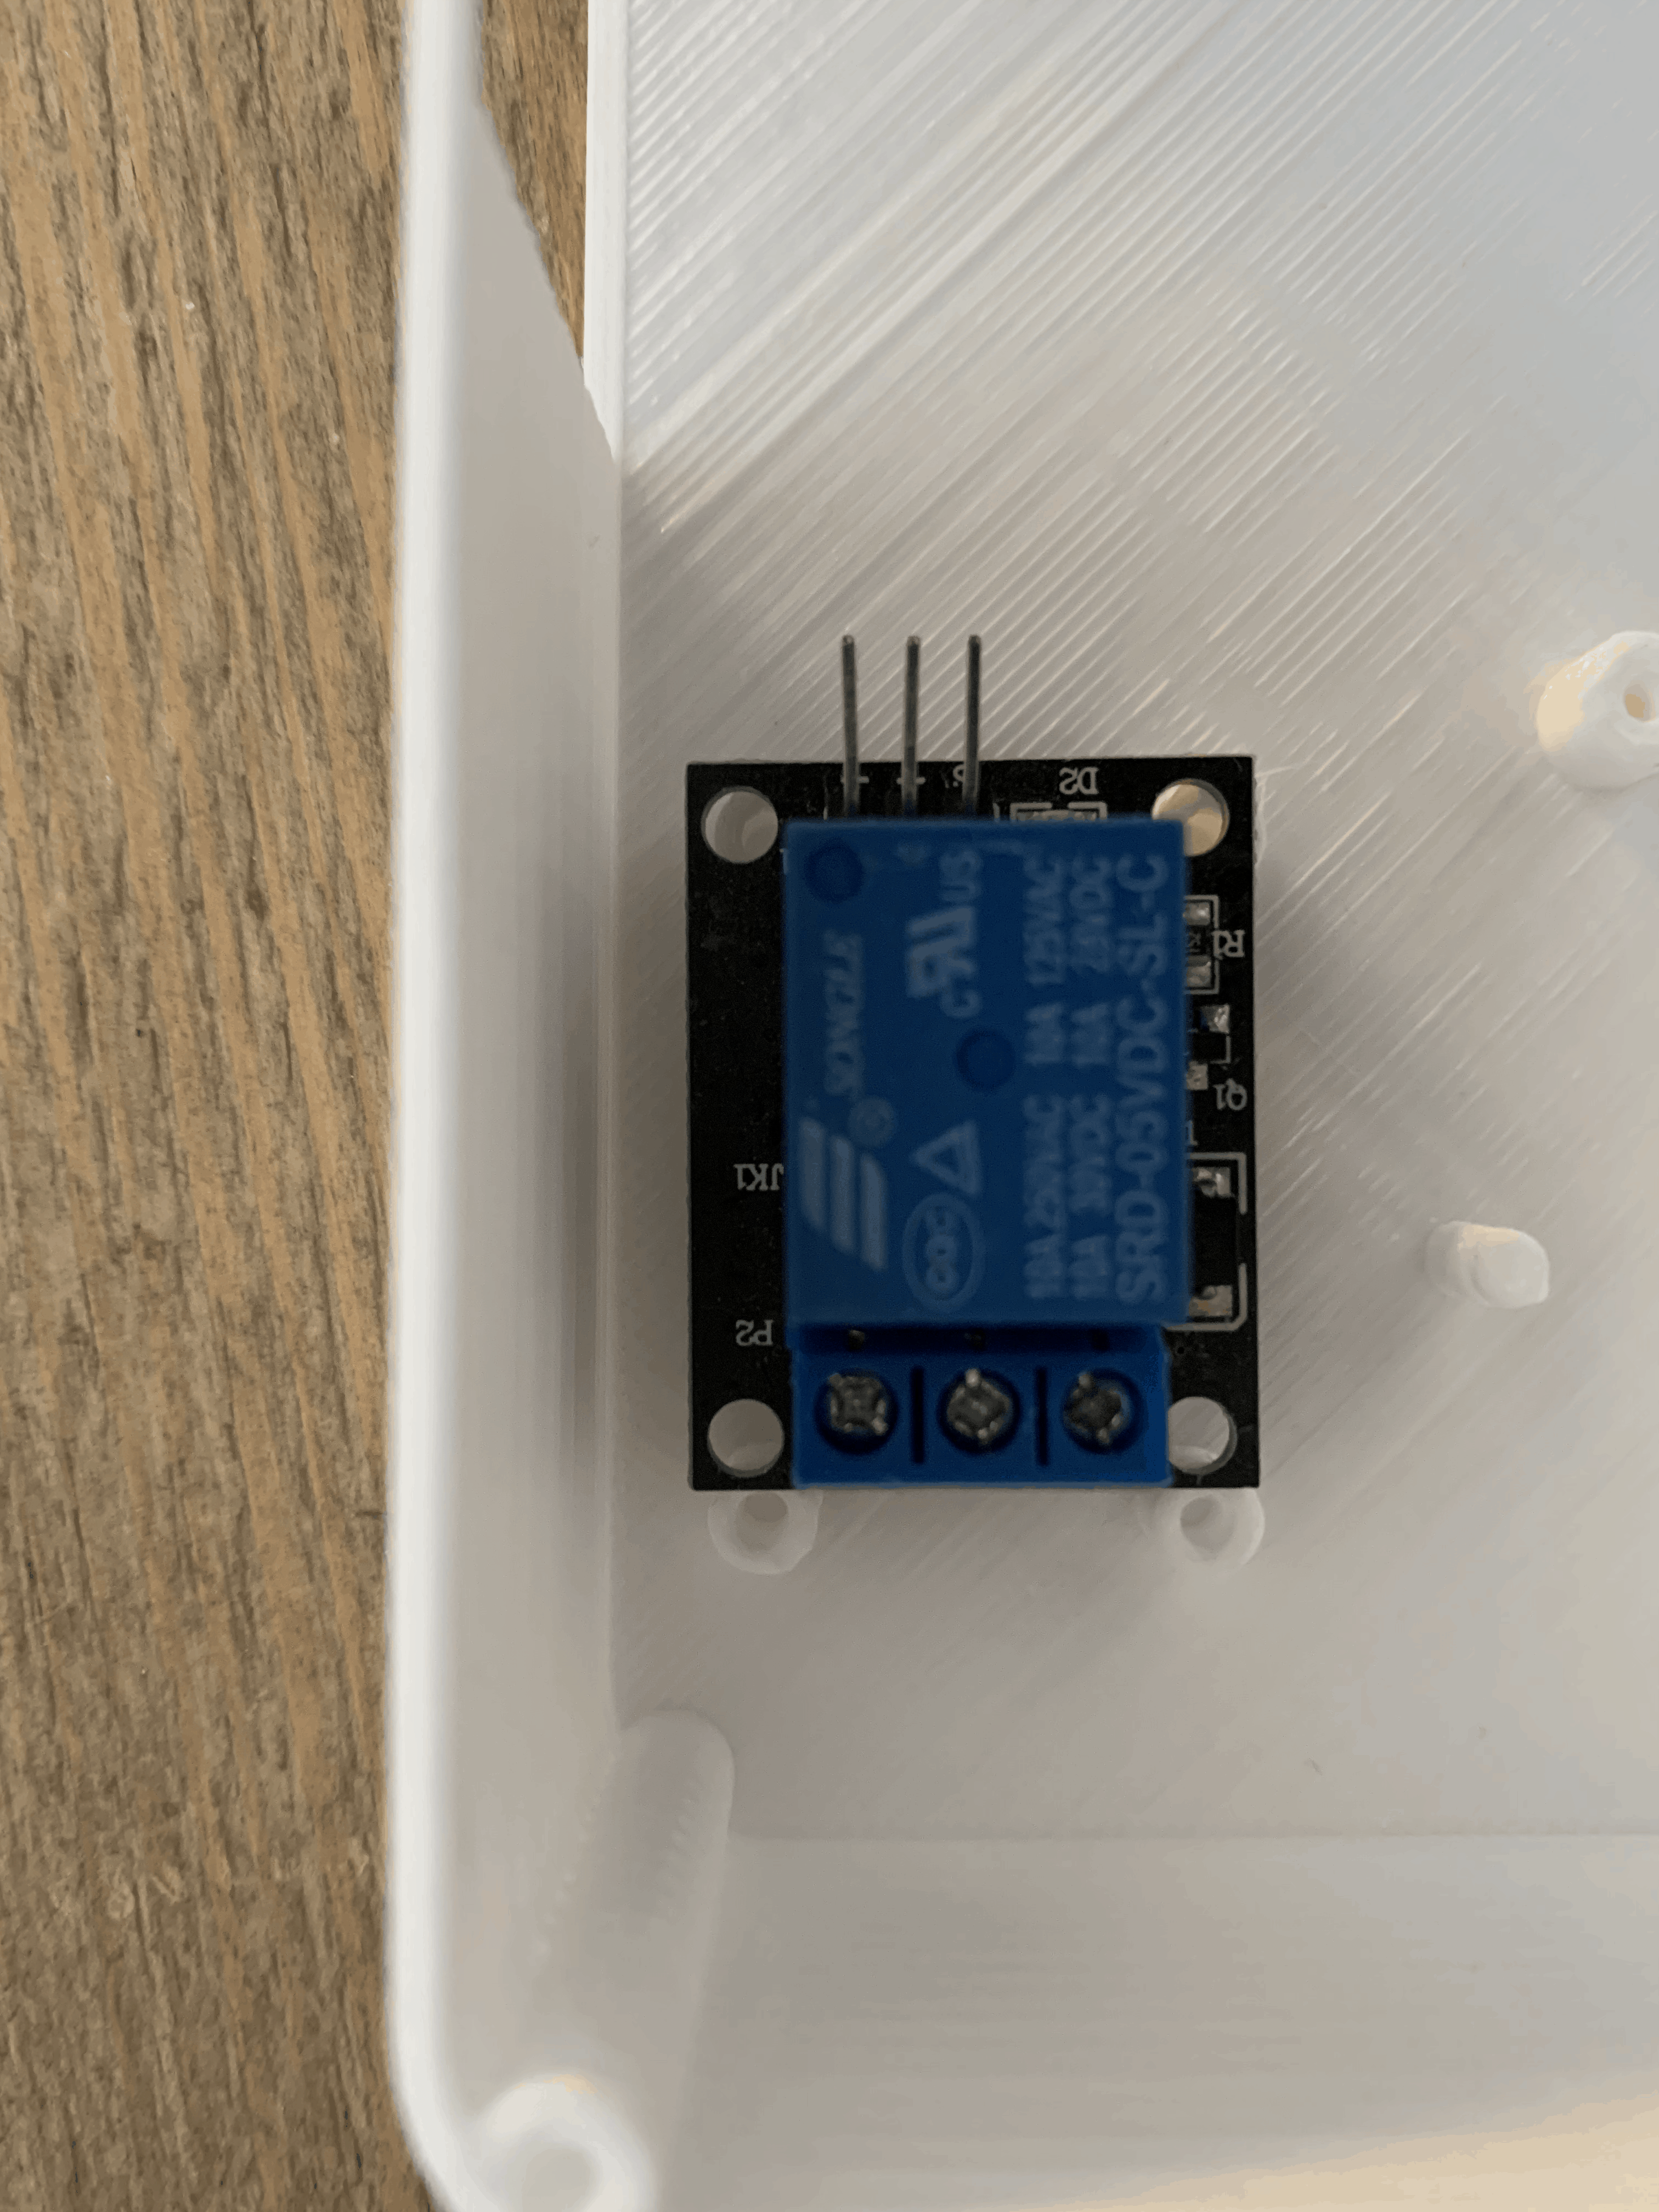
I’m gonna use my printed case anyway and print a new one later on when I fixed the problem. And believe it or not but I’am also human! I made a mistake the mounting holes for the relay are too far apart. I already fixed it in the 3D drawing so when I Print a new version this problem will be solved.
The Montage
Now It’s time to prepare the casing for the montage of the hardware. Here fore I need this tool for tapping thread and some double-sided tape.
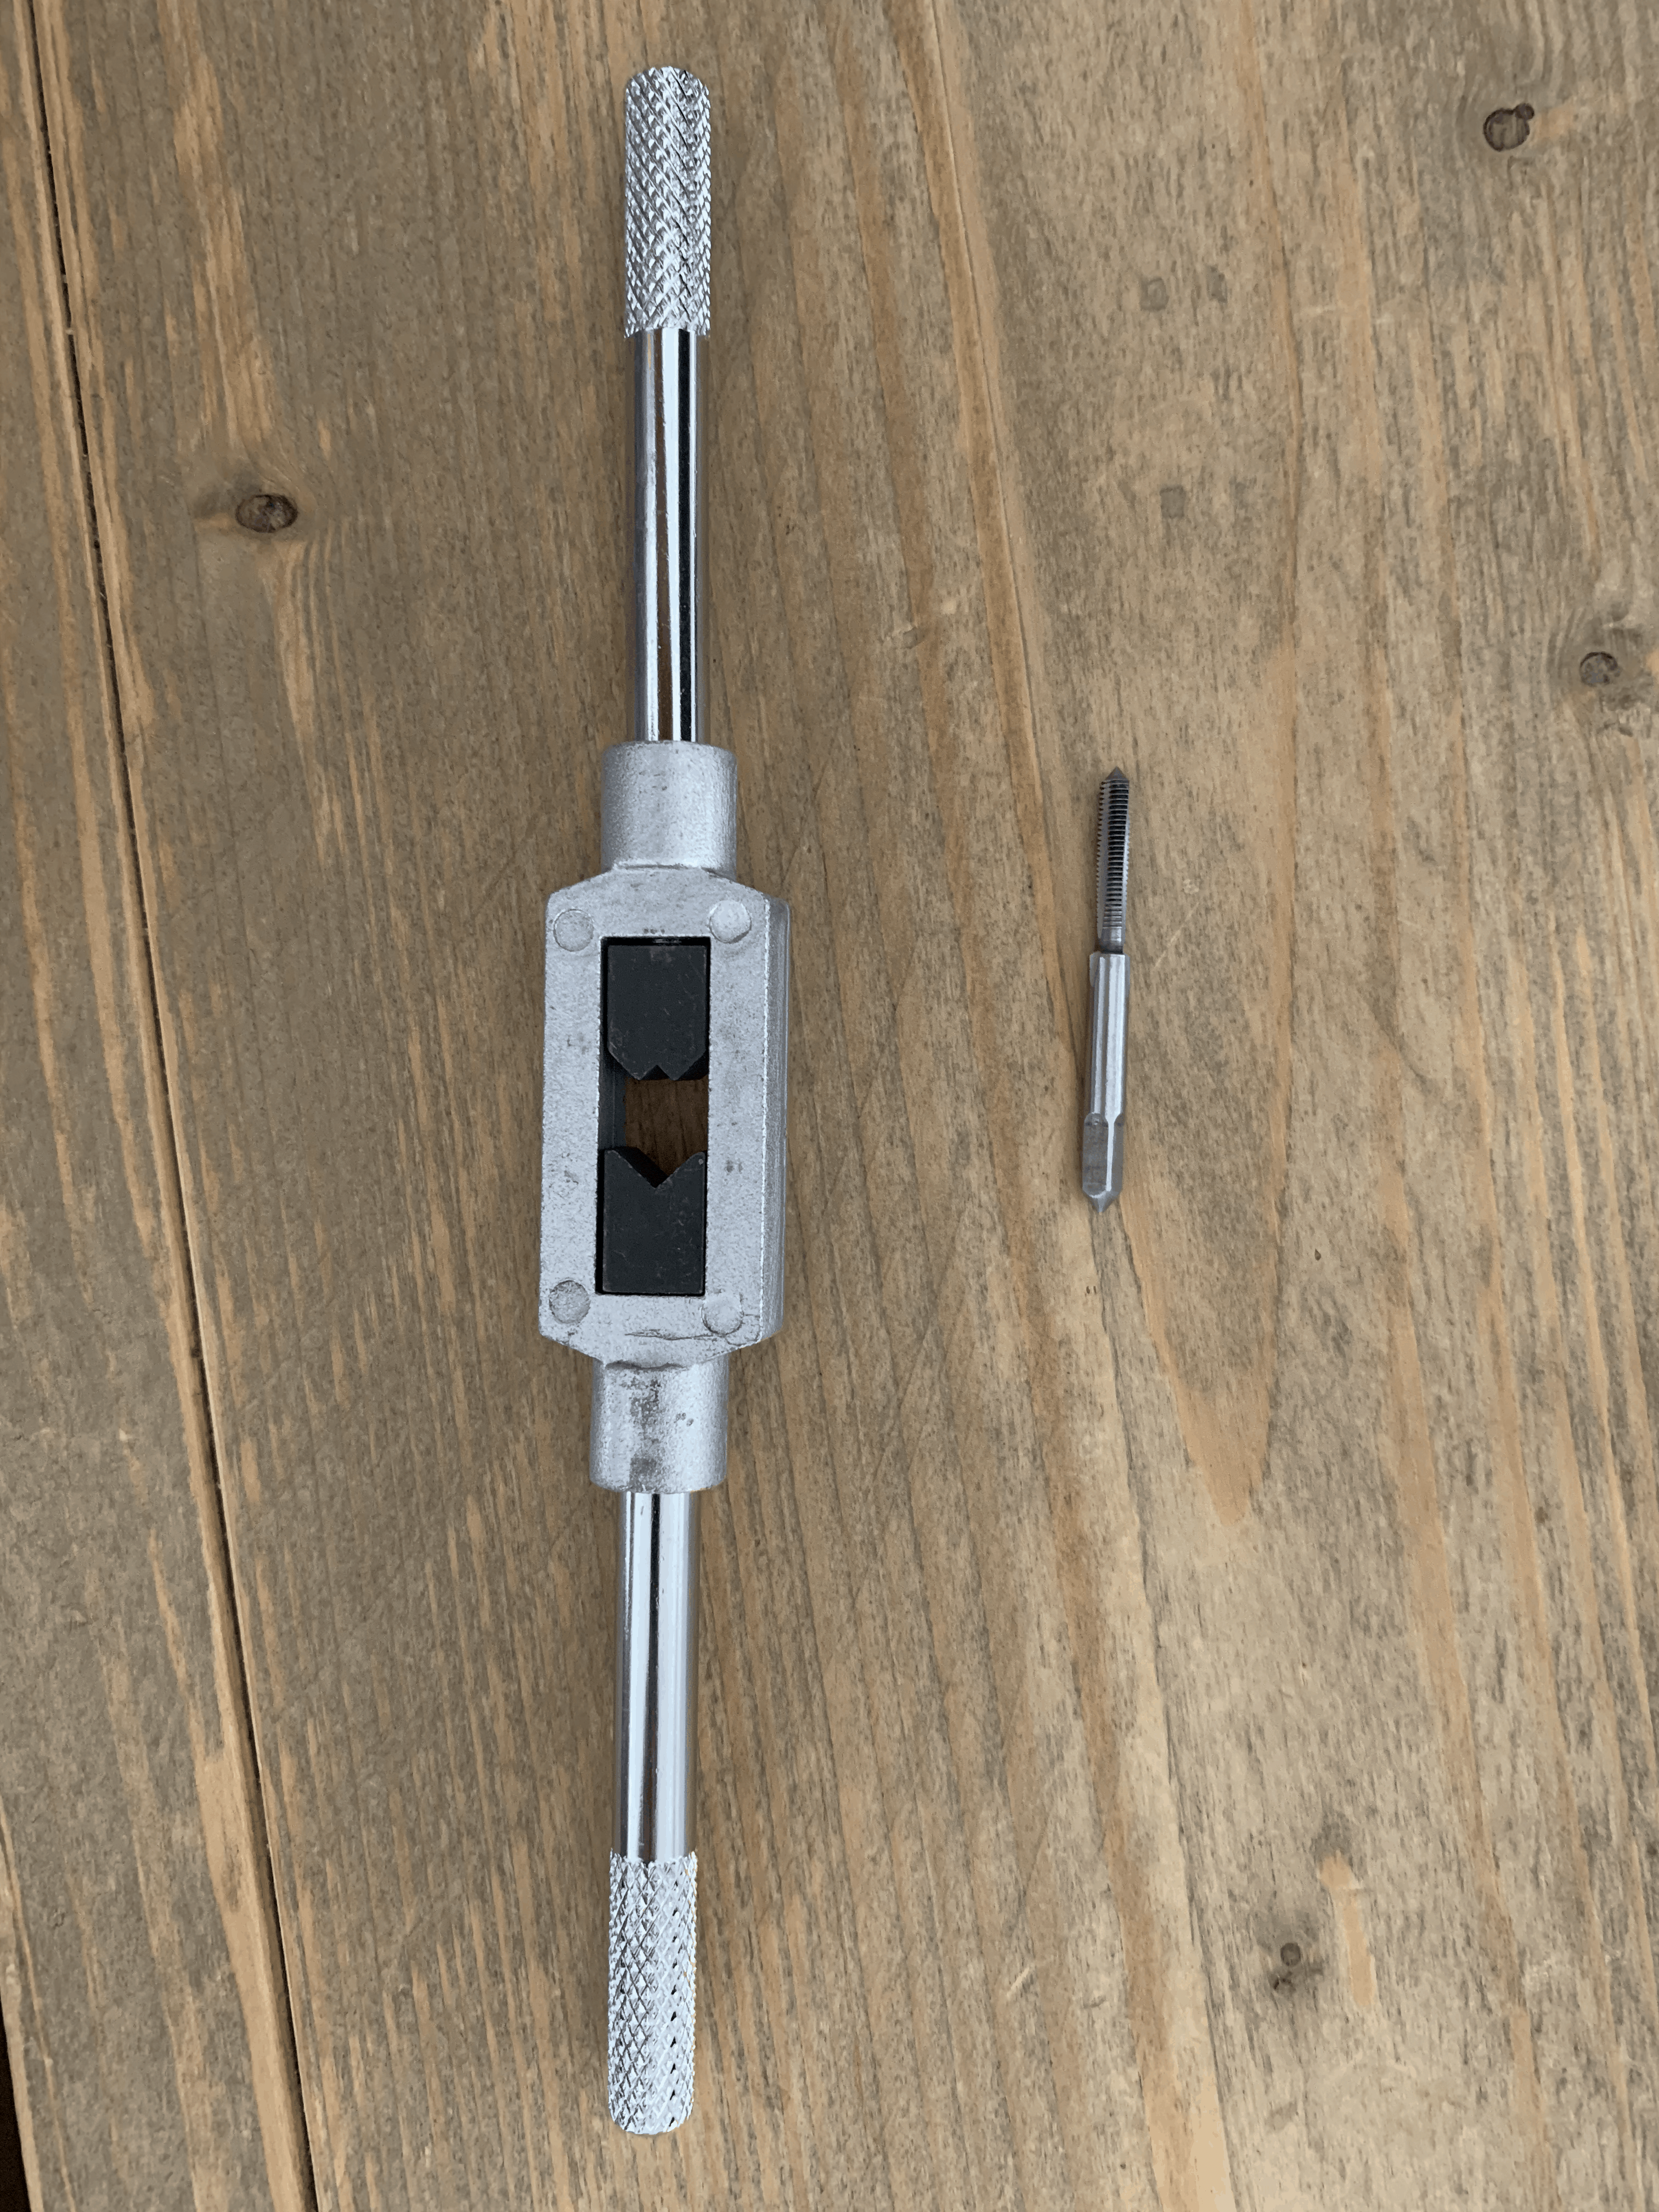
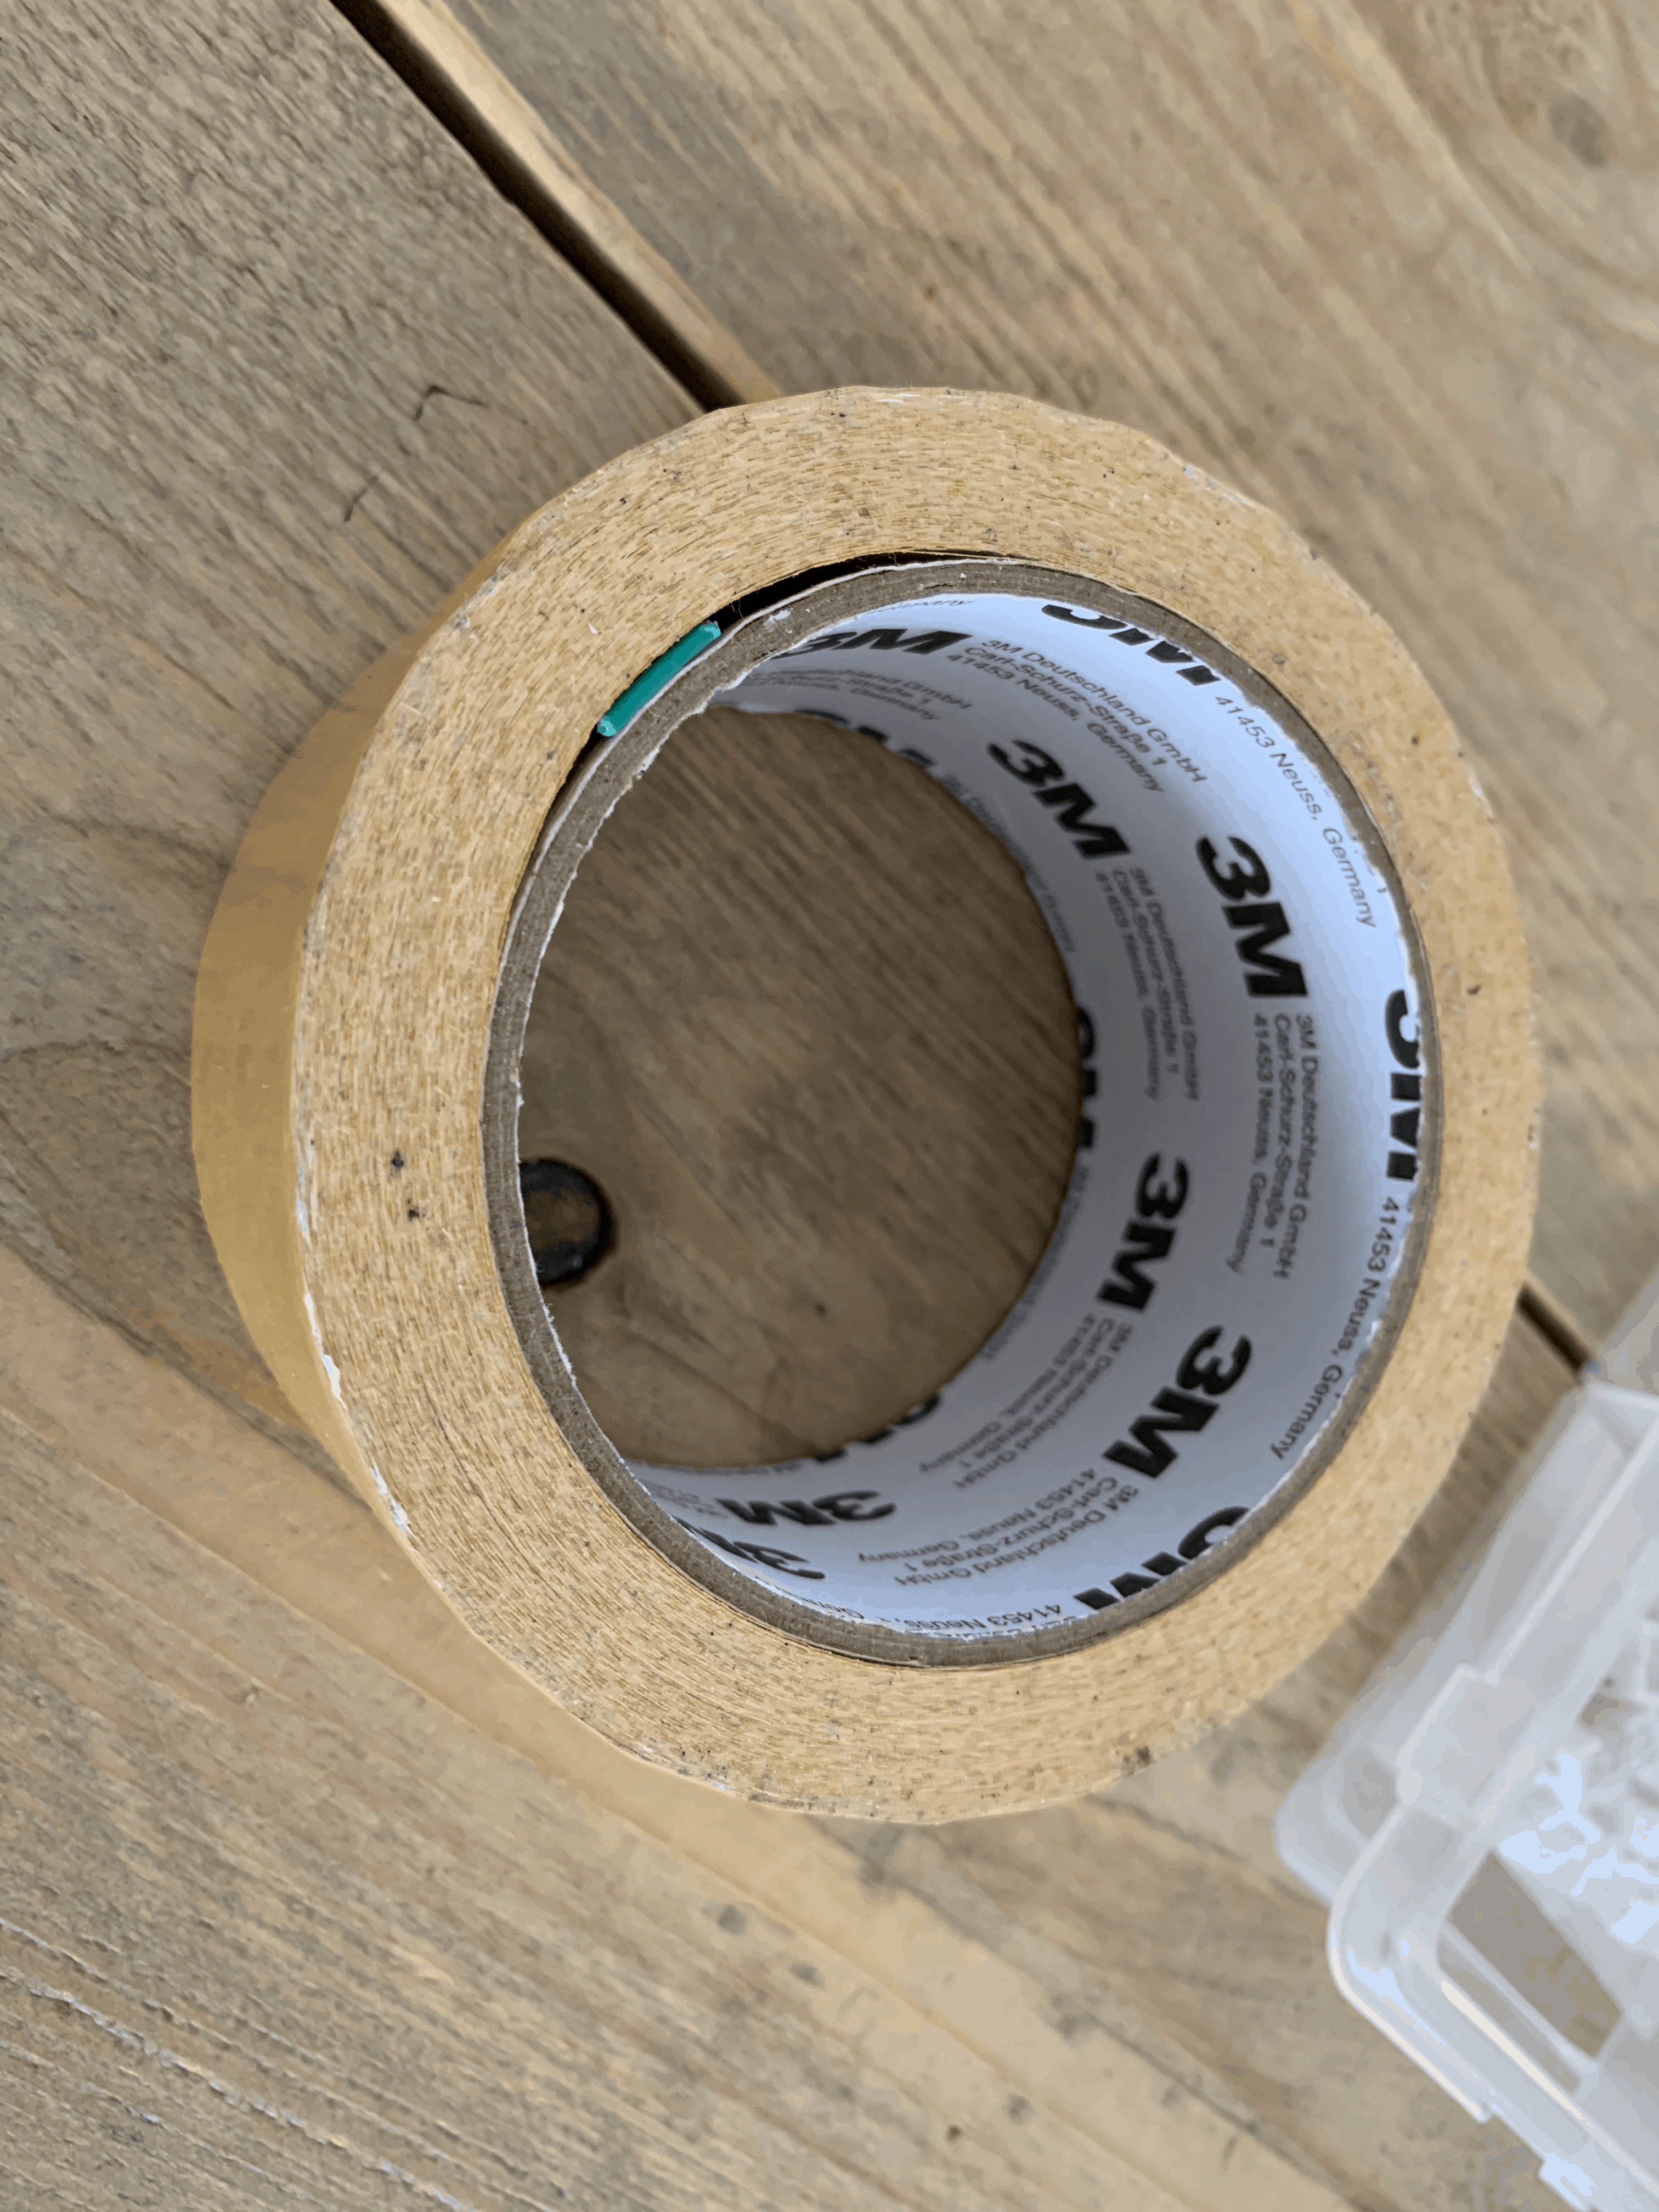
Fiets I tap thread in the whole for easy mounting the screws. Because the mounting pins for the PSU are to smattered to tap or place a screw, I mount it with some double-sided tape. And here is the end result!
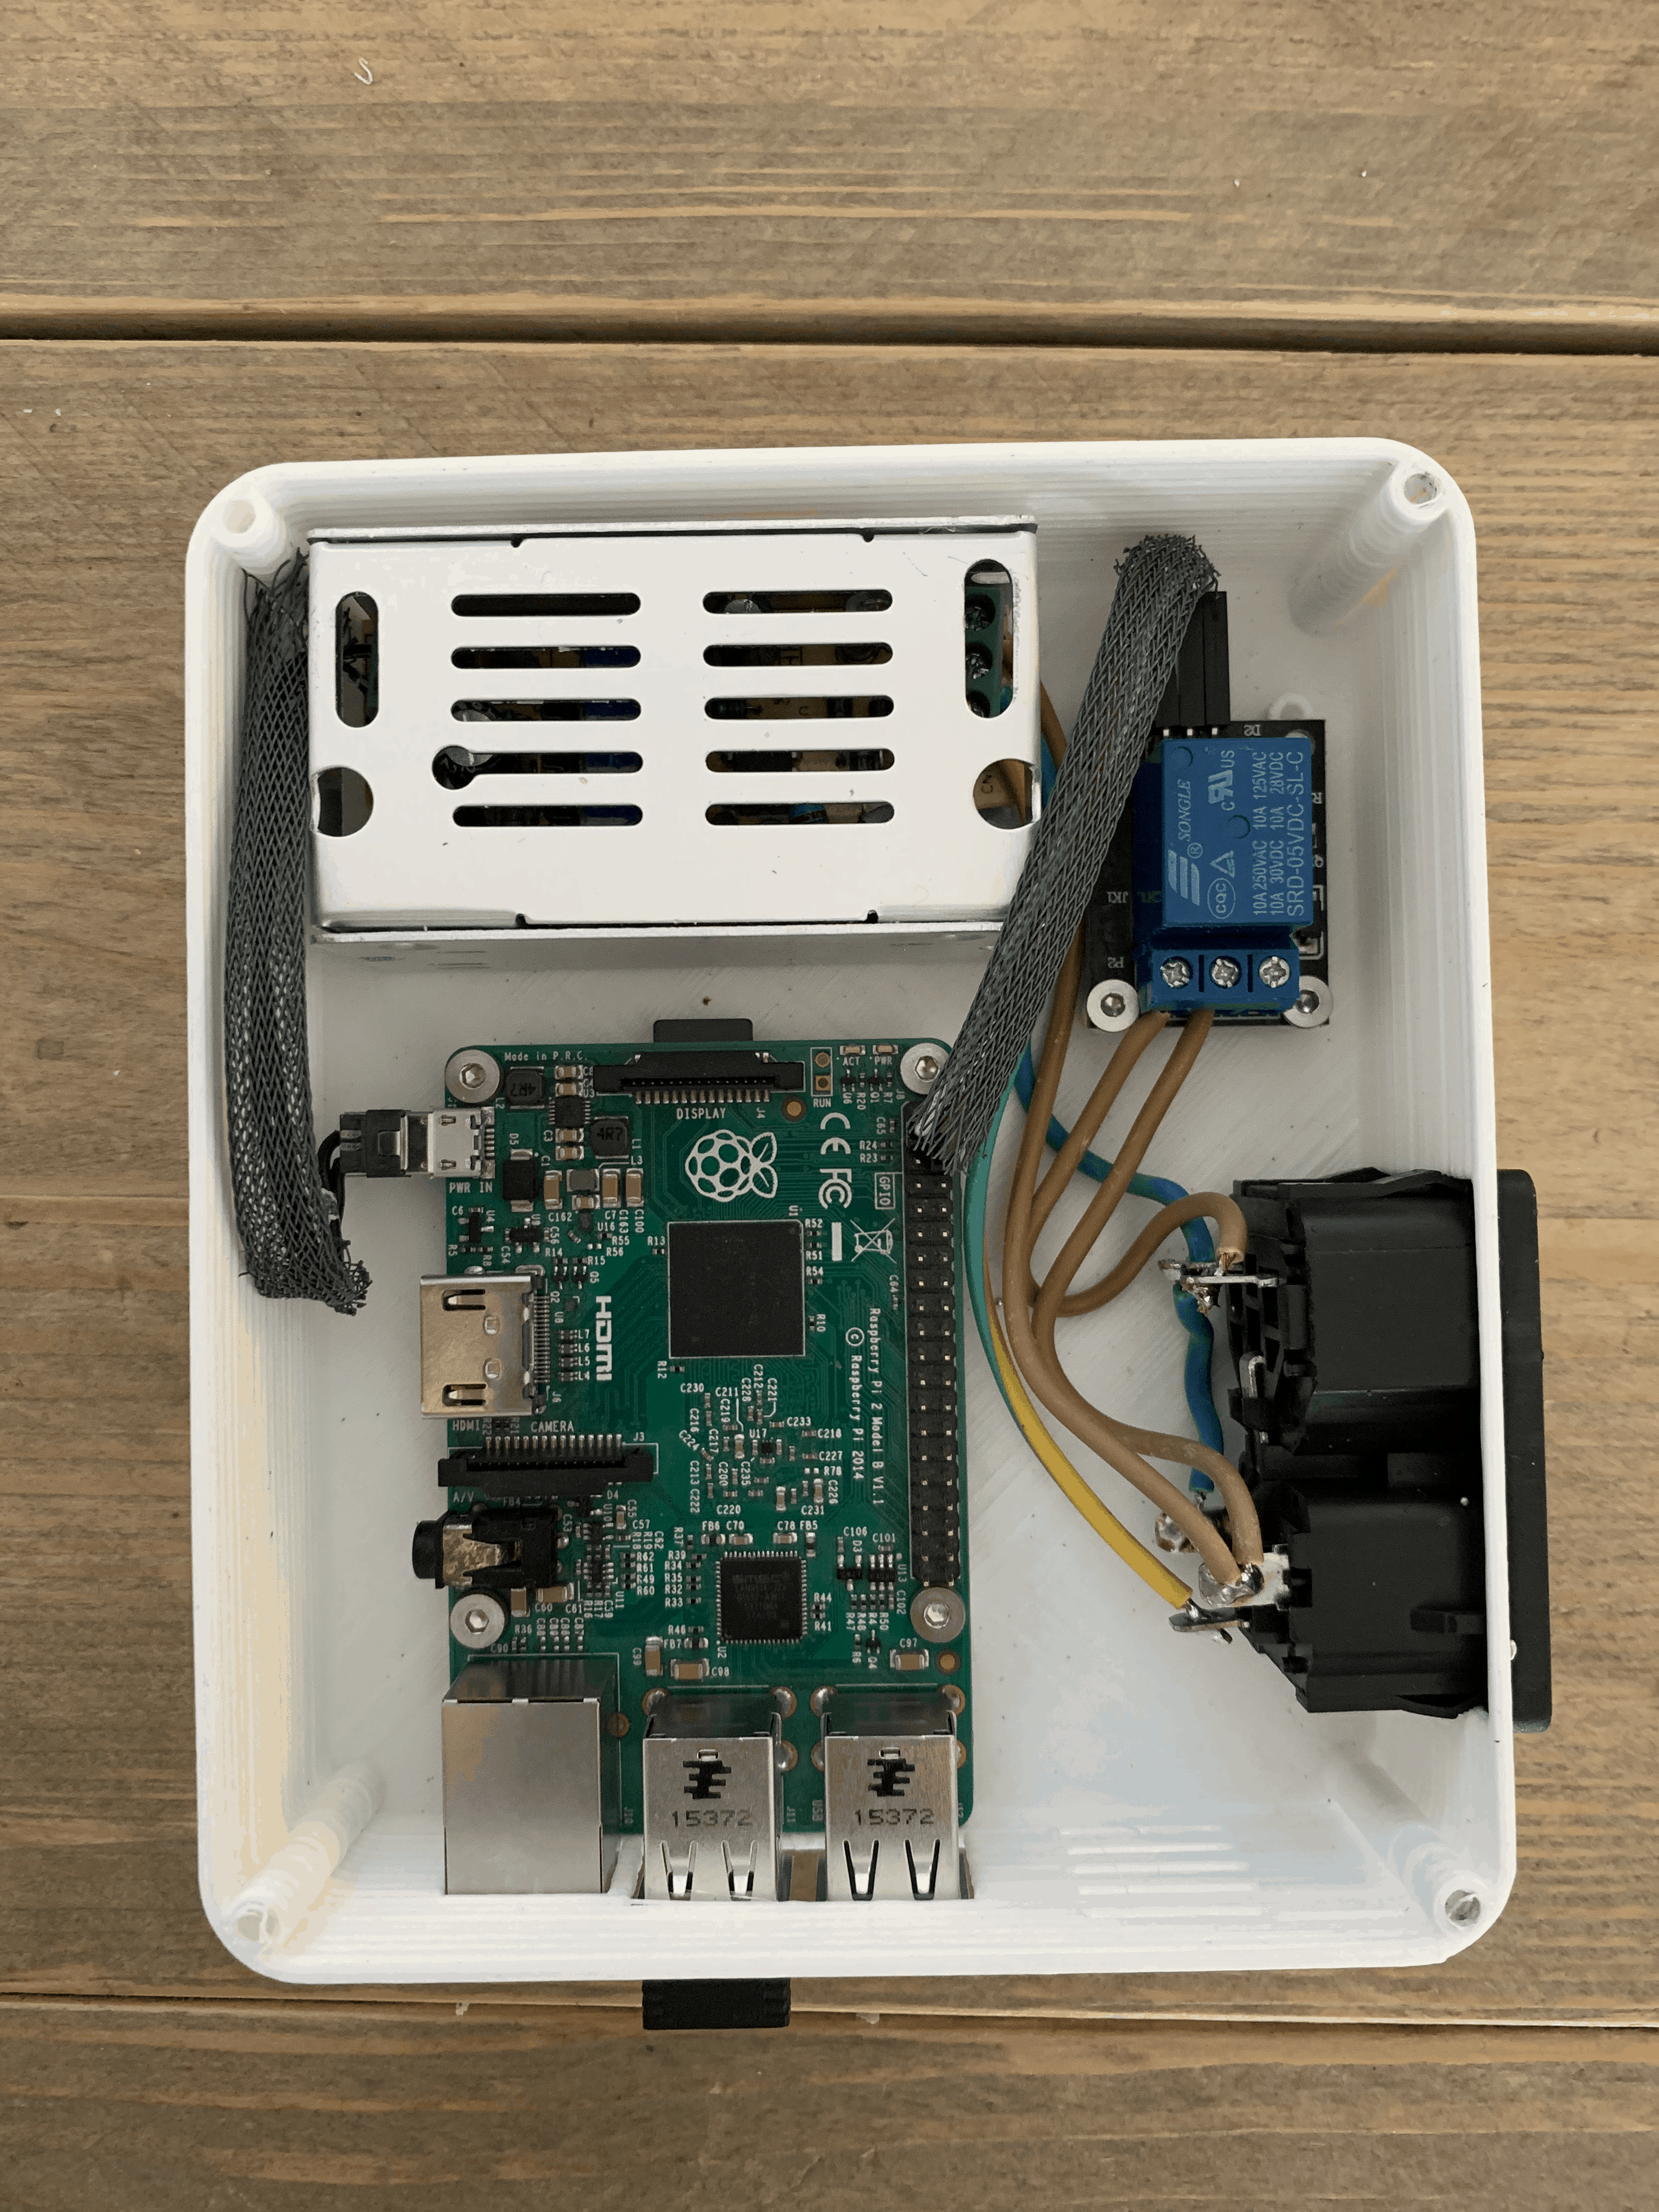
Now you can cross you fingers plug the power cord in and hope nothing blows up.

If you did everything right you’ll be able to turn your 3D on and off with Octoprint. Another first world problem solved. You’re welcome 😀
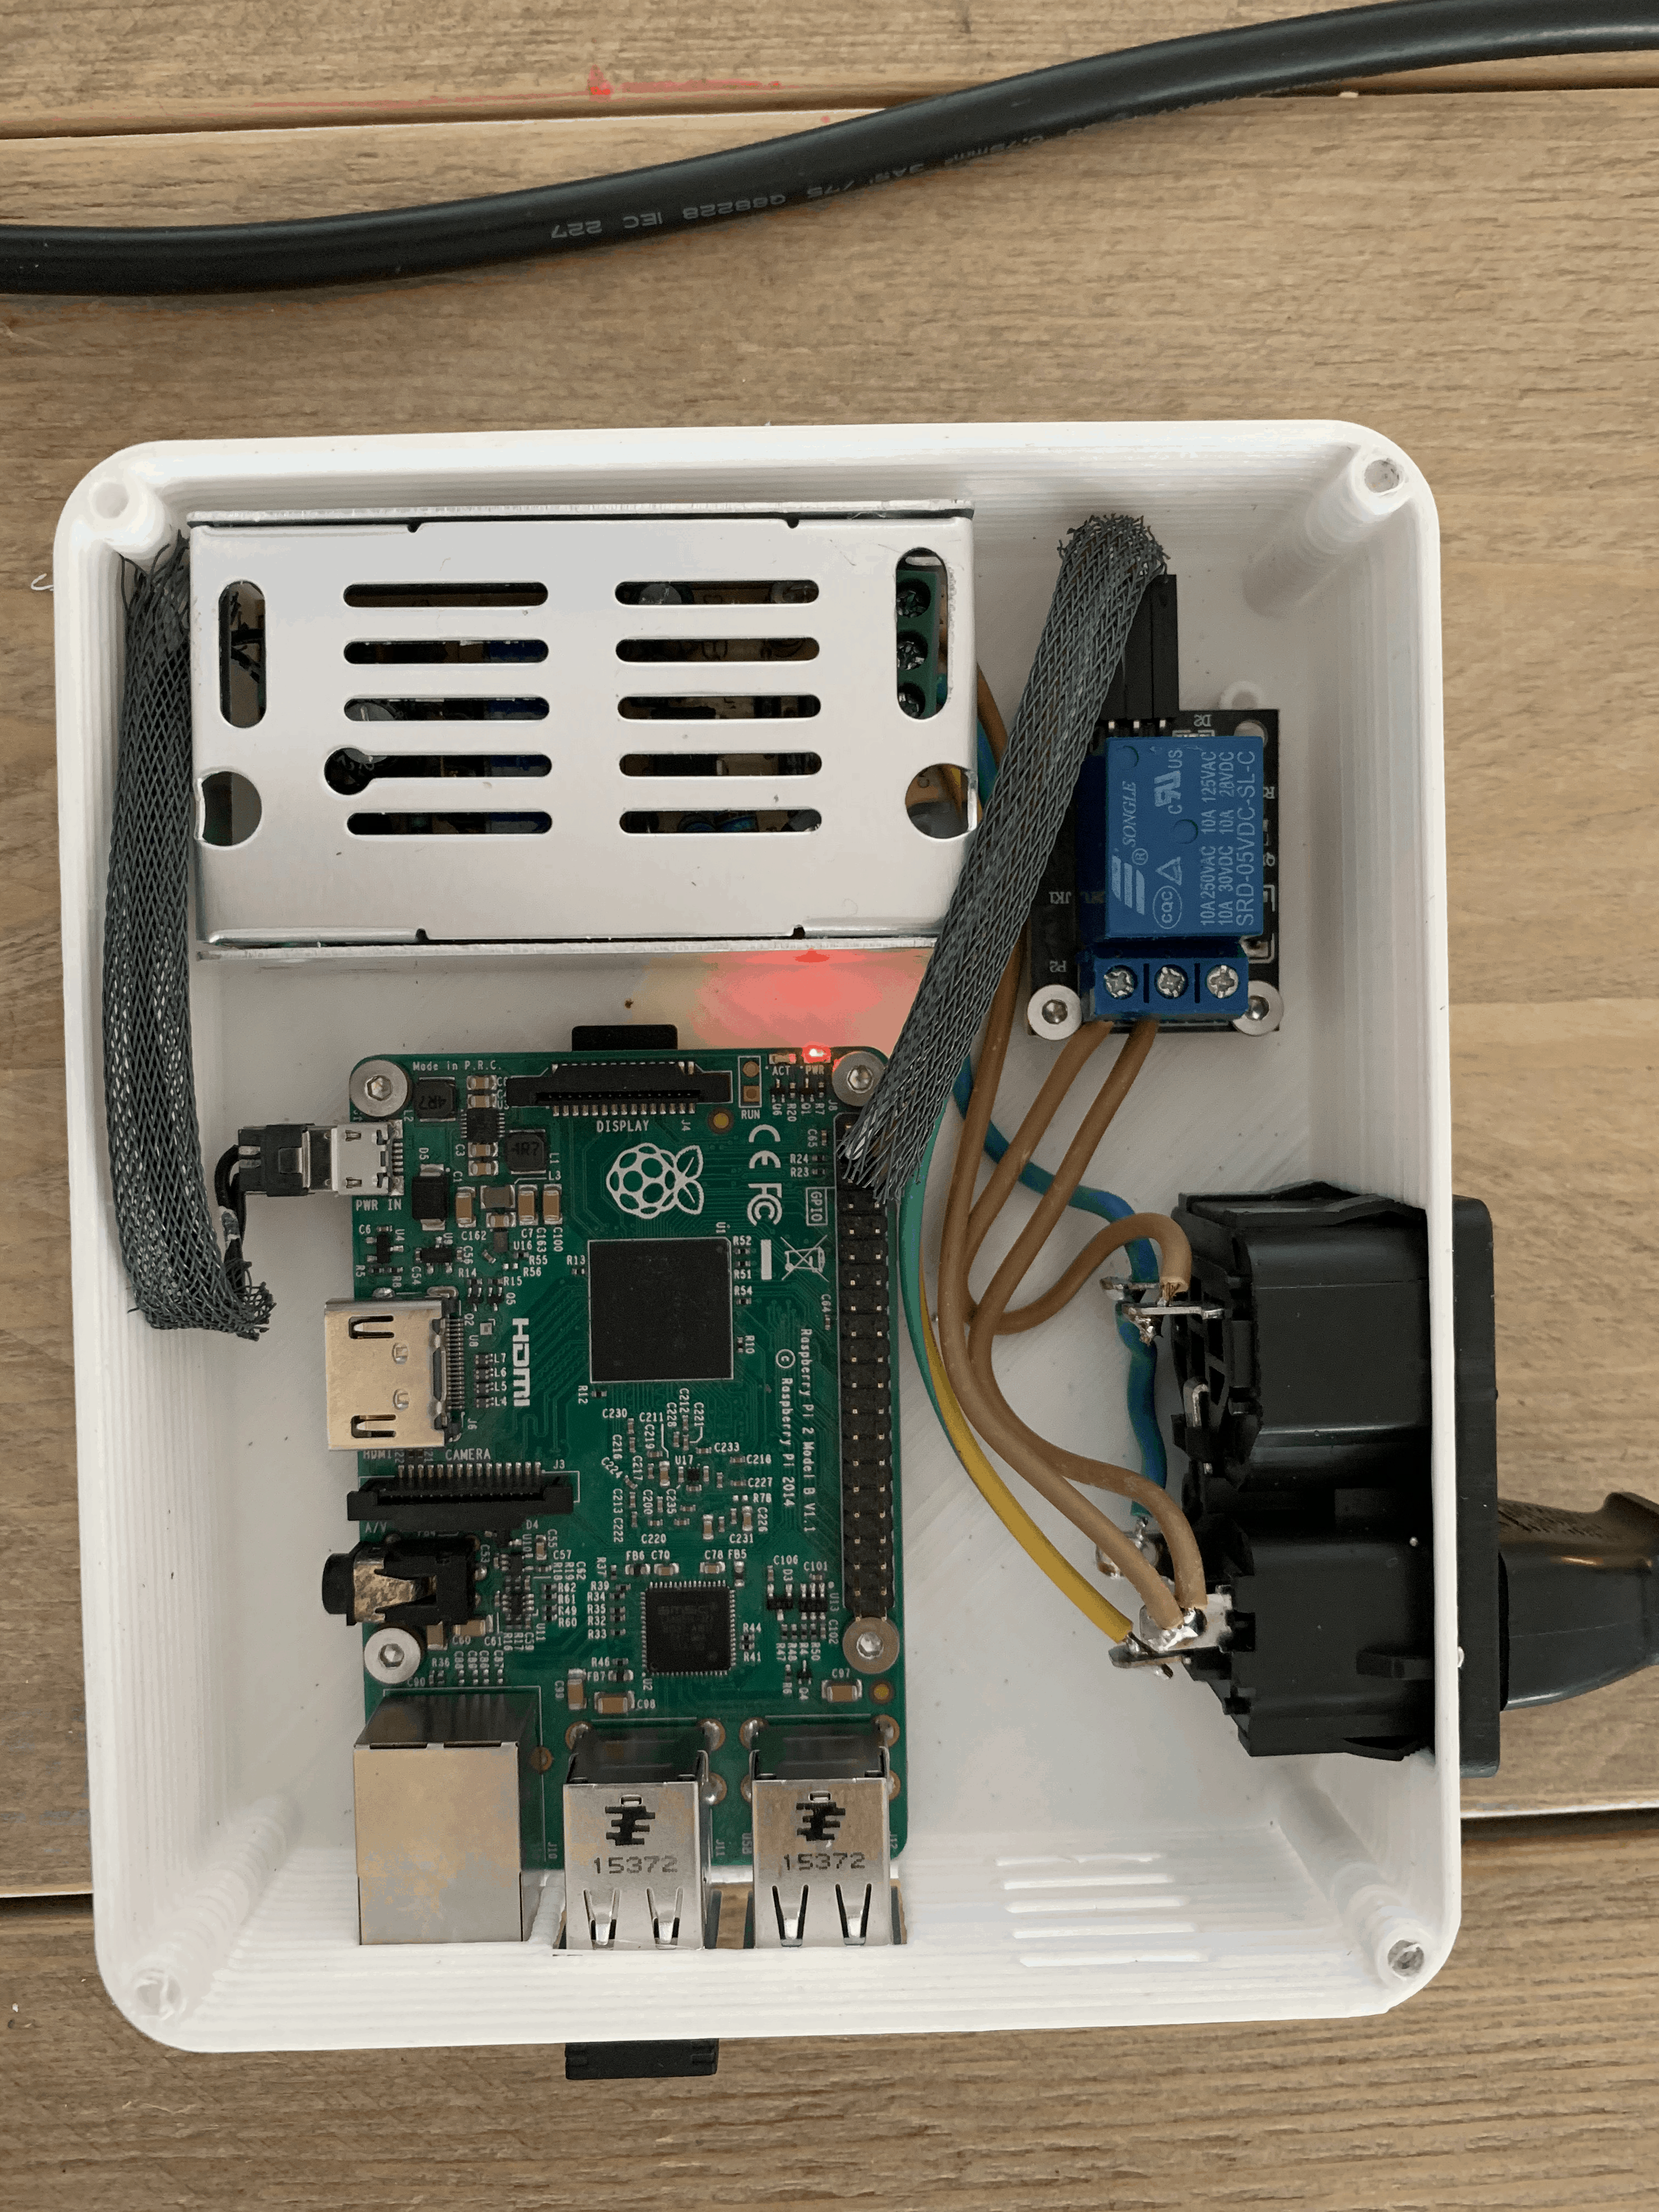
When everything works we can close the lid.
So now that this is done I want to show you one more thing. Because my printer has some trouble while writing this blog I didn’t printed yet but I don’t want to keep it from you.
OctoPrintTM Wallmount
I didn’t print it yet because I first have to troubleshoot my printer, but here it is!


You can download the files at GrabCAD of at Thingsiverse.