In my previous blogs I started a new project Raspberry Pi® – Powerunit® with a follow up about the software here. Hereafter I designed the PCB in KICAD here. It used to be, that buying PCB’s in hobby quantities, was expensive and filled with gotcha’s. Now, places like Seeed Studio can send your PCB’s to the inexpensive prototyping factory in Shenzhen China, and ship them anywhere in the world at great prices. You get two-sided PCB’s, with the works, starting at USD$4.90 per 10 PCB’s. Turnaround is a few days, worldwide shipping starts at $10. It’s a happy day for electronics hobbyists. Before you can place your order you need to generate so called Gerber files, needed for production of your PCB’s. Today I received my PCB’s.

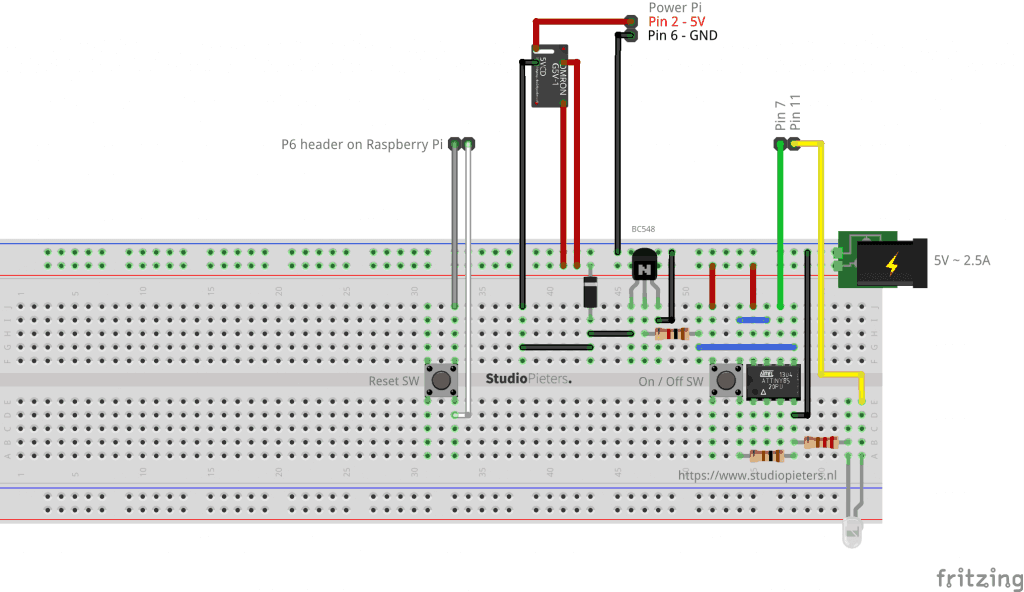
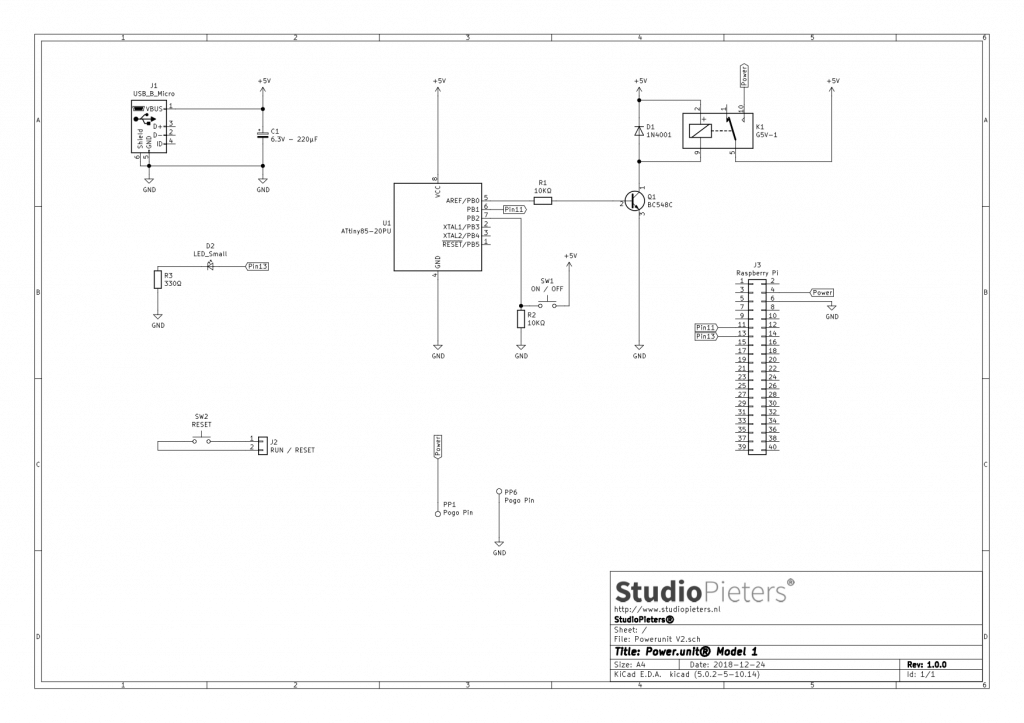
Scheme

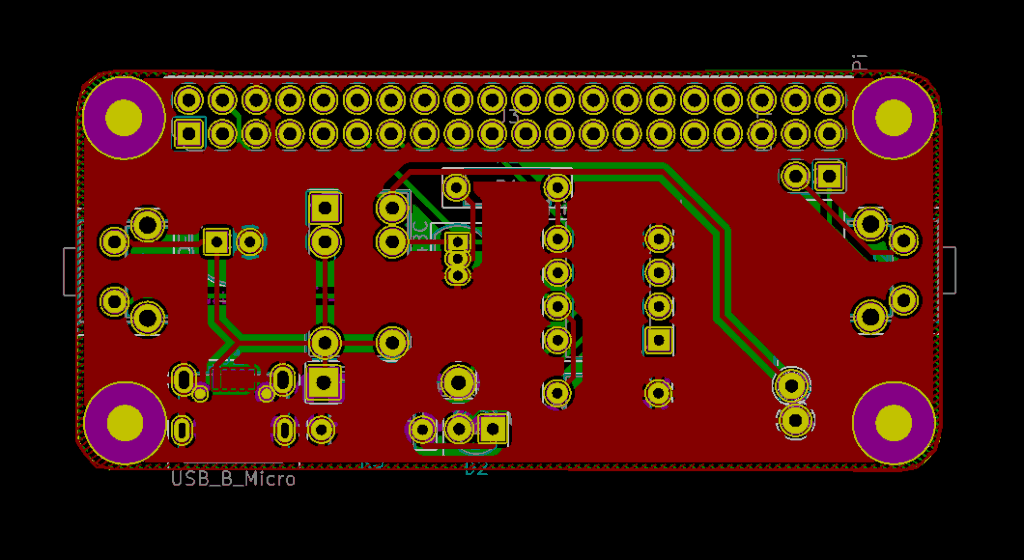
PCB
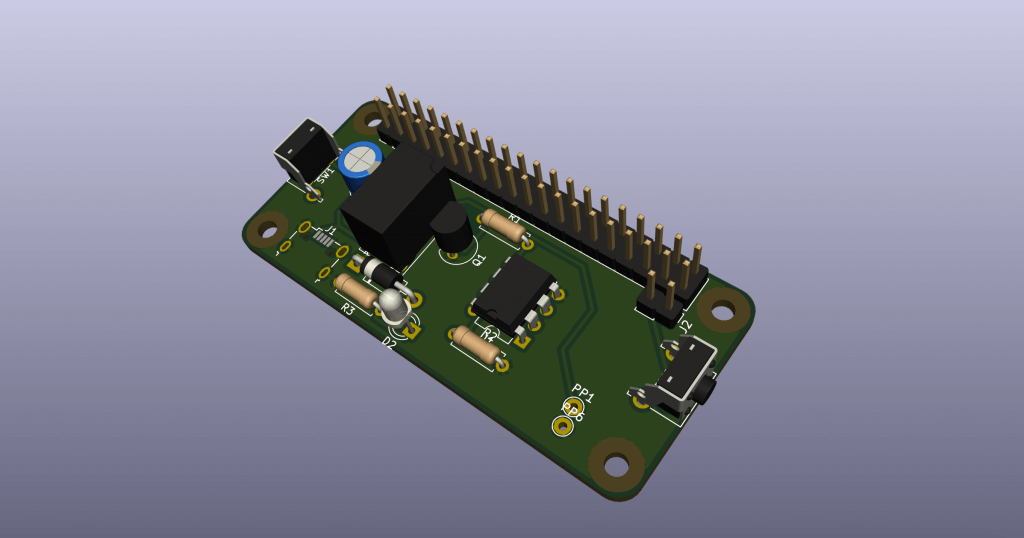
3D
With the help of KiCad’s 3D render function I could get a good idea of the final result. So after a few days of tweaking, playing and checking the footprints based on a paper printed version, It was time to order the first version of the PCB. Of course I used stylish Black PCB’s since this is in my blog’s colour palette.
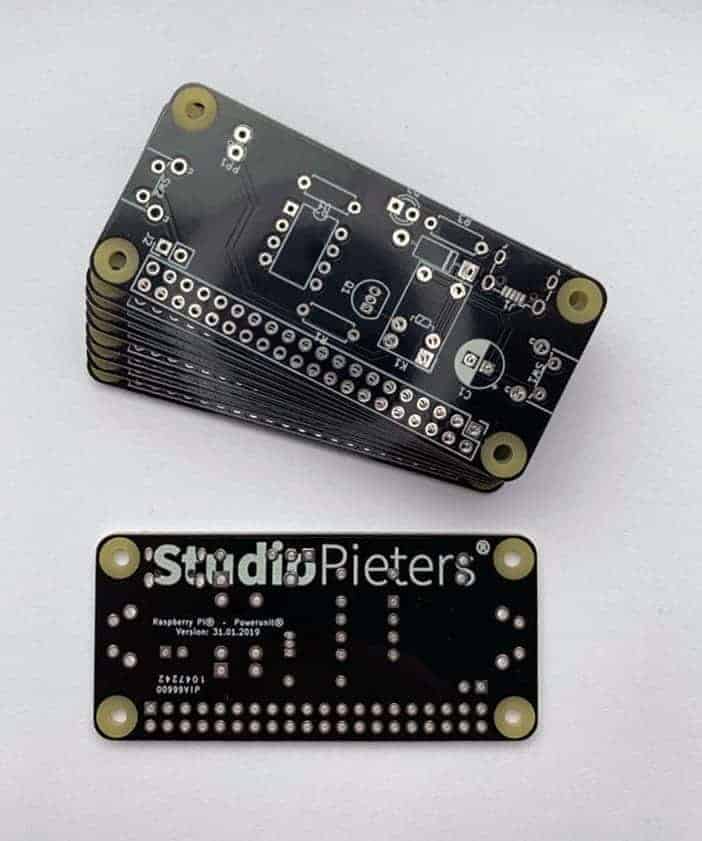
PCB in real life
The end result of the PCB really looks more beautiful than I could have hoped. The Black soldering mask really pops, and the PCB’s are the perfectly finished. On the back you can see my Blog’s name. Remember that name, it might be the blog you need for you future innovation projects.

REFERENCE
Raspberry Pi® (2019), The Raspberry Pi is a tiny and affordable computer that you can use to learn programming through fun, practical projects, https://www.raspberrypi.orgPython™ (2019 )Python is a programming language that lets you work quickly and integrate systems more effectively, https://www.python.org/ PiSupply (DEC 5 2017), Pi-Supply-Switch, Pi Sup