For a new project, I was, once again playing around with Kicad, the new version has received a lot of changes, improvements and additions again. For my current project I need a Raspberry Pi Zero W template that is not included in Kicad as standard. So time to make it myself.

Project templates
Using a project template facilitates setting up a new project with predefined settings. Templates may contain pre-defined board outlines, connector positions, schematic elements, design rules, etc. Complete schematics and/or PCBs used as seed files for the new project may even be included.
Creating templates
The template name is the directory name where the template files are stored. The metadata directory is a subdirectory named meta containing files describing the template.
All files and directories in a template are copied to the new project path when a project is created using a template, except meta.
When a new project is created from a template, all files and directories starting with the template name will be renamed with the new project file name, excluding the file extension.
The metadata consists of one required file, and may contain optional files. All files must be created by the user using a text editor or previous KiCad project files, and placed into the required directory structure.
Here is an example showing project files for raspberrypi-gpio template:
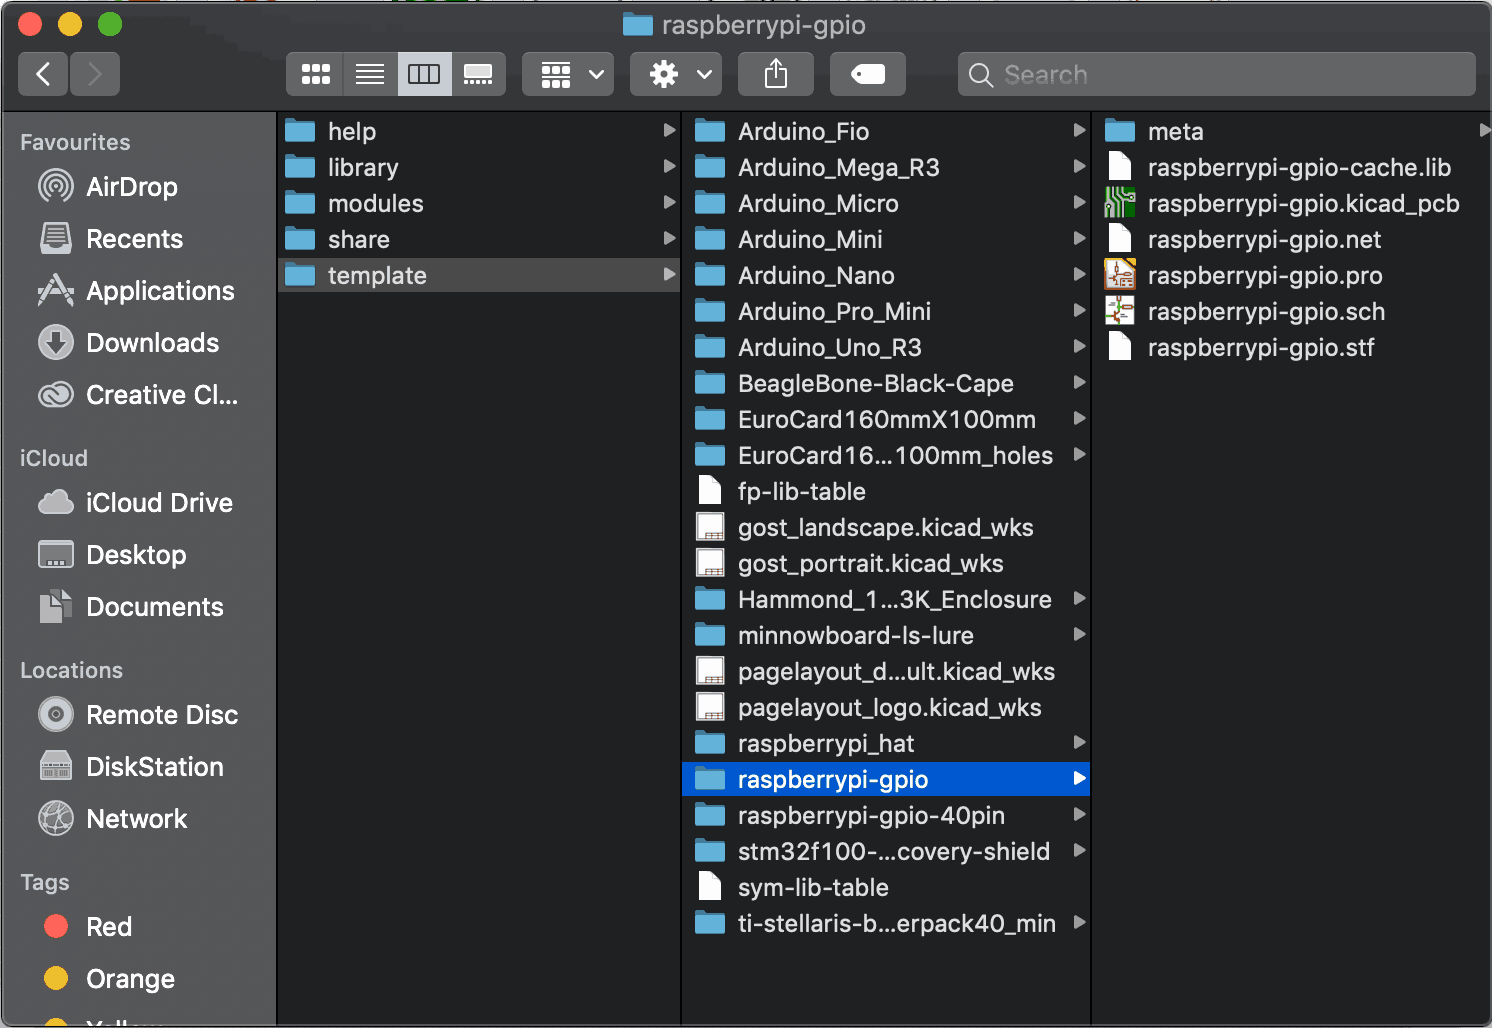
and the meta files:

Required File:
| meta/info.html | HTML-formatted information describing the template. |
The <title> tag determines the actual name of the template that is exposed to the user for template selection. Note that the project template name will be cut off if it’s too long. Due to font kerning, typically 7 or 8 characters can be displayed.
Using HTML means that images can be easily in-lined without having to invent a new scheme. Only basic HTML tags can be used in this document.
Here is a sample info.html file:
<!DOCTYPE HTML PUBLIC "-//W3C//DTD HTML 4.0 Transitional//EN"> <HTML> <HEAD> <META HTTP-EQUIV="CONTENT-TYPE" CONTENT="text/html; charset=windows-1252"> <TITLE>Raspberry Pi - Expansion Board</TITLE> <META NAME="GENERATOR" CONTENT="LibreOffice 3.6 (Windows)"> <META NAME="CREATED" CONTENT="0;0"> <META NAME="CHANGED" CONTENT="20121015;19015295"> </HEAD> <BODY LANG="fr-FR" DIR="LTR"> <P>This project template is the basis of an expansion board for the <A HREF="http://www.raspberrypi.org/" TARGET="blank">Raspberry Pi $25 ARM board.</A> <BR><BR>This base project includes a PCB edge defined as the same size as the Raspberry-Pi PCB with the connectors placed correctly to align the two boards. All IO present on the Raspberry-Pi board is connected to the project through the 0.1" expansion headers. <BR><BR>The board outline looks like the following: </P> <P><IMG SRC="brd.png" NAME="brd" ALIGN=BOTTOM WIDTH=680 HEIGHT=378 BORDER=0><BR><BR><BR><BR> </P> <P>(c)2012 Brian Sidebotham<BR>(c)2012 KiCad Developers</P> </BODY> </HTML>
Optional Files:
| meta/icon.png | A 64 x 64 pixel PNG icon file which is used as a clickable icon in the template selection dialog. |
Any other image files used by meta/info.html, such as the image of the board file in the dialog above, are placed in this folder as well. Time to make my own template.

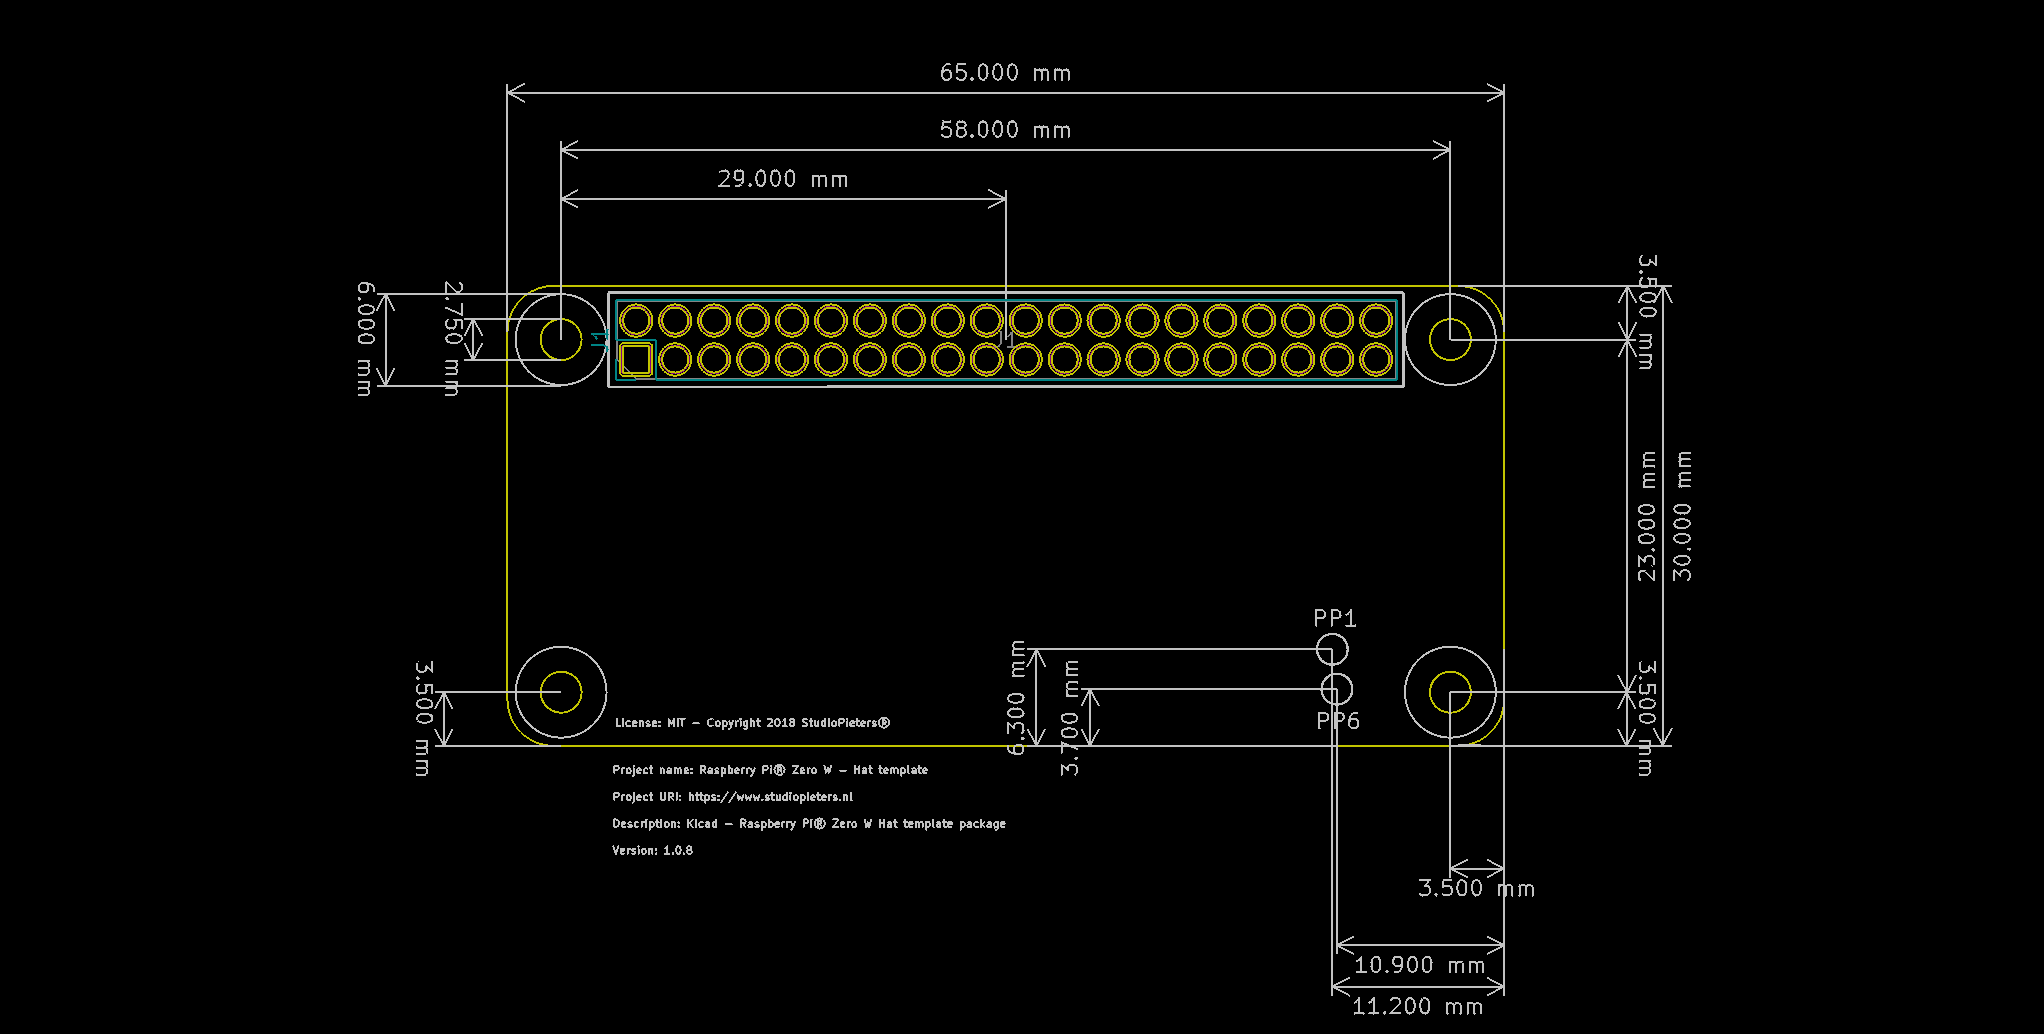
The template
After a few hours of drawing. This is the end result.
You can download aal the files down below.
Getting started
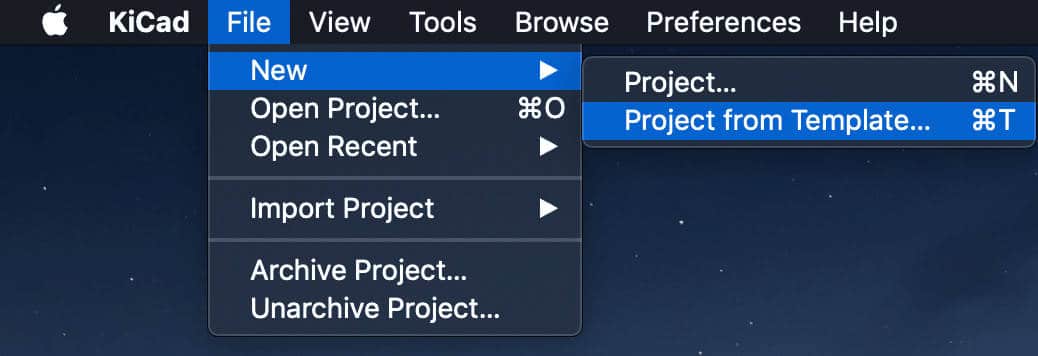
Download the template and open Kicad. Then go to File -> New -> Project form Template.
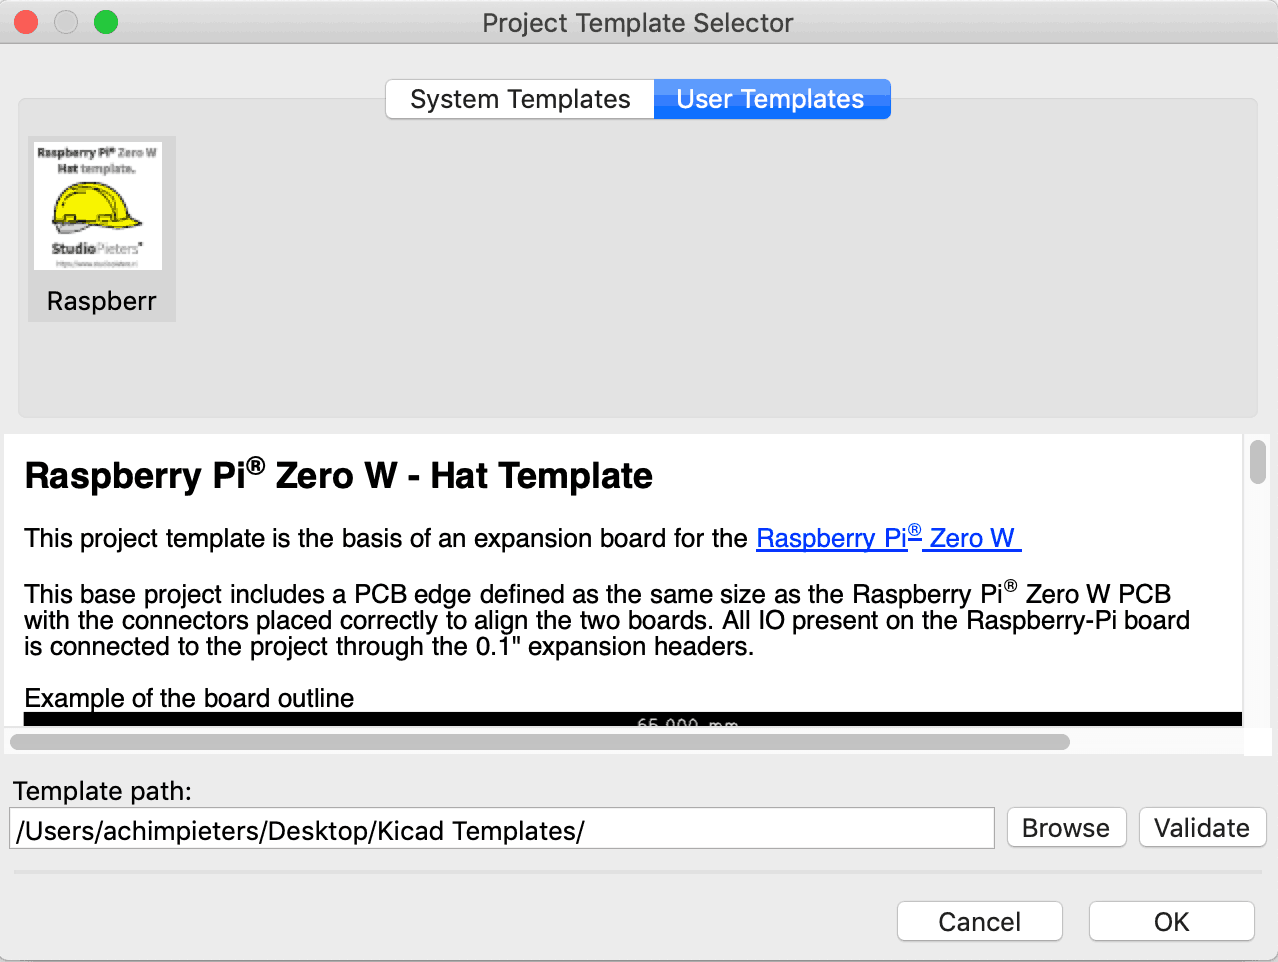
A new window will open. Now select User Templates. Then click Browse, select the directory where you put the files. Now you wil see the Template as shown below.
Now you are ready to make your own Raspberry Pi® Zero W Hat, or as many as you want.

DOWNLOAD ALL FILES FOR THIS PROJECT ON GITHUB.

DO YOU HAVE ANY QUESTIONS? LEAVE A COMMENT DOWN HERE.
REFERENCE
The KiCad Team ( 2018), Reference manual, KiCad is an open-source software tool for the creation of electronic schematic diagrams and PCB artwork. , http://docs.kicad-pcb.org/master/en/kicad.html#_introduction