The iMac is an iconic piece of hardware that I love to use. What to do when you want to increase it speed? Increasing the RAM gets you part of the way, but for a real optimisation you need an iMac SSD upgrade. Replacing the hard drive on any iMac means removing the screen. This is not for the faint hearted, but with the right instructions, it can be done.

The Hardware
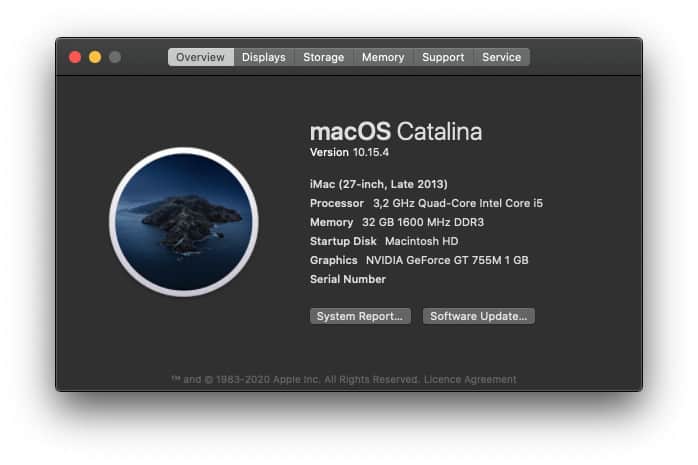
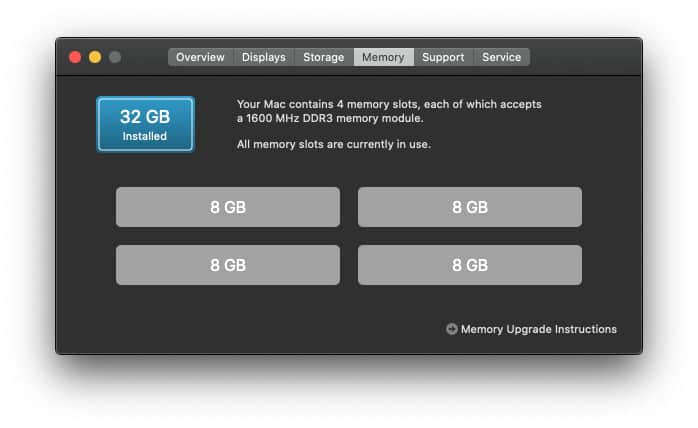
My iMac already has the maximum of RAM installed (32GB), the only other speed bottleneck is the mechanical hard drive. Upgrade to an SSD and I can make my iMac run like new. Applications will open quicker, starting up is snappy, and the overall result is extending the life of my iMac.
Replacing my mechanical hard drive with an SSD, and I should experience an incredible increase in speed. A RAM upgrade is easy, a iMac SSD upgrade is a bit harder, but after reading this blog you’ll be an expert with all the knowledge to make an SSD upgrade simple.
For general use, most iMacs have enough CPU power. I have a 2013 iMac in my office and I decide to upgrade the hard drive to an SSD. How fast can it perform? The results even surprised me. The start time went from 2 minutes to 15 seconds. It can perform moderate tasks with ease, browser, mail, word processing.
SSD performance
It is not the raw speed of the SSD, it is how it works. A traditional hard drive is like a record player, when you send data from the HDD to the CPU the computer has to find it, it hunts around the platters/disc looking for all the data. With an SSD, there is no waiting, this is because your data is effectively in a spreadsheet. The SSD knows where all your data is instantaneously. No waiting. No spinning beach ball.

The SSD is also made from flash chips that are almost as fast as the RAM. So when your Mac runs out of ram and pages to the SSD (uses the SSD as RAM) then it does not slow down, because an SSD is really like a big RAM drive!
Start using your Mac the way it was designed to be used…fast and no waiting. There is a reason most new Macs only come with SSDs. I will tried to show exactly what you need to do in simple steps.
Bracket
before I order my SSD I checked if my existing drive is 3.5 inch or 2.5 inch. If it is 3.5 inch, the new SSD needs to be screwed into an HDD bracket. Why do you need this bracket? The SSD is 2.5″, if the old iMac drive is 3.5″, so to small to mount between the rails of the old HDD.When you buy a “standard” SDD Bracket, the holes to fasten it to the iMac will not line up, you need an bracket that has al the three holes that also available on any 3.5″ drive.
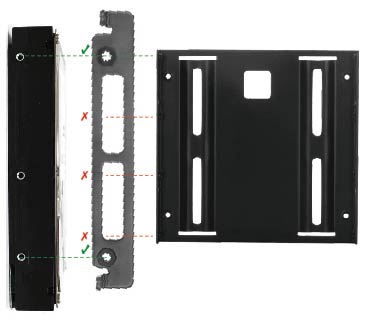
So make sure you have the right bracket, before starting your upgrade!
Software and tools
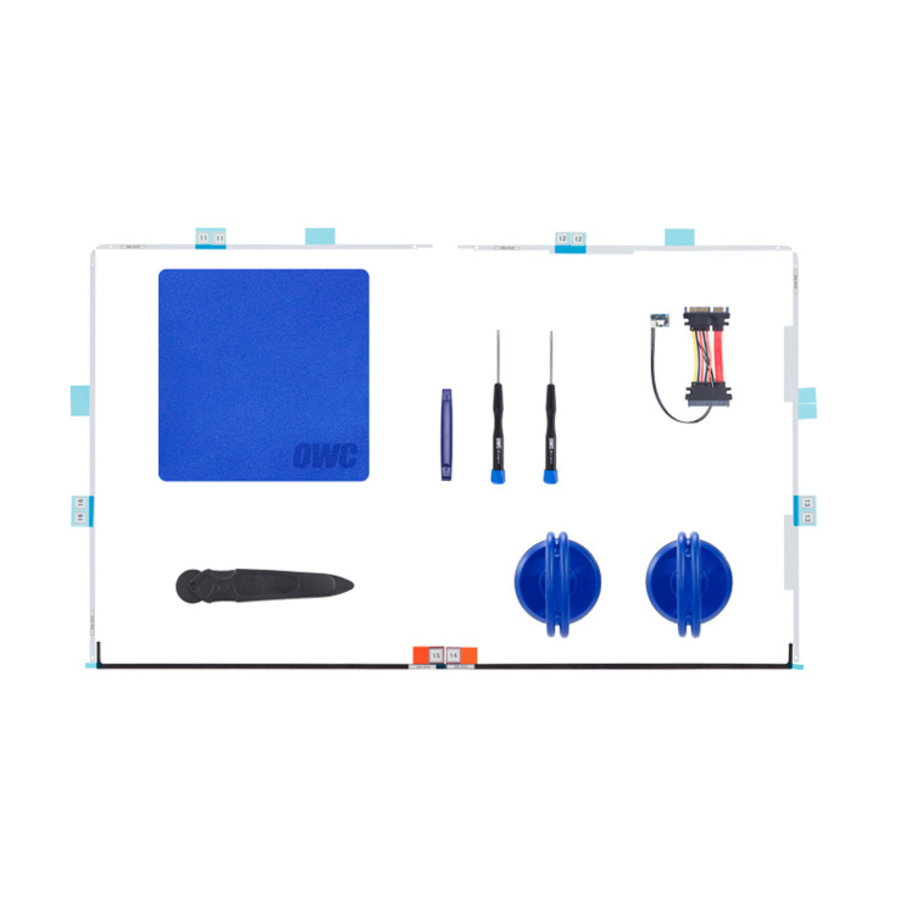
Before you can open you Mac you need som tools and software.
• Torx T8 and T10 screwdrivers.
• Heavy-Duty Suction Cups to remove the screen on your iMac.
• Adhesive strips and opener for your iMac
• A suitable Drive Bracket converts 2.5″ drive to 3.5″ size
• A temperature Sensor (OWC only).
• A SSD drive.
You can buy all this stuff you need here. But ofcrures when you search the internet you will find more stores sell this. The price will not differ because OWC is the only manufacturer selling this upgrade kit. But before we can start we need to prepare one thing.
create a macOS USB
There are a lot of options to create bootable USB to install macOS. The method we outline here is the recommended method from Apple.
This is our summary of how to make a Catalina macOS USB drive. With this drive you can install macOS on a blank SSD or boot from this USB and use the tools and utilities to check or format a Mac drive.
Download Mojave
Go to the App Store, search for macOS Catalina and download. After it has downloaded it should appear in your Applications as “Installer macOS Catalina. If you have already downloaded and upgraded to Catalina you will need to download Catalina again.
8GB USB
You need at least an 8GB USB drive. It does not have to be a super fast USB 3.0 version, and older one can be repurposed. It does not have to be a USB. You can use an external hard drive (note: any data on the drive will be lost as it gets formatted). Go into Disk Utilities and rename the USB to “upgradeable”. You can erase and rename. The MacOS creation method will reformat the drive, so it does not need to be any specific format type like Fat32 or Mac Journaled. What is important is the name of the drive, as it is used in the code below.
Using Terminal
We are going to use the command line app called Terminal to create the MacOS drive. Don’t worry if you have never used it, it is very easy, not that scary. Open Terminal, it is found in the Utilities folder in Applications.
Copy this code
Copy this code:
sudo /Applications/Install\ macOS\ Catalina.app/Contents/Resources/createinstallmedia --volume /Volumes/upgradeable
Paste the code
Paste the code you copied into Terminal and hit enter. It will ask for your system password (usually the one you log on with at start up). Type Y and return when it asks if you want to erase this drive. When it is finished creating it will display “Copy complete“. You can close Terminal.

How to use the USB
When the USB or external drive is plugged in, restart the Mac holding down the Option key. The USB will appear on screen as Install MacOS. Select and hit return. You do not need to select a network. If you are installing the macOS on a new SSD it will need to be initialised. Go into Disk Utility, Erase and name. Proceed to install macOS. Please note Apple have added a new format type in Catalina. If you are starting with a new macOS, like Catalina, then Apple recommends you use APFS and not Mac Extended journal. APFS is a new format specific designed for Catalina and above macOS and optimised for SSD drives.

Instruction video
The rest I can type here but the manufacturer has made a instruction video, so here you go!
REFERENCE
onlinemacwinkel, Mac Upgrades (2020), Hard drive upgrade Kit for iMac 27” model 2012 and later., https://www.onlinemacwinkel.nl Upgradeable, The definitive guide (2019), How To Upgrade Your iMac with an SSD, https://www.upgradeable.com.au OWC, EVERYTHING IS POSSIBLE (2020), HMake the most of your Mac with OWC, https://www.owcdigital.com