After the basics of sending and receiving data packages over MQTT it’s to combine these in a more complex project. Lets see if we can connect a neopixel strip to our homebridge.

HOMEBRIDGE
You need to setup your Apple Homebridge based on MQTT first to connect this setup with Apple HomeKit / Siri. For whom did not read my previous blog about setting up your Apple Homebridge based on MQTT you can find it here.
THE HARDWARE
NodeMCU V3 ( you can buy one here or this one here)
0.1 uF Capacitor ( you can buy one here)
Breadboard and Wires ( you can buy one here)
When I have collected al the necessary parts, I can setup the test environment like show in the image below.
![]()
SOFTWARE
To connect this hardware with our Apple Homebridge based on MQTT, we need a MQTT client. There are many open source libraries available allowing you to connect your ESP8266 to a MQTT server. The one I found most stable and complete, is the pubsubclient by Imroy. Note that there are multiple pubsubclient libraries available, so make sure you download the one by Imroy. After installing this library to your Arduino IDE, It’s time to start coding.
THE CODE
/* Project name: HomeBridge – MQTT NeoPixel
   Project URI: https://www.studiopieters.nl/homebridge-mqtt-neopixel/
   Description: HomeBridge – MQTT NeoPixel Strip
   Version: 5.0.3
   License: MIT
*/

#include <ESP8266WiFi.h>
#include <WiFiClient.h>
#include <ESP8266mDNS.h>
#include <WiFiUdp.h>
#include <PubSubClient.h>
#include <Adafruit_NeoPixel.h>

#define PIN D2 // The pin where you connect the neopixel dataline
#define NUMPIXELS 16 // How many NeoPixels are attached

Adafruit_NeoPixel strip = Adafruit_NeoPixel(NUMPIXELS, PIN, NEO_GRB + NEO_KHZ800);

const char* ssid = "YOUR SSID";
const char* password = "YOUR PASSWORD";
const char* host = "neolight"; // the name of your fixture, and the base channel to listen to
IPAddress MQTTserver(192, 168, 1, 10);

/* NO NEED TO CHANGE BENEATH THIS LINE */
int hue = 0;
float brightness = 0.0;
float saturation = 0.0;

#define BUFFER_SIZE 100

WiFiClient wclient;
PubSubClient client(wclient, MQTTserver);


void callback(const MQTT::Publish& pub) {

  uint16_t i, j;

  currentValues();
  String myMessage = String(pub.payload_string());
  // handle message arrived
  Serial.print(pub.topic());
  Serial.print(" => ");
  String myTopic = String(pub.topic());


  if (myTopic == host)
  {

    Serial.println(pub.payload_string());

    if (pub.payload_string() == "on")
    {

      // use this to reset parameters if you want them to always come on bright white.
      //hue = 0;
      brightness = 1.0;
      //saturation = 0.0;

      for (i = 0; i < strip.numPixels(); i++) {
        strip.setPixelColor(i, HSVColor(hue, saturation, brightness));
      }
      strip.show();

    }
    else
    {
      //hue = 0;
      brightness = 0.0;
      //saturation = 0.0;

      for (i = 0; i < strip.numPixels(); i++) {
        strip.setPixelColor(i, HSVColor(hue, saturation, brightness));
      }
      strip.show();
    }

  }

  else if (myTopic == host + (String)"/brightness")
  { // Brightness up to 100
    Serial.println(pub.payload_string());
    brightness = (myMessage.toFloat()) / 100;
    for (i = 0; i < strip.numPixels(); i++) {
      strip.setPixelColor(i, HSVColor(hue, saturation, brightness));
    }
    strip.show();

  }
  else if (myTopic == host + (String)"/hue")
  { // Hue value 0-360
    Serial.println(pub.payload_string());
    hue = myMessage.toInt();
    for (i = 0; i < strip.numPixels(); i++) {
      strip.setPixelColor(i, HSVColor(hue, saturation, brightness));
    }
    strip.show();

  }
  else if (myTopic == host + (String)"/saturation")
  { // Saturation value at 0-100
    Serial.println(pub.payload_string());
    saturation = (myMessage.toFloat()) / 100;
    for (i = 0; i < strip.numPixels(); i++) {
      strip.setPixelColor(i, HSVColor(hue, saturation, brightness));
    }
    strip.show();
  }
  currentValues();
}

void setup() {
  Serial.begin(115200);
  Serial.println("Booting");
  WiFi.mode(WIFI_STA);
  WiFi.begin(ssid, password);
  while (WiFi.waitForConnectResult() != WL_CONNECTED) {
    Serial.println("Connection Failed! Rebooting...");
    delay(5000);
    ESP.restart();
  }

  Serial.println("Ready");
  Serial.print("IP address: ");
  Serial.println(WiFi.localIP());

  // MQTT callback
  client.set_callback(callback);

  strip.begin();
  strip.show(); // Initialize all pixels to 'off'

}

void loop() {
  if (WiFi.status() == WL_CONNECTED) {
    if (!client.connected()) {
      if (client.connect("ESP8266: Fountain")) {
        client.publish("outTopic", (String)"hello world, I'm " + host);
        client.subscribe(host + (String)"/#");
      }
    }

    if (client.connected())
      client.loop();
  }

}

// Convert Hue/Saturation/Brightness values to a packed 32-bit RBG color.
// hue must be a float value between 0 and 360
// saturation must be a float value between 0 and 1
// brightness must be a float value between 0 and 1
uint32_t HSVColor(float h, float s, float v) {

  h = constrain(h, 0, 360);
  s = constrain(s, 0, 1);
  v = constrain(v, 0, 1);

  int i, b, p, q, t;
  float f;

  h /= 60.0;  // sector 0 to 5
  i = floor( h );
  f = h - i;  // factorial part of h

  b = v * 255;
  p = v * ( 1 - s ) * 255;
  q = v * ( 1 - s * f ) * 255;
  t = v * ( 1 - s * ( 1 - f ) ) * 255;

  switch ( i ) {
    case 0:
      return strip.Color(b, t, p);
    case 1:
      return strip.Color(q, b, p);
    case 2:
      return strip.Color(p, b, t);
    case 3:
      return strip.Color(p, q, b);
    case 4:
      return strip.Color(t, p, b);
    default:
      return strip.Color(b, p, q);
  }
}

void currentValues() {
  Serial.println("");
  Serial.println("Current State");
  Serial.print("Hue (0-360):");
  Serial.println(hue);
  Serial.print("Saturation (0-100 in, 0-1):");
  Serial.println(saturation * 100);
  Serial.print("Brightness (0-100):");
  Serial.println(brightness * 100);
  Serial.println("");
}
First off, lets start by adding your Network Credentials:
const char *ssid = "Your_SSID"; // cannot be longer than 32 characters!
const char *pass = "Your_PASS"; //
Now you have to add the IP address of your Apple Homebridge based on MQTT:
IPAddress server(192, 168, 1, 10);
The you only need to add the Intopic to your code:
const char* host = "neolight"; // the name of your fixture, and the base channel to listen to
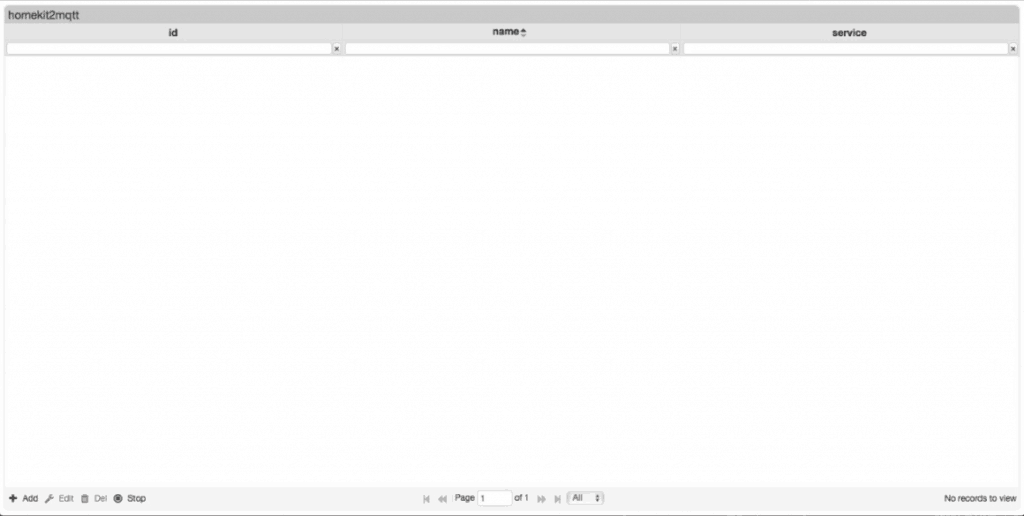
You can find the intopic when you have your Apple Homebridge based on MQTT up and running by going to your web browser and opening the Homekit2mqtt web server.
HOMEKIT2MQTT WEBSERVER
To add the new accessories, homekit2mqtt has a build-in web-server. This allows you that easily add new MQTT accessories for Homekit. So to connect to your homekit2mqtt web-server, open your web browser and type:
Raspberry_ip_adress:51888
Now you can login with the username:
homekit
and password:
031-45-154
For this setup I added a accessories to the Apple Homebridge based on MQTT by removing all standard MQTT clients by selecting them and press DEL in the lower left corner.
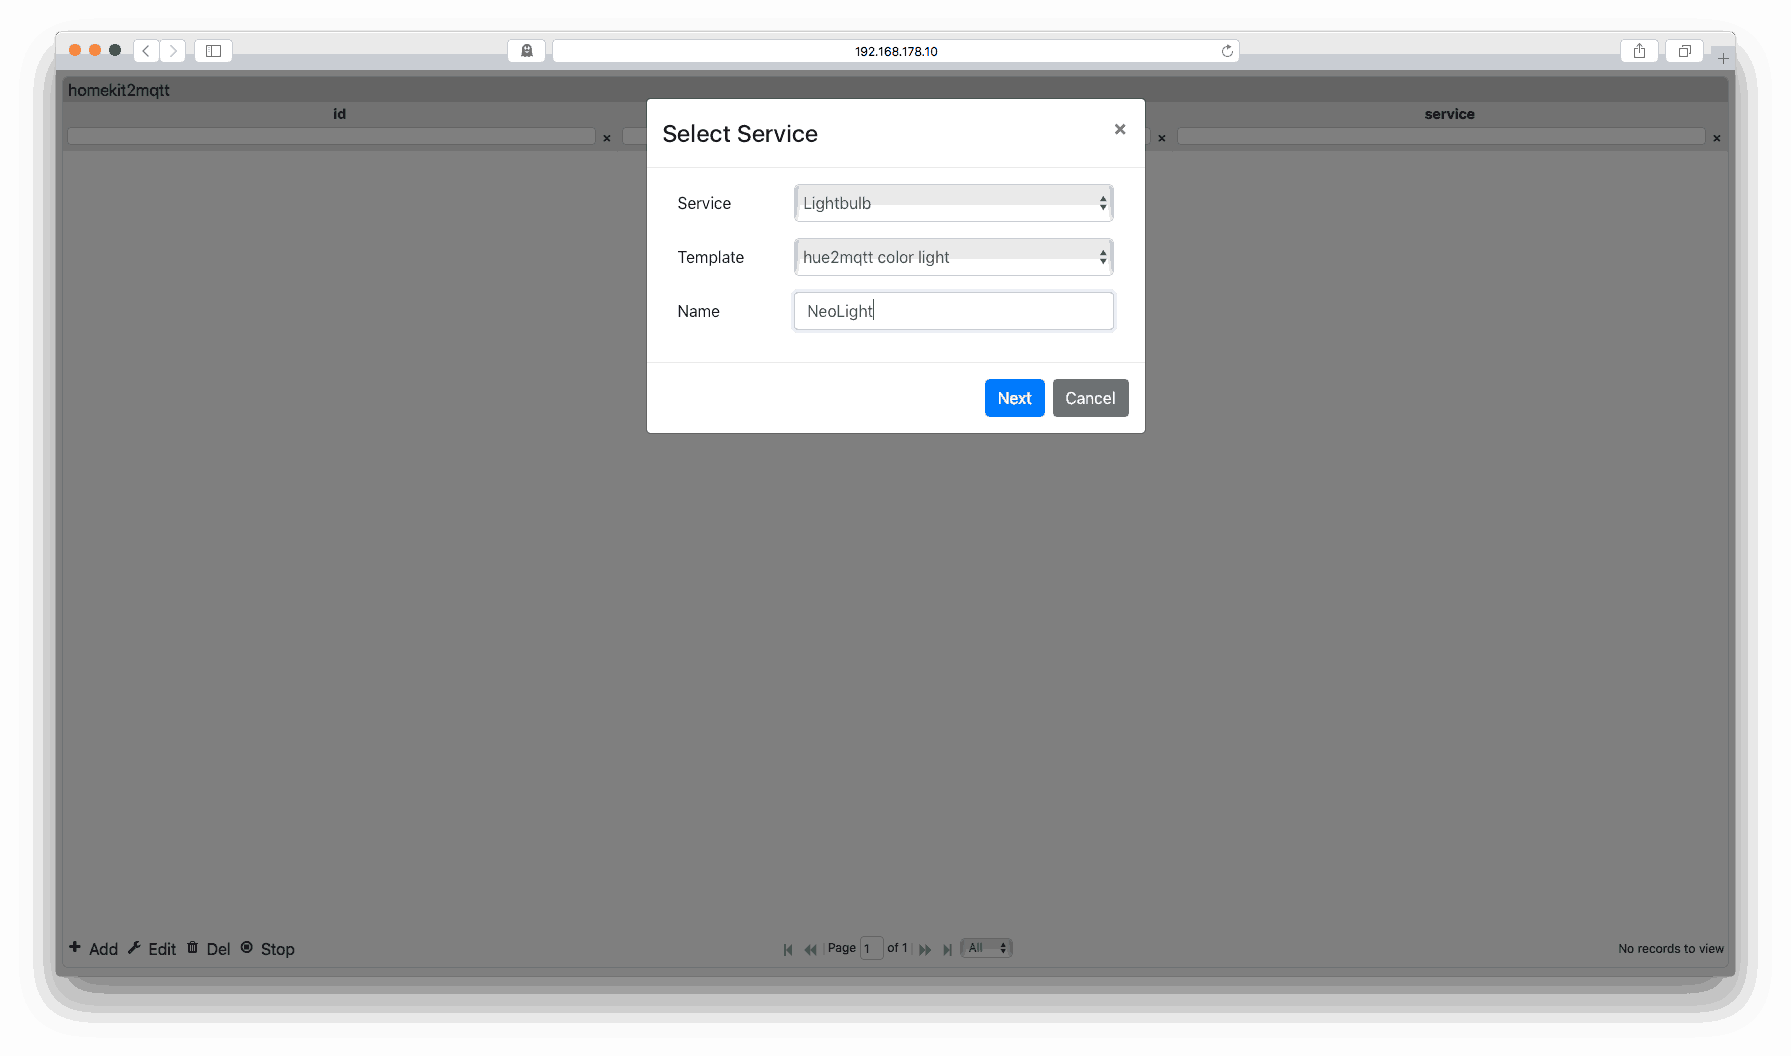
Then I pressed + Add, to add my new build neopixel light. In the service field you can select your type of service, in this case want want to add a light bulb. In the Template field you can select a predefined template , in this case we choose Hue2mqtt color light. In the Name Field we give the new service a name. In this case NeoLight.
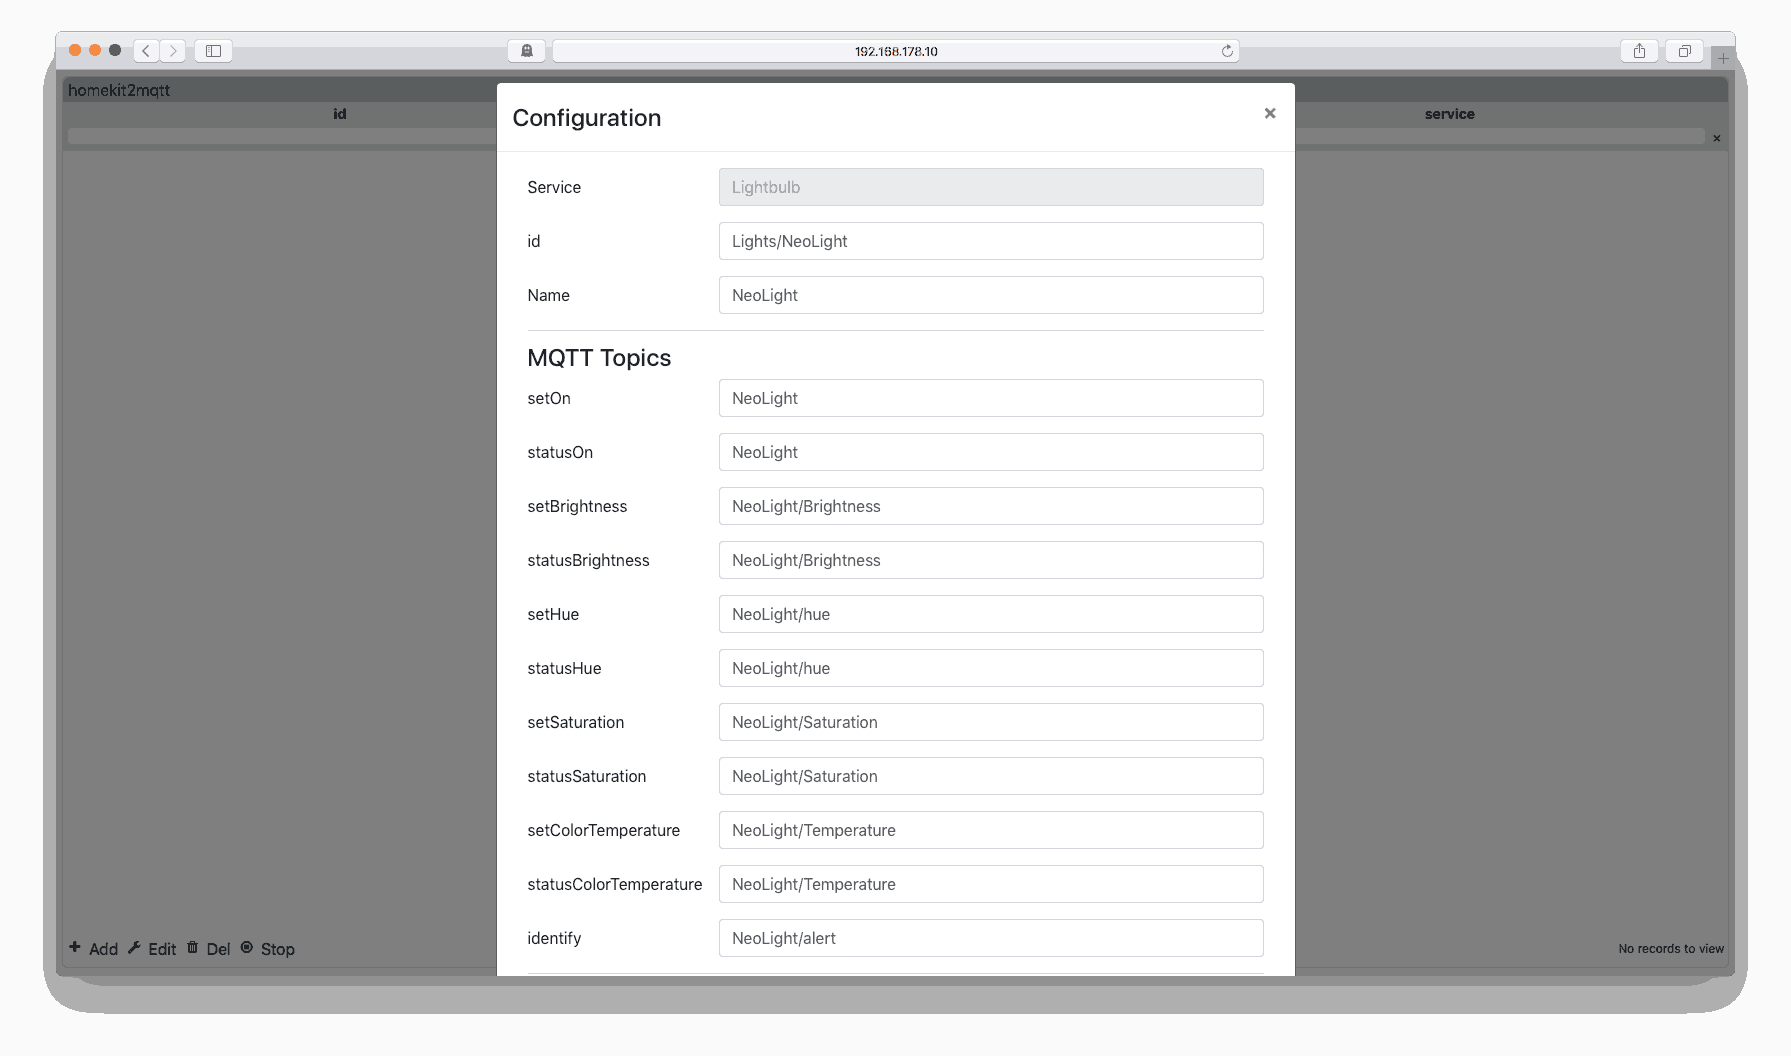
HomeKit2MQTT now fills the rest of the fields with the predefined settings of the template. We have to change them to the following settings:
| SetOn | NeoLight |
| StatusOn | NeoLight |
| SetBrightness | NeoLight/Brightness |
| StatusBrightness | NeoLight/Brightness |
| SetHue | NeoLight/Hue |
| StatusHue | NeoLight/Hue |
| SetSaturation | NeoLight/Saturation |
| StatusSaturation | NeoLight/Saturation |
| SetColorTemperature | NeoLight/Temperature |
| StatusColorTemperature | NeoLight/Temperature |
| Indentify | NeoLight/alert |
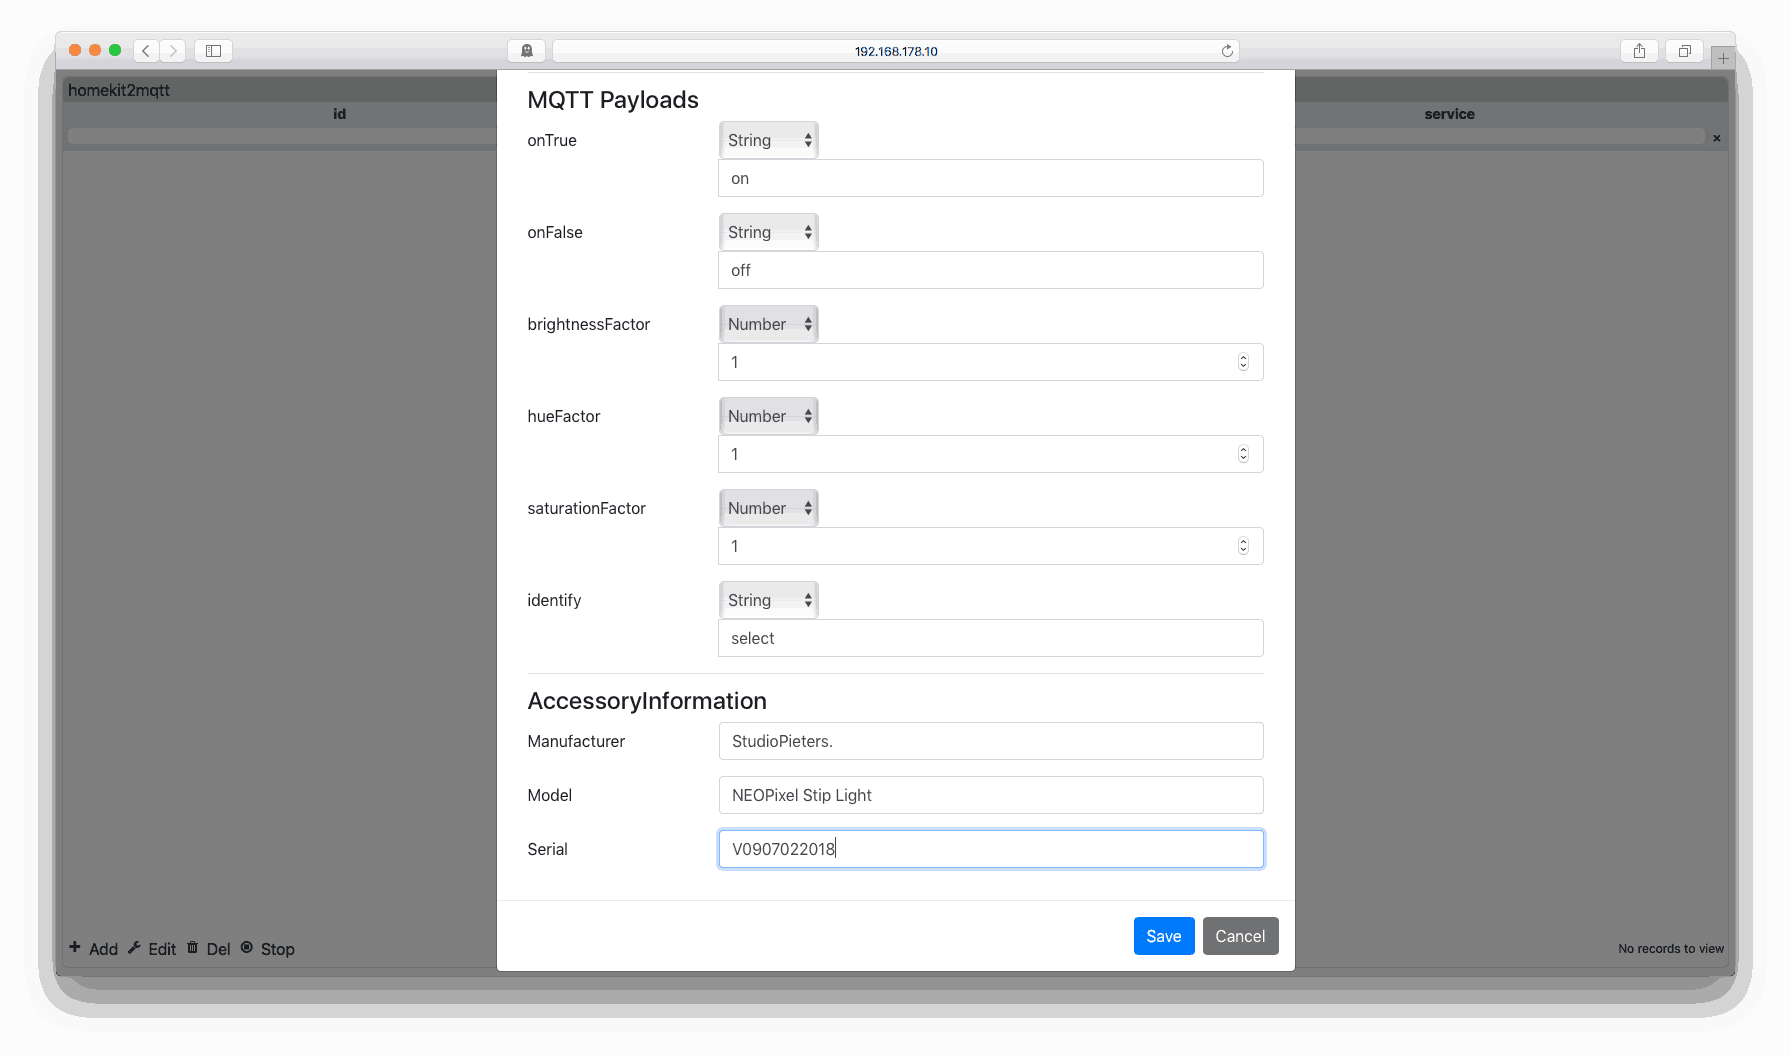
At The bottom we change OnTrue (0) and OnFalse (254) to a String value and to OnTrue (on) and OnFalse (off) and then select Save and close the web browser. and replace a the values to 1 as seen here below. You can add the accessoryInformation if you want, but isn’t necessary.
Yes it Works!

So Now I’ve made a more complex MQTT accessory for the Apple Homebridge based on MQTT. From here on we can make more accessories and expand our accessories, so more to come…
![]()
DOWNLOAD ALL FILES FOR THIS PROJECT ON GITHUB.

DO YOU HAVE ANY QUESTIONS? LEAVE A COMMENT DOWN HERE.
REFERENCE
Sebastian Raff (APR 25 2018), Homekit2MQTT, Use to control a MQTT-connected “Thing” in your home automation through Siri and with HomeKit apps., https://github.com/hobbyquaker/homekit2mqtt