I have been fascinated by Domotica all my life. As a small child I visited all the house of the future (The House of the Future, a project by Chriet Titulaer, was opened in the summer of 1989 in the Netherlands ), an experience that stayed with me all my life. Now with Homekit on my iPhone, the future is here now. Somebody has the same fascination as me for Domotica and made HomeBridge.

What is HomeBridge and why should you use it?
HomeBridge is a utility that some wonderful geniuses wrote to allow you to tie together all of the various “almost smart” home devices into Apples new HomeKit framework for Siri to control. If you want to learn more about Siri and HomeKit then I would suggest you start reading Apple’s website for some examples and details. Now that you are familiar with Siri and HomeKit we can move onto using HomeBridge. HomeBridge is a utility that needs to be run on a device that can stay powered on all the time in the background. Ideally you will want something that doesn’t consume lots of power or resources. That’s where the Raspberry Pi comes in.
Ok I’m convinced. Now what?
Now you will need to get everything together and assembled. Some of the things I’ll be covering will be optional. Such as you can optionally connect your server via Ethernet or WiFi, depending if you use a Raspberry Pi 3 Model B or a Raspberry Pi Zero W.

In my case I use the Raspberry Pi Zero W. You may also want to protect your Raspberry Pi by installing it into a case, You can find a case that I made here and here depending on your Raspberry model.
The hardware
- Raspberry Pi Zero W ( I bought mine here )
- SanDisk Ultra 32GB microSDHC
- USB 3.0 Card Reader
Once you have acquired all the necessary and desired pieced you will need to download the operating system to install on your raspberry pi.
UPDATE: Recommend to follow the homebridge – homekit 2 MQTT revised installation here
Installing your Raspberry Pi Zero W.
First we need to download the Raspberry image and a tool to write the image to a SD card.
Download pibakery
Download the latest Raspbian image
When you have installed pibakery, put the SD card into your USB 3.0 Card Reader. Open Pibakery and click on startup en select On Every Boot. Hereafter click on Network and select Setup Wifi.
Now you can fill in your network credentials. Once you’ve created the perfect setup for your Raspberry Pi, you’re ready to write it to an SD card to use. Click on the Write button in the top right corner of PiBakery. This will bring up the SD card chooser. Select your SD card.
Choose your SD card from the drop-down menu making sure that you choose the right one. The drive that you choose will be erased and then written over, meaning that any data on it currently will be deleted permanently. Once you’ve chosen your SD card, click on Start Write and choose Yes in the warning dialog that pops up. Once the write has finished, you’ll see a green tick with the Write Successful message.

Once PiBakery has finished writing to your SD card, you can remove it from your computer, insert it into your Raspberry Pi and power it on. Your scripts will be running after a few seconds, customizing Raspbian to your requirements.
Setting Up your Raspberry Pi Zero W.
Open the Terminal app. Click the Finder icon in your dock. Click Go. Click Utilities. Double-click Terminal. We start with setting up your ssh connection. Type the following line where your IP address, is the one you provided when installing your Raspberry Pi Zero W.
ssh@your_ip_adress
and press enter.
Note: If you get this error because you already made a connection with your Raspberry Pi Zero W in the past.
@@@@@@@@@@@@@@@@@@@@@@@@@@@@@@@@@@@
@ WARNING: REMOTE HOST IDENTIFICATION HAS CHANGED! @
@@@@@@@@@@@@@@@@@@@@@@@@@@@@@@@@@@@
IT IS POSSIBLE THAT SOMEONE IS DOING SOMETHING NASTY!
Someone could be eavesdropping on you right now (man-in-the-middle attack)!
It is also possible that the RSA host key has just been changed.
The fingerprint for the RSA key sent by the remote host is
5c:9b:16:56:a6:cd:11:10:3a:cd:1b:a2:91:cd:e5:1c.
Please contact your system administrator.
Add correct host key in /home/user/.ssh/known_hosts to get rid of this message.
Offending key in /home/user/.ssh/known_hosts:1
RSA host key for ras.mydomain.com has changed and you have requested strict checking.
Host key verification failed.
Then type
rm -f ~/.ssh/known_hosts
and try to reconnect.
Configure your Raspberry Pi Zero W.
To configure your Raspberry Pi Zero W for further use, I recommend to follow these steps before installing the actual Homekit2MQTT software. To open the program called Raspi-config, which you use to change some of the settings on your Raspberry Pi, type:
sudo Raspi-config
First of all expand the capacity of the SD-card for your operating system.
Expand_rootfs
When you flash your SD card, an exact copy of the operating system and its disk formatting is copied to the card. As a result, the SD card can look like it has less capacity than it really does, which means you can quickly run out of space, even on a higher capacity card.
One of the first things you should do is use this option in Raspi-config to ensure your Raspberry Pi can use all the space available on your SD card.
When you press Enter with this option highlighted, it runs straight away. When you next start up your Raspberry Pi, your Raspberry Pi resizes the file system, which can take a few minutes, during which the screen won’t update. The new capacity then becomes available to you.
change_pass (strongly advised!)
This option enables you to change the password for the default user on your Raspberry Pi, which is the user called pi. You can leave this setting alone, unless you’re particularly security-conscious or are using your Raspberry Pi for particularly sensitive activities. If you change your password, don’t forget it!

Static IP Address (strongly advised!)
Provide your Raspberry Pi Zero W with a Static IP Address you can read how in my previous blog here.
Update your Raspberry Pi Zero W.
Update your Raspberry Pi Zero W? I just installed it fresh? It’s always a good thing to update you Raspberry Pi Zero W to the latest software to prevent bugs and security issues. You may have installed a fresh copy, but there can be updates that aren’t slip streamed into your image yet.
To update your Raspberry Pi Zero W type:
sudo apt-get update
When the updates are downloaded type:
sudo apt-get upgrade
And then:
sudo reboot
Now we are ready to install Homekit2MQTT prerequisites.
Installing Homekit2MQTT Prerequisites
Before installing the actual Homekit2MQTT software you need two Prerequisites:
Install Node.js 6 or higher
Check the Nodejs.org website to be sure you have the latest version of Node.js then type.
sudo wget https://nodejs.org/dist/v9.11.1/node-v9.11.1-linux-armv6l.tar.gz
sudo tar -xvf node-v9.11.1-linux-armv6l.tar.gz
cd node-v9.11.1-linux-armv6l
Copy to / usr / local / using the following command to execute :
sudo cp -R * /usr/local/
When the installation is done type:
cd
and then:
node –v
This will show you the version installed of node.js on your system. Now you need to reboot your Raspberry Pi Zero W.
sudo reboot
libavahi-compat-libdnssd-dev package
If you’re running on Linux ( Yes, your raspberry Pi runs on Linux), you’ll need to make sure you have the libavahi-compat-libdnssd-dev package installed. You can do this by typing:
sudo apt-get update
When the updates are downloaded type:
sudo apt-get upgrade
and then:
sudo apt-get install libavahi-compat-libdnssd-dev
Now, you need to add the Mosquitto repository. Enter the following commands.
sudo wget http://repo.mosquitto.org/debian/mosquitto-repo.gpg.key
sudo apt-key add mosquitto-repo.gpg.key
sudo rm mosquitto-repo.gpg.key
Next, make the repository available to apt-get. First we need to change to the apt sources list directory.
cd /etc/apt/sources.list.d/
Now install the packages list for your version of Raspbian.
For Jessie (old version)
sudo wget http://repo.mosquitto.org/debian/mosquitto-jessie.list
For Stretch (latest)
sudo wget http://repo.mosquitto.org/debian/mosquitto-stretch.list
Now update apt information and install Mosquitto.
sudo apt-get update
sudo apt-get install mosquitto mosquitto-clients
That is it. Mosquitto is now installed and running on your Raspberry Pi. Now you need to reboot your Raspberry Pi Zero W.
sudo reboot
Where almost there…

Installing Homekit2MQTT
Now that you have installed all the Prerequisites you’re ready for the real deal, installing Homekit2MQTT. Type:
sudo npm install -g homekit2mqtt --unsafe --perm
Installation can take quite some time. Wait quietly until the completion of the installation. When the installation is complete, we can start Homekit2MQTT for the first time. Enter the following command:
homekit2mqtt
Now that you have homekit2mqtt up and running you can add sensors. homekit2mqtt needs a JSON file that defines devices and mappings from MQTT-topics and payloads to HomeKit-characteristics. You can either create this manually or use the Web UI to configure homekit2mqtt.
Connect you iPhone to homekit2mqtt
Now we have to connect our iPhone to the homekit2mqtt and add the new accessories.
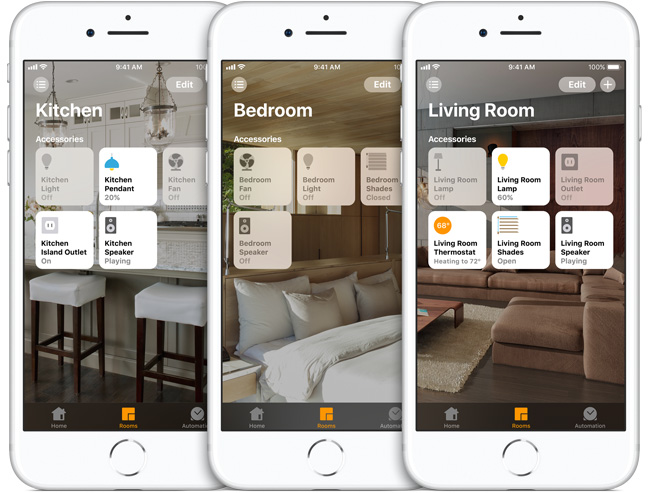
On your iOS device launch the Home app.
Tap the Add button in the top right corner of the screen (looks like a plus sign).
Tap Add Accessory.
Tap on the MQTT accessory (mine’s just called MQTT Bridge).
You will see an alert that says, “This accessory is not certified and may not work reliably with HomeKit.” tap Add Anyway.
Tap Enter Code Manually at the bottom of the screen.
Enter the HomeKit code for your MQTT Bridge accessory.

Add your Homebridge accessory and tap Next.
Add the accessories (The are a few preconfigured) and tap Done.
Homekit2mqtt webserver
To add the new accessories, homekit2mqtt has a build-in web-server. This allows you that easily add new MQTT accessories for Homekit. So to connect to your homekit2mqtt web-server, open your web browser and type:
Raspberry_ip_adress:51888
Now you can login with the username:
homekit
and password:
031-45-154
Congratulations! You’ve successfully linked a HomeKit-enabled smart home accessory to HomeKit. Now it’s time to make some sensors for homekit2mqtt so we can test if everything is working. But that will be in a next blog…
Reference
Sebastian Raff (APR 25 2018), Homekit2MQTT, Use to control a MQTT-connected “Thing” in your home automation through Siri and with HomeKit apps., https://github.com/hobbyquaker/homekit2mqtt