Are you a Raspberry Pi enthusiast looking for a simple yet effective solution to keep your Pi cool without breaking the bank? Look no further! Today, we’re diving into a quick and affordable fan control setup that will keep your Raspberry Pi 4 running smoothly, even during intense tasks.
The Challenge
Recently, someone approached me with a straightforward request: they needed a basic fan control system for their Raspberry Pi 4. The criteria were clear—it had to be simple, inexpensive, and get the job done without any unnecessary frills. Challenge accepted!

The Ingredients
To concoct this budget-friendly solution, we’ll need just a few components:
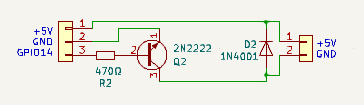
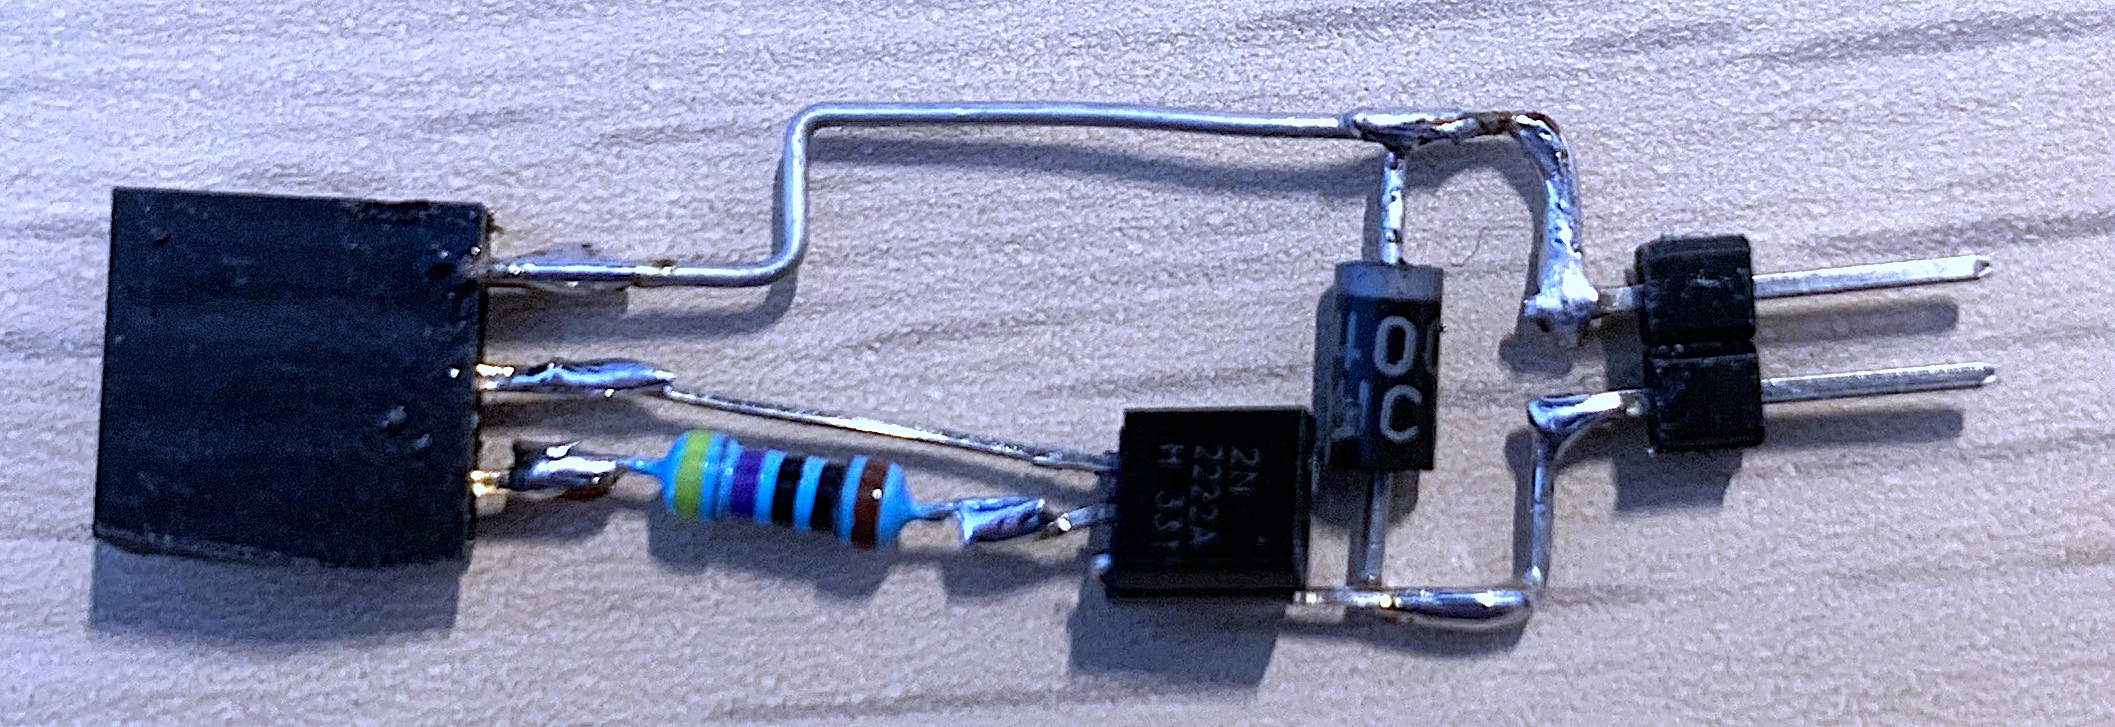
- 2N222 Transistor: This versatile transistor is a staple in DIY electronics projects due to its reliability and affordability.
- 470 Ohm Resistor: A common resistor that will help control the flow of current in our circuit.
- 1N4001 Diode: This diode will protect our setup from reverse voltage spikes, ensuring longevity and stability.
- Connectors: Basic connectors to easily integrate the fan control into our Raspberry Pi setup.
The Recipe
Let’s get down to business! Here’s a step-by-step guide to assembling our fan control system:
- Connect the Transistor: Start by connecting the base of the 2N222 transistor to GPIO pin 14 on your Raspberry Pi. This pin will act as the control signal for the fan.
- Add the Resistor: Next, wire the 470 Ohm resistor between the GPIO pin and the base of the transistor. This resistor will limit the current flowing into the transistor, preventing damage to both the Pi and the transistor.
- Integrate the Diode: Now, place the 1N4001 diode across the fan terminals, ensuring that the cathode (marked end) is connected to the positive terminal of the fan. This diode will protect the circuit from voltage spikes when the fan switches off.
- Power Up: Finally, connect the fan to a suitable power source, ensuring that it can handle the current requirements of both the fan and the Raspberry Pi.

Testing and Tweaking
With our setup complete, it’s time to put it to the test! Power up your Raspberry Pi and monitor the temperature. You should notice a significant decrease in temperature, thanks to the cooling provided by the fan.
If you find that the fan is running too fast or too slow, you can adjust the GPIO signal or resistor value to fine-tune the speed to your liking.
Accessing the Raspberry Pi Configuration Menu
The Raspberry Pi configuration menu provides a user-friendly interface for configuring various settings, including overclocking, networking, and—of course—fan control. To access this menu, follow these simple steps:
- Open Terminal: Launch the terminal application on your Raspberry Pi. You can find it in the applications menu or by pressing
Ctrl + Alt + T. - Enter Configuration Menu: In the terminal, type the following command and press Enter:
sudo raspi-config
This command will launch the Raspberry Pi configuration tool. - Navigate to Fan Control: Use the arrow keys to navigate to the “Fan Control” option in the configuration menu. Press Enter to select it.

Configuring Fan Control Settings
Once you’ve accessed the fan control settings, you’ll have the opportunity to customize various parameters to suit your preferences and requirements. Here are some common options you may encounter:
- Fan Activation Threshold: This setting allows you to specify the temperature at which the fan should start spinning. You can adjust this threshold based on your desired balance between cooling efficiency and noise level.
- Fan Hysteresis: Hysteresis refers to the range of temperatures within which the fan will remain active after being triggered. Setting a higher hysteresis value can prevent the fan from rapidly switching on and off in response to minor temperature fluctuations.
- Fan GPIO Pin: You’ll also need to specify which GPIO pin on your Raspberry Pi will be used to control the fan. Make sure to choose a pin that is not already in use and is compatible with your fan’s voltage and current requirements.
Saving and Applying Changes
Once you’ve configured the fan control settings to your satisfaction, navigate to the “Finish” option in the Raspberry Pi configuration menu and press Enter. You’ll be prompted to reboot your Raspberry Pi to apply the changes. After rebooting, your fan control system will be up and running, ready to keep your Raspberry Pi cool under any workload.
Conclusion
In just a few simple steps and with minimal investment, we’ve crafted a reliable fan control system for the Raspberry Pi 4. Whether you’re running intensive applications or simply want to prolong the life of your Pi, this DIY solution has you covered.
Remember, innovation doesn’t always have to come with a hefty price tag. Sometimes, all it takes is a bit of creativity and a handful of components to make a meaningful difference. Happy hacking!