
HomeKit
ESP8266 HomeKit Motion Sensor with an HC-SR501
A HomeKit motion sensor on an ESP8266 with an HC-SR501 PIR module, including how to set its sensitivity, time delay and trigger mode.
- ESP8266
- HomeKit
- 3 min read
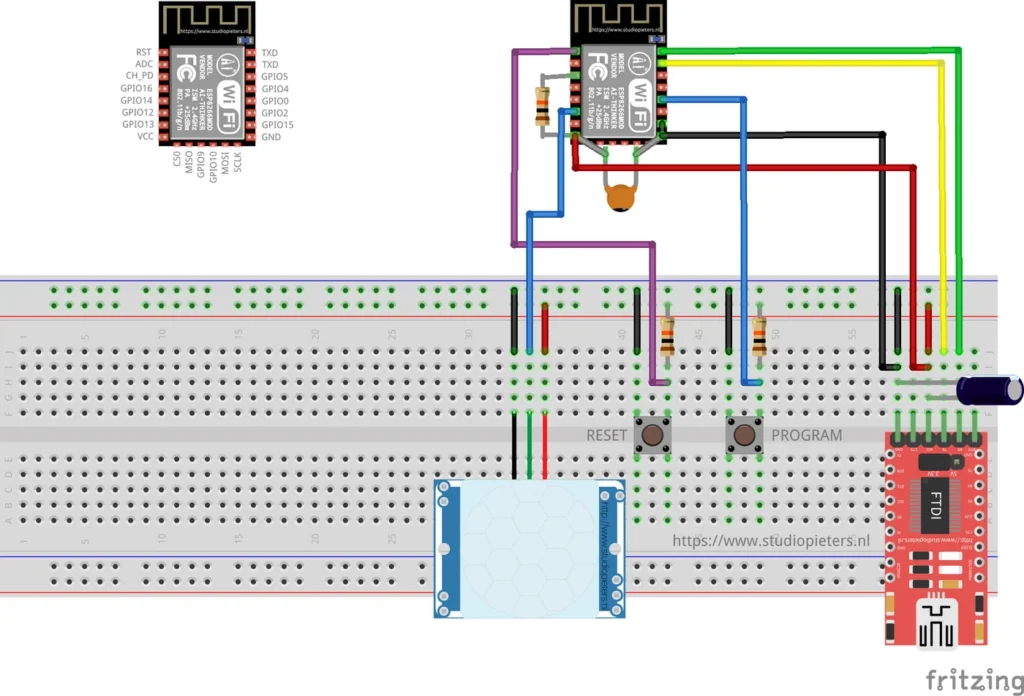
A motion sensor for Apple HomeKit, built from an ESP8266 and an HC-SR501 PIR module. When the sensor sees movement, the Home app shows motion detected, and you can use that to switch lights, send a notification or start any other automation.
The HC-SR501 has two adjustments and a jumper that decide how sensitive it is and how long it stays on, and this article explains them with the illustrations from the repository.
This is a test setup.
What it does
| Feature | Details |
|---|---|
| HomeKit service | Motion Sensor, reporting motion detected |
| Reaction | Every change of the sensor output is reported to the Home app, when motion starts and when it stops |
| Several sensors | The accessory name gets the last three bytes of the MAC address, for example Motion Sensor-A1B2C3, so more than one sensor fits in a home. This came with release 0.0.3 |
| Identify | The on-board LED flashes |
| Updates | Over the air, through Life Cycle Manager 2 |
| No cloud | Control stays on your own network |
Hardware and wiring
| Component | Notes |
|---|---|
| ESP8266 module | An Ai-Thinker ESP8266 module of the ESP-12 type. See the ESP8266 pinout |
| HC-SR501 PIR module | The motion sensor. See the HC-SR501 guide for how it works |
| 2 push buttons | RESET and PROGRAM |
| USB-serial (FTDI) adapter | For flashing. Set it to 3.3 V logic |
| Electrolytic capacitor and small ceramic capacitor | As drawn |
| Resistors | As drawn |
The Fritzing diagram at the top of this page shows the build on a breadboard, with the pinout of the module in the corner. The sensor has three wires: ground, supply and signal.
| Function | ESP8266 pin |
|---|---|
| Motion sensor signal | GPIO12, an input without pull-up, with an interrupt on every change of the signal |
| On-board LED | GPIO2 |
These pins come from the firmware source in main.c. Use an FTDI adapter set to 3.3 V, because a 5 V adapter can damage the module.
Setting up the HC-SR501
The module has three connections, and two adjustment screws on the back.
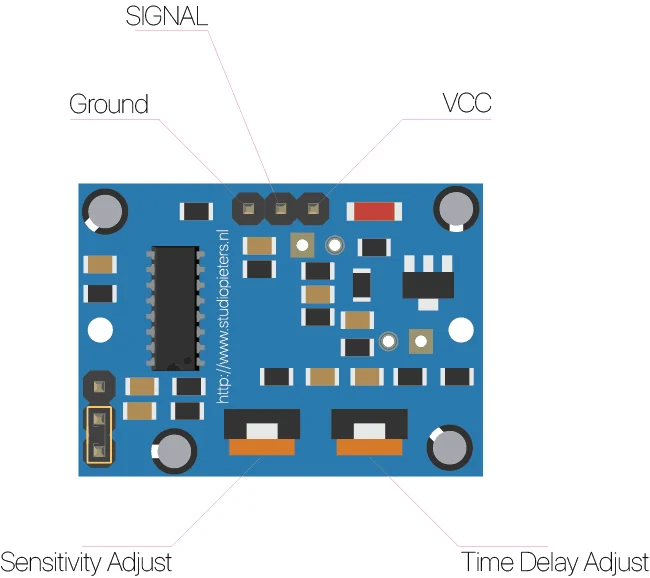
Sensitivity
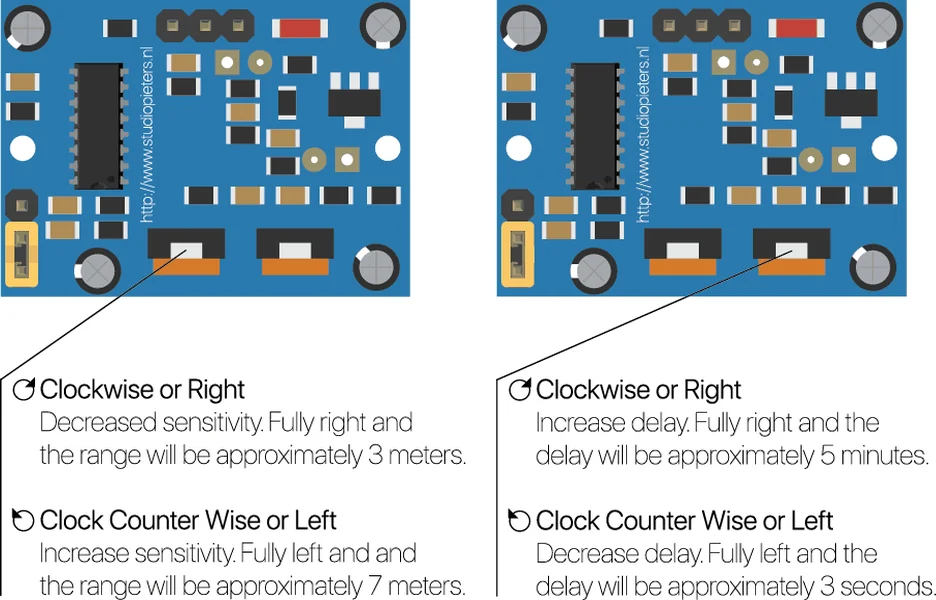
Turning the sensitivity screw clockwise decreases the sensitivity, and fully to the right the range is about 3 meters. Turning it counter-clockwise increases it, and fully to the left the range is about 7 meters.
Time delay
Turning the time delay screw clockwise increases the delay, and fully to the right it is about 5 minutes. Turning it counter-clockwise decreases it, and fully to the left it is about 3 seconds.
Trigger mode
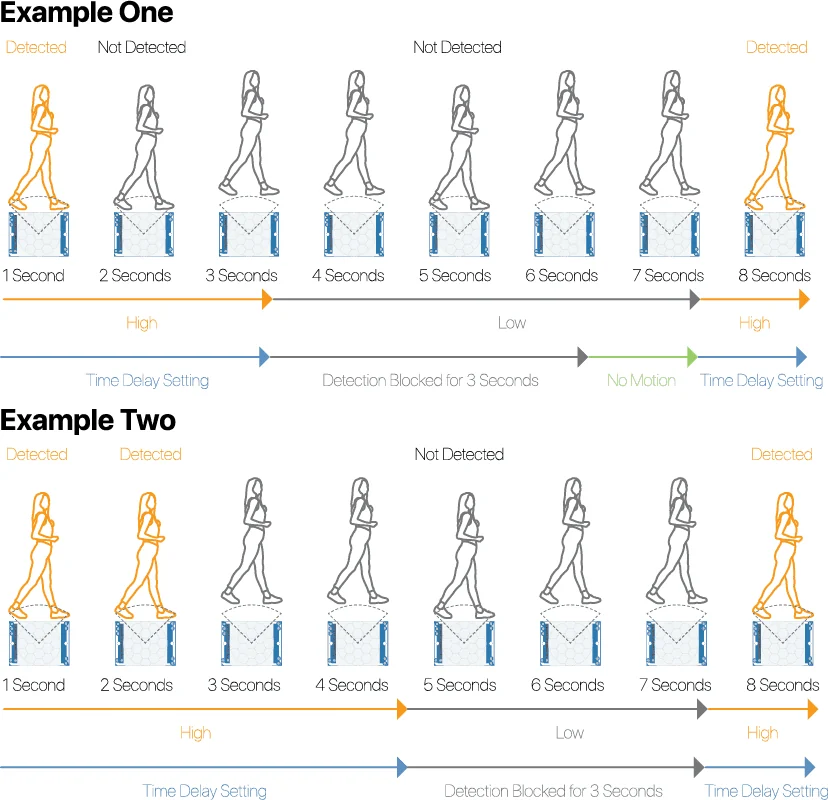
A jumper on the back selects one of two modes. In single trigger mode, the time delay starts immediately when motion is detected, and continued detection is blocked. In repeatable trigger mode, the time delay is restarted every time motion is detected.
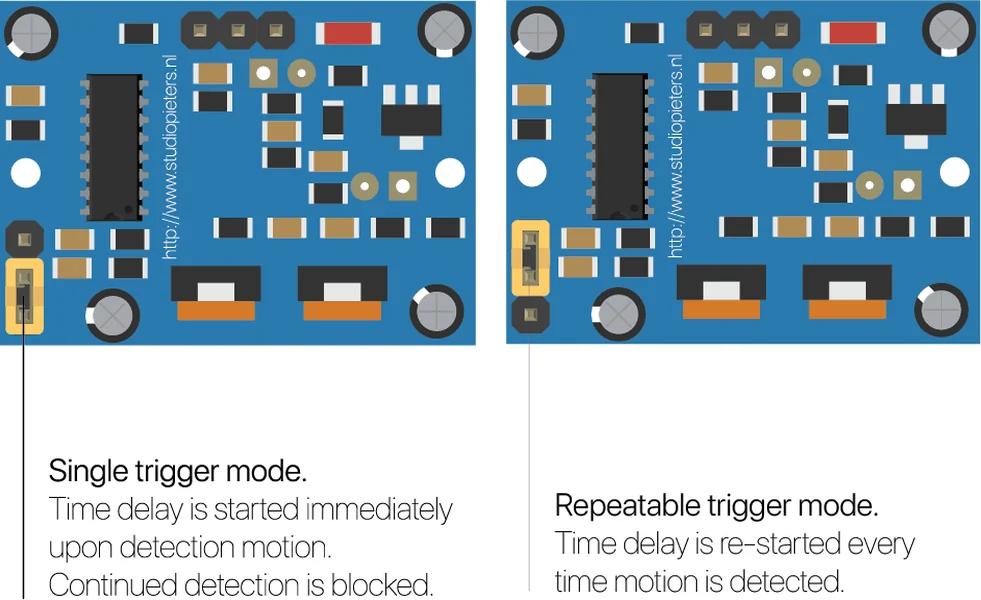
The two examples below show what the modes do over eight seconds. In both, the output stays high during the time delay setting, then detection is blocked for 3 seconds before it can trigger again.
Flash and install
The installation is the same as for the other ESP8266 HomeKit accessories on this site. The firmware runs on ESP-Open-RTOS with Life Cycle Manager 2, which sets up the WiFi and installs updates over the air. The full steps, from installing esptool to flashing, joining the LCM- WiFi network and pairing, are in ESP8266 HomeKit Blinds.
In the portal, use these values:
| Field | Value |
|---|---|
| OTA repository | AchimPieters/ESP8266-HomeKit-Motion-Sensor |
| OTA binary file | main.bin |
When the installation is done, scan the QR code the device generates in the Home app to add it.
Firmware releases
| Version | Date | Notes |
|---|---|---|
| 0.0.3 | 28 June 2021 | Code added that makes it possible to add more than one sensor |
| 0.0.2 | 5 September 2019 | |
| 0.0.1 | 2 September 2019 | First release |
Each release has a main.bin and a signature file, main.bin.sig.
Source and housing
The firmware source is in the repository as main.c, with a Makefile for ESP-Open-RTOS. It uses the http-parser and dhcpserver extras and the wifi_config, wolfssl, cJSON and homekit components. The HomeKit setup code is set in the source, so change it to your own.
A 3D-printed housing for an HC-SR501 is shown in the ESP8266 HomeKit Garden Light EX article.
Good to know
- This is a test setup and not a finished product.
- The HomeKit Accessory Protocol specification the firmware follows is the non-commercial version, for accessories you build yourself and do not distribute or sell.
- The repository is under the MIT licence.
Everything is in the ESP8266-HomeKit-Motion-Sensor repository on GitHub.
Related
 HomeKit
LSC Smart Plug Versions 1 and 2 with an ESP8266
The LSC Smart Connect power plug as a HomeKit outlet: version 1 runs the firmware as it is, version 2 needs its module replaced with an ESP-02S.
Read more
HomeKit
LSC Smart Plug Versions 1 and 2 with an ESP8266
The LSC Smart Connect power plug as a HomeKit outlet: version 1 runs the firmware as it is, version 2 needs its module replaced with an ESP-02S.
Read more
 HomeKit
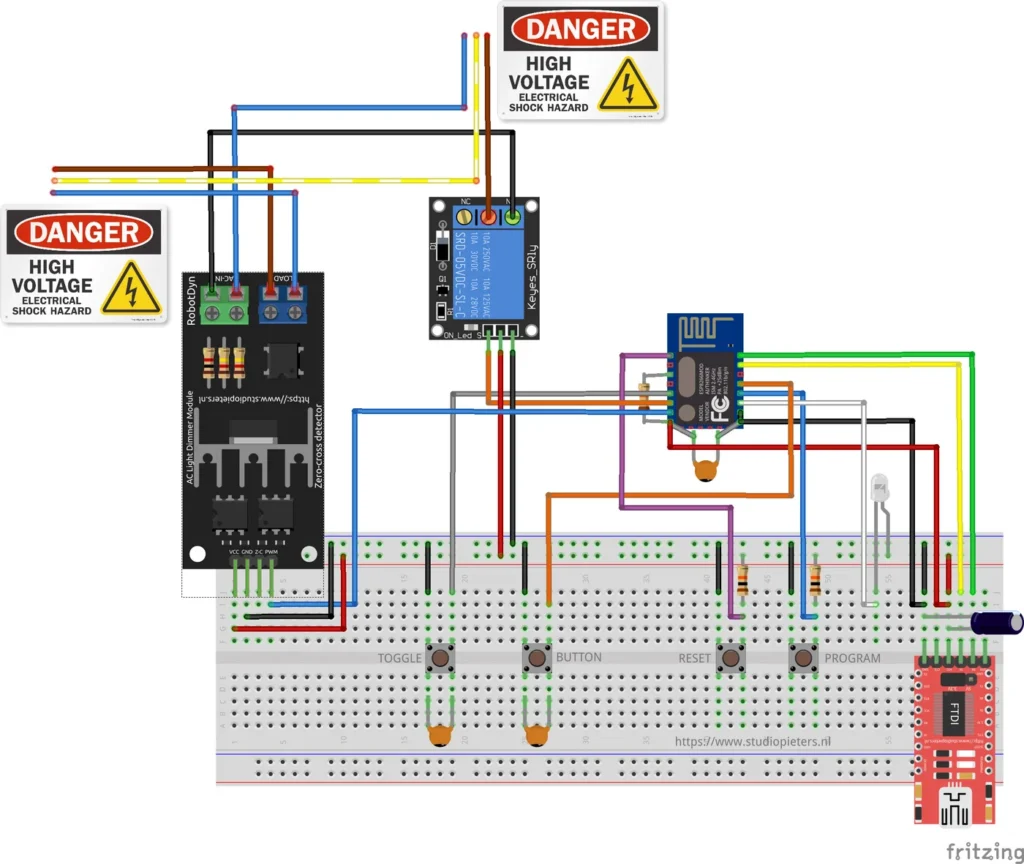
ESP8266 HomeKit Light Dimmer with a TRIAC Module
A test setup that dims a mains lamp with an ESP8266 and a RobotDyn TRIAC dimmer module, and why it was hard to use in practice.
Read more
HomeKit
ESP8266 HomeKit Light Dimmer with a TRIAC Module
A test setup that dims a mains lamp with an ESP8266 and a RobotDyn TRIAC dimmer module, and why it was hard to use in practice.
Read more
 HomeKit
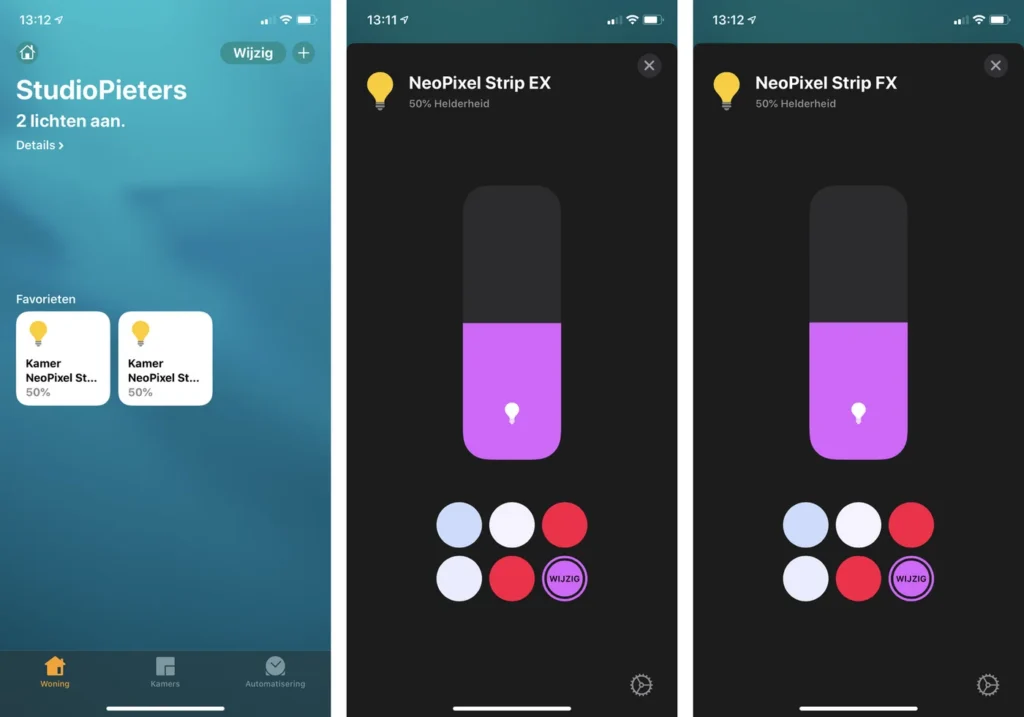
ESP8266 HomeKit NeoPixel Light Strip EX with Effects
The extended NeoPixel strip for the Home app: an EX light and an FX light with more effects, with firmware for a strip of 72 or 144 LEDs.
Read more
HomeKit
ESP8266 HomeKit NeoPixel Light Strip EX with Effects
The extended NeoPixel strip for the Home app: an EX light and an FX light with more effects, with firmware for a strip of 72 or 144 LEDs.
Read more
More HomeKit
Keep building.
Switches, sensors, plugs and blinds: more accessories that you build yourself and add to the Home app.
All HomeKit