We are on the eve of a lot of changes in the field of Home Smart accessories. Despite the fact that a lot still needs to be done, we take a dive into the deep end. We are going to make our first Matter accessories. Although it is still in development, this is the time that it will make large steps ahead. With the release of IOS 16, matter Development has been integrated into the Home app and the start signal has been given.

Matter
Matter, previously project CHIP, is the new foundation for connected things. Guided by the Connectivity Standards Alliance, and developed through collaboration amongst all the leaders of the IoT industry, Matter focuses on building connected devices that are secure, reliable, and importantly, seamless to use. These Matter accessories will create a simple smart home control for the whole family: anyone in the home can control multiple smart home devices wirelessly with the press of a button, instead of resorting to a smartphone app.

Prerequisites
Before we can start this experiment need to set up the environment Prerequisites.
Docker
Docker is an open platform for developing, shipping, and running applications. Docker enables you to separate your applications from your infrastructure so you can deliver software quickly. With Docker, you can manage your infrastructure in the same ways you manage your applications. By taking advantage of Docker’s methodologies for shipping, testing, and deploying code quickly, you can significantly reduce the delay between writing code and running it in production.
Download and install Docker
This tutorial assumes you have a current version of Docker installed on your machine. If you do not have Docker installed, choose your preferred operating system below to download Docker:
Mac with Intel chip Mac with Apple chip Windows Linux
For Docker Desktop installation instructions, see:
Setting up the Matter development environment
Set up your development environment for building, running, and testing matter accessories. First we have to make a local directory called matter.
Opening Terminal through the Finder
1. On the left toolbar, click “Applications“.
2. Scroll down and open the “Utilities” folder.
3. Double click “Terminal” to launch it.
mkdir matter
Change into the newly created directory
cd matter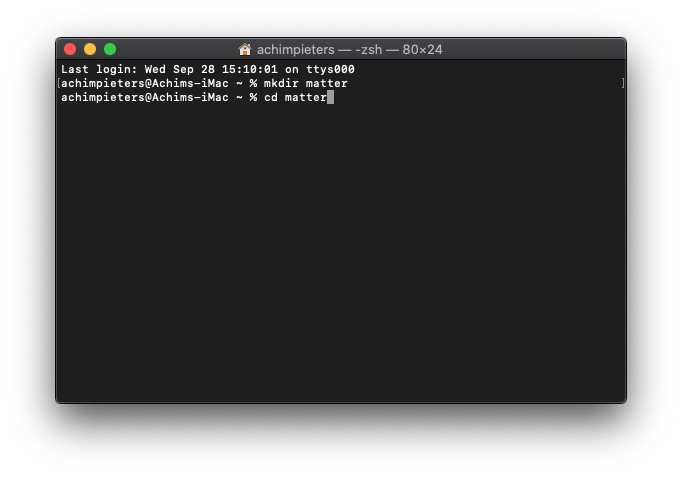
Now we clone the connectedhomeip repository.
git clone https://github.com/project-chip/connectedhomeip.git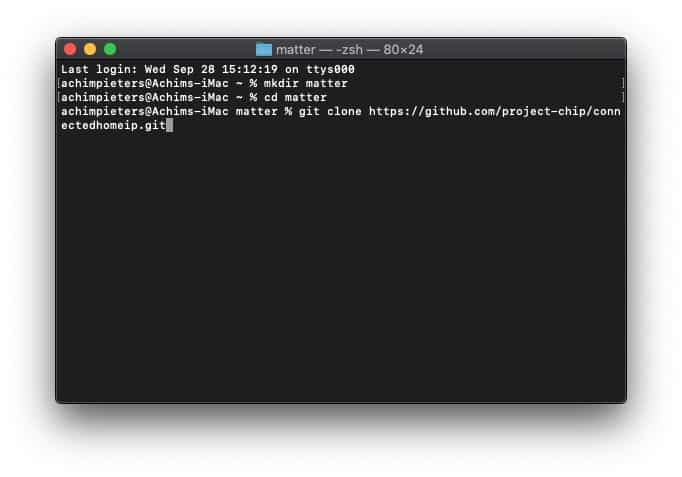
Once the cloning is ready, we change into the docker folder
cd connectedhomeip/integrations/docker/images/chip-build-esp32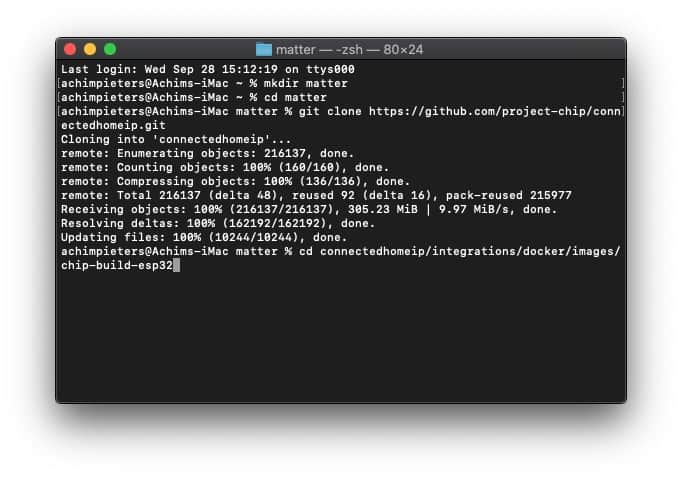
Here we can execute the installation script.
./build.sh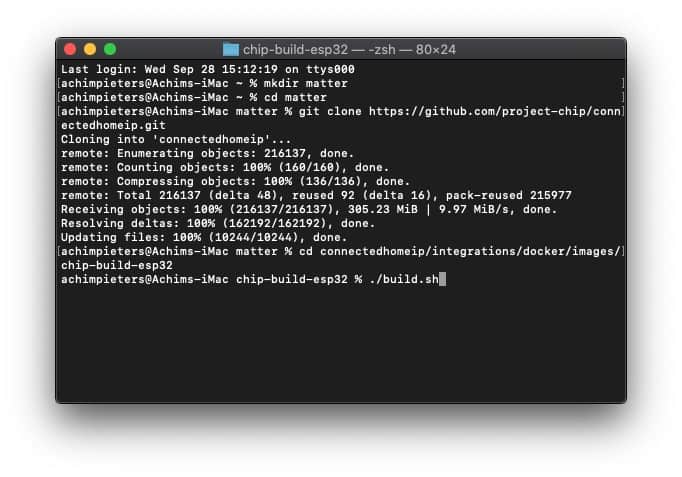
The installation can take a wile……

Prepare for building
The ‘root’ I work from is a folder called matter on my macOS, which gets mapped to /project in the container. In the previous file, I described how I did git clone to that matter Development folder. Let’s change into the docker and map the matter Development folder.
Opening Terminal through the Finder
1. On the left toolbar, click “Applications“.
2. Scroll down and open the “Utilities” folder.
3. Double click “Terminal” to launch it.
docker run -it -v ~/matter:/project -w /project connectedhomeip/chip-build-esp32:0.5.99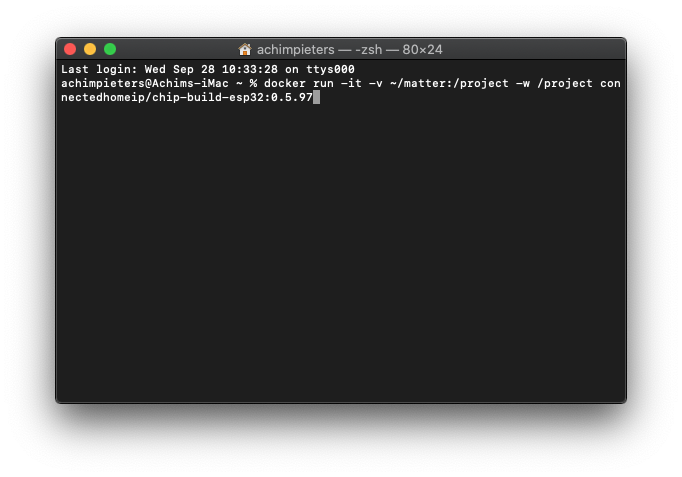
Change into the connectedhomeip folder.
cd connectedhomeip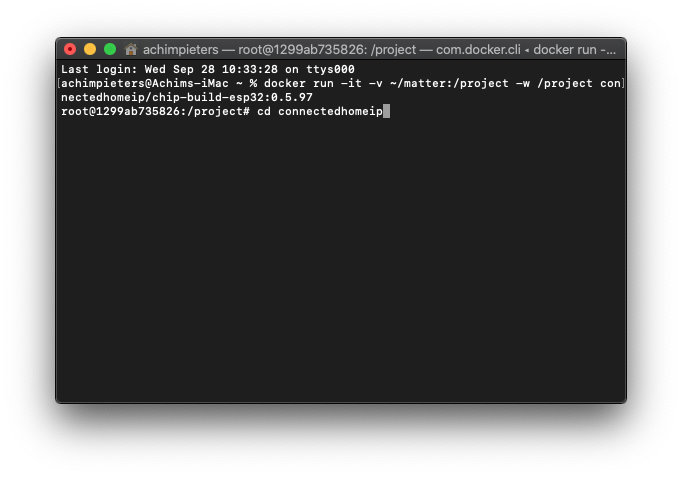
Enable caching for quicker compiling.
export IDF_CCACHE_ENABLE=1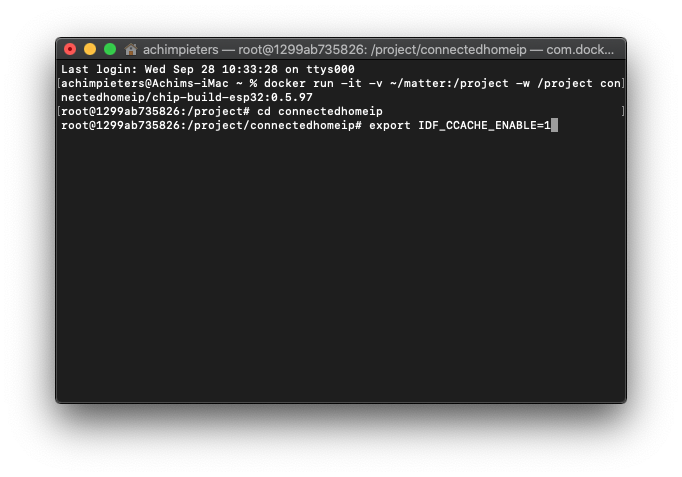
Before running any other build command, the scripts/activate.sh environment setup script should be sourced at the top level. This script takes care of downloading GN, ninja, and setting up a Python environment with libraries used to build and test.
source scripts/activate.sh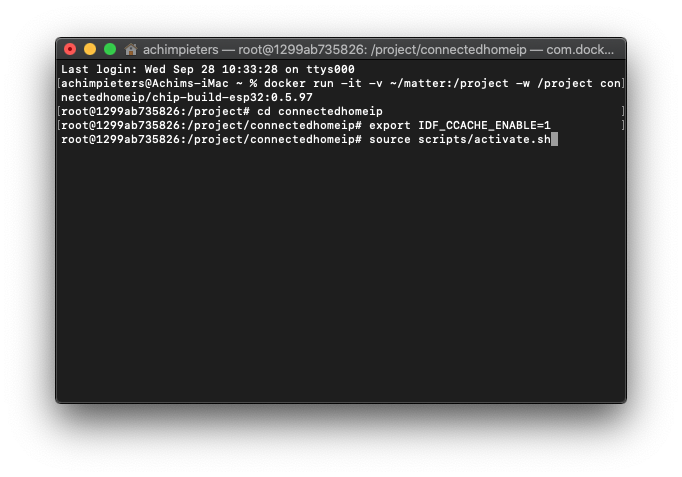
If you run this part the first time, then the installation can take a wile……
The installed tools are not yet added to the PATH environment variable. To make the tools usable from the command line, some environment variables must be set. ESP-IDF provides another script which does that. Change into the IDF directory.
cd /opt/espressif/esp-idf/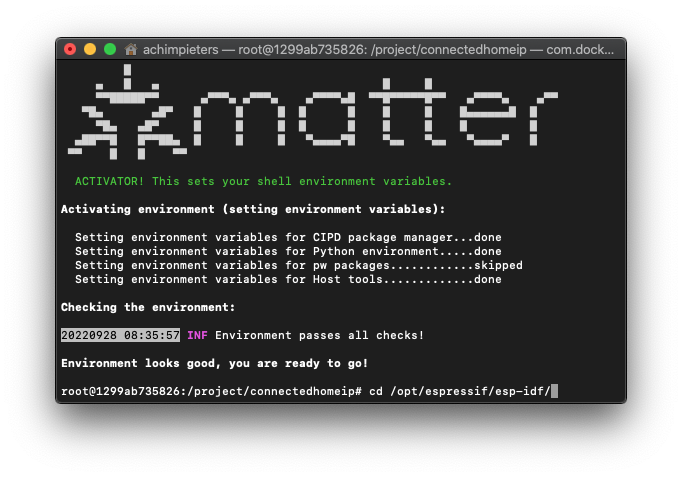
In the terminal where you are going to use ESP-IDF, run:
source export.sh
Building a ESP32 Application
A device is represented in Matter in terms of its data model. As a first step of building your product, you will have to define the data model for your device. Matter Development has a standard set of device types already defined that you can use. Change to example application directory.

Opening Terminal through the Finder
1. On the left toolbar, click “Applications“.
2. Scroll down and open the “Utilities” folder.
3. Double click “Terminal” to launch it.
cd /project/connectedhomeip/examples/lighting-app/esp32/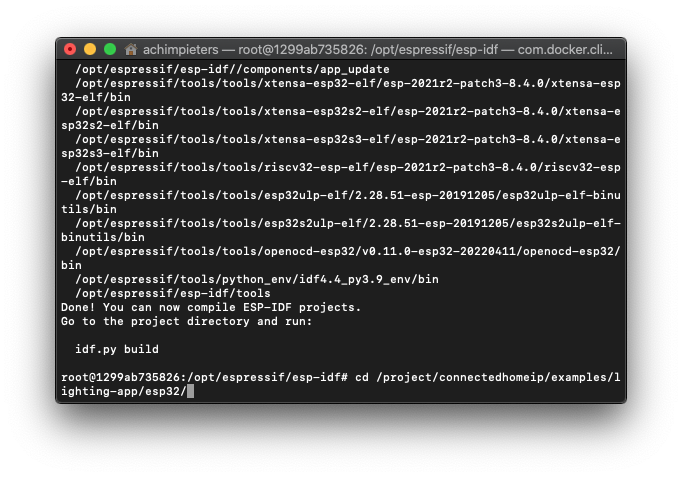
If you made this application already and want to do it again, you need to clean it first.
idf.py clean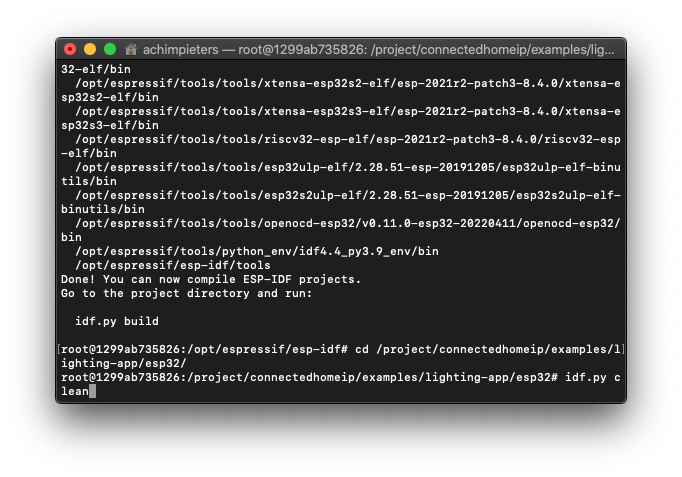
Set the chip target to build. All the example applications supports target chips: esp32, esp32s2, esp32c3, esp32s3and esp32h2.
idf.py set-target esp32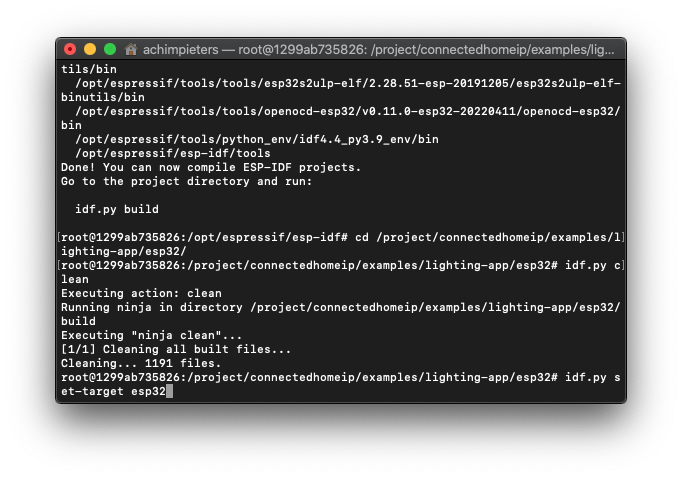
To customize the configuration, run menuconfig:
idf.py menuconfig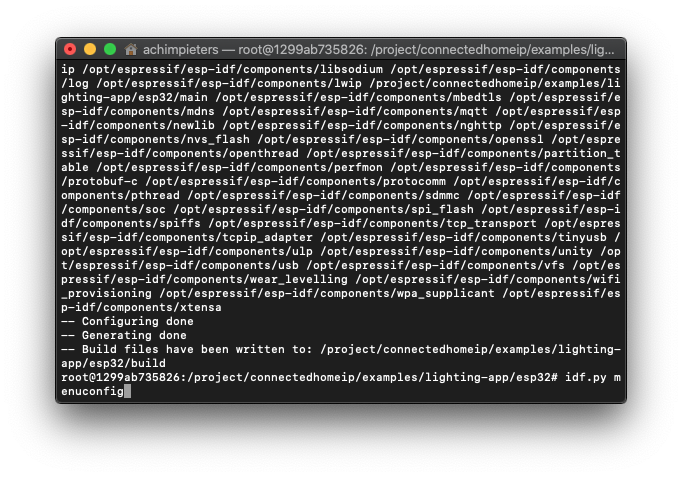
The menu opens and there are a lot of options, but we don’t go to explain these now.
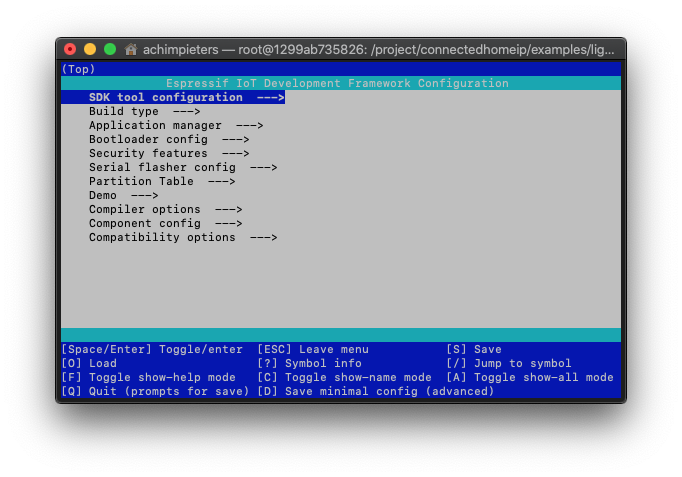
Go to Demo in the menu.
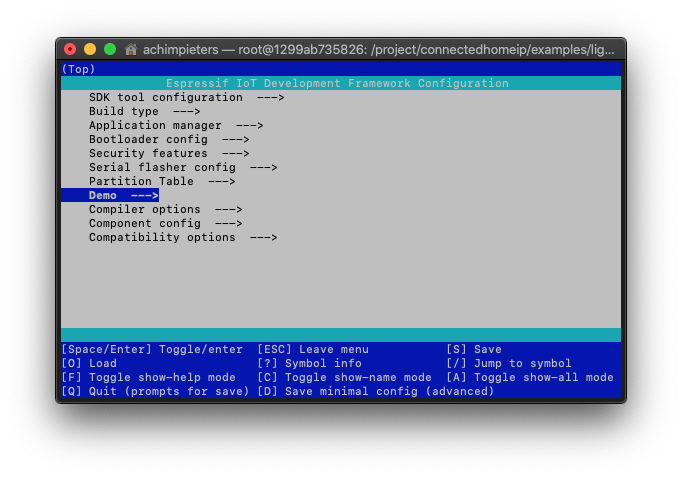
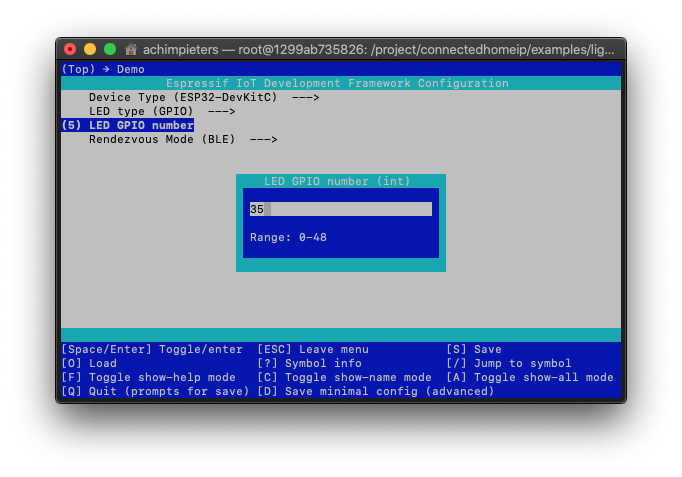
Then go to LED GPIO Number.
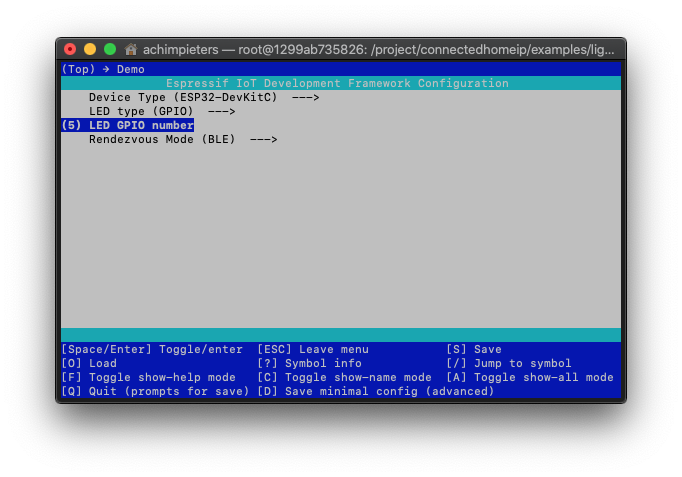
Type the GPIO number where you connected your LED.
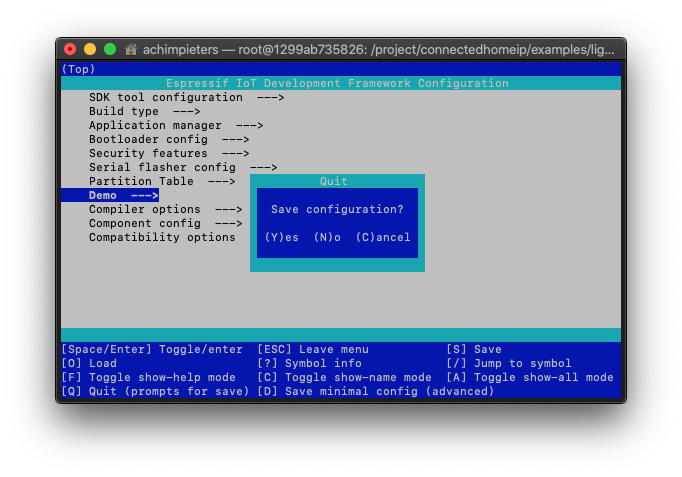
Then Exit the menu and select Y to save the configuration.
Build the application
idf.py build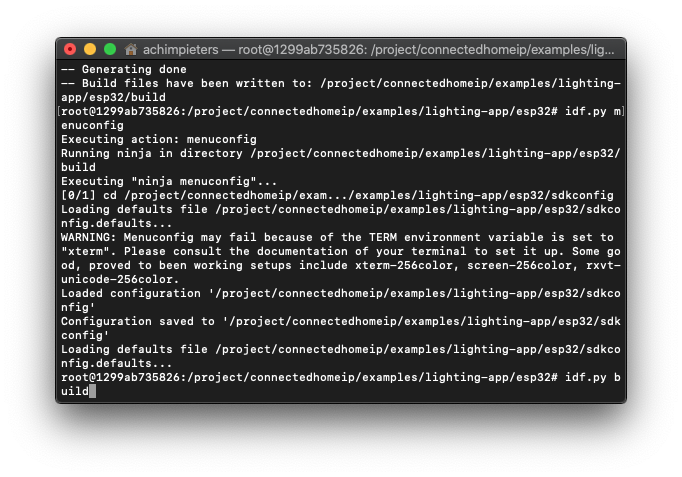
The compiling can take a wile……

Prepairing your code for Life Cycle Manager for ESP32
At the moment of writing, Life Cycle Manager for ESP32 is still at beta stage (Release 0.1.4). But HomeACcessoryKid is working hard, Please support the developer HomeACcessoryKid with his project! Change into the right directory.
Opening Terminal through the Finder
1. On the left toolbar, click “Applications“.
2. Scroll down and open the “Utilities” folder.
3. Double click “Terminal” to launch it.
cd matter/connectedhomeip/examples/lighting-app/esp32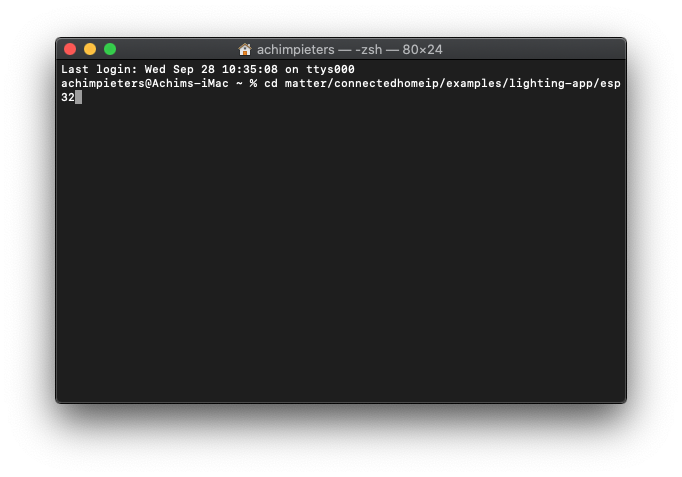
First we’re creating a user app Digital Signature.
openssl sha384 -binary -out build/chip-lighting-app.bin.sig build/chip-lighting-app.bin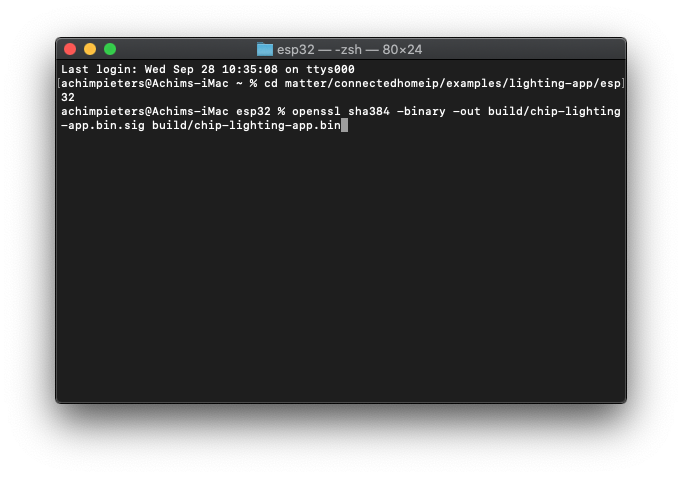
And then the line.
printf "%08x" cat build/chip-lighting-app.bin | wc -c| xxd -r -p >>build/chip-lighting-app.bin.sig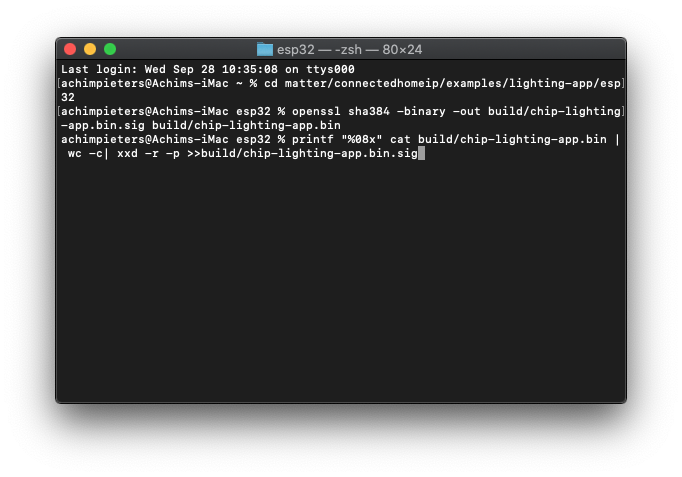
You need to download 3 files from GitHub. Or download them directly here. Remeber at the moment of writing, Life Cycle Manager for ESP32 is still at beta stage! Go to GitHub to get the latest version and see the latest changes!
Bootloader.bin (Release 0.1.4).
PartitionTable.bin (Release 0.1.4).
otaboot.bin (Release 0.1.4).
Then you create a release on GitHub.

GitHub
What Is GitHub, and What Is It Used For? GitHub is a website and service that we hear geeks rave about all the time, yet a lot of people don’t really understand what it does. Want to know what all the GitHub hubbub is about? Read on to find out. To understand GitHub, you must first have an understanding of Git. Git is an open-source version control system that was started by Linus Torvalds—the same person who created Linux. Git is similar to other version control systems—Subversion, CVS, and Mercurial to name a few
So, Git is a version control system, but what does that mean? When developers create something (an app, for example), they make constant changes to the code, releasing new versions up to and after the first official (non-beta) release. Version control systems keep these revisions straight, storing the modifications in a central repository. This allows developers to easily collaborate, as they can download a new version of the software, make changes, and upload the newest revision. Every developer can see these new changes, download them, and contribute.
Similarly, people who have nothing to do with the development of a project can still download the files and use them. Most Linux users should be familiar with this process, as using Git, Subversion, or some other similar method. It is pretty common for downloading needed files—especially in preparation for compiling a program from source code (a rather common practice for Linux geeks). Git is the preferred version control system of most developers, since it has multiple advantages over the other systems available. It stores file changes more efficiently and ensures file integrity better. If you’re interested in knowing the details, the Git Basics page has a thorough explanation on how Git works.
Github Repository
A repository (usually abbreviated to ‘repo‘) is a location where all the files for a particular project are stored. Each project has its own repo, and you can access it with a unique URL.
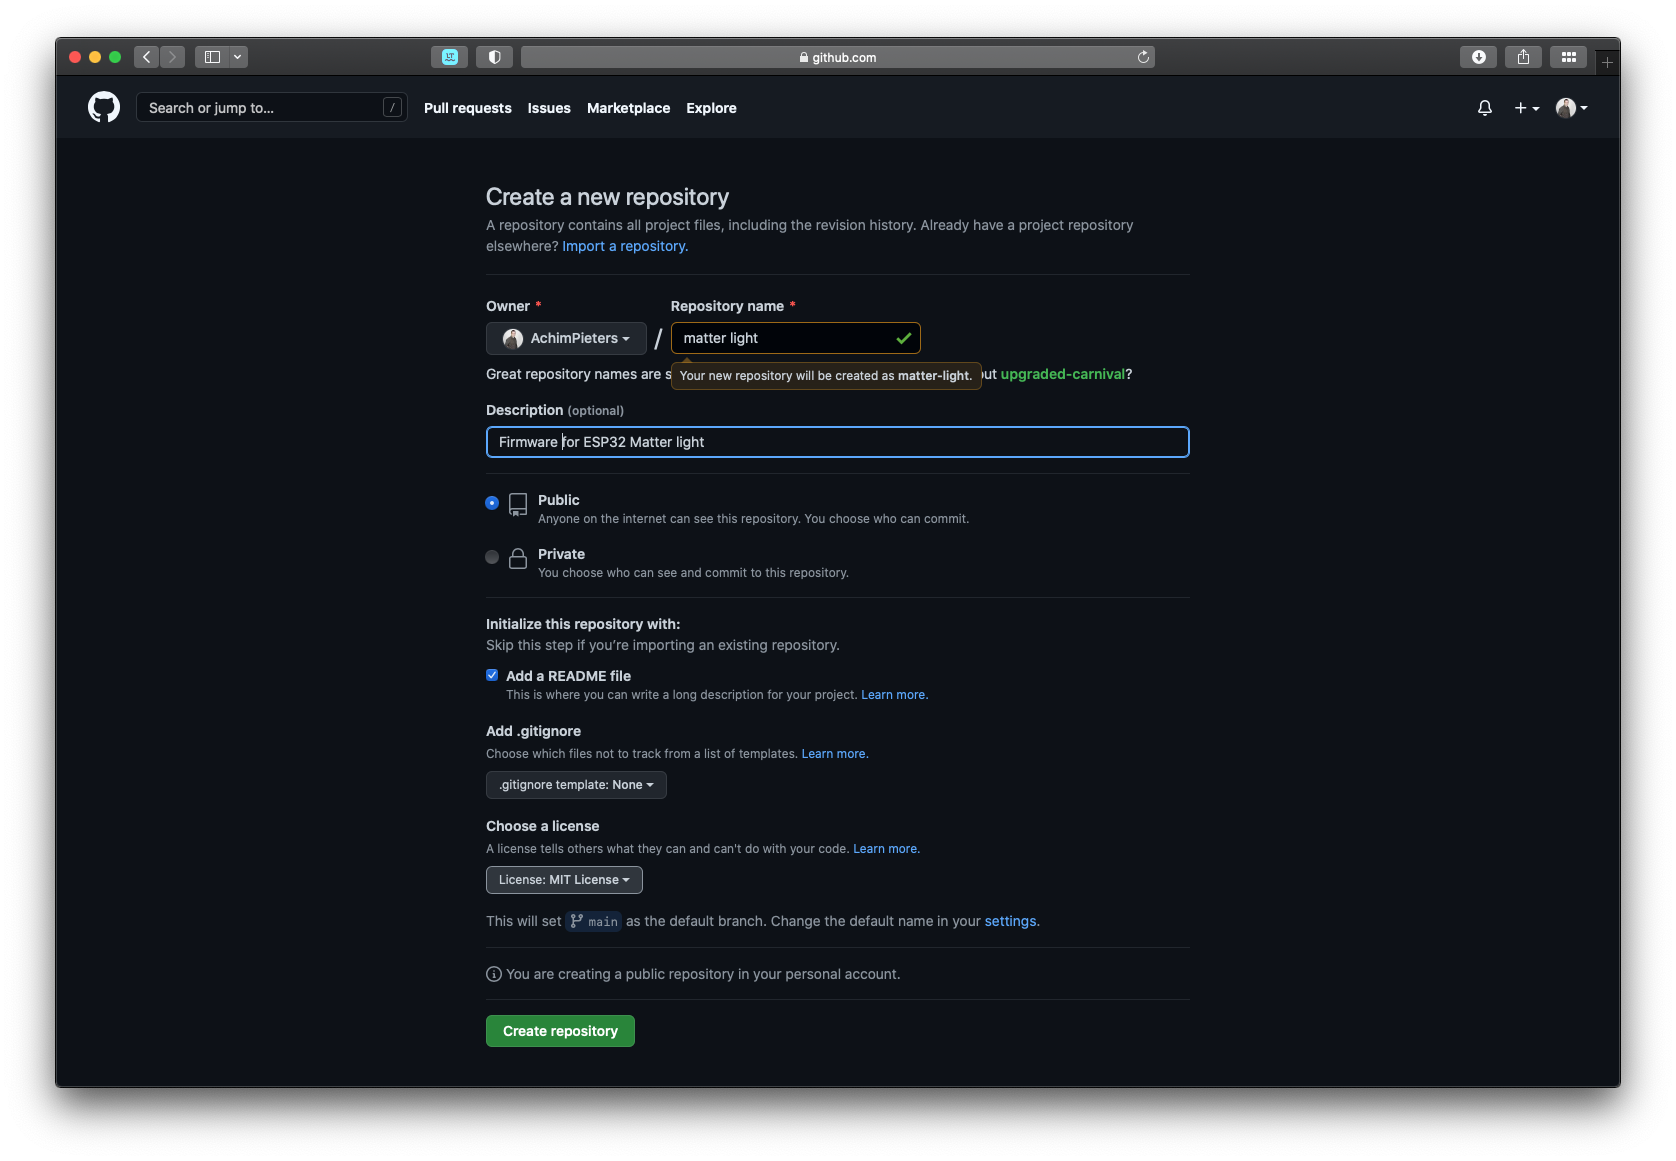
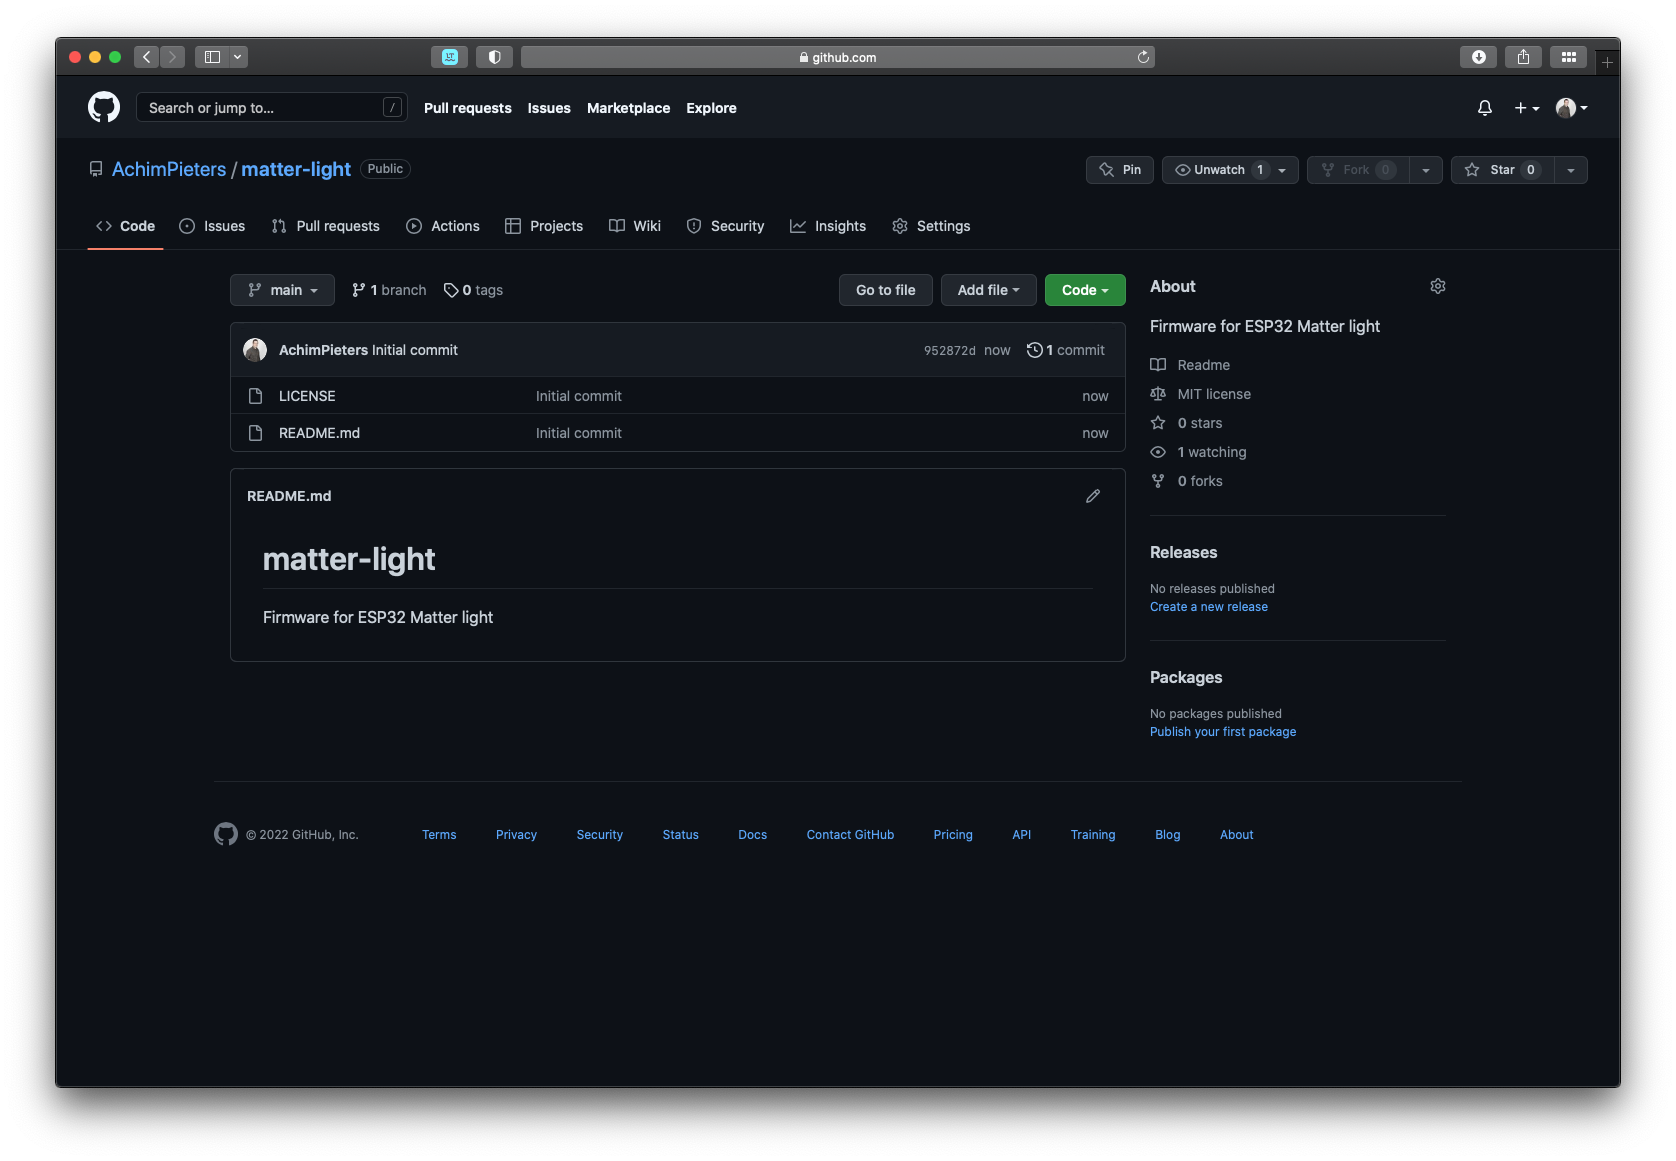
In a nutshell, go to GitHub.com and make an account create a new Repository and give it a name (e.g., matter light). File in the Description (e.g., Firmware for ESP32 matter light) and place a tick at “Initialize this repository with a README“. Select your license type (e.g., MIT License). Now click on Create Repository.
Now click on Releases and the Create a new release.
Change into the right directory.
cd matter/connectedhomeip/examples/lighting-app/esp32Now you have to fill in the version number (e.g., 0.0.1). Give your release a name (e.g., matter light) and fill in a description if you want to. Then upload the chip-lighting-app.bin and chip-lighting-app.bin.sig files to your new release.
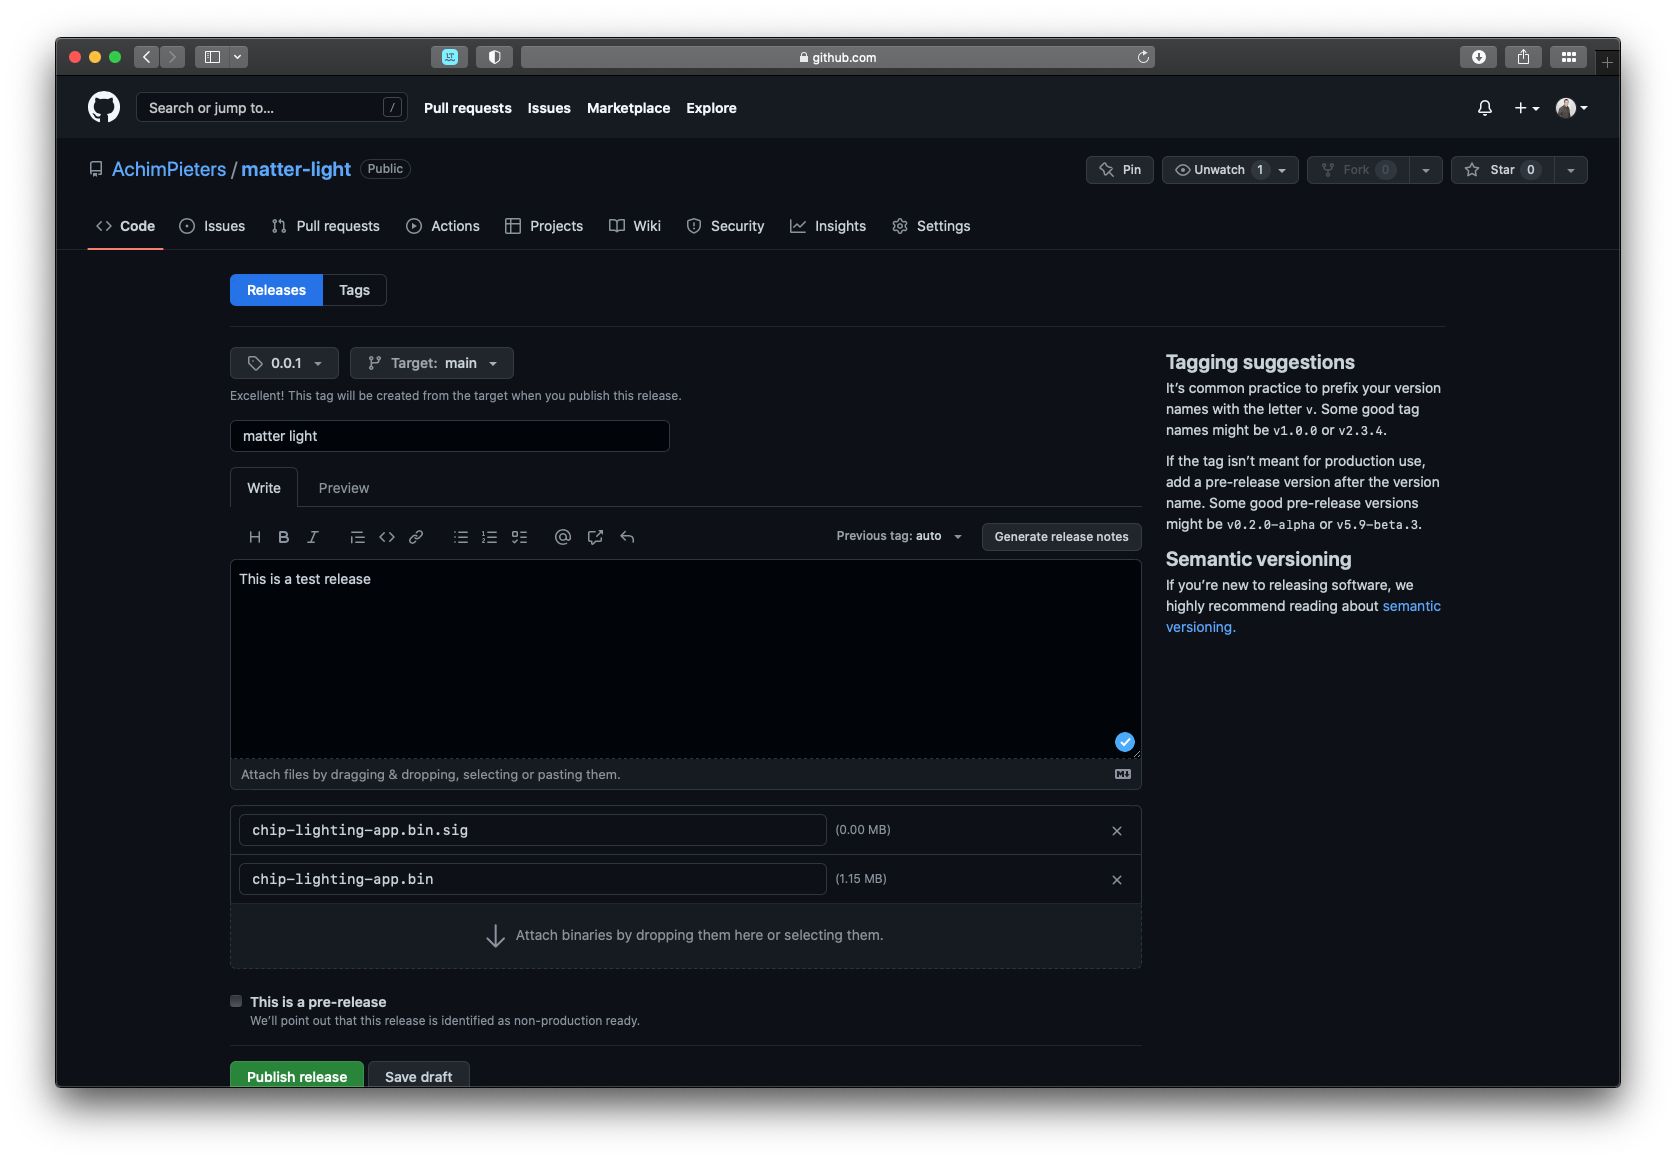
Note: the version number always has to be in x.y.z format. On the GitHub page you will find this text ” It’s common practice to prefix your version names with the letter v. Some good tag names might be v1.0 or v2.3.4.” DO NOT USES V0.0.1 But only use the digits e.g. 0.0.1 otherwise it will not work!
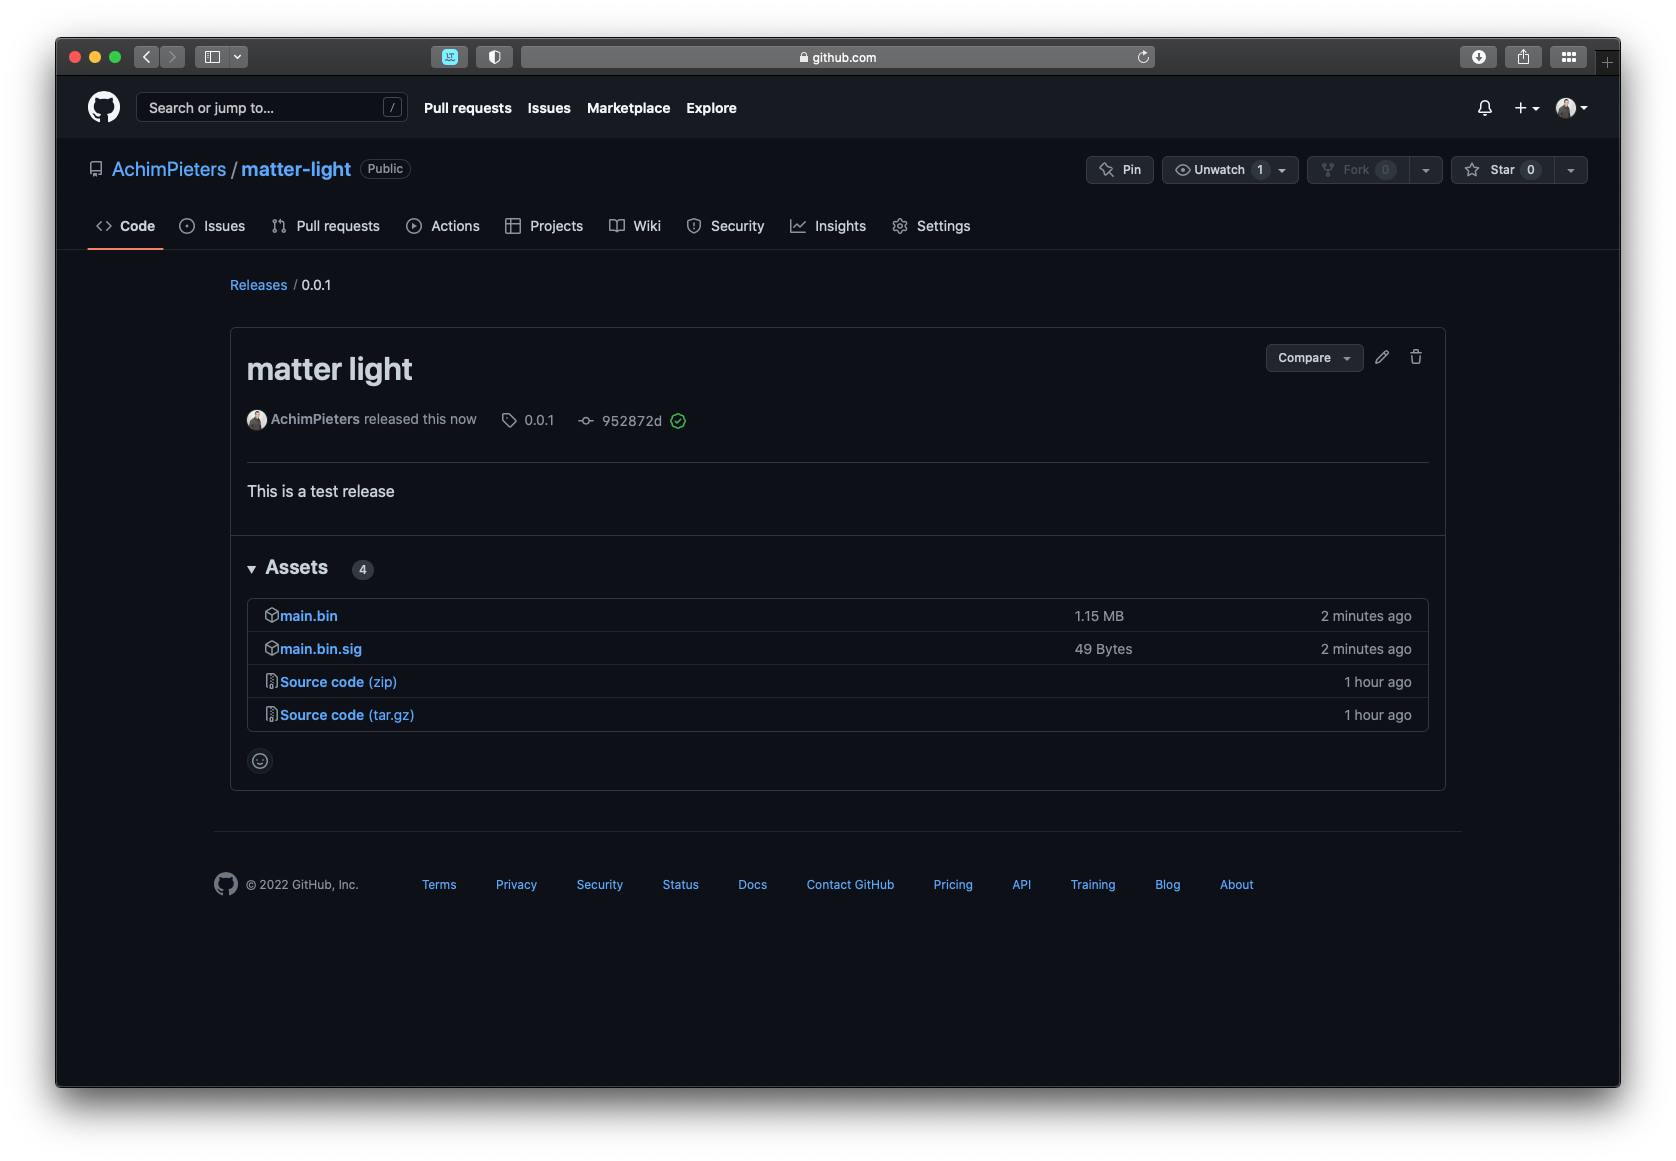
Rename the files to main.bin and main.bin.sig.

Click on the green button named Publish release.

Installing Life Cycle Manger for ESP32
At the time of writing, the Life cycle manger is still at beta stage. Go to the directory you made where you put the previously downloaded (e.g., Downloads) Bootloader.bin, PartitionTable.bin and otaboot.bin files.
cd downloads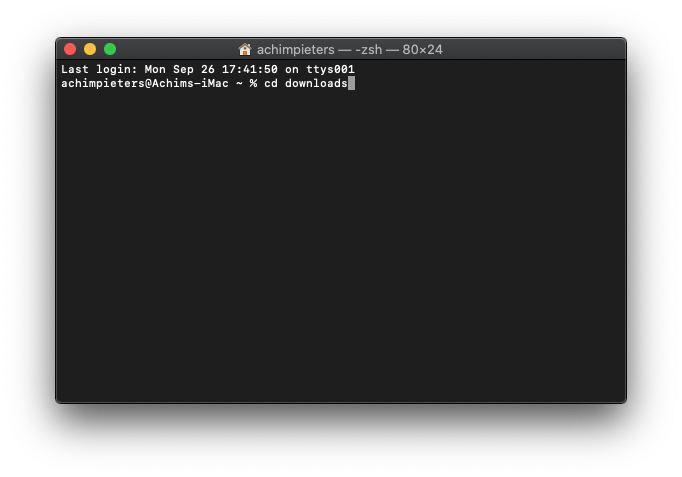
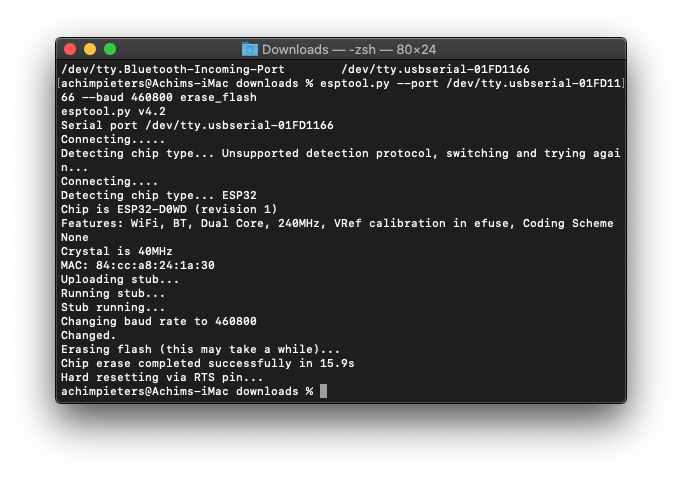
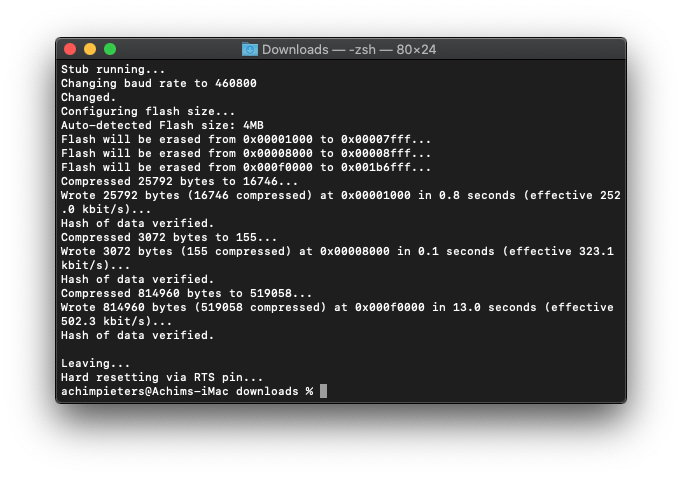
Use esptool.py to flash it in your device. First, erase flash memory from your ESP module:
esptool.py --port /dev/cu.usbserial* --baud 460800 erase_flash
Normally, your ESP Port will be something like (e.g /dev/cu.usbserial-A50285BI). To find out the port you can use:
ls /dev/tty.* 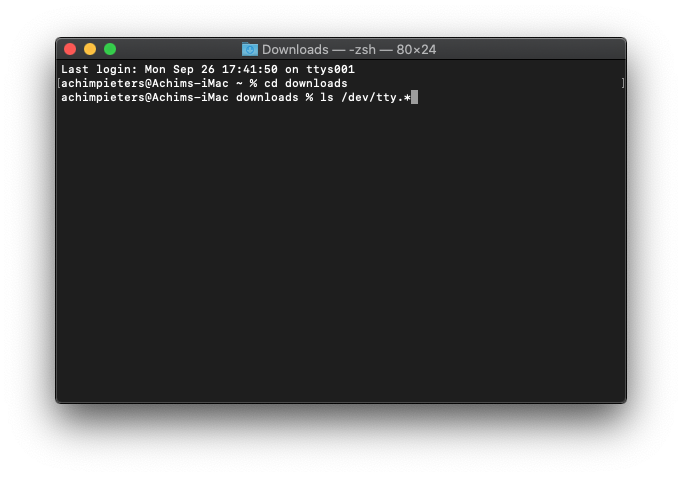
In this case, the port is /dev/tty.usbserial-01FD1166.

Then fill in the port and execute.
esptool.py --port /dev/tty.usbserial-01FD1166 --baud 460800 erase_flash
The Erase process is starting, wait until it’s done.
Then you must flash the Bootloader.bin, PartitionTable.bin and otaboot.bin. Change into the directory where you downloaded the files (e.g., Downloads) we need to use the following lines to flash Life Cycle Manager for ESP32 to our module.
esptool.py --chip esp32 --port /dev/cu.usbserial* --baud 460800 --before default_reset --after hard_reset \
write_flash -z --flash_mode dio --flash_freq 40m --flash_size detect \
0x01000 bootloader.bin \
0x08000 partition-table.bin \
0xe0000 otaboot.bin
Normally, your ESP Port will be something like (e.g /dev/cu.usbserial-A50285BI). To find out the port you can use:
ls /dev/tty.* Then fill in the port and execute.
esptool.py --chip esp32 --port /dev/tty.usbserial-01FD1166 --baud 460800 --before default_reset --after hard_reset \
write_flash -z --flash_mode dio --flash_freq 40m --flash_size detect \
0x01000 bootloader.bin \
0x08000 partition-table.bin \
0xe0000 otaboot.bin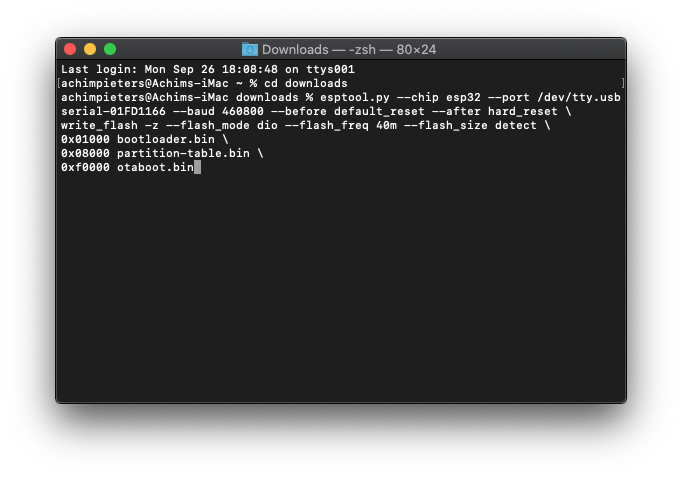
The flashing starts, wait until it’s done.
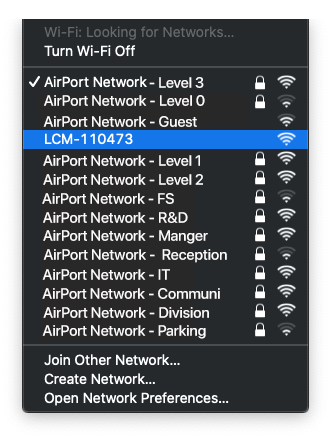
When this is done, it is recommended to monitor the serial output, but it is not essential. If you do not use serial input of the initial input, otamain will start a softAP LCM-xxxx. You select the Wi-Fi network, and define your repo to be used.
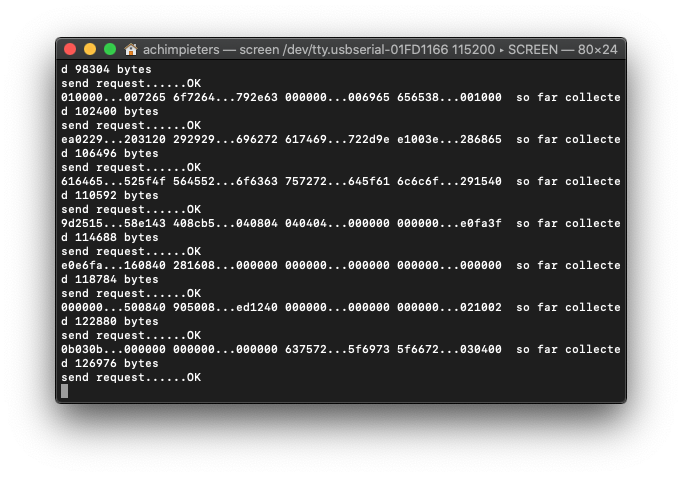
In ~5 minutes, the software will set up everything and download your code. You should be able to monitor progress on the Wi-Fi network you configured by using this command.
screen /dev/tty.usbserial-01FD1166 115200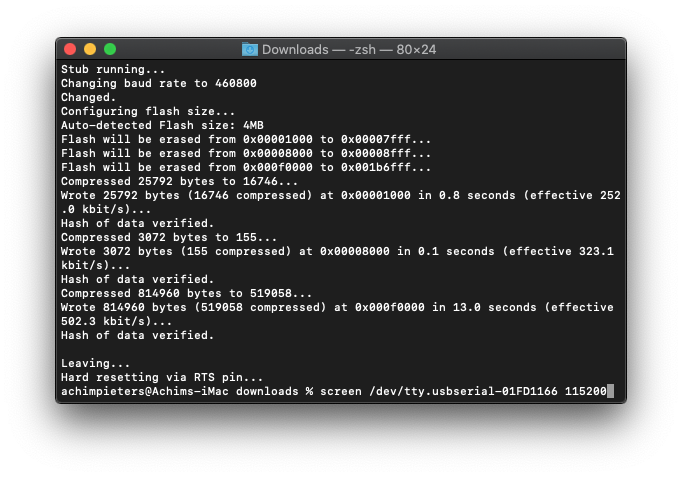

Connecting to Life Cycle Manger for ESP32
You must configure Wi-Fi network and OTA repository. To configure Wi-Fi settings, the device generates its own Wi-Fi in AP mode. You must connect to it in order to set up your Wi-Fi network. Before you connect to Life Cycle Manger for ESP32, reset your module by pressing the reset button.
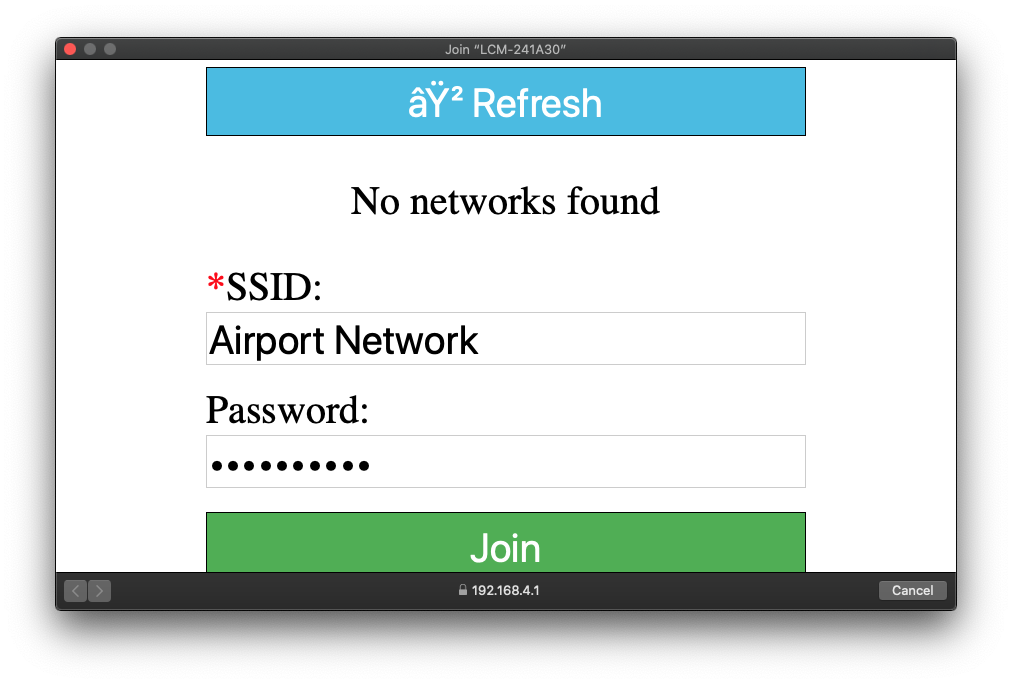
Simply click the Wifi Icon on your Mac, and search a SSID with LCM-XXXXXX , connect to it, and wait a few seconds until a captive portal appears showing you all WiFi networks that the device has found.
A captive portal will open, a warning pops up, select continue.

As mentioned, the Lifecycle manager for ESP32 is still in Beta stage at the time of writing. Nevertheless, we can already use it now.
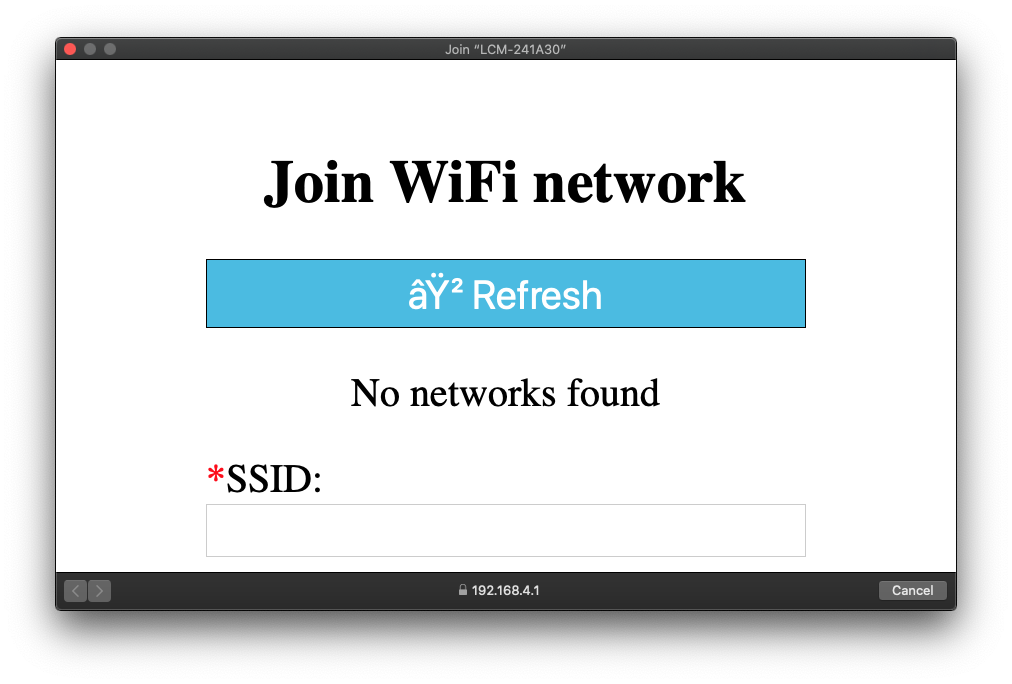
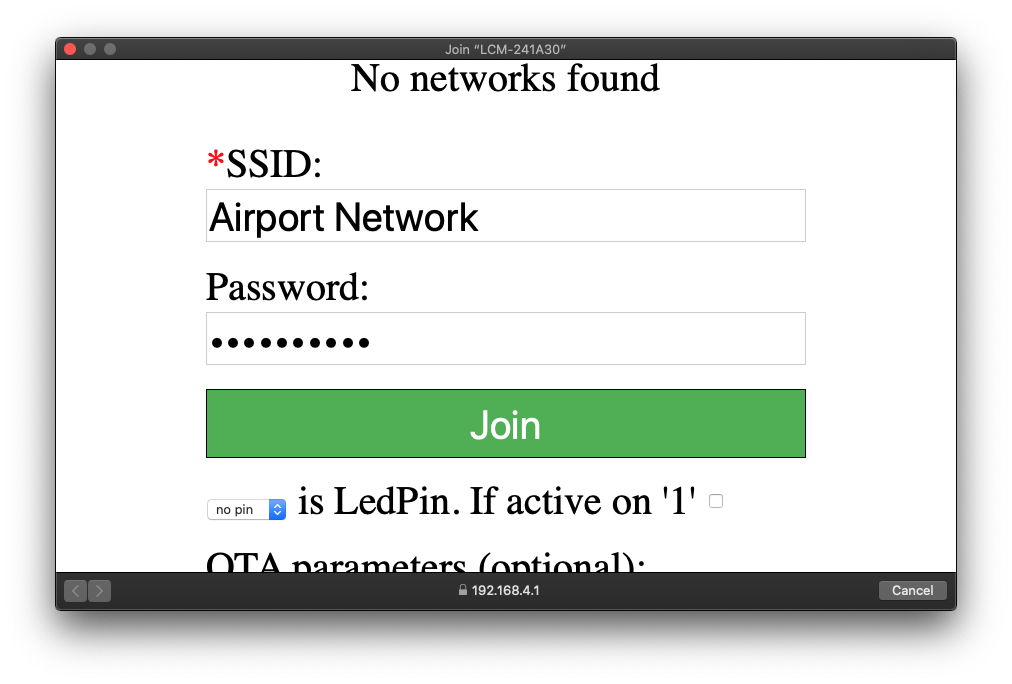
Enter your network name and your password. Do not click Join yet!
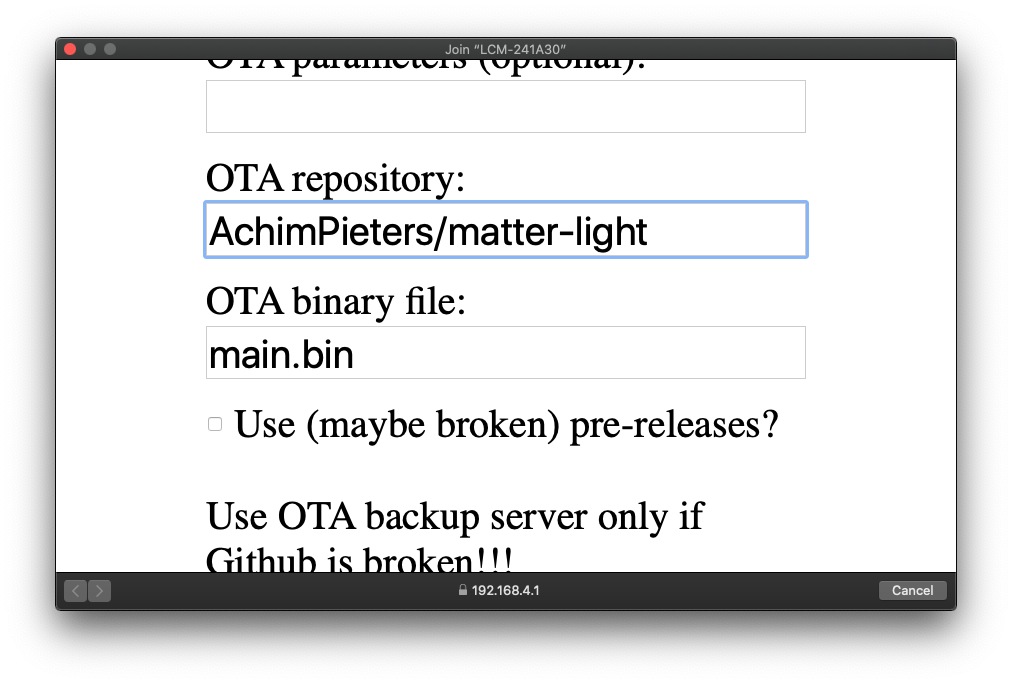
Now you can enter the OTA repository ( this is your previously made GitHub name followed by your repository name):
Your_Name/matter-light (e.g. AchimPieters/matter-light)
OTA binary file:
main.bin
To finish initial setup, click Join button and wait about 7 minutes until process finish (While installation is working, device doesn’t show anything, and buttons don’t work). After that, you will be able to add your accessory to your Matter ecosystem using Home App. Life Cycle Manger for ESP32 will install your Matter device on your ESP32.
TIP: Open your Arduino IDE and then the serial monitor. now you can see the whole installation process! (screen your_Port 115200)
HomeKit Setup
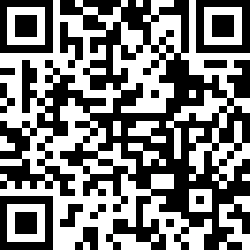
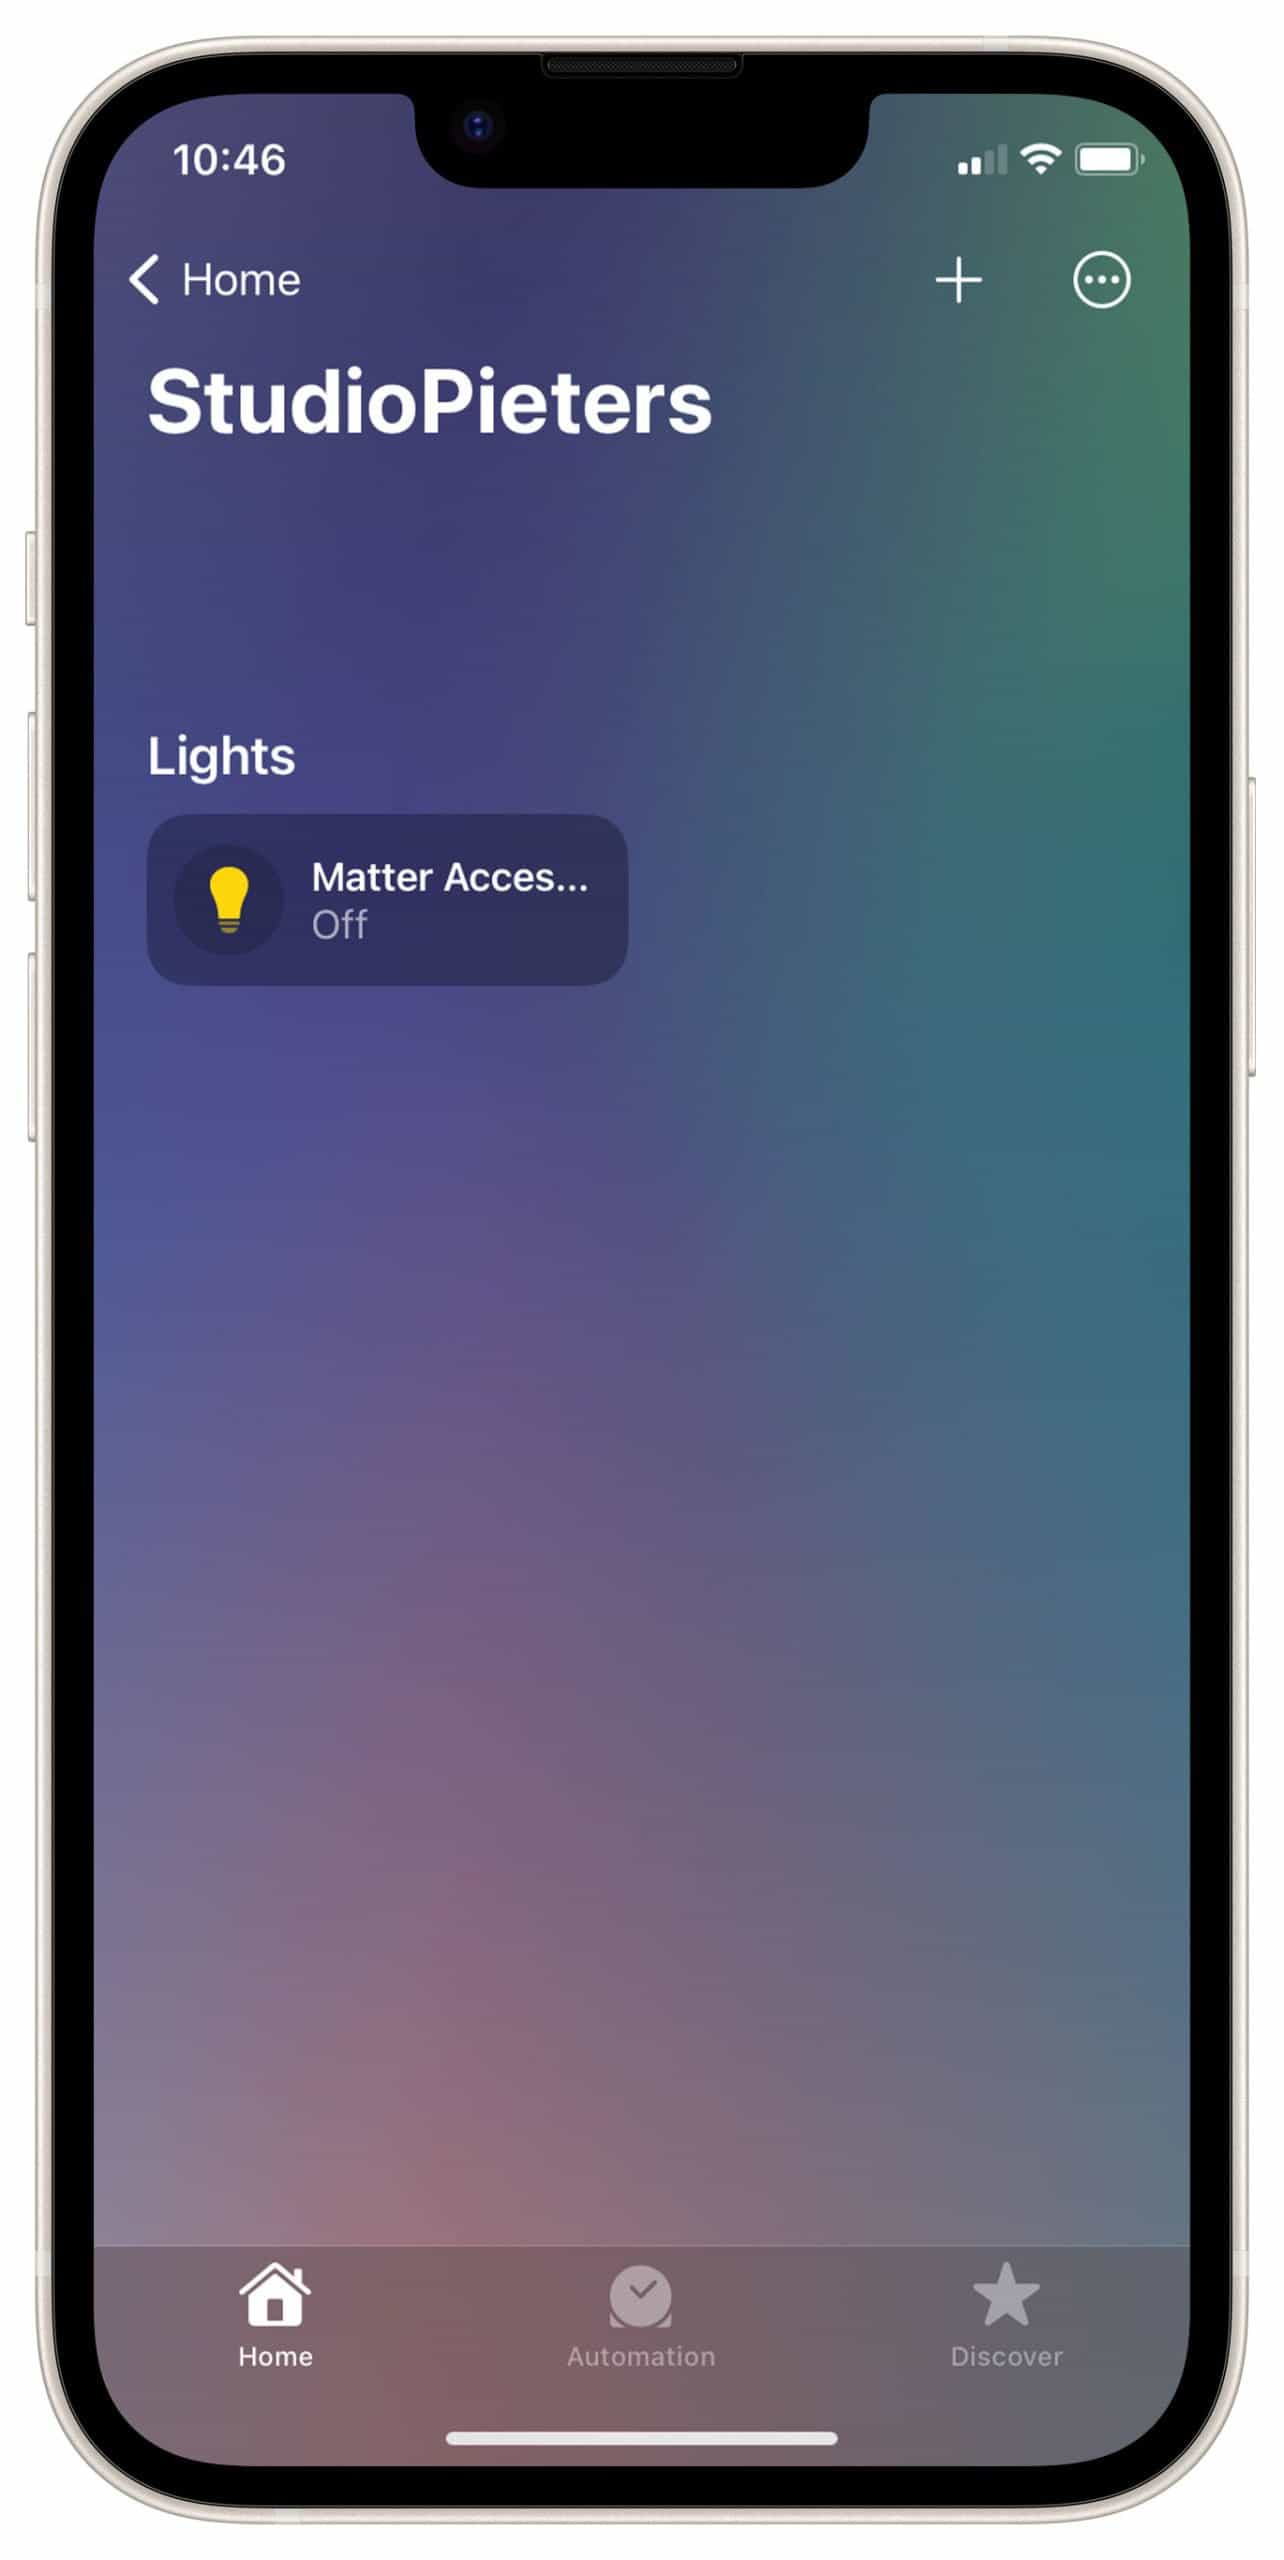
Now it’s time to add your Matter accessory. Open the Home app on your iPhone. Tap Add Accessory. If you already have other HomeKit accessories paired, tap + in the top-right corner to add an accessory. Select the Matter Accessory. A setup code is requested.

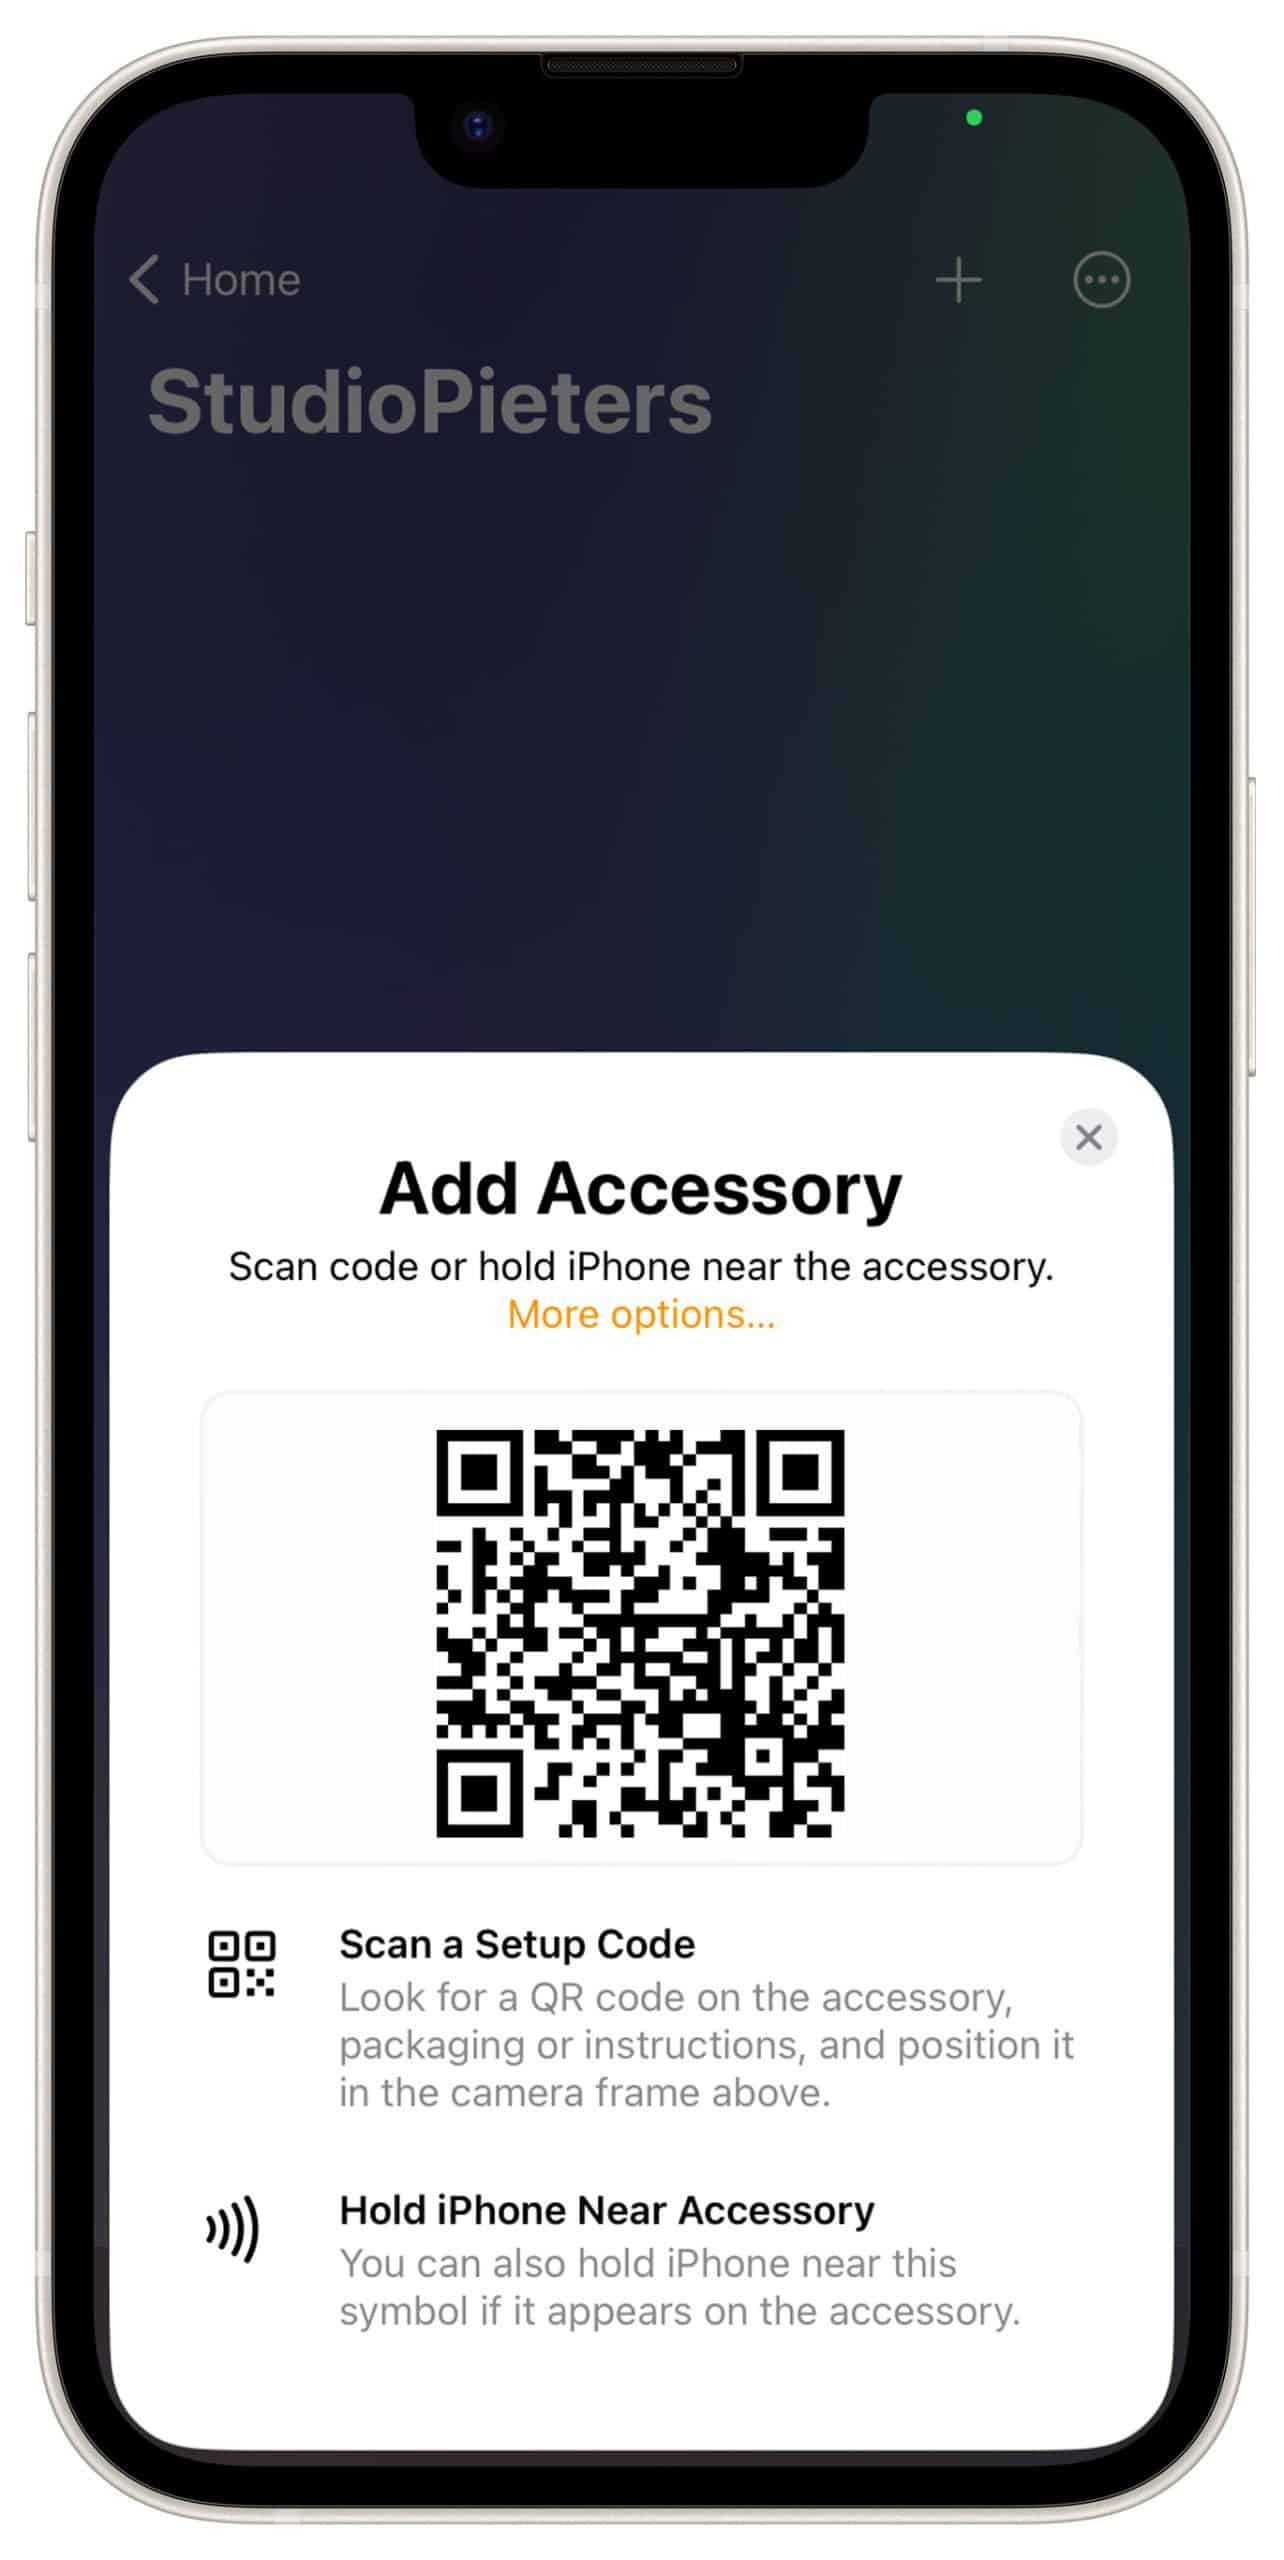
Scan the QR code below to add your matter accesorie.
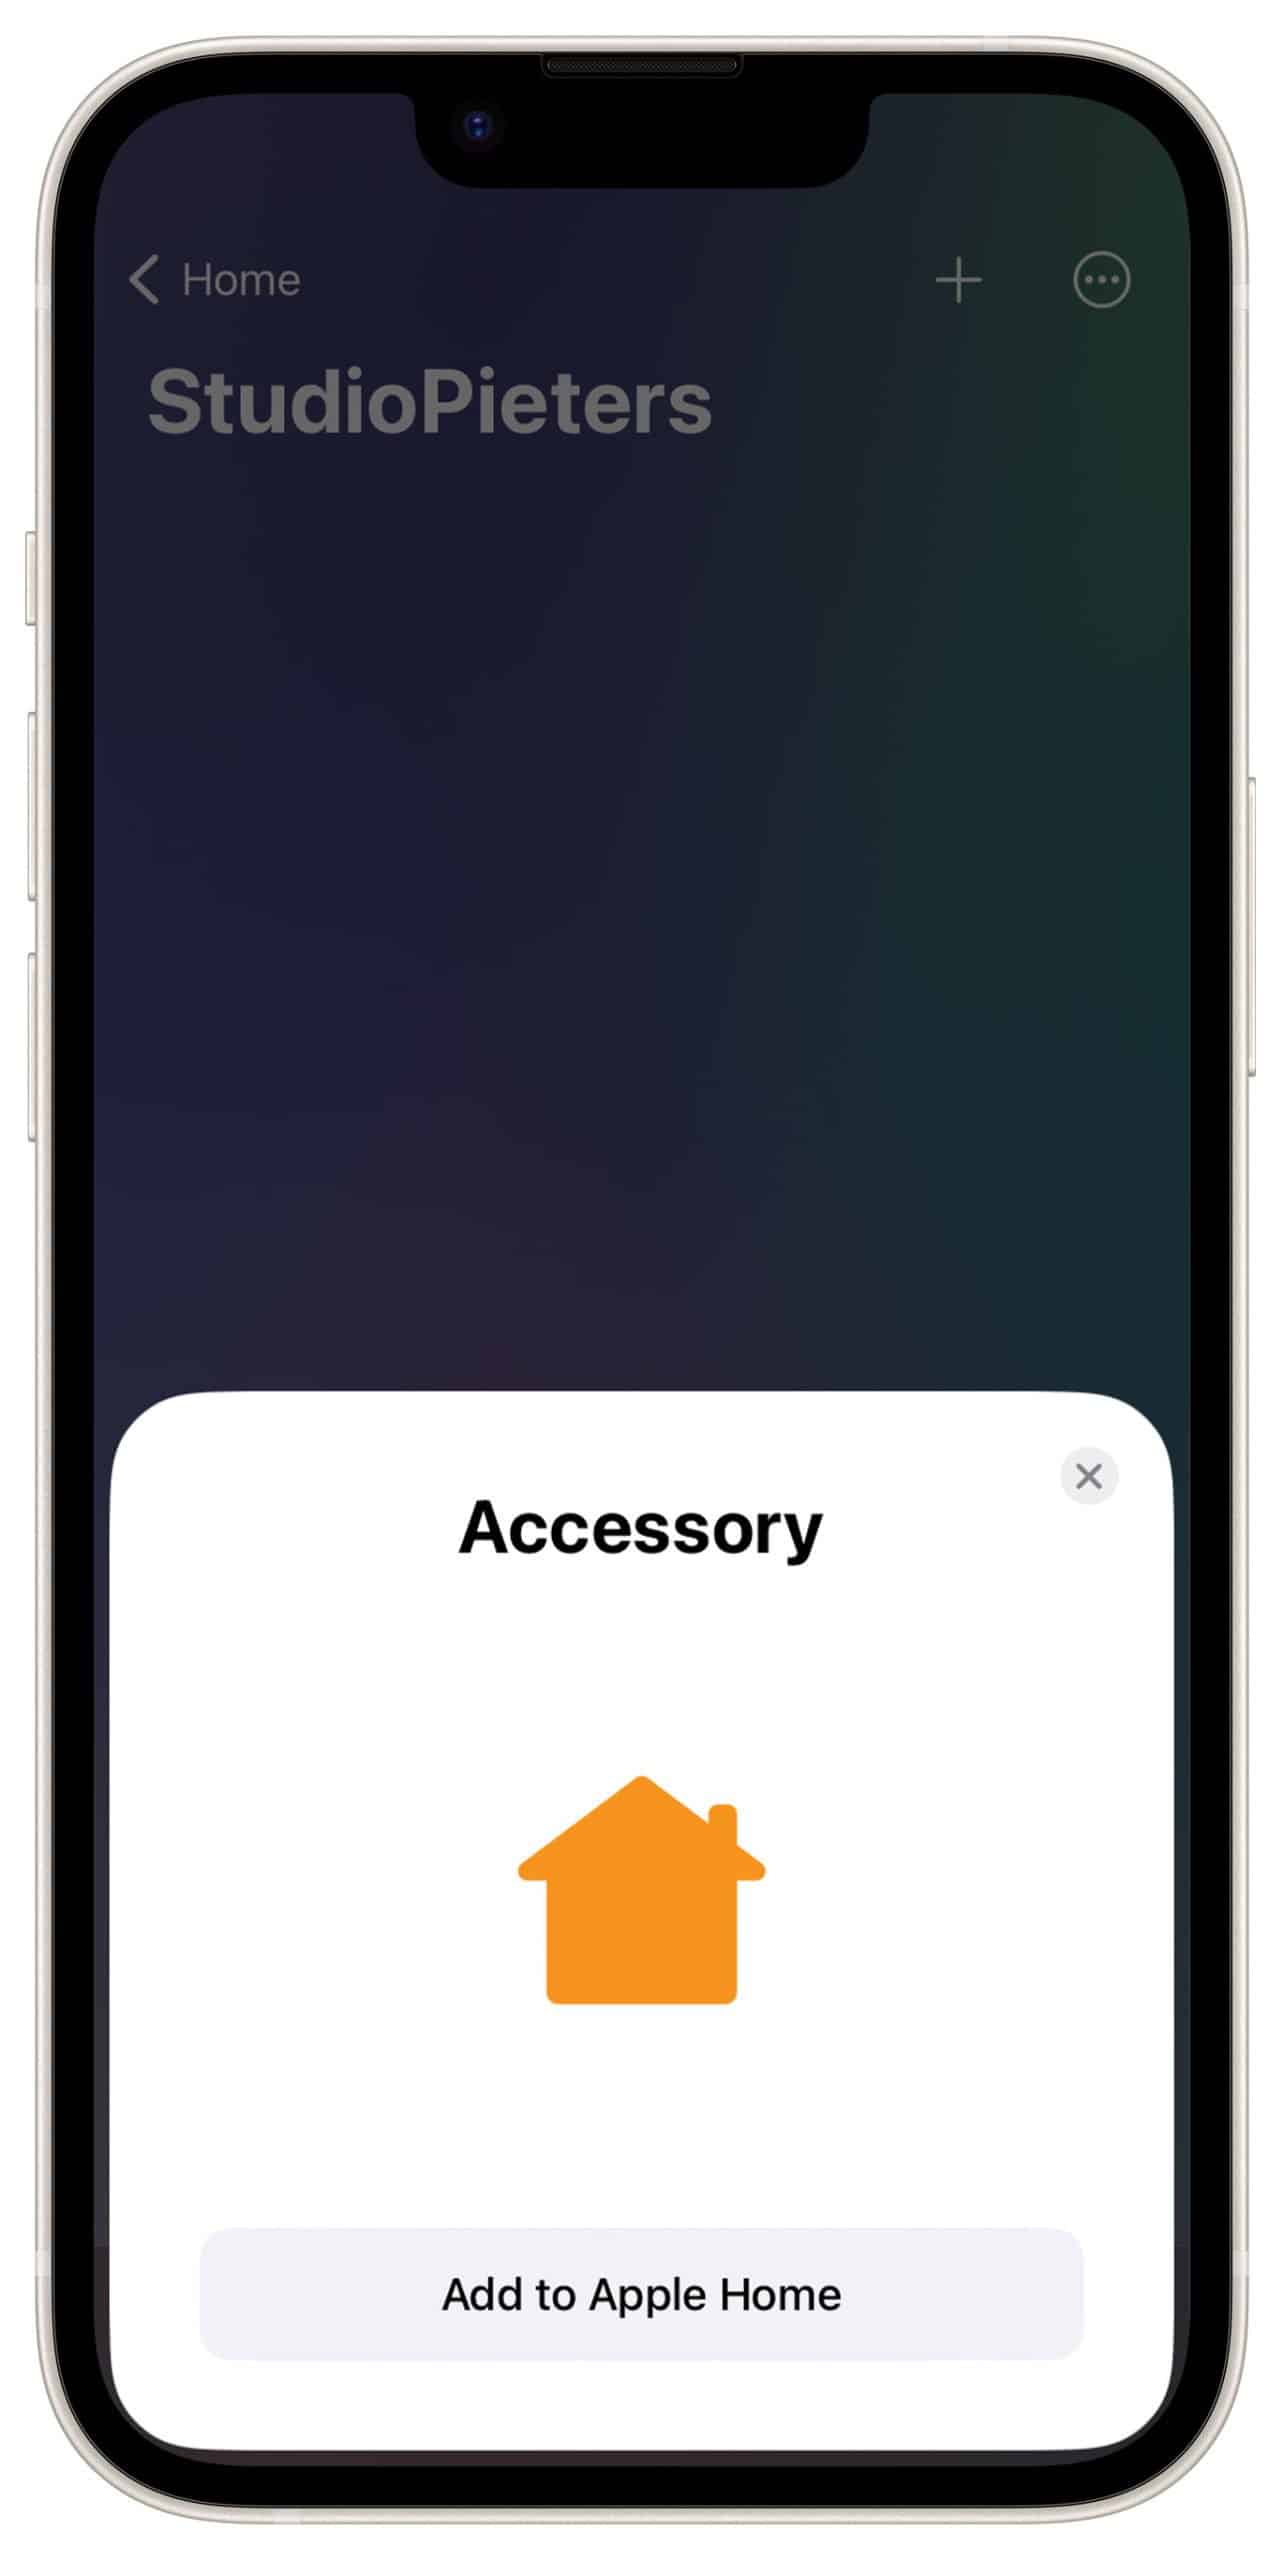
Then Add it to your home.
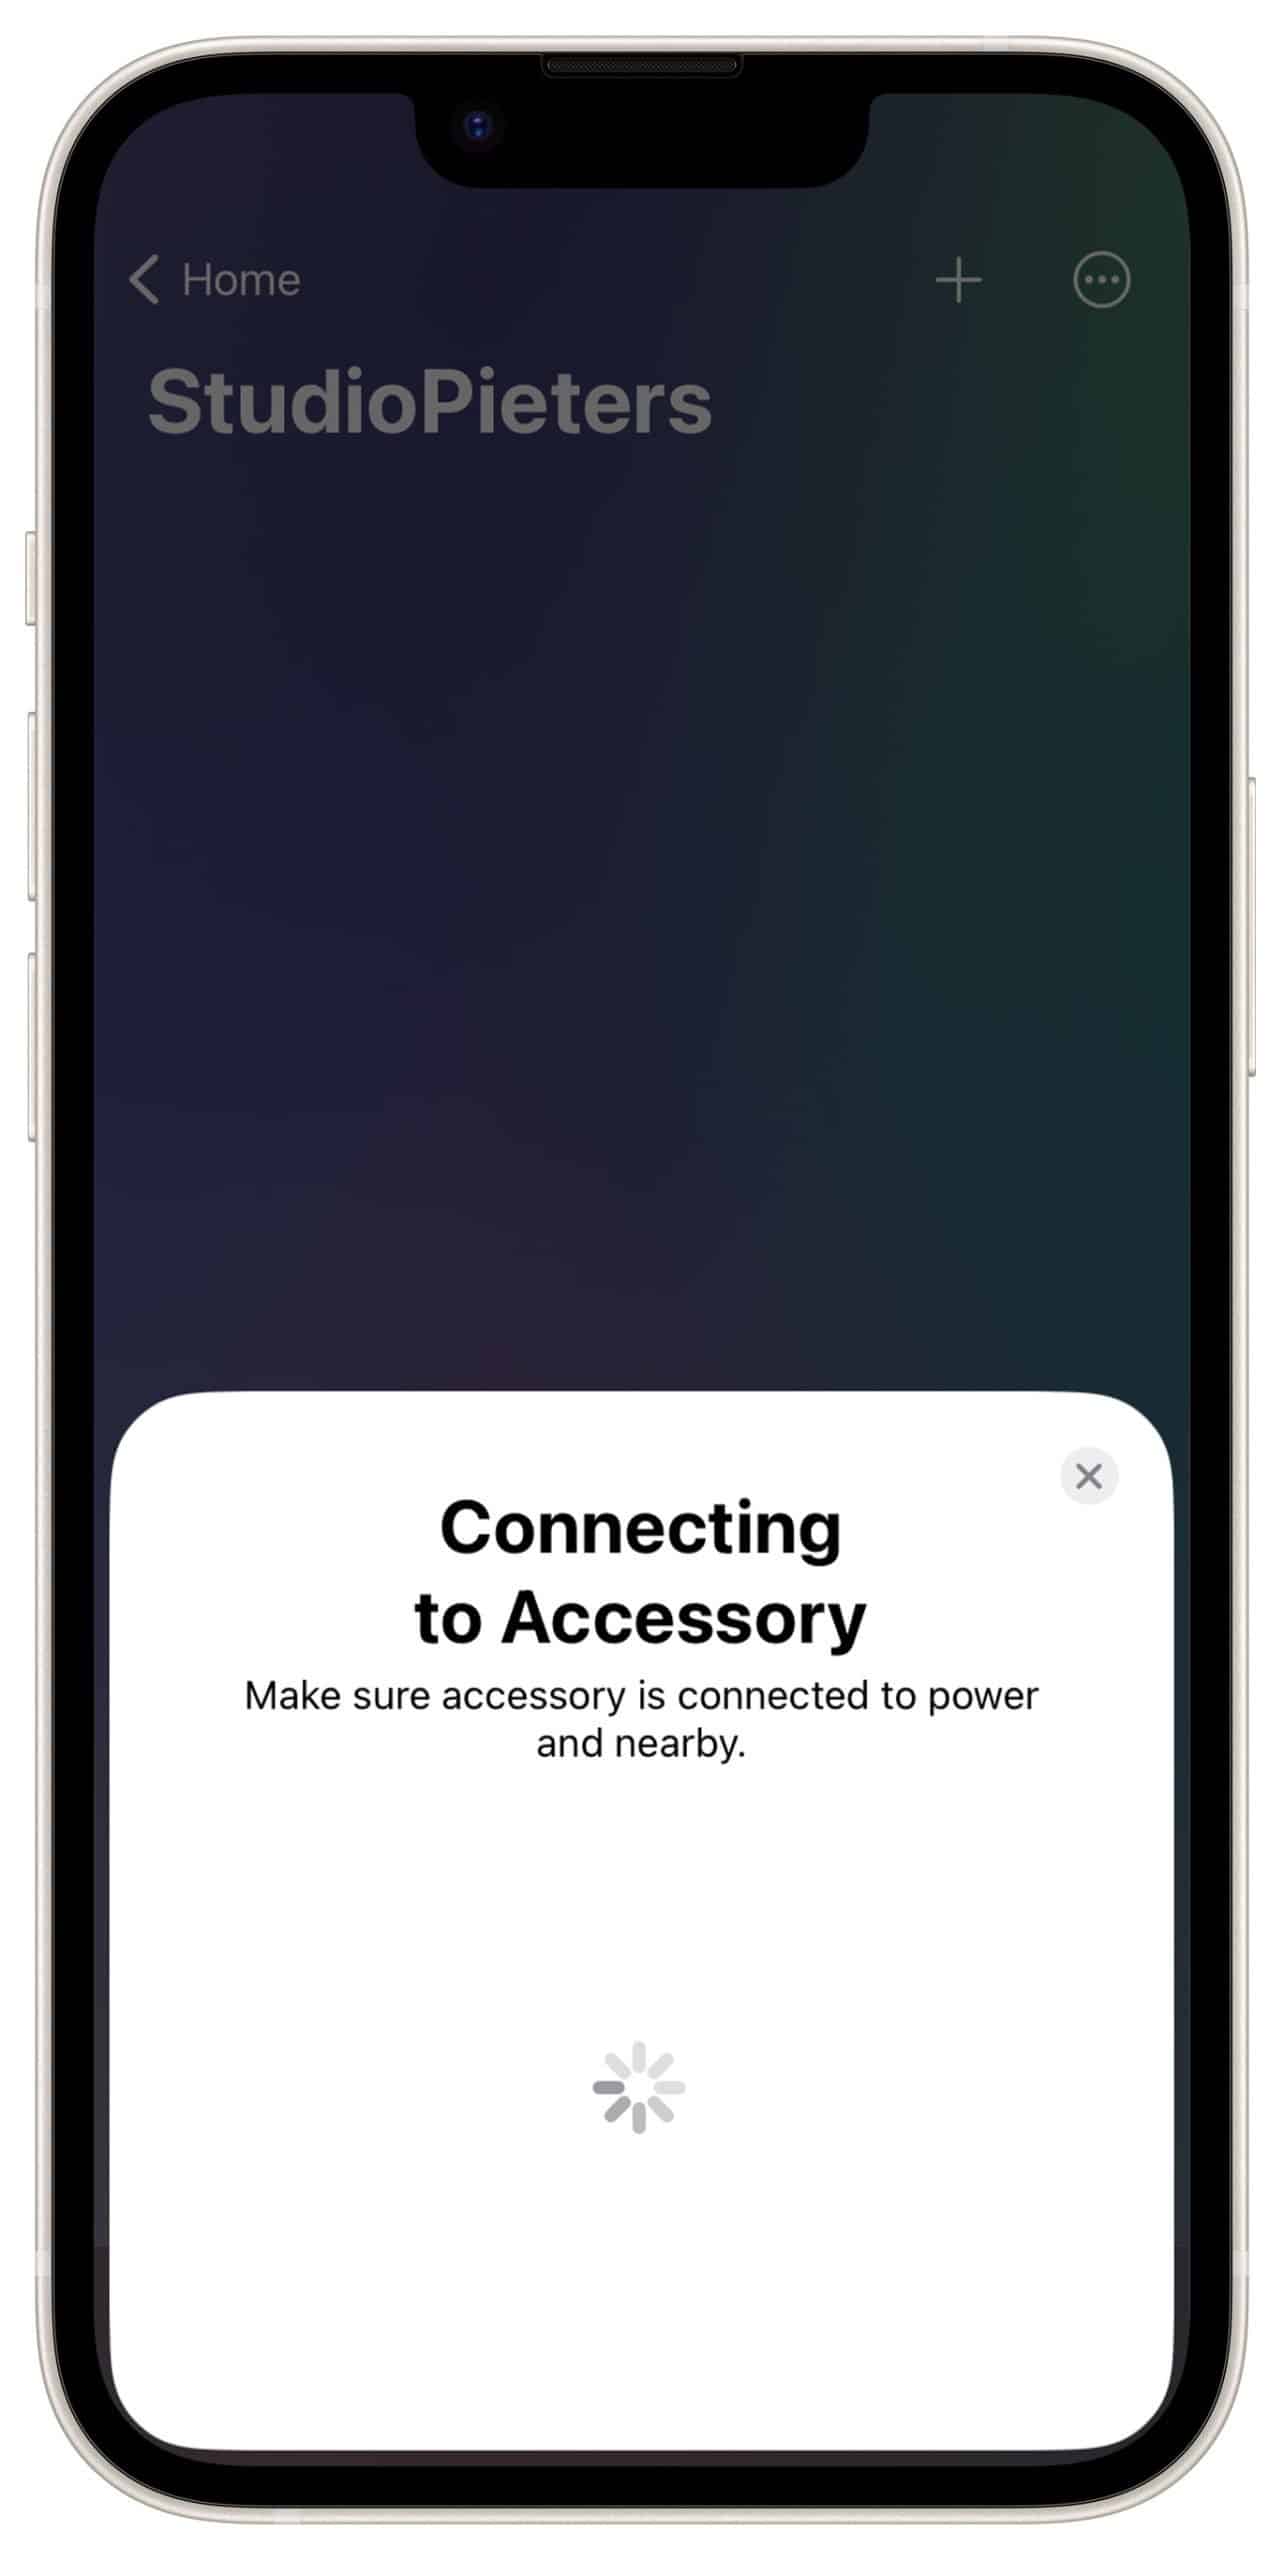
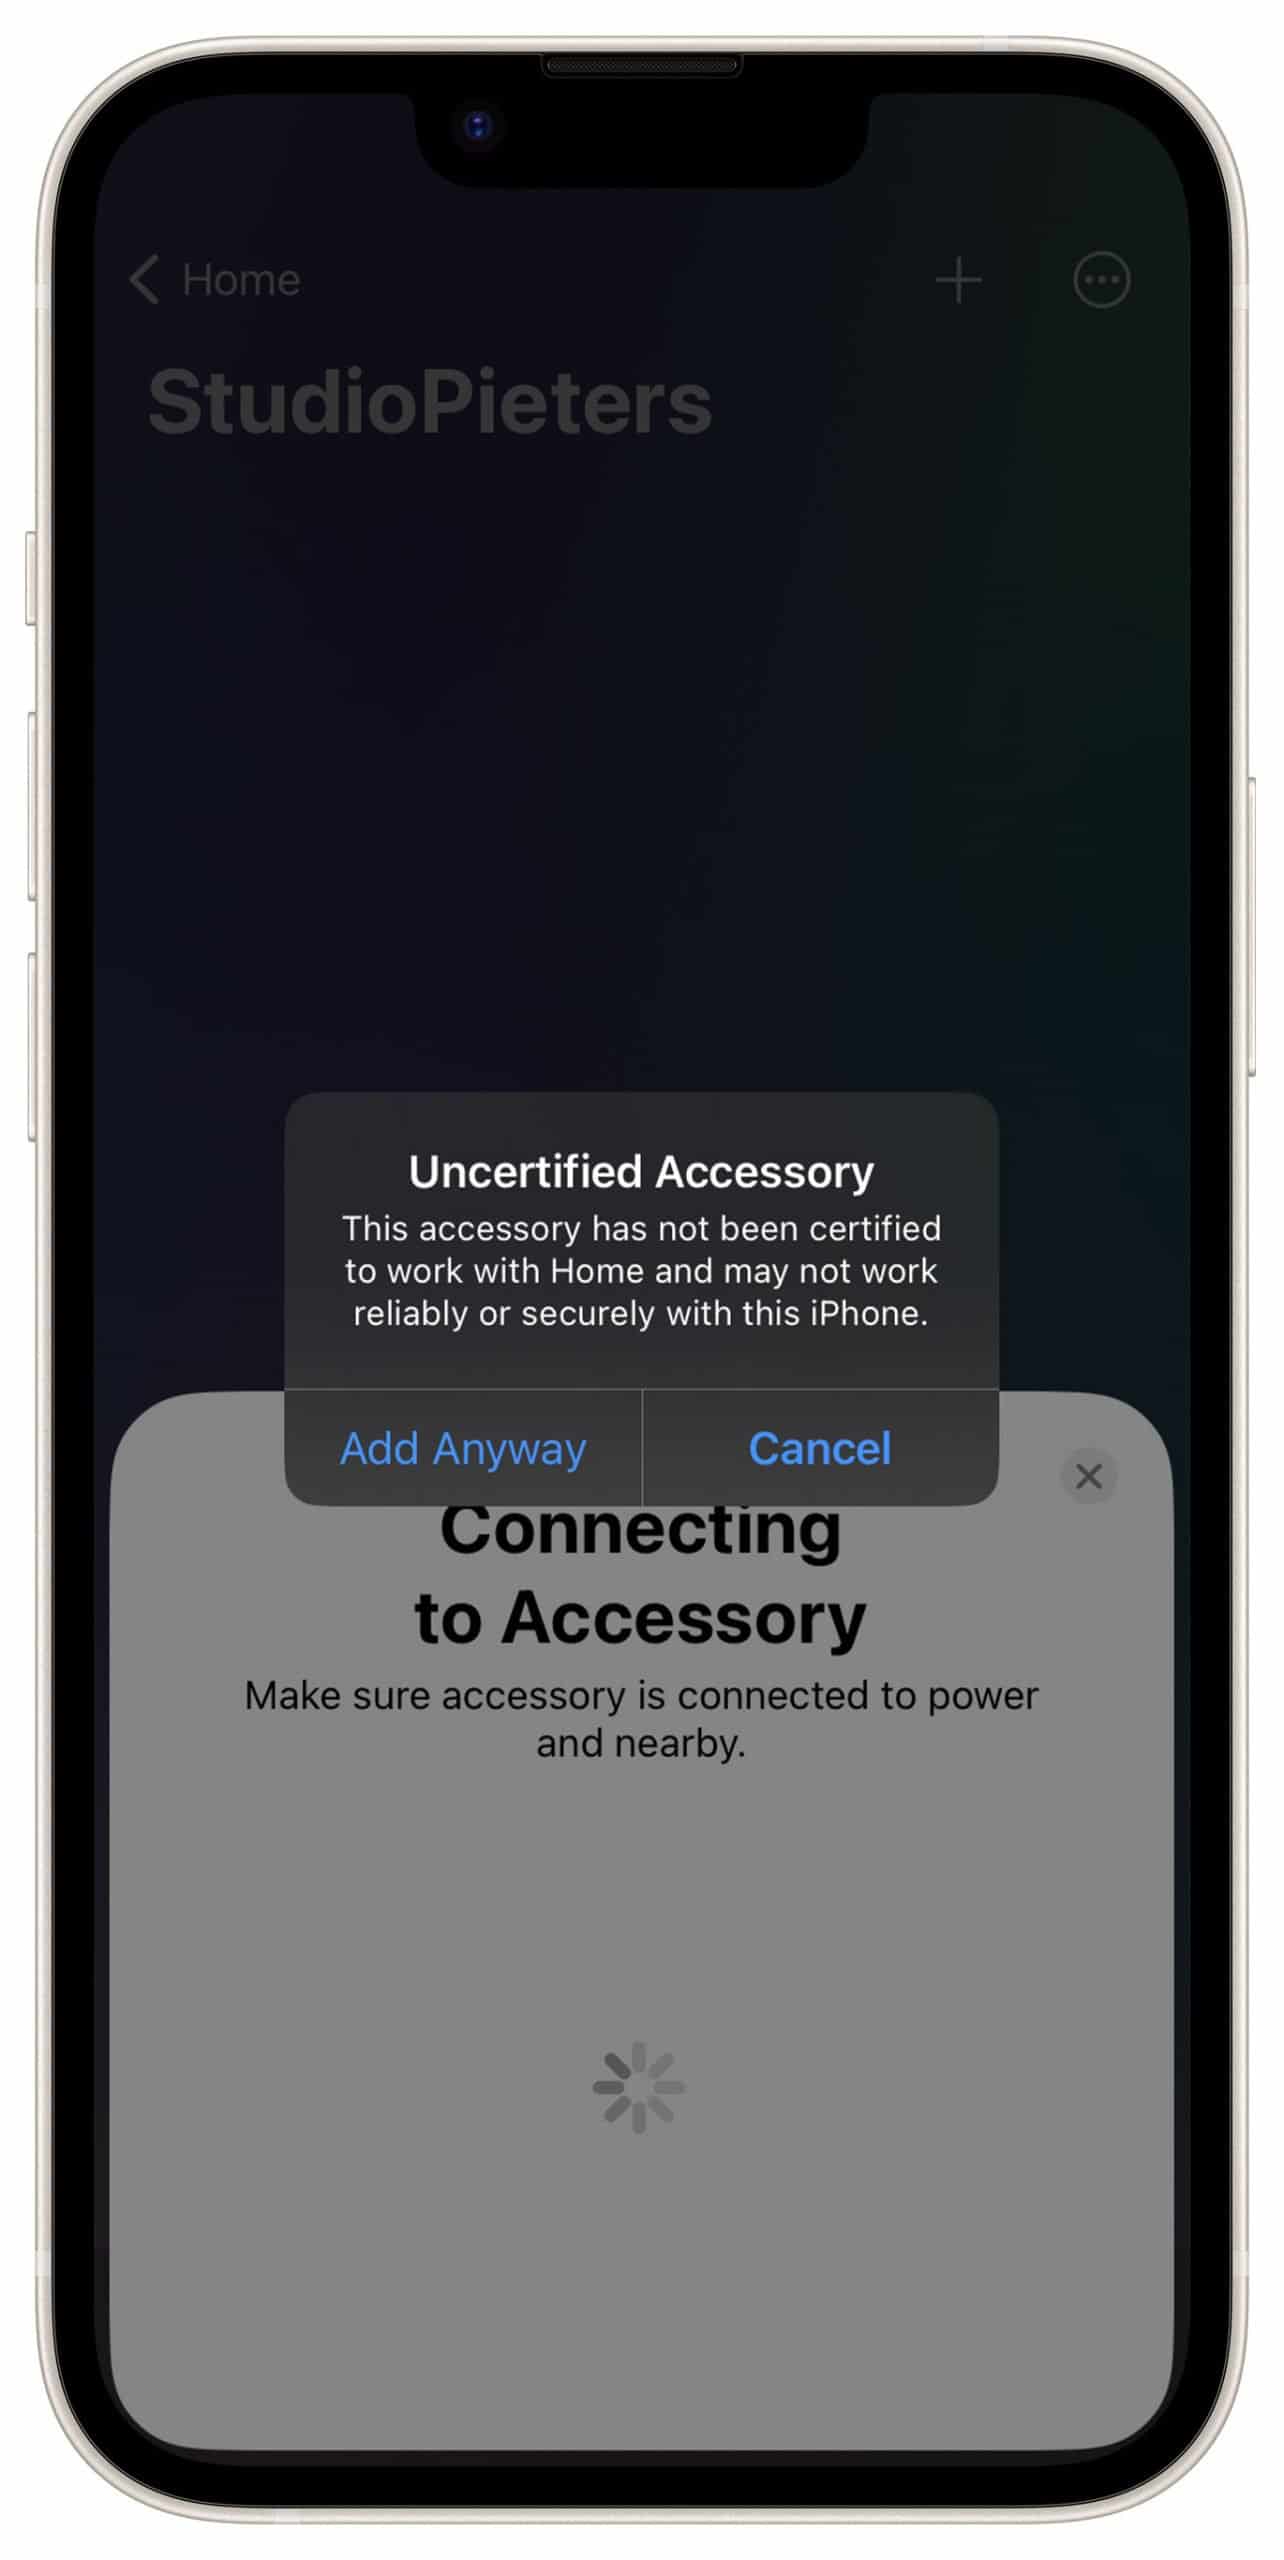
Then your accessory is setting up this can take a moment.
A pop-up appears saying it’s not certified, choose to add anyway.
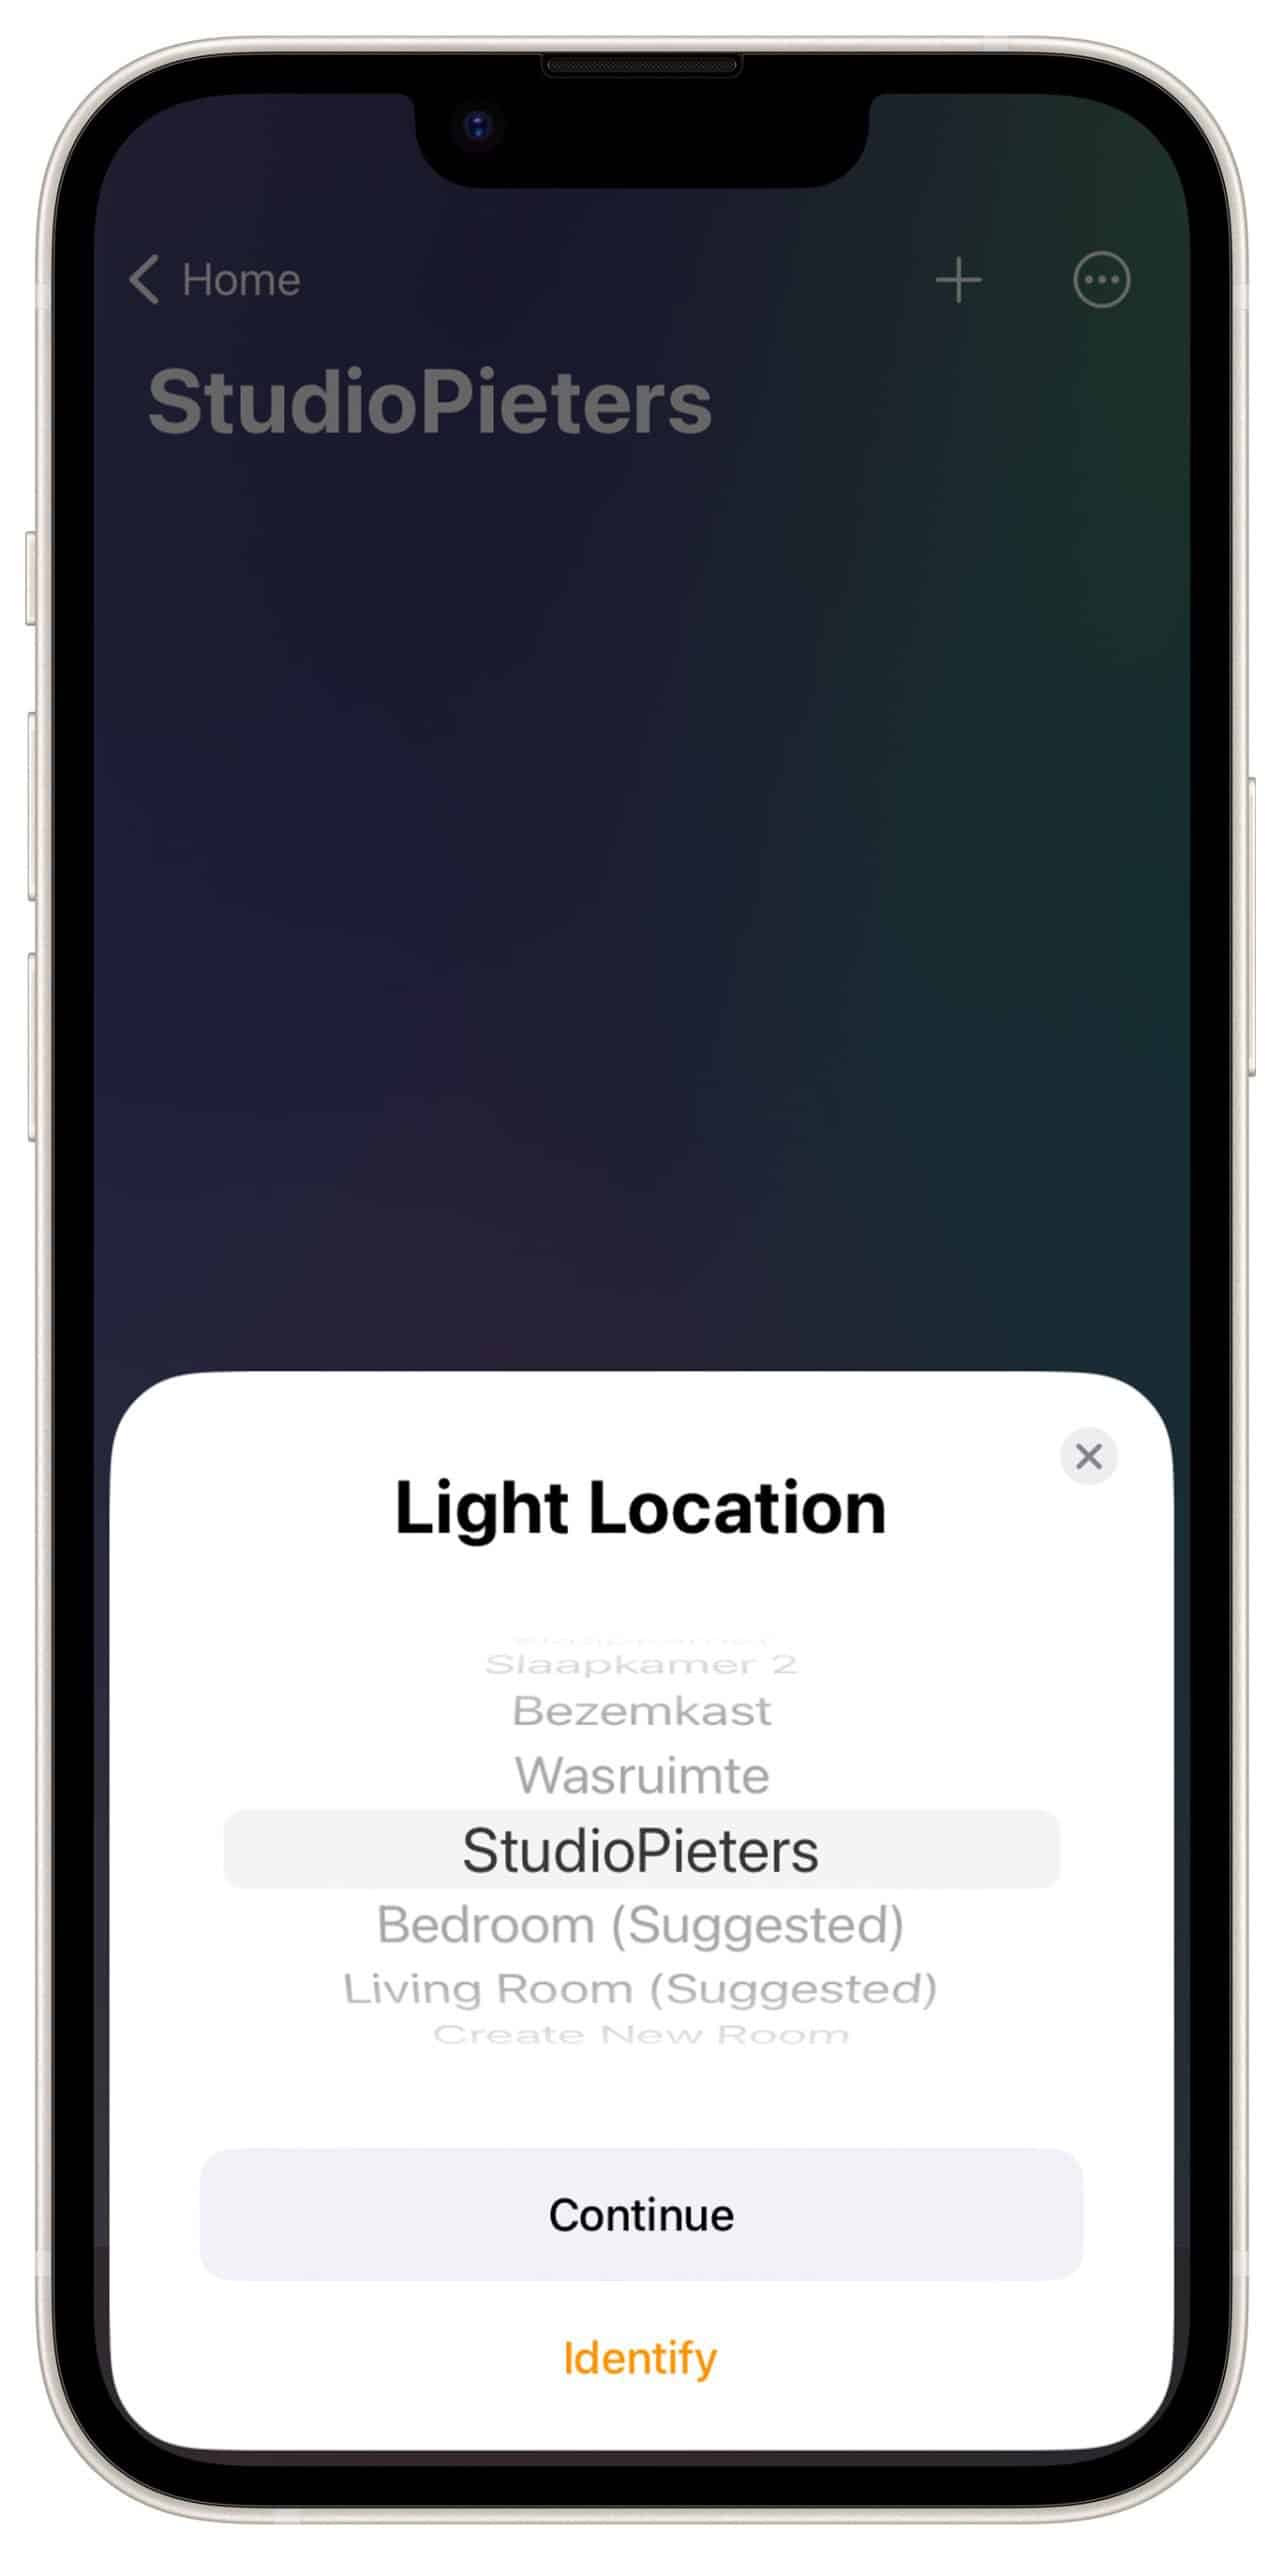
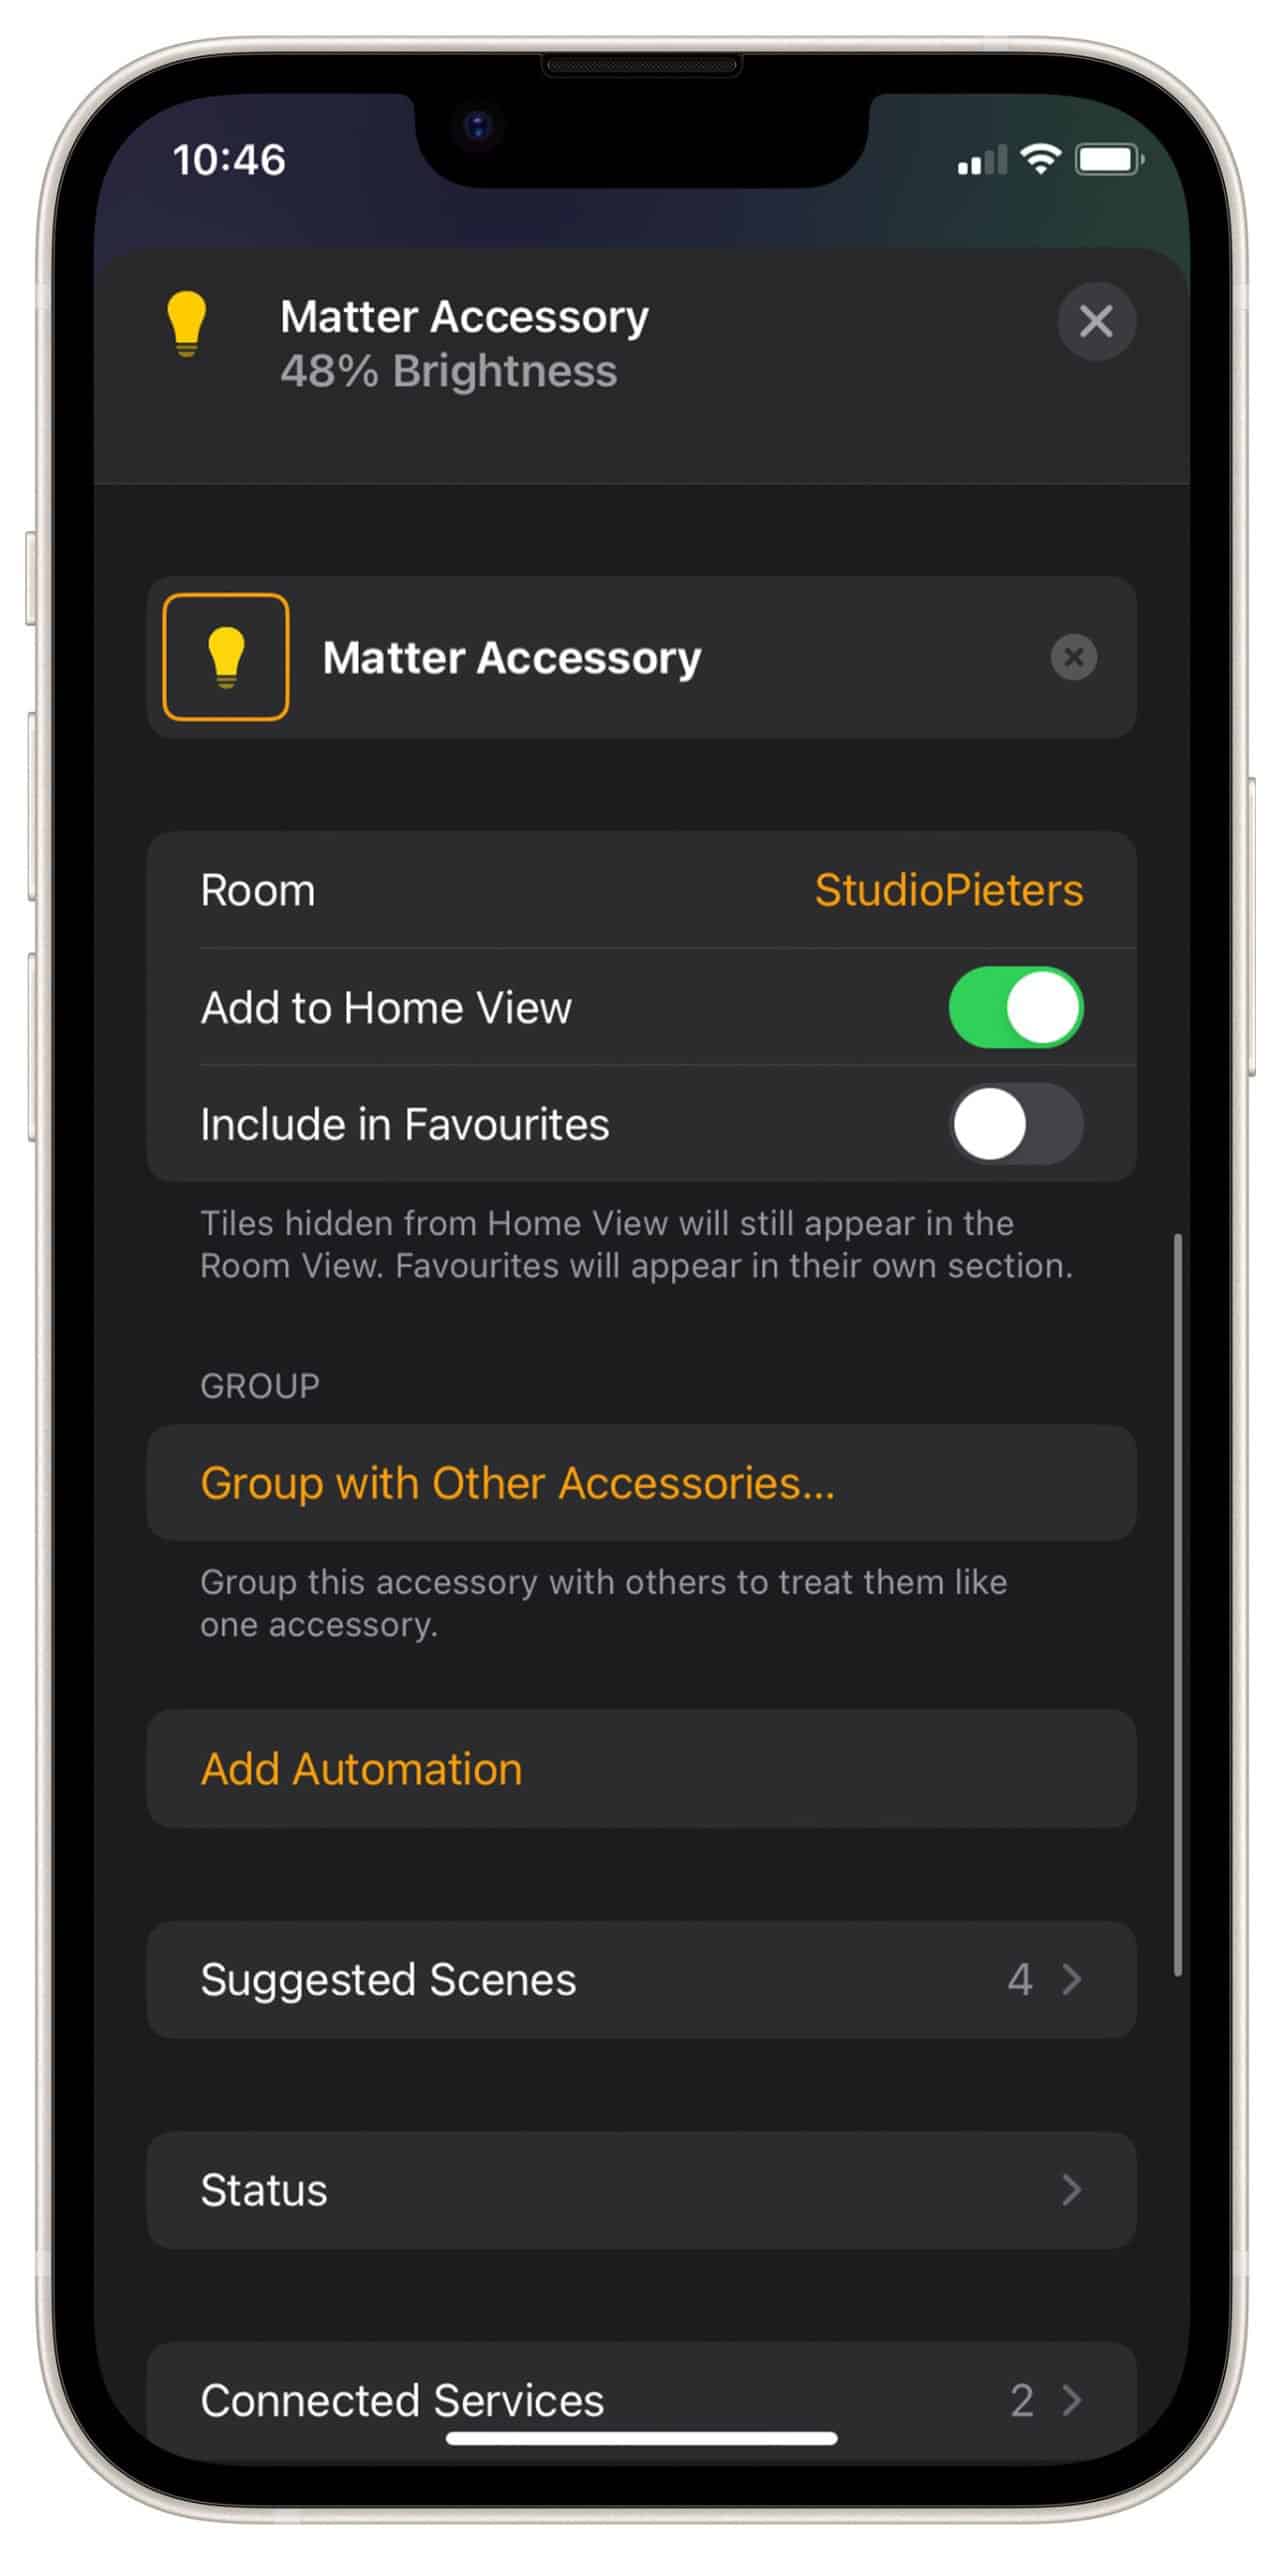
Then you will be asked in which room your accessory is located.
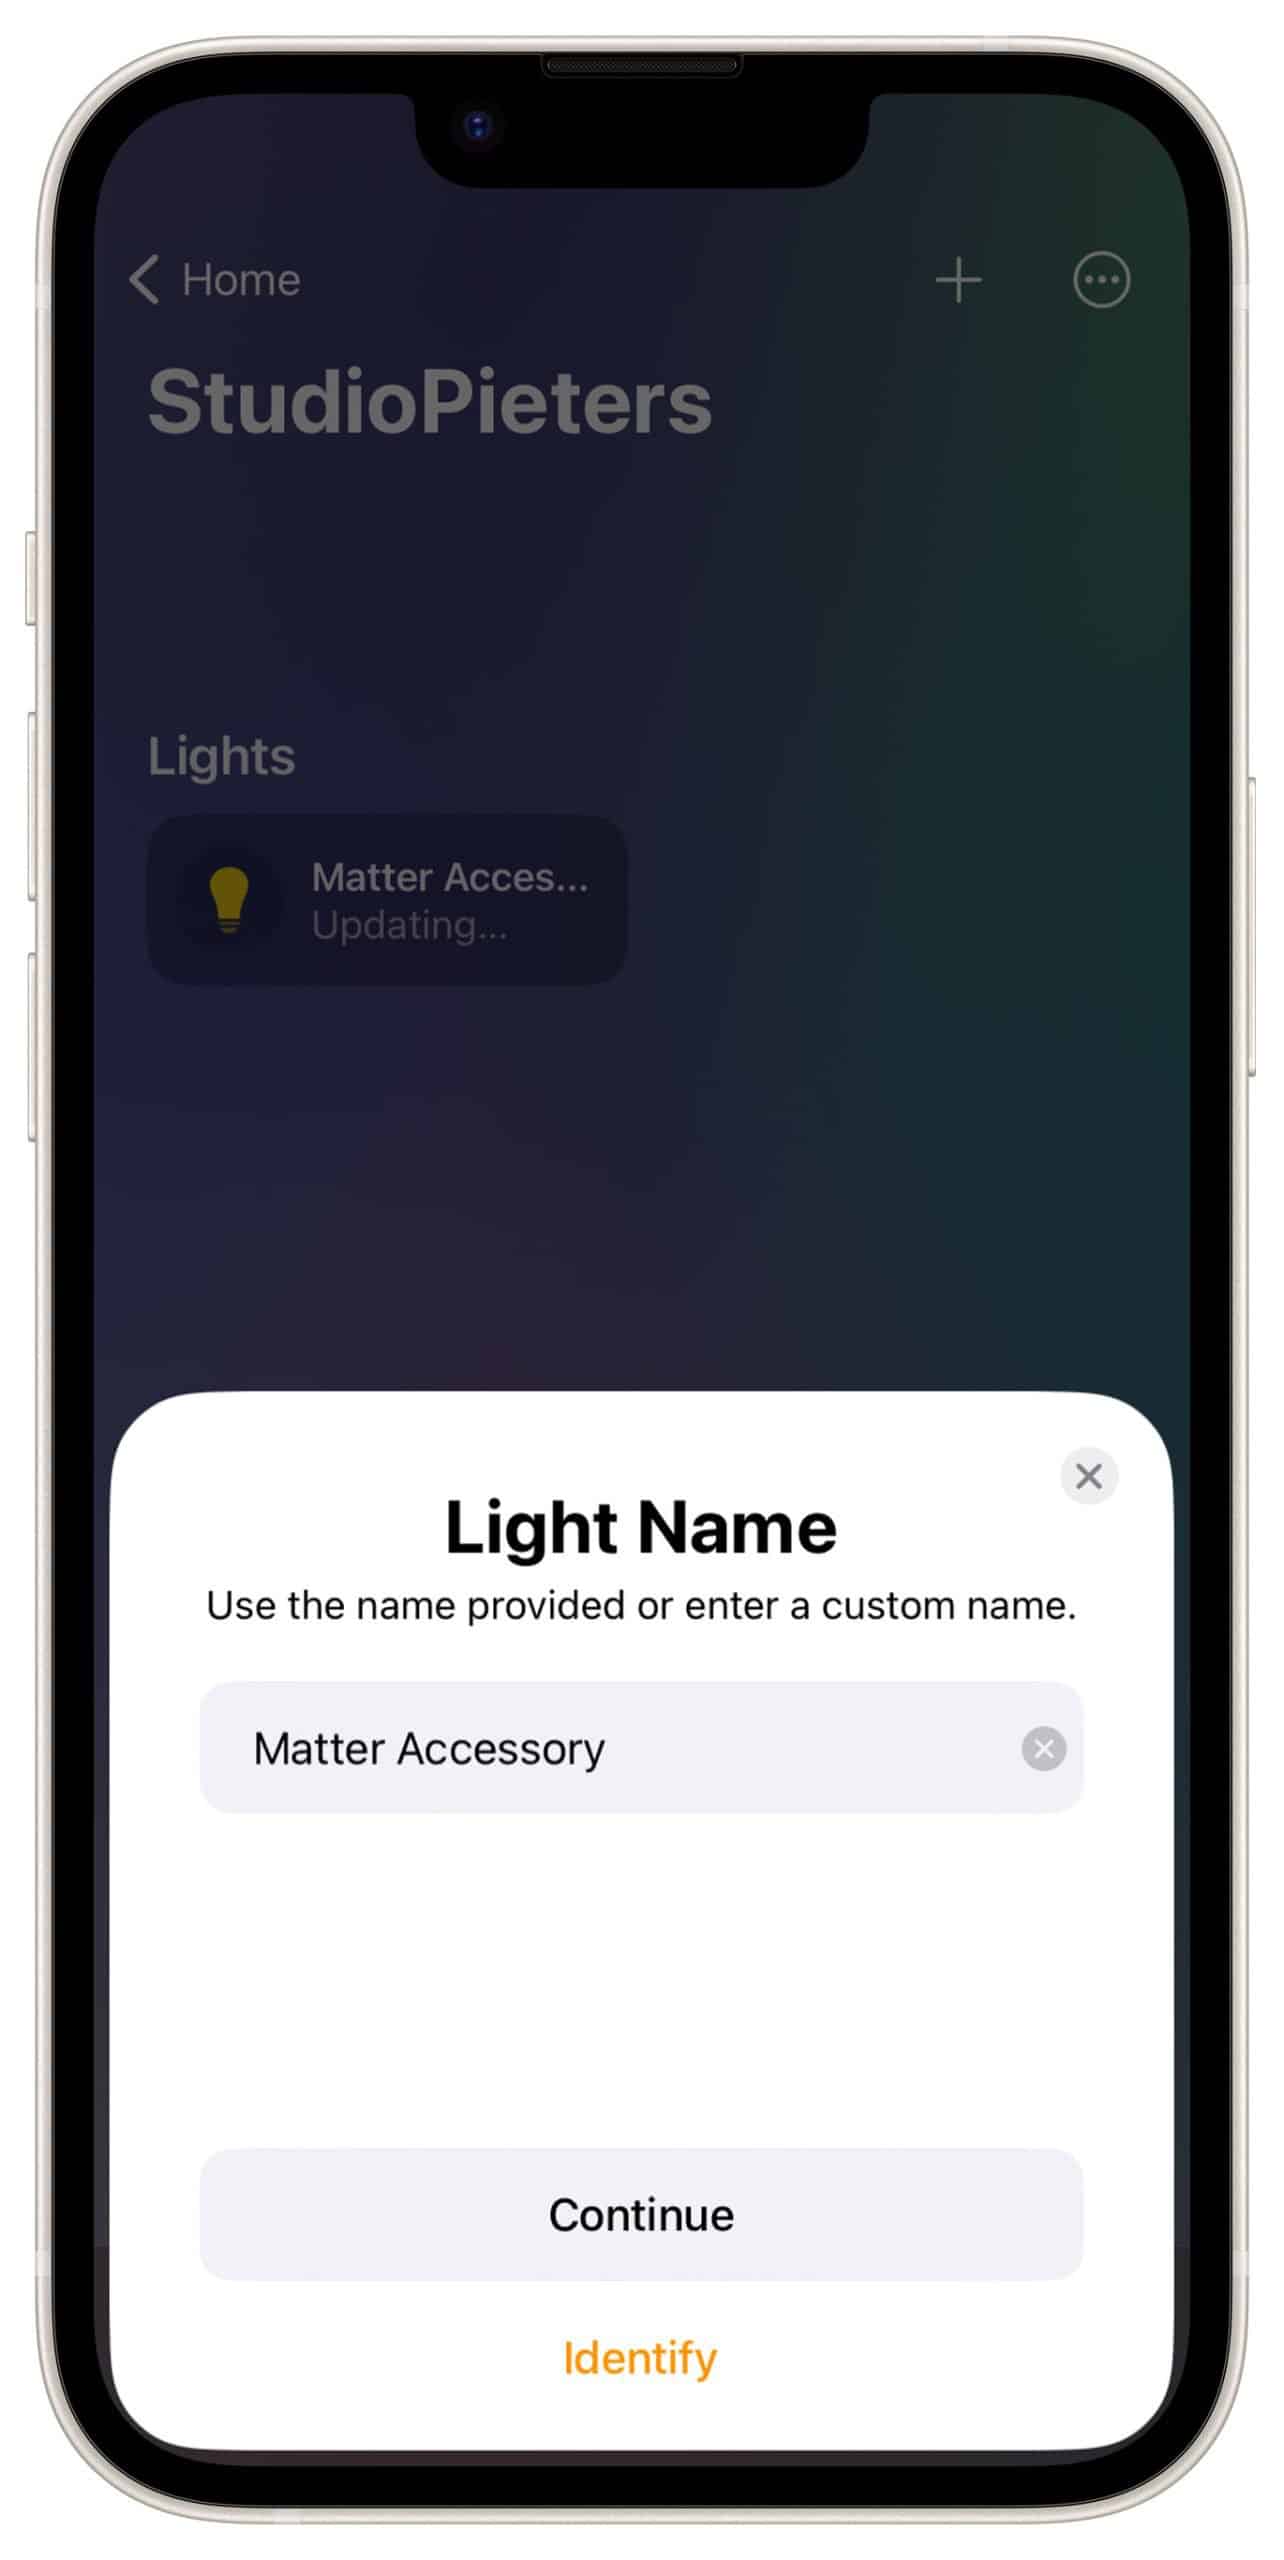
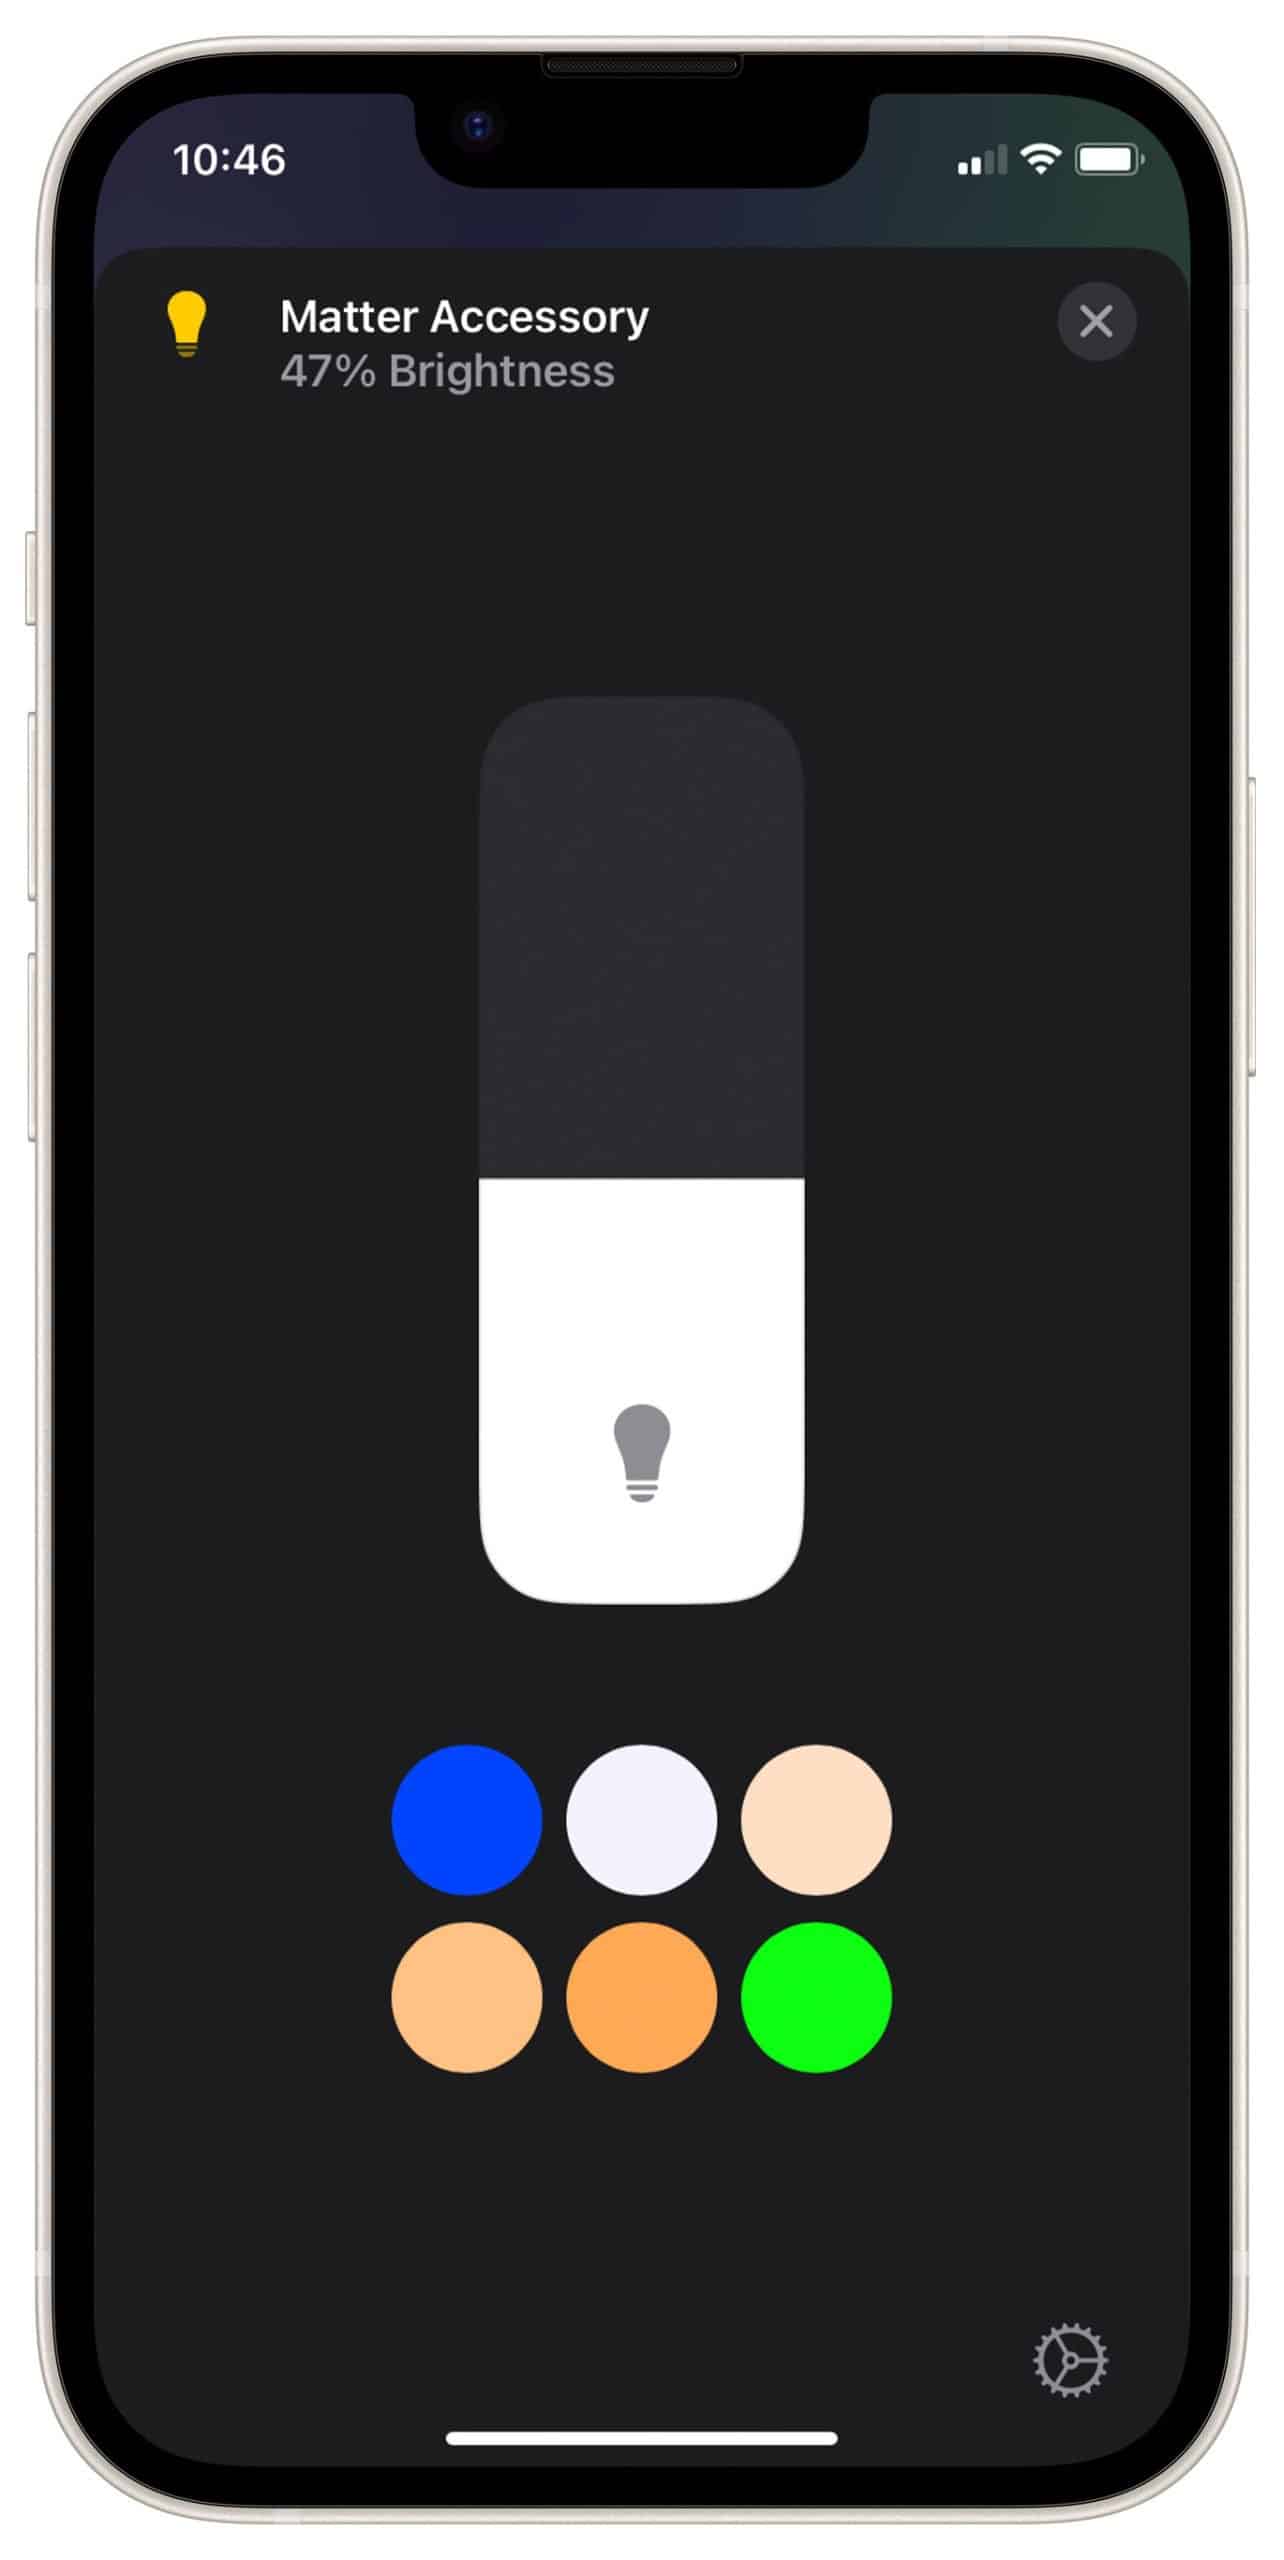
Now you can change the name of your accessory, but you can leave it as it is.
Your Setup is done.
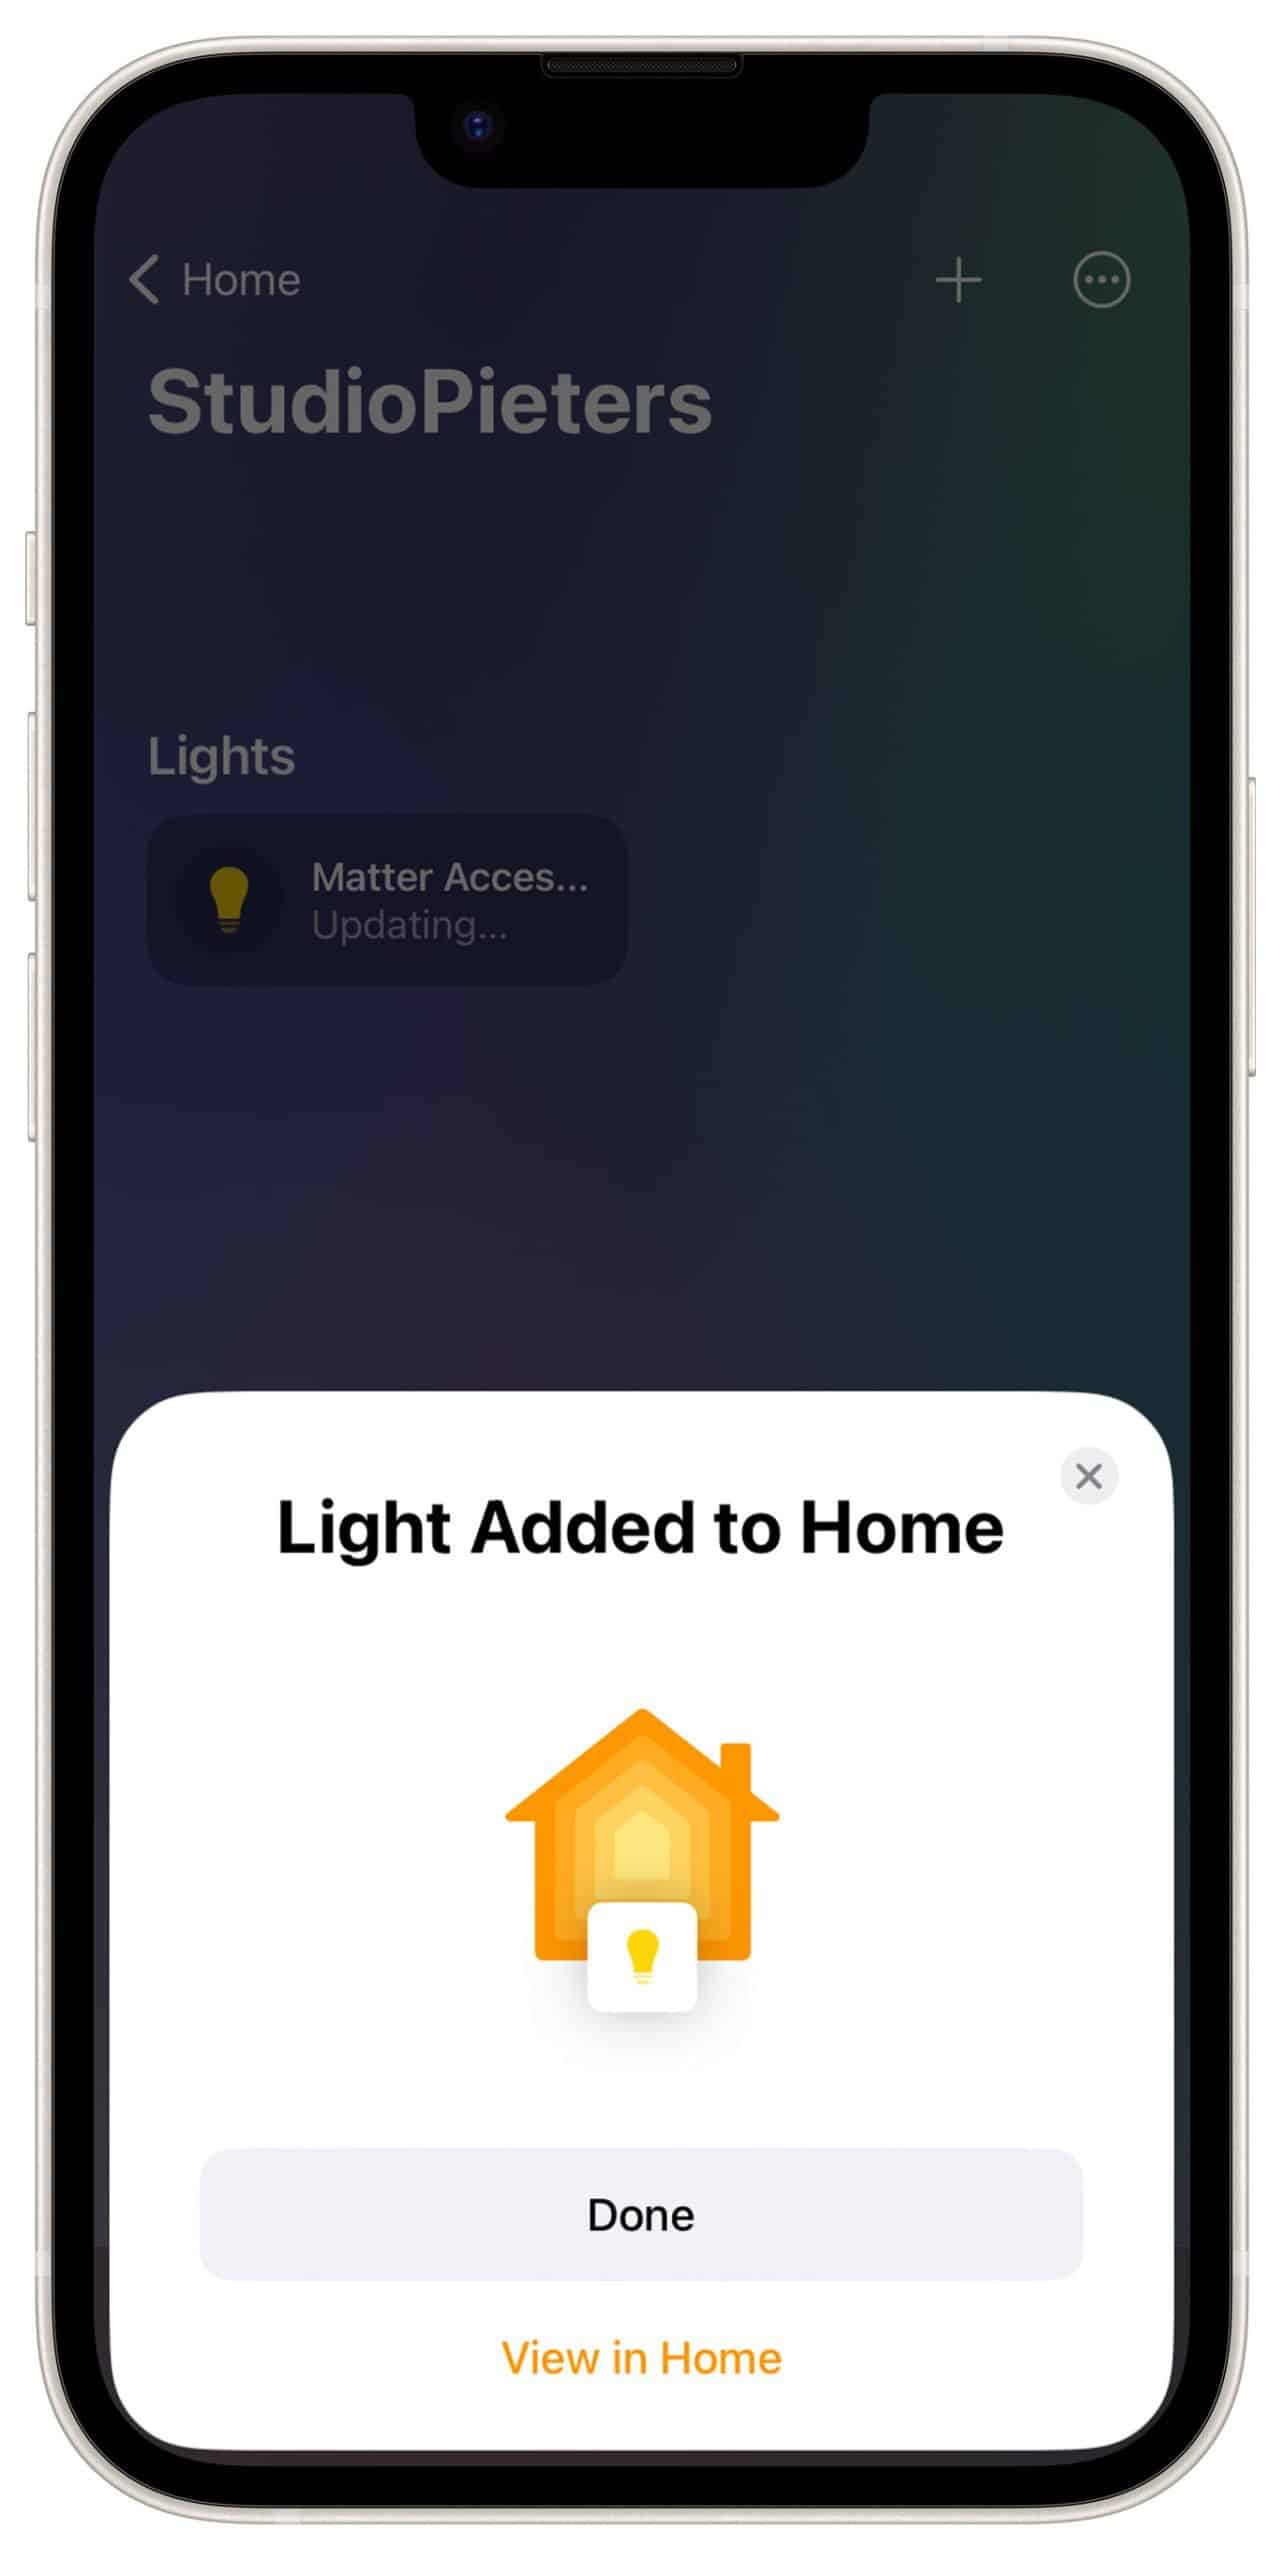
And there it is, your first Matter accessory!
So there it is, the whole compiling and installation! This was even hard for me because there are some next level skills and knowledge needed to do this. That’s why in my articles I work with pre-built binary files, so that also people with fewer skills can enjoy this project.

Matter Development Conclusion
The Development of matter Is extremely difficult at the moment. You have to have some level of knowledge to make your own matter accessories. As it’s still in it early stage, the Matter Development has still to be perfected. We believe that matter developments will accelerate in the near future as they are being rolled out by the major players in the market. Although it is still quite complicated, the expectation is that this will also become easier. There will also be more and more hardware that is also suitable for threads, such as the ESP32-H2 module, expected release date the first quarter of 2023. So keep following me if you want to keep up with the developments.
REFERENCE
Espressif Systems, esptool (2019), ESP8266 and ESP32 serial bootloader utility, https://github.com/espressif/esptool HomeACcessoryKid, life-cycle-manager-for-esp32 (2022), Initial install, Wi-Fi settings and over the air firmware upgrades for any esp-open-rtos repository on GitHub,https://github.com/HomeACcessoryKid/LCM4ESP32