The first question that probably comes to your mind is “What?, Why?” when you read this headline: ESP HomeKit SDK – On a Raspberry Pi Zero W. Well I tell you why. While I was waiting for some stuff from Aliexpress I had noting else to do. I seems that I would not receive my goods soon due to the Carona virus. So let’s try if we can run the ESP HomeKit SDK on a Raspberry Pi Zero W, to make it more Interesting.

Install ESP HomeKit SDK
In this blog we therefore we use a Rapberry Pi zero W with Raspberry Pi OS, (previously called Raspbian) is our official operating system for all models of the Raspberry Pi. we use the Raspberry Pi OS (32-bit) with desktop and recommended software. This is a Image with desktop and recommended software based on Debian Buster.
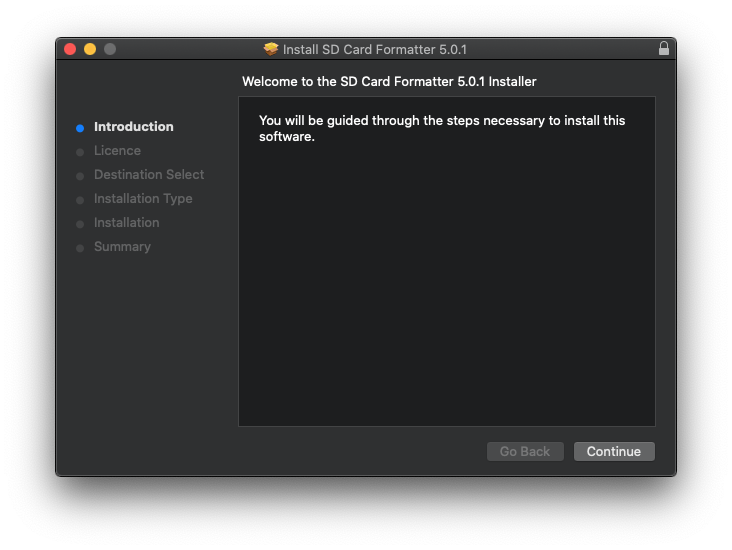
SD Formatter
Before we can write the image to the SD Card we need to prepare the SD Card. Visit the SD Association’s website and download SD Formatter 5.0.1* for either Windows or Mac. Follow the instructions to install the software.
*Current version on time of writing.
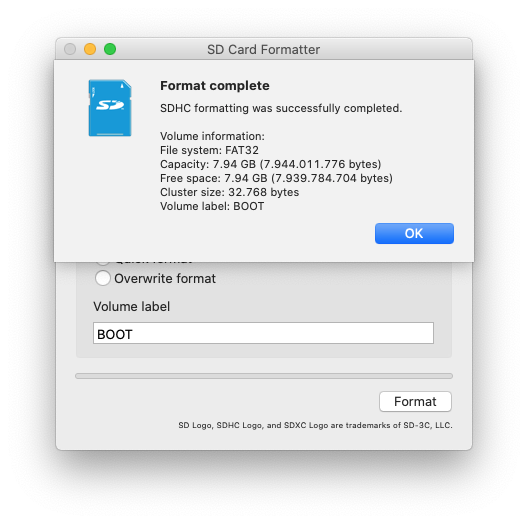
Insert your SD card into the computer or laptop’s SD card reader, select the drive letter for your SD card. Rename the volume label to Boot and format it.
 When your card is formatted it will promt you.
Download Raspberry Pi OS image
I use Raspberry Pi OS, (previously called Raspbian) is our official operating system for all models of the Raspberry Pi. we use the Raspberry Pi OS (32-bit) with desktop and recommended software. This is a Image with desktop and recommended software based on Debian Buster. These instructions are for a Raspberry Pi OS image that I downloaded from here:
Once you download the file, note the location of the *.img file.
Download etcher
Visit etcher.io and download and install the Etcher SD card image utility. Run Etcher and select the Raspbian image you unzipped on your computer or laptop. Select the SD card drive. Note that the software may have already selected the right drive. Finally, click Burn to transfer Raspbian to the SD card. You’ll see a progress bar that tells you how much is left to do. Once complete, the utility will automatically eject/unmount the SD card so it’s safe to remove it from the computer.

Take your SD card out of your computer and place it back so it can be mounted again.

Enable ssh
For security reasons, ssh is no longer enabled by default. Open the Terminal app. Click the Finder icon in your dock. Click Go. Click Utilities. Double-click Terminal. To enable it, run this command:
touch /Volumes/boot/ssh
Add network information
Create a new empty file that will hold network information:
touch /Volumes/boot/wpa_supplicant.conf
then open the file:
sudo nano /Volumes/boot/wpa_supplicant.conf
Edit the file that you just created and paste this into it (adjusting for the name of your country code, network name and network password):
country=GB
ctrl_interface=DIR=/var/run/wpa_supplicant GROUP=netdev
update_config=1

network={
    ssid="NETWORK-NAME"
    psk="NETWORK-PASSWORD"
}
Save your changes, press CTRL + O, followed by Enter. Then press CTRL + X.
Eject the micro SD card
Issue an eject command:
diskutil eject /dev/disk2
The command won’t physically eject the disk/card. It’s more of a logical eject: meaning it’s safe to remove the card now. You can also do this by right-clicking on the card on your desktop.
Boot the Pi Zero W
Put the SD card into the Pi Zero W. Plug a Micro-USB power cable into the power port (the one closest to the end of the board). Give the Pi Zero plenty of time to bootup (it can take as much as 90 seconds — or more)
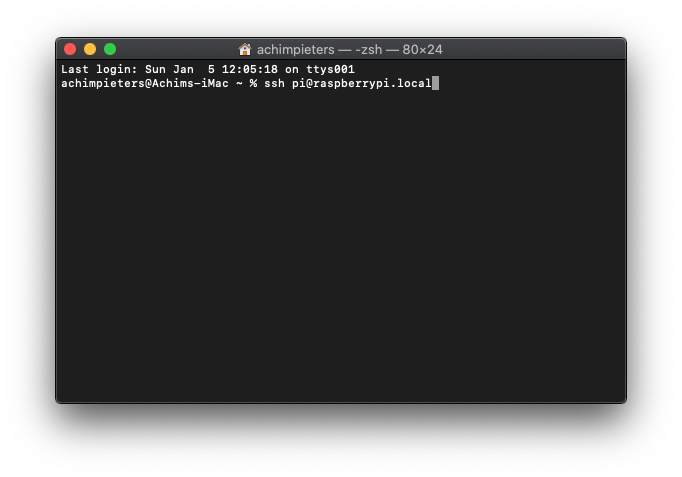
Login over Wifi
This part assumes that ssh is enabled for your image and that the default user is pi with a password of raspberry. Open the Terminal app. Click the Finder icon in your dock. Click Go. Click Utilities. Double-click Terminal. Run the following commands:
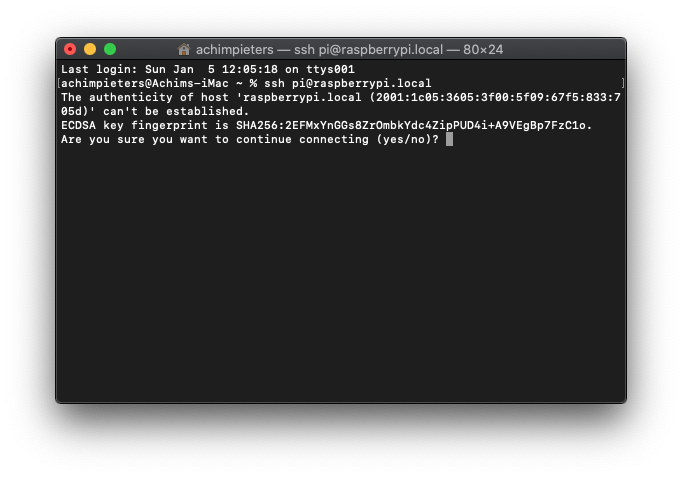
ssh pi@raspberrypi.local
If prompted with this warning:
The authenticity of host 'raspberrypi.local (xxxxxxxxxxxxxxxxxxxxxxxxxxxxx)' can't be established.
ECDSA key fingerprint is SHA256:xxxxxxxxxxxxxxxxxxxxxxxxxxxxxxxxxxxxxxxxxxx.
Are you sure you want to continue connecting (yes/no)?
just hit enter to accept the default (Yes). Type in the password — by default this is raspberry.
Congratulations! You can now access your Pi Zero W over wifi! If you can’t connect, see the troubleshooting blog here.
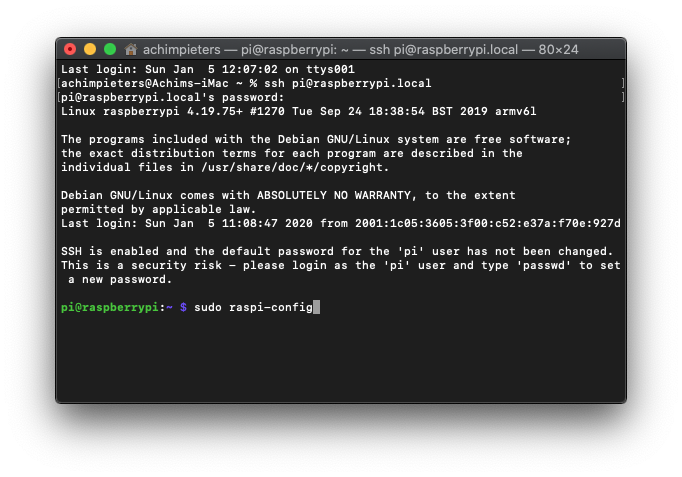
Change your Hostname and Password
Because your pi is now on the network, you should immediately change the host-name and password. At the command line type:
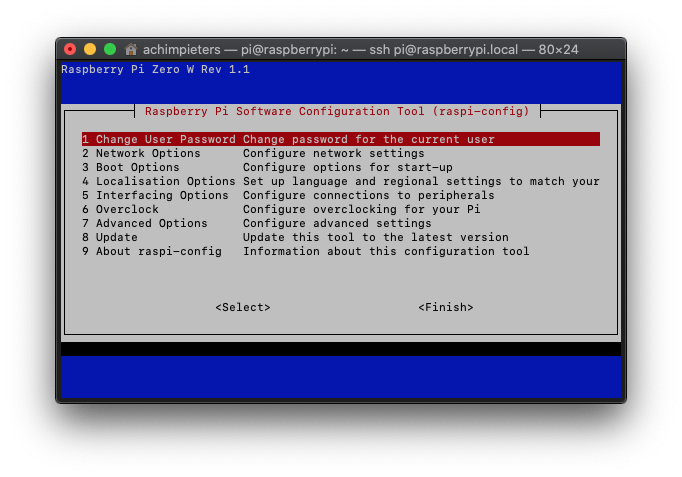
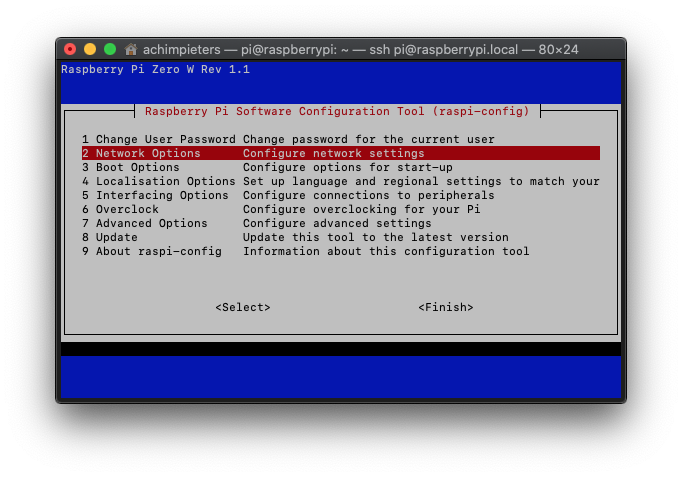
sudo raspi-config
Select the options for changing the host-name (eg. MagicMirror) and password. On a new image, I would also recommend expanding the file system.
1 Change User Password - Change password for the current user
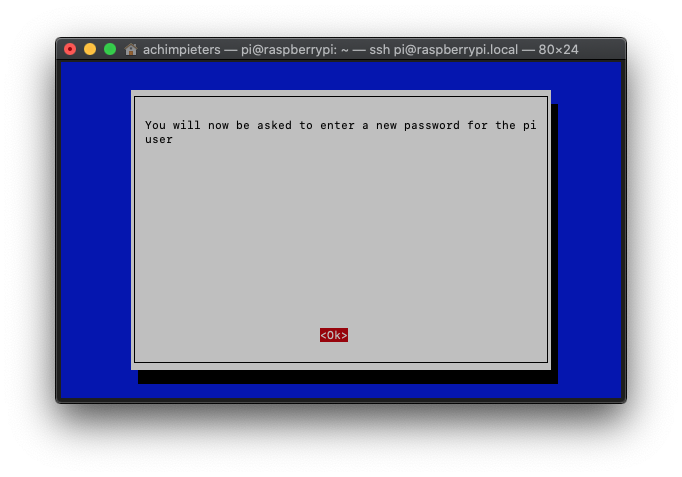
 You will see a screen “You will now be asked to enter a new password for the pi user” press ‘OK‘.
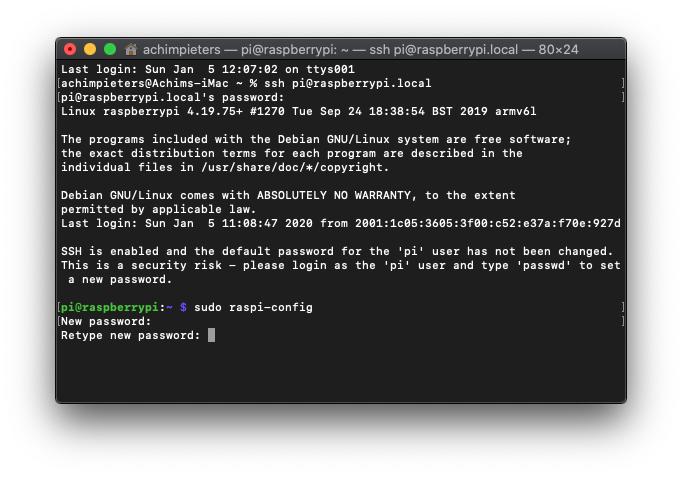
 Now you need to type your ‘New password‘ and press ‘Enter‘ the the raspberry will ask you the ‘Retype new password‘ and press ‘Enter‘.
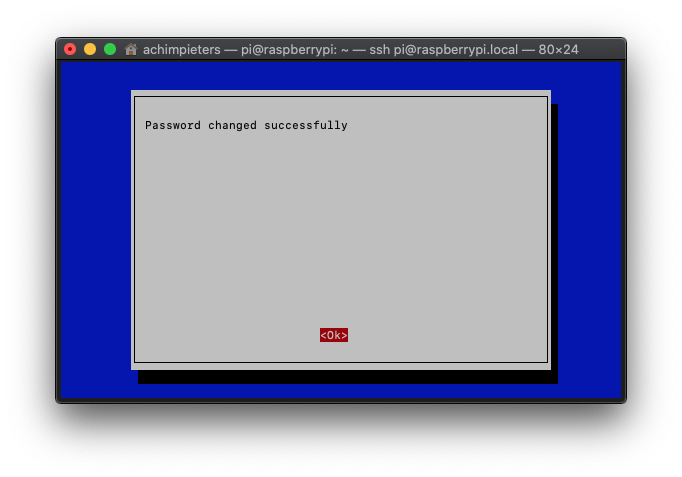
 Then you will return to the raspi-config menu, it will say ‘ Password changed successfully‘ and press ‘OK‘.
host-name
2 Network Options - Configure network settings
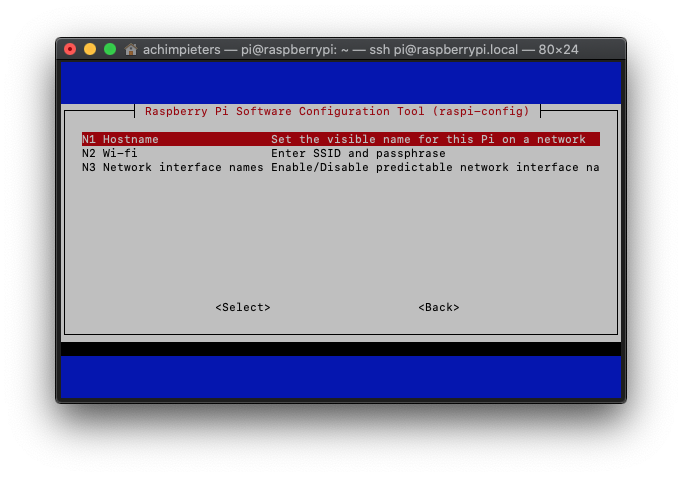 Here Choose ‘N1 Hostname – Set the visible name for this pi on a network‘ and press ‘OK‘ twice.
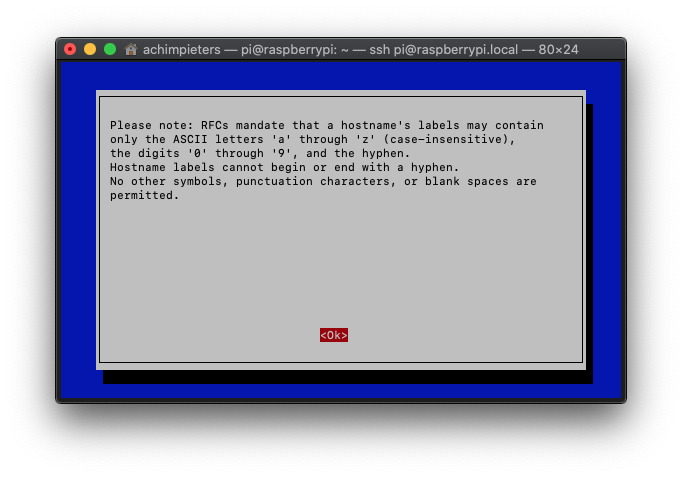 Then you will see a screen that say ‘ Please enter a Hostname‘ Default this is ‘raspberrypi.
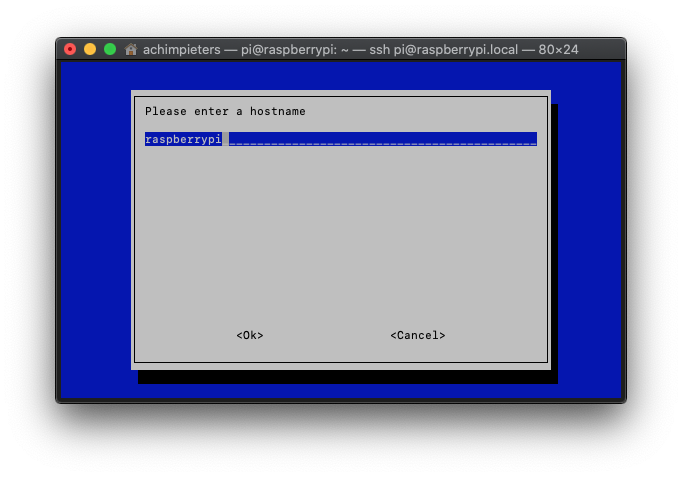 Change this to ‘Server‘ or any name you desire and press ‘OK‘.
Expanding the file system
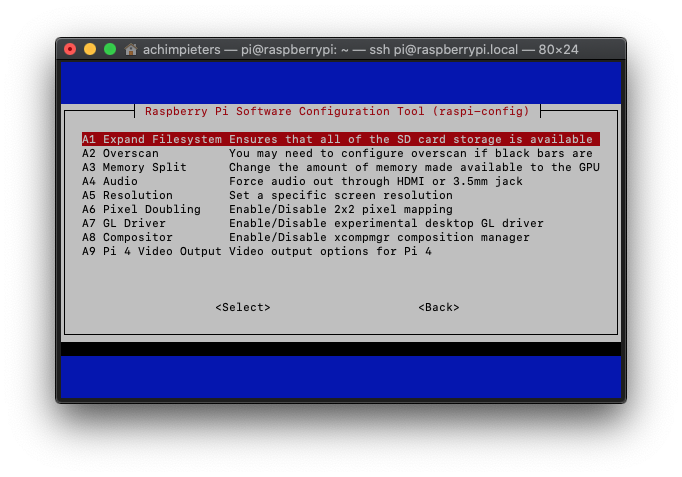
7 Advanced Options - Configure advanced settings
 Here choose ‘A1 Expand Filesystem – Ensures that all of the SD card storage is available‘ and press ‘Enter‘.
Your Pi will change the partition en come back to the raspi-config menu, here press ‘OK‘.
Set the screen resolution.
7 Advanced Options - Configure advanced settings
Here choose ‘A5 Resolution – Set a specific screen resolution‘ and press ‘Enter‘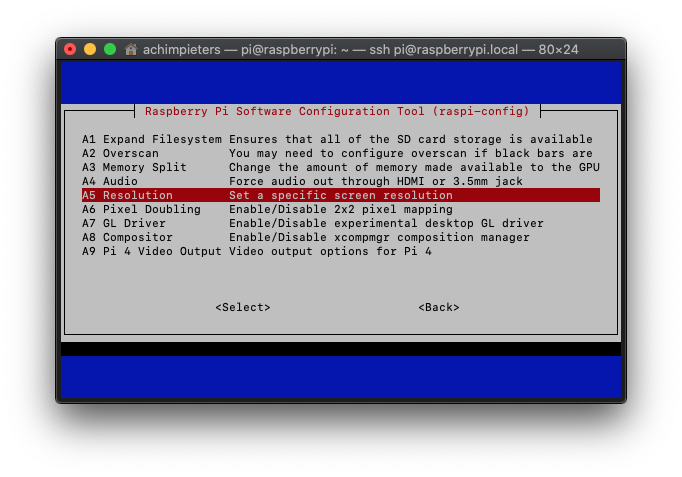 choose your screen resolution (eg DMT Mode 82 1920×1080 60Hz 16:9 ) and press ‘OK‘ twice.
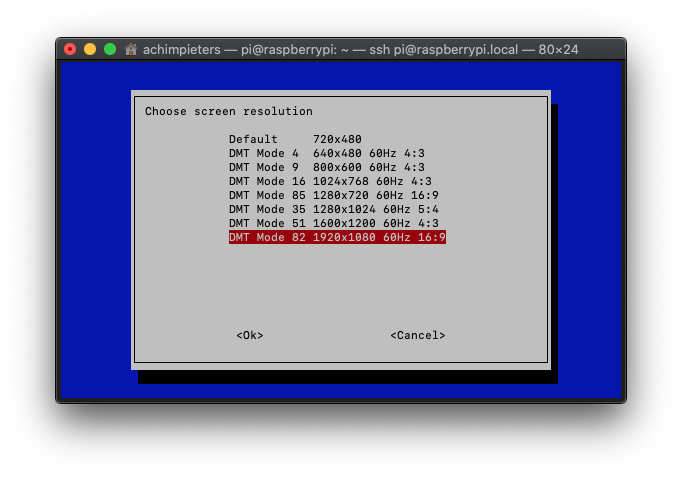
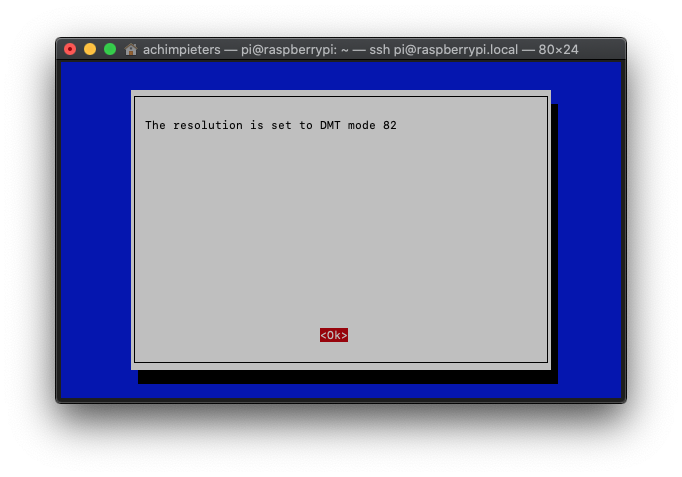
Note: This will give you a better resolution when opening a new VNC window.
Now your back in the main rasps-config menu and select ‘Finish‘ it will ask you ‘Would you like to reboot now?‘ select ‘No‘ for now. This will take you to the terminal session.
Fix the locale issue
Last week I was trying to make my Raspberry Pi work again, and while reinstalling and upgrading Raspbian OS packages I run into an issue where a perl warning is displayed.
The warning message appears during the installation packages(invoking Perl) and it’s due to missing locales. Type:
locale
when you see this message and see that LC_ALL = (unset), and LANG = (unset) are (unset), then proceed with the fix.
[...]
perl: warning: Setting locale failed.
perl: warning: Please check that your locale settings:
        LANGUAGE = "en_GB.UTF-8",
        LC_ALL = (unset),
        LC_TIME = "en_GB.UTF-8",
        LC_MONETARY = "en_GB.UTF-8",
        LC_ADDRESS = "en_GB.UTF-8",
        LC_TELEPHONE = "en_GB.UTF-8",
        LC_NAME = "en_GB.UTF-8",
        LC_MEASUREMENT = "en_GB.UTF-8",
        LC_IDENTIFICATION = "en_GB.UTF-8",
        LC_NUMERIC = "en_GB.UTF-8",
        LC_PAPER = "en_GB.UTF-8",
        LANG = (unset),
    are supported and installed on your system.
perl: warning: Falling back to the standard locale ("C").
locale: Cannot set LC_ALL to default locale: No such file or directory
I searched the internet for the fix but non of them where working. But I found one that did. Type:
sudo nano /etc/default/locale
Change it, and include these three lines:
LANG=en_GB.UTF-8
LC_ALL=en_GB.UTF-8
LANGUAGE=en_GB.UTF-8
Save your changes, press CTRL + O, followed by Enter. Then press CTRL + X. Once the changes are made you need to, reboot. To reboot your raspberry pi zero w, type:
sudo reboot
Remember that once you reboot, you will need to use the new host-name to login over ssh. For example, if your new host-name is Server you would connect like this:
ssh pi@server.local
Now we only have to enable the VNC® Server on the Raspberry Pi Zero W.
At the command line type:
sudo raspi-config
Navigate to Interfacing Options
5 Interfacing Options Configure connections to peripherals
Here choose ‘P3 VNC – Enable/Disable graphical remote access to your pi using …‘ Now you will be asked ‘Would you like the VNC Server to be enabled?‘ press ‘Yes‘ and then press ‘OK‘ . Click on Finish, which should either prompt you to reboot, or return you to the main command line shell. If you are returned to the main command line shell, issue the command:
sudo reboot
The system will restart, so you will lose your connection.At this point, you can exit the terminal session. Now we have to install VNC® viewer so we can make a remote connection to our raspberry Pi Zero W.
VNC® Viewer
In computing, Virtual Network Computing (VNC) is a graphical desktop-sharing system that uses the Remote Frame Buffer protocol (RFB) to remotely control another computer. It transmits the keyboard and mouse events from one computer to another, relaying the graphical-screen updates back in the other direction, over a network.
VNC is platform-independent – there are clients and servers for many GUI-based operating systems and for Java. Multiple clients may connect to a VNC server at the same time. Popular uses for this technology include remote technical support and accessing files on one’s work computer from one’s home computer, or vice versa.

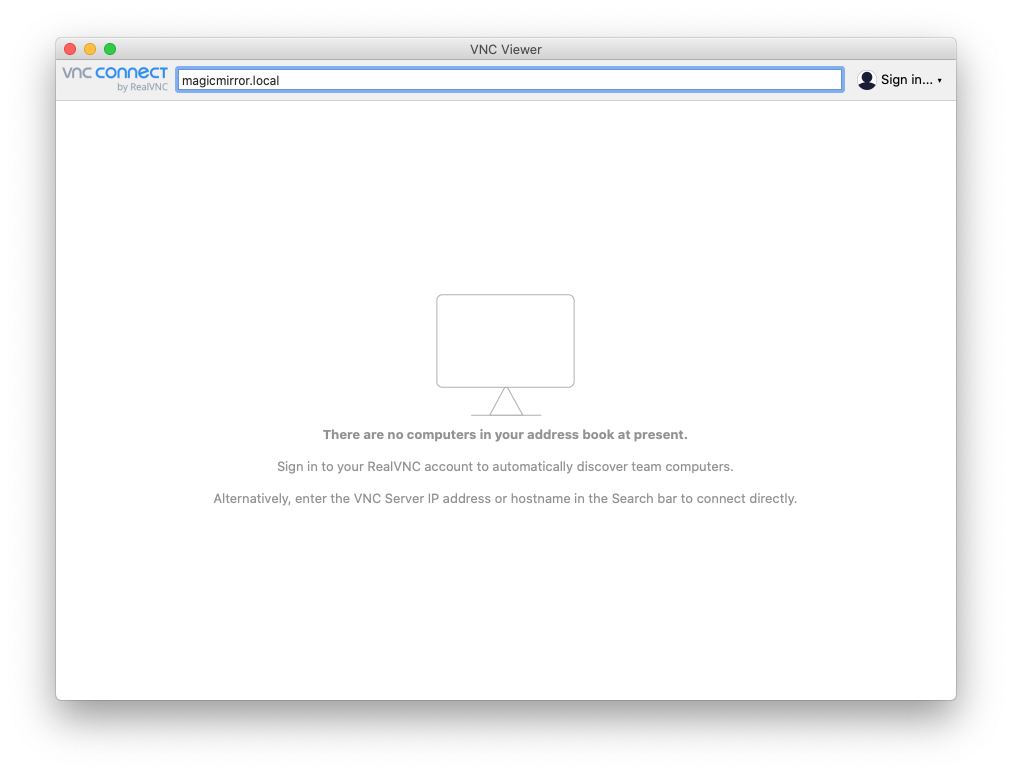
Open up RealVNC and connect to Raspberry Pi
Note: I used the images from another project (magic mirror ) but the steps are the same.
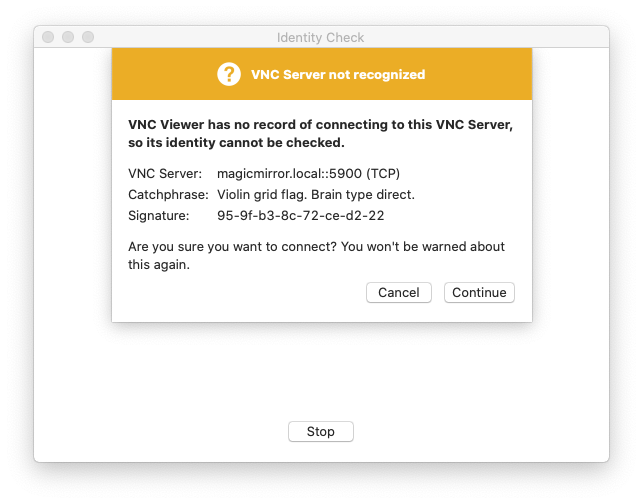
you may get a security warning, press Continue.
 Login in with your Username (pi) and your password. and press OK.
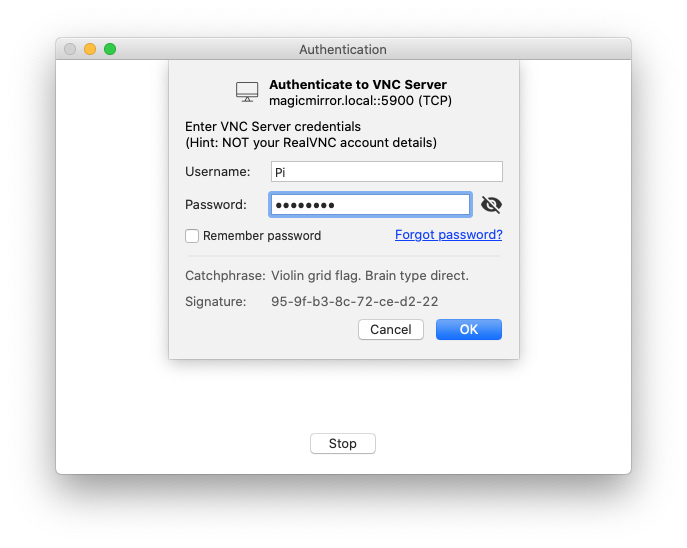
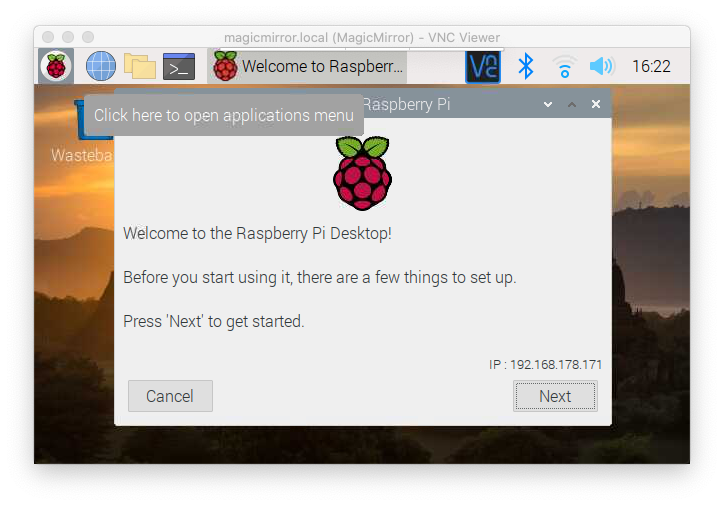
You will see a welcom screen, press Next.
Set you country Settings and press Next.
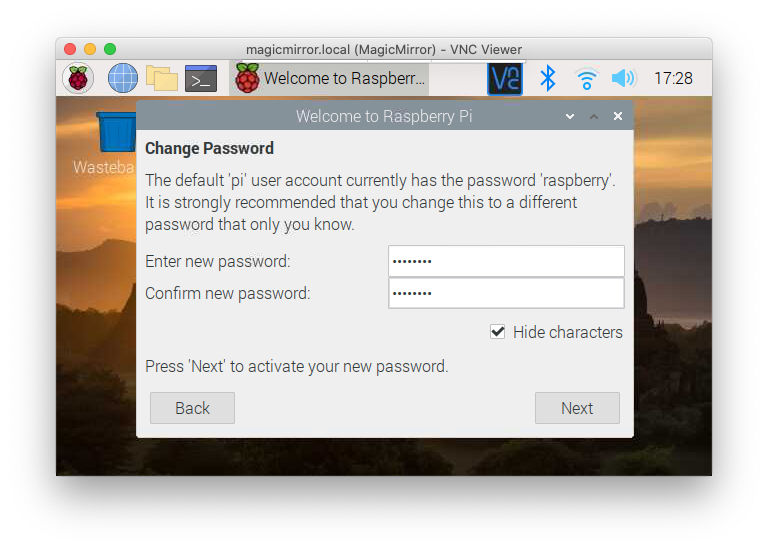
Now you will be asked to change your password. I have used the same password as I did before in the Raspberry Pi config menu.
Then you will be asked about the screen settings, choose what applies to you, and pres Next.

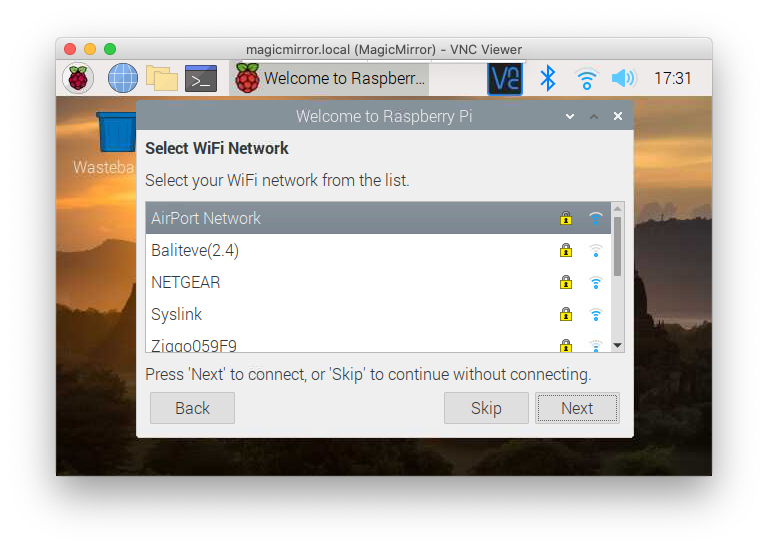
Select your Wifi Network, You already applied the network settings (if you followed this whole blog) when setting up your SD card. And press Next.
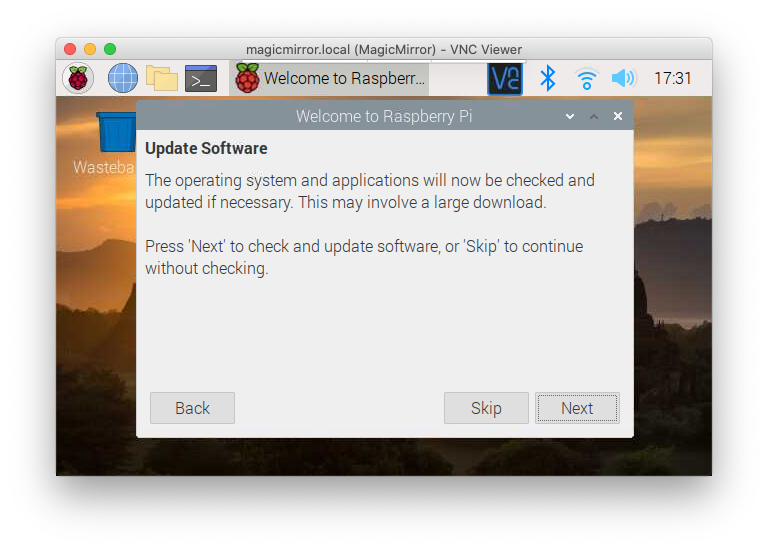
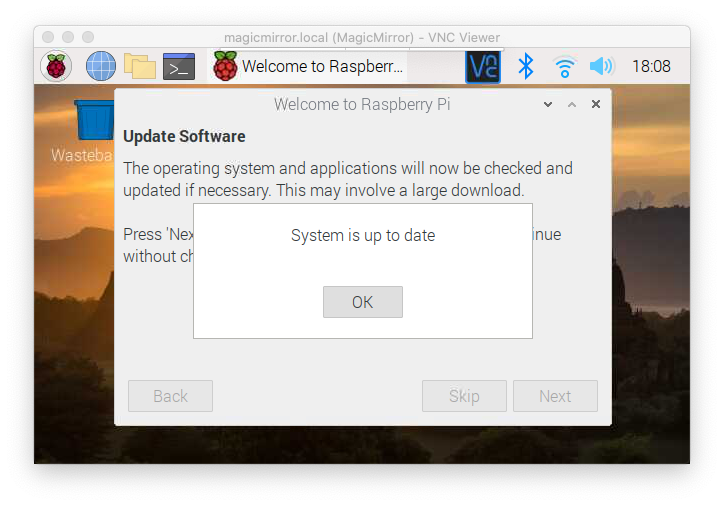
Where almost there, the Raspbian OS ask you to check for updates, Just Press Next.
Once the system is updated you will see this screen, Press OK.
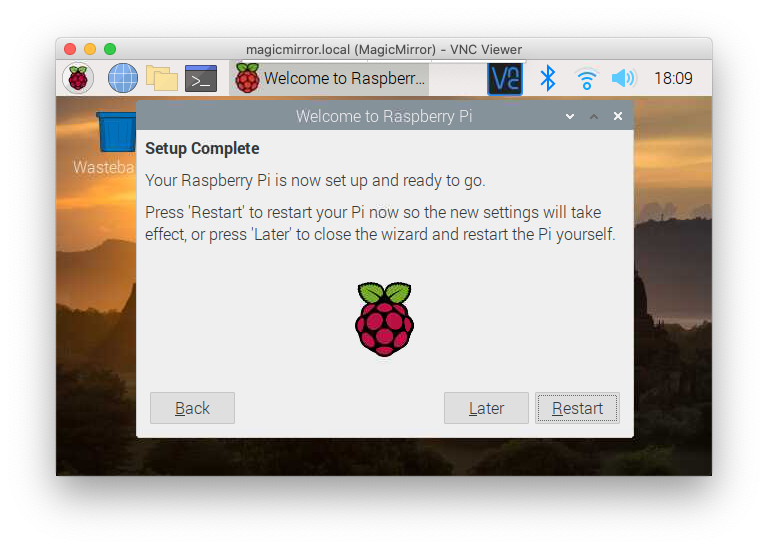
Now your Raspbian OS Setup is completed, press Restart.
Installing ESP HomeKit SDK
Create an empty directory and change into it. Open the Terminal app. To make a new directory, run this command:
mkdir esp
Change into the directory by typing:
cd esp
Clone recursively
Clones the repository and also clones all submodules. If the submodules themselves contain additional submodules, Git will also clone those.
git clone --recursive https://github.com/maximkulkin/esp-homekit-demo.git
esp-open-sdk
Now that We have installed The Raspberry pi Zero W, With the latest ( at time of writing) Rasbian OS. And fully configured it. It’s time to Install MagicMirror². Once again make a connection to your Raspberry Pi trough VNC.
Install esp-open-sdk, build it with make toolchain esptool libhal STANDALONE=n, then edit your PATH and add the generated toolchain bin directory. The path will be something like /path/to/esp-open-sdk/xtensa-lx106-elf/bin.
Requirements and Dependencies
To build the standalone SDK and toolchain, you need a GNU/POSIX system (Linux, BSD, MacOSX, Windows with Cygwin) with the standard GNU development tools installed: bash, gcc, binutils, flex, bison, etc. Please make sure that the machine you use to build the toolchain has at least 1G free RAM+swap (or more, which will speed up the build).
Debian/Ubuntu
sudo apt-get install make unrar-free autoconf automake libtool gcc g++ gperf \
flex bison texinfo gawk ncurses-dev libexpat-dev python-dev python python-serial \
sed git unzip bash help2man wget bzip2
sudo apt-get install libtool-bin
Building
Be sure to clone recursively:
git clone --recursive https://github.com/pfalcon/esp-open-sdk.git
The project can be built in two modes:
Where the toolchain and tools are kept separate from the vendor IoT SDK which contains binary blobs. This makes licensing more clear, and helps facilitate upgrades to vendor SDK releases.
A completely standalone ESP8266 SDK with the vendor SDK files merged into the toolchain. This mode makes it easier to build software (no additinal -I and -L flags are needed), but redistributability of this build is unclear and upgrades to newer vendor IoT SDK releases are complicated. This mode is default for local builds.
Change into the directory by typing:
cd esp-open-sdk
To build the self-contained, standalone toolchain+SDK type:
make toolchain esptool libhal STANDALONE=n
If you receive this error:
configure: error: could not find bash >= 3.1
make[1]: *** [../Makefile:143: _ct-ng] Error 1
make[1]: Leaving directory '/home/studioPieters/esp8266/esp-open-sdk-git/src/esp-open-sdk/crosstool-NG'
make: *** [Makefile:139: crosstool-NG/ct-ng] Error 2
then open the configure.ac file with ATOM located in the crosstool-NG folder. Then change this line:
|$EGREP '^GNU bash, version (3.[1-9]|4)')
to
|$EGREP '^GNU bash, version (3.[1-9]|4|5)')
and rerun the command again.
It can take some time to install please be patient!*
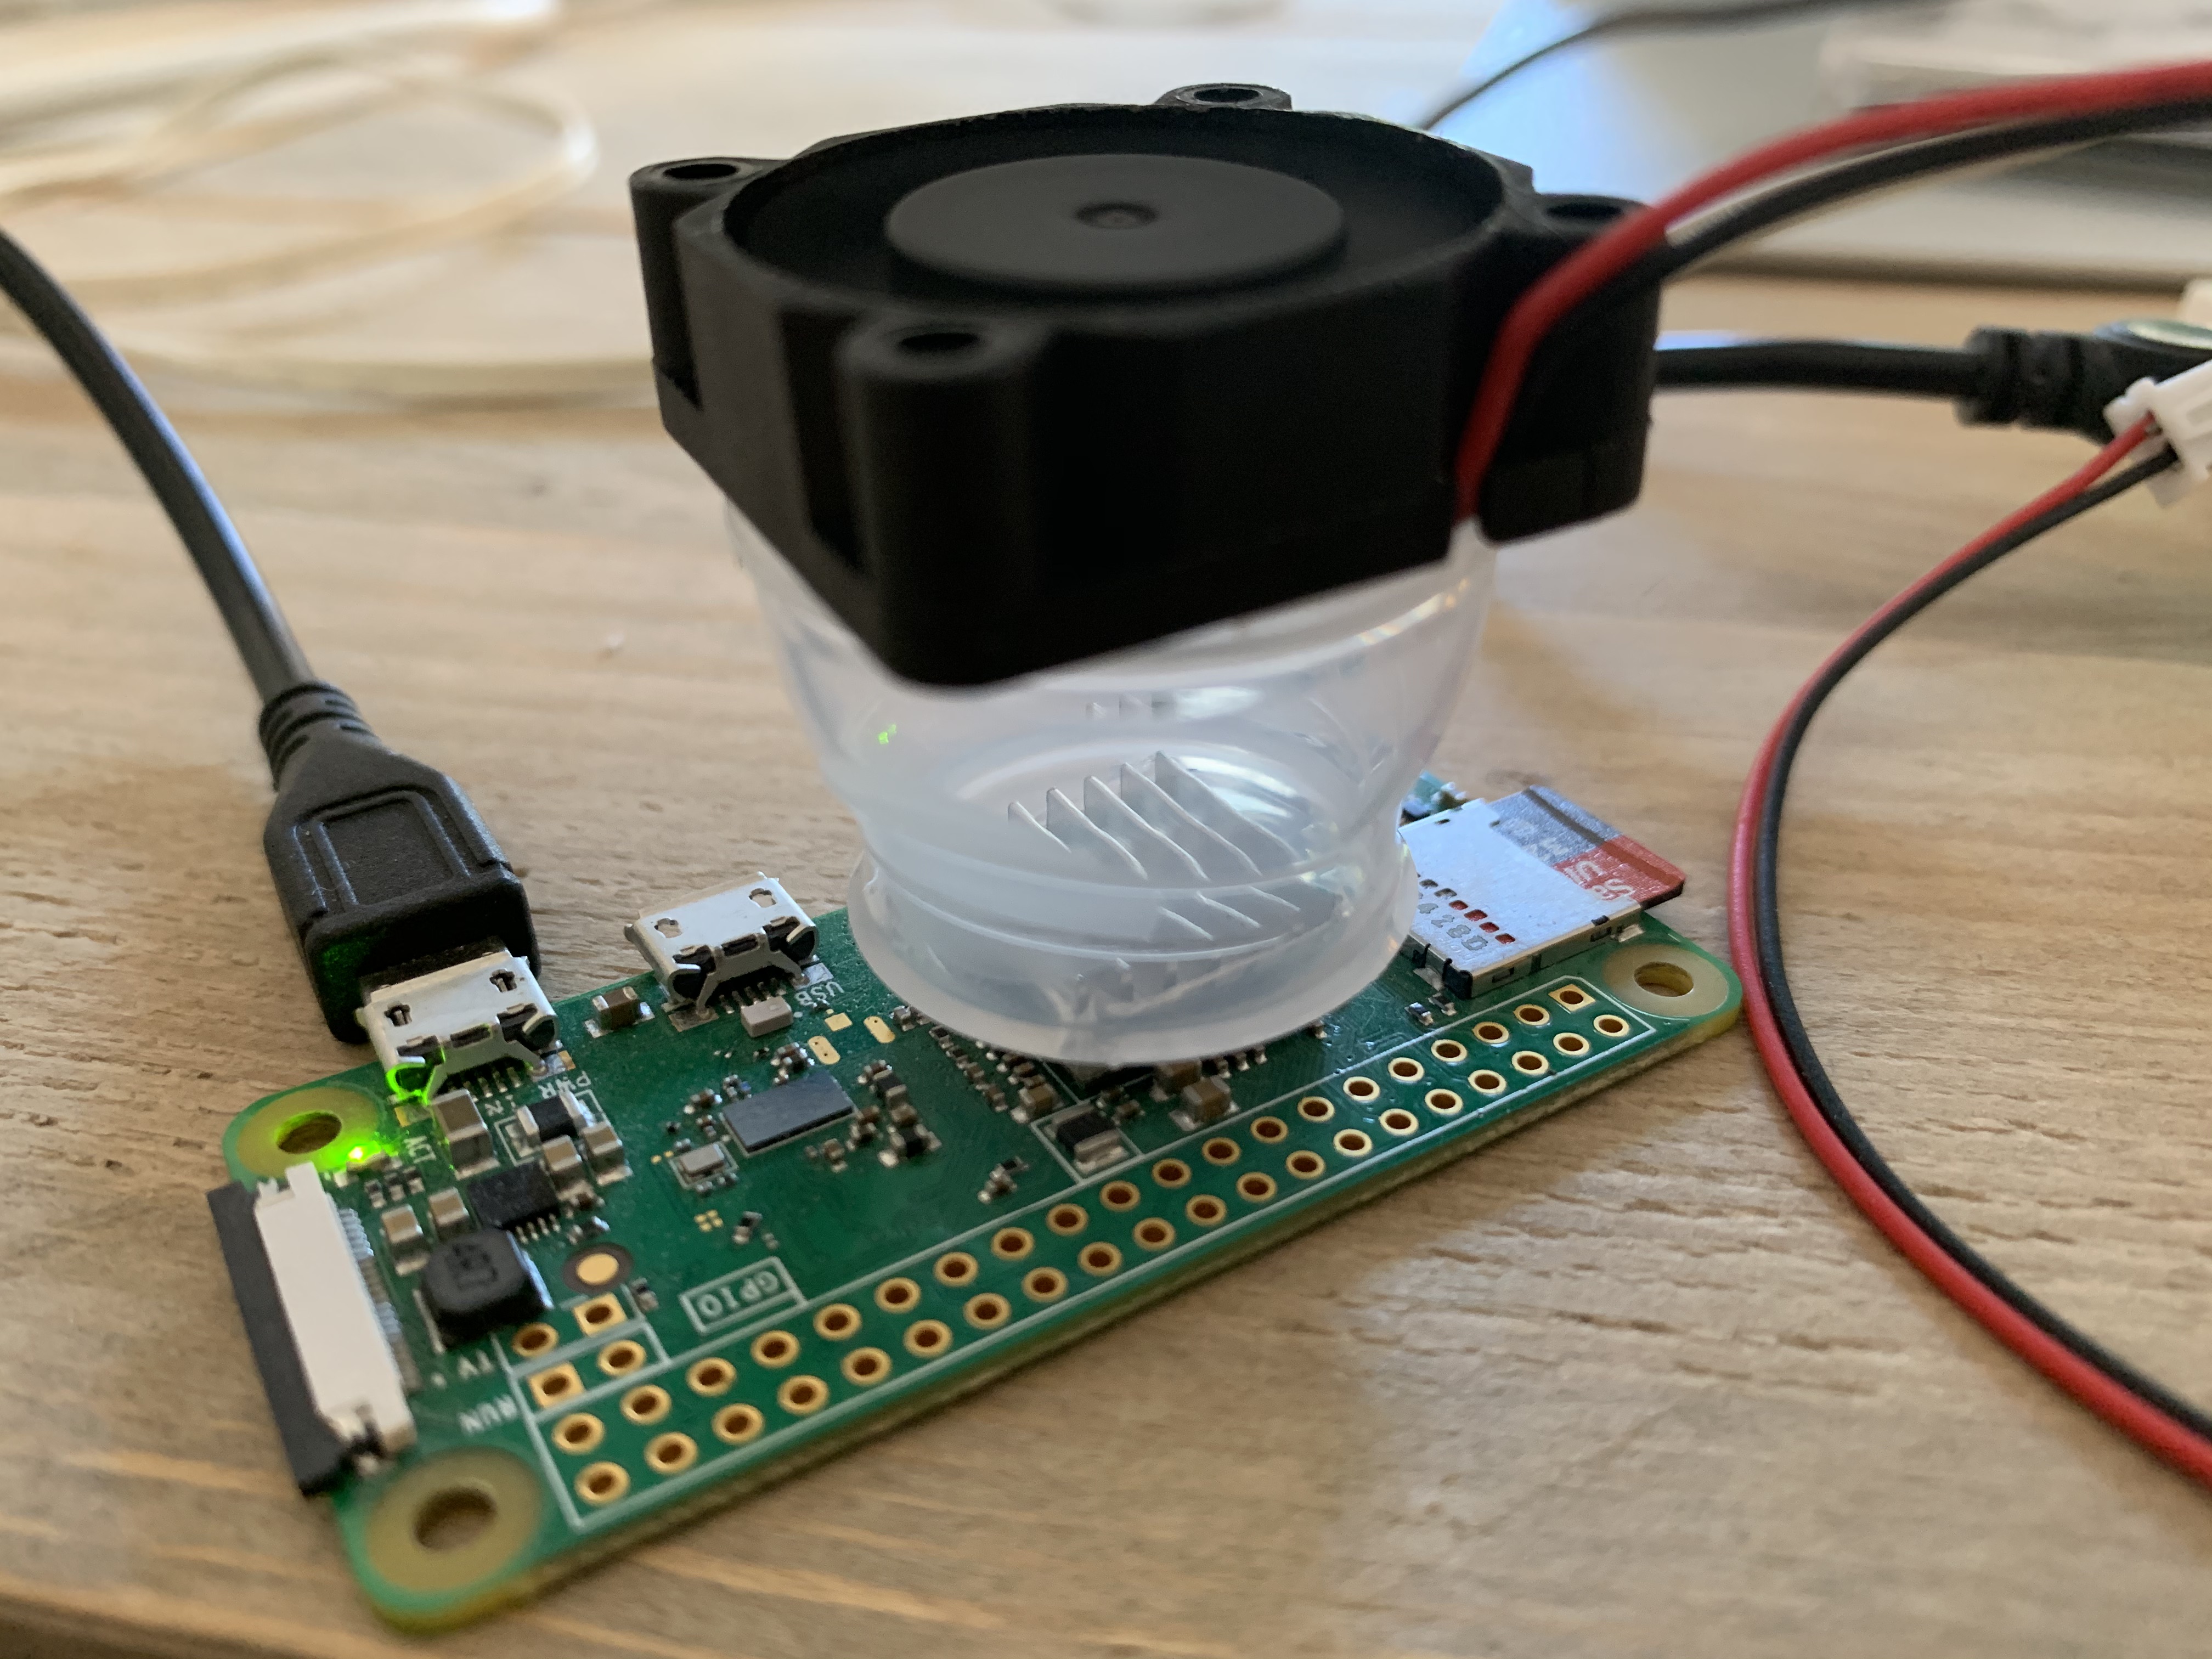
*In case of installing it on a raspberry pi Zero W it takes almost a whole day! If you you use another Raspberry is will take les time, depending of the versions of your raspberry pi.

Because it takes alot of my Raspberry Pi Zero W and it got hot I decided to cool it down a little. I took a Cap of a bottle cut a square into so it fit on the heatsink, leaving the vents open. then I put the fan on top of it. Cool air is pushed upon the heatsink and leaving tough it’s vents on the bottom.
esptool.py
A Python-based, open source, platform independent, utility to communicate with the ROM bootloader in Espressif ESP8266 & ESP32 chips.
Installation / dependencies
You will need either Python 2.7 or Python 3.8 or newer installed on your system.
Installing pip for Python 2
Python 2 is not installed by default in Ubuntu 18.04. To install Python 2 and pip for Python 2. Update the package index by running the following command:
sudo apt update
Install pip for Python 2 with:
sudo apt install python-pip
The command above will install Python2, Pip and all the dependencies required for building Python modules. Verify the installation by printing the pip version number:
pip --version
The version number may vary, but it will look something like this:
pip 9.0.1 from /usr/lib/python2.7/dist-packages (python 2.7)
The latest stable esptool.py release can be installed from pypi via pip:
pip install esptool
With some Python installations this may not work and you’ll receive an error, try python -m pip install esptool or pip2 install esptool.
After installing, you will have esptool.py installed into the default Python executables directory and you should be able to run it with the command esptool.py.

esp-open-rtos
A community developed open source FreeRTOS-based framework for ESP8266 WiFi-enabled microcontrollers. Intended for use in both commercial and open source projects. Originally based on, but substantially different from, the Espressif IOT RTOS SDK.
Return to the ESP directory by typing:
cd
cd esp
Change into the directory by typing:
git clone --recursive https://github.com/Superhouse/esp-open-rtos.git
Now we only have to setup the enviroment variables:
export PATH=~/esp/esp-open-sdk/xtensa-lx106-elf/bin:$PATH
export SDK_PATH=~/esp/esp-open-rtos
Configuring esp-homekit-demo
open wifi.h.sample and save it as wifi.h.

cd esp-homekit-demo
Open the nano editor.
nano wifi.h.sample
Edit it with correct WiFi SSID and PASSWORD. Press CTRL + O, change the name to Wifi.h followed by Enter. Then press CTRL + X.
Note: The Wifi.h.sample part is not necessary when you use LifeCycle Manager.You can leave the SSID and PASSWORD blank. Just follow these steps for good practice.
To build an example, first change into esp-homekit-demo directory (into it’s root directory:
cd esp-homekit-demo
Compiling the code
Now its time to compile the code by default it is done by typing:
Testing
Build example:
make -C examples/led all