
3D printing
Building a 3D Printed Pit Droid, Part 2: The Hardware
Every part you need for the Pit Droid, what it does, and what to check when the boxes arrive. One shopping list for the bolts, rods and tools, one total list for the full animatronic build, and a checklist for when it arrives.
- 3D printing
- Safety notes
- 11 min read
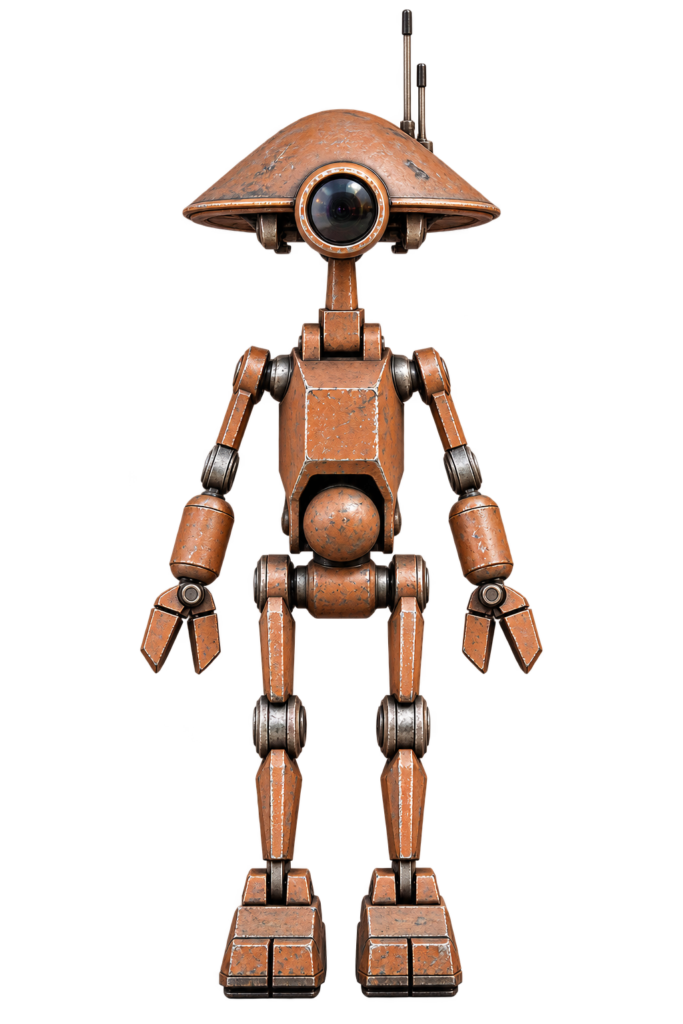
In Part 1 we chose a plan. Now we order everything. This part has two order lists:
- Order list 1: the standard droid. The hardware every Pit Droid needs.
- Order list 2: the animatronic upgrade. Everything extra for the full animatronic droid: head, both arms, waist and backpack.
Every row shows the total quantity to order, so you don’t have to count anything. We build the full animatronic droid in this series, so we order both lists.
Download the list
Pit Droid shopping list (PDF) has both order lists, the electronics and a drawing of every part, with a tick box per item. Print it and take it to the hardware shop.
Affiliate disclosure
Some links in this part are affiliate links (marked with *). If you buy through them, I may earn a small commission at no extra cost to you. It doesn’t change what I recommend.
Check the info sheets
The sizes and quantities come from the designers’ info sheets. The designs get updated, so check them against the sheets that come with your files before you order.
Before You Order: Five Decisions
- Furniture bolts or normal bolts? Furniture bolts (M6 with cap nuts and barrel nuts, like IKEA) give the best look, and the list below is for those. Normal M6 bolts and nuts also work, but then use a washer of 15 mm or less, add 5 to 10 mm to every bolt length, and print the alternative hip and upper-arm files that take a square nut.
- Whole or split prints? Choose split parts if your printer is small (see Part 3).
- Magnets? Optional. Without them the dome and doors may still hold by friction.
- Which lens for the eye? Cheap options: a clear plastic bowl lid, a 3 inch magnifying lens, a flat clear bauble, a Pringles lid, or a mirror party mask. You choose in Part 7.
- Which animatronic level? The list below is for the full build (Level 3). Building less? The “For” column shows which part of the droid each item is for, so you can leave out the rest.
Order List 1: The Standard Droid
Bolts and Nuts (M6 Furniture Bolts)
| Item | Qty | What to order | Used for |
|---|---|---|---|
| M6 furniture bolt, 20 mm | 2 | Allen key type, flat round head | Elbows |
| M6 furniture bolt, 30 mm | 4 | Allen key type. May be longer, the length is not critical | 2 for the hips, 2 for the shoulders |
| M6 furniture bolt, 35 mm | 4 | Allen key type | Ankles and knees |
| M6 furniture bolt, 55 mm | 2 | Allen key type | Hands and fingers |
| M6 furniture bolt, 70 mm | 1 | Allen key type | Lower neck. Skip it if you build the animatronic head |
| M6 furniture bolt, 75 mm | 1 | Allen key type. Use 70 mm if it feels too loose | Upper neck. Skip it if you build the animatronic head |
| Cap nut, 17 mm | 10 | M6, “cap nut” or “joint connector nut”. Can be shorter than 17 mm | 4 ankles and knees, 2 hands, 2 elbows, 2 neck (skip the 2 neck nuts for the animatronic head) |
| Barrel nut, 20 mm | 4 | M6, “barrel nut” or “cross dowel nut”. Can be shorter than 20 mm | 2 hips, 2 shoulders |
Optional poseable shoulder: 2 more 20 mm bolts and 2 more cap nuts. Search terms: joint connector bolts, furniture bolts, cross dowel bolts, barrel nuts. Order one spare bolt, they’re cheap.
Rods, Glue and Finishing
| Item | Qty | What to order | Used for |
|---|---|---|---|
| Rod, 4 mm diameter | 1 | At least 40 cm, fibreglass, carbon or metal. Shiny aluminium knitting needles work well, the grey painted ones are slightly thicker | Cut into 130 mm and 220 mm (antennas) and 2 pieces of 10 mm (elbow pins). Optional 55 mm pin for the 2-part foot toe |
| Superglue (CA) | 1 or more | Normal superglue. A weld-type glue is optional for large areas | Gluing the split parts together |
| Bed adhesive | 1 | 3DLac spray, the designer’s recommendation | Printing (Part 3) |
| Magnets, 10 x 3 mm* | 12 (optional) | Round neodymium | Back door and head dome |
| Lens material | 1 | See “Before you order”, decision 4 | The eye |
You print the dowels (5.7 x 17 mm) and the 10 mm filament pins yourself, so there is nothing to order. Sandpaper, filler primer and paint come in Part 9.
Order List 2: The Animatronic Upgrade (Full Build)
The quantities below are totals for the whole animatronic droid: head, both arms, waist and backpack. The For column says which part each item belongs to: Head, Arms, Waist or Backpack.
Tip: buy position servos, not 360° servos
The droid needs position servos (standard hobby servos): you tell them an angle and they go there and stay. A 360° “continuous rotation” servo spins like a motor and doesn’t know where it is, so it can’t hold a head or an arm at a set position. The standard MG996R is a position servo that turns about 120°, which is why the head gears in the designer’s sheet give 120° of head rotation at a 1:1 ratio. There is also a 180° “robot” version of the MG996R, but the designer hasn’t tested that one. Avoid listings that say “360°” or “continuous rotation”.
Servos
| Item | Qty | What to order | For |
|---|---|---|---|
| MG996R servo* | 5 | MG996R or MG946R, position servo (not continuous rotation), preferably genuine TowerPro, because clones can have plastic gears. For the 2 arm servos you can choose a stronger 25 or 35 kg·cm servo that lifts more | 2 Head (turn and tilt), 2 Arms (one each), 1 Waist |
| Servo horns | Included | The MG996R comes with a set of plastic 25T horns, including a double-ended bar. You cut that bar down to fit for the waist swivel, so there is nothing to order. Check the set when the servos arrive. Only if the double-ended bar is missing, order one 25T double-arm servo horn | Waist |
Bearings, Tubes, Rods and Shafts
| Item | Qty | What to order | For |
|---|---|---|---|
| Bearing 6800-2RS* | 2 | Size 10 x 19 x 5 mm. The 2RS version has rubber seals | Head |
| Bearing MR126* | 4 | Size 6 x 12 x 4 mm. Sold as MR126ZZ (metal shield) or MR126-2RS (rubber seal), both are fine. Not the 686, that one is 6 x 13 x 5 mm | Arms |
| Bearing 6801* | 2 | Size 12 x 21 x 5 mm. Sold as 6801-2RS or 6801ZZ, both are fine | Waist |
| Tube, 10 mm outside diameter* | 1 | Order 1 tube of 250 mm and cut it to length in Part 7 if needed. The designer’s sheet gives 150 to 280 mm because the exact length depends on how deep you let it run into the neck. It is glued into the lower neck (measured from the file: 138.5 mm tall) and must reach at least halfway into it, 20 to 22 mm must stick out of the upper neck, and it may continue down into the body. Steel or aluminium. Chamfer the ends so they can’t cut wires | Head (the neck “spine”) |
| Metal tube, 12 mm diameter* | 1 | 60 mm long | Waist |
| Rod, 6 mm diameter* | 2 | 25 mm long, steel, aluminium or brass, or cut from the unthreaded part of a long bolt | Head (tilt pivots) |
| Metal shaft, 6 mm diameter* | 2 | 60 mm long, round or D-shaft | Arms (arm axles) |
| Clamping hub (“sonic hub”) | 2 | 6 mm bore for the 6 mm shaft, with four M4 mounting holes in a square of 16 x 16 mm to match the printed arm lever. Check the hole spacing and the number in the pack before you order | Arms |
Bolts, Nuts and Washers
You can order these on AliExpress too, but they are probably cheaper at your local hardware shop. Take the list with you and check the sizes there.
| Item | Qty | What to order | For |
|---|---|---|---|
| M6 square nut and M6 bolt | 2 of each | Plain M6 bolt, about 70 mm (the sheet gives no length, so this is the same as the standard lower neck bolt, check it when test fitting), with an M6 square nut (DIN 557). Not a binding post screw, a round sleeve does not fit the square slot | Head (neck to torso) |
| M4 x 10 mm countersunk bolt | 8 | With 8 washers | Arms |
| M3 x 8 mm bolt | 8 | M3 x 10 is OK. With 8 washers | Arms (servo mounts) |
| M3 x 12 mm cap head bolt | 2 | With 2 washers | Waist |
| M3 x 25 mm cap head bolt | 1 | Waist | |
| M3 square nut | 11 | 8 for the arms, 3 for the waist | Arms and Waist |
Springs, Magnets and Linkage
| Item | Qty | What to order | For |
|---|---|---|---|
| Tension spring* | 1 | Light extension spring with a hook on each end, not a compression spring. The sheet gives no size, so as a starting point look for about 5 to 8 mm outside diameter, 0.4 to 0.6 mm wire and 30 to 50 mm long at rest. A spring assortment is the easiest buy, so you can try a few and keep the lightest one that stops the head drooping. Balances the head weight and stops it drooping when the power is off | Head |
| Servo linkage | 4 sets | Model-shop rods and M3 ball links, or the printable rod ends (nothing to order). 2 sets for the head, 1 for each arm. The space is tight, so wire rods or ball links may be easier than printed links | Head and Arms |
| Magnets, 10 x 3 mm* | 4 (optional) | Same magnets as in order list 1, so one order of 16 covers both. For the waist. The dome magnets are already in order list 1. The backpack adaptor takes more, see the backpack sheet | Waist and Backpack |
| Magnets, 10 x 2 mm* | Per design (optional) | See the backpack sheet | Backpack door |
Head turn with gears instead of a lever? Then you also need 1 round servo disc* that fits the printed gear (the large round disc that comes with the MG996R must be trimmed, a smaller disc from a 24T servo fits better) and 1 M3 x 8 mm bolt. Only the bolt needs ordering if you use the disc from the servo set. Gears at a 1:1 ratio give about 120° of rotation (60° each side). A 1:1.5 ratio gives about 180° but loads the servo about 50% more.
Warning
A 35 kg·cm servo is powerful. It can break glued joints and printed parts, and it will hurt fingers. Always centre the servos with a tester before fitting.
Electronics
Decide now, build in Part 8. The designs don’t force one system: the designer lists puppet control, radio control, an Arduino or a Pololu Maestro and leaves the choice to you. I use an ESP32-S3 with a PCA9685 servo driver, so the list below is for that. If you prefer a Pololu Maestro or an RC receiver, you don’t need the ESP32-S3 and the PCA9685.
| Item | Qty | What to order | For |
|---|---|---|---|
| Servo tester* | 1 | Any cheap one with a knob and a centre mode, running on 4.8 to 6 V. A must-have for centring servos before fitting | Everything |
| PCA9685 servo driver* | 1 | 16 channel, I2C, blue board with 16 three-pin servo outputs and a screw terminal for servo power. We use 5 channels and keep 11 spare. It cannot run on its own, it needs the ESP32-S3 | Everything |
| ESP32-S3-DevKitC-1 N16R8* | 1 | The brain that tells the PCA9685 which angle each servo goes to. Order the N16R8 version (16 MB flash, 8 MB PSRAM), which leaves room for extras such as sound or a camera later. Four wires go to the PCA9685: 3.3 V, GND, SDA and SCL. The board runs from USB-C or its own supply, not from the servo power. With the N16R8, GPIO 35, 36 and 37 are used by the PSRAM, so don’t use those pins | Everything |
| Power supply | 1 | 5 to 6 V, able to deliver several amps, separate from the controller’s own power. Weak power means jittering and resets. This is my own advice, not from the design sheets, I’ll test it in Part 8 | Everything |
| Fuse and main switch | 1 of each | Inline fuse and a switch | Safety |
| Servo extension leads | As needed | For the long runs from body to head. The number depends on where you mount the controller | Head and Arms |
| Wire, connectors, heat shrink | 1 set | Everything | |
| Battery (only if mobile) | 1 | In the body or backpack, not in the head, because head weight affects servo life | Backpack |
| Amplifier* (optional) | 1 | Small audio amplifier for the droid sounds. Droid Division includes a folder with Pit Droid sounds | Backpack |
| Speaker* (optional) | 1 | Small speaker that matches the amplifier (check its impedance and power in the amplifier listing). Fits in the backpack | Backpack |
Tools
The full tool list is in Part 1. For this build you also need:
- A small saw for cutting rods and tubes
- A servo tester and a multimeter
- Screwdrivers, side cutters, and optionally a soldering iron
- Safety glasses, a dust mask and gloves
Arrival Checklist
Do this when the packages come in.
- ☐ Count all bolts and nuts against order list 1
- ☐ Check lengths with a calliper or ruler
- ☐ Try the 4 mm rod in a 4 mm hole (and in a printed test part)
- ☐ Check that the 10 mm tube fits the bearings and that the rods fit their bearings
- ☐ Spin each bearing. It should turn smoothly and quietly
- ☐ Connect each servo to the tester. Does it turn smoothly without grinding or twitching?
- ☐ Check the servo horn set: is there a double-ended bar and a round disc, and do they say 25T?
- ☐ Label every servo (head turn, head tilt, left arm, right arm, waist)
- ☐ Check the magnets for size and keep them apart, because they snap together and chip
- ☐ Write down what you paid in the cost log below
- ☐ Store small parts in labelled boxes. Future you will be grateful
Cost Log
| Item | Shop | Price | Date |
|---|---|---|---|
| Droid Division files | |||
| Animatronic files | |||
| Filament | |||
| Servos | |||
| Bearings | |||
| Bolts and nuts | |||
| Tubes and rods | |||
| Electronics | |||
| Paint and materials | |||
| Total |
Words Explained
- kg·cm: the pulling force of a servo. 25 means about 25 kg at 1 cm from the shaft.
- Torque: turning force.
- Clamping hub (“sonic hub”): a part that grips a shaft and connects it to a lever.
- Linkage: a rod or arm that transfers movement from the servo to a part.
- Square nut: a nut that sits in a slot in a printed part and can’t turn.
- Chamfer: a small angled edge that removes sharp corners.
- BEC / power supply: the thing that gives the servos their power.
Conclusion: Time to Shop
Next up: Part 3: Printing the parts (with my slicer settings and a full print list per level)
Previous: Part 1: The plan
Unofficial fan project
Pit Droid and Star Wars are trademarks of Disney/Lucasfilm. This site is not affiliated with, endorsed by or sponsored by Disney. The droid in this series is based on the PD-23 files by DroidDivision (Dave Moog), which are used under a single-person licence.
Related
 Opinion
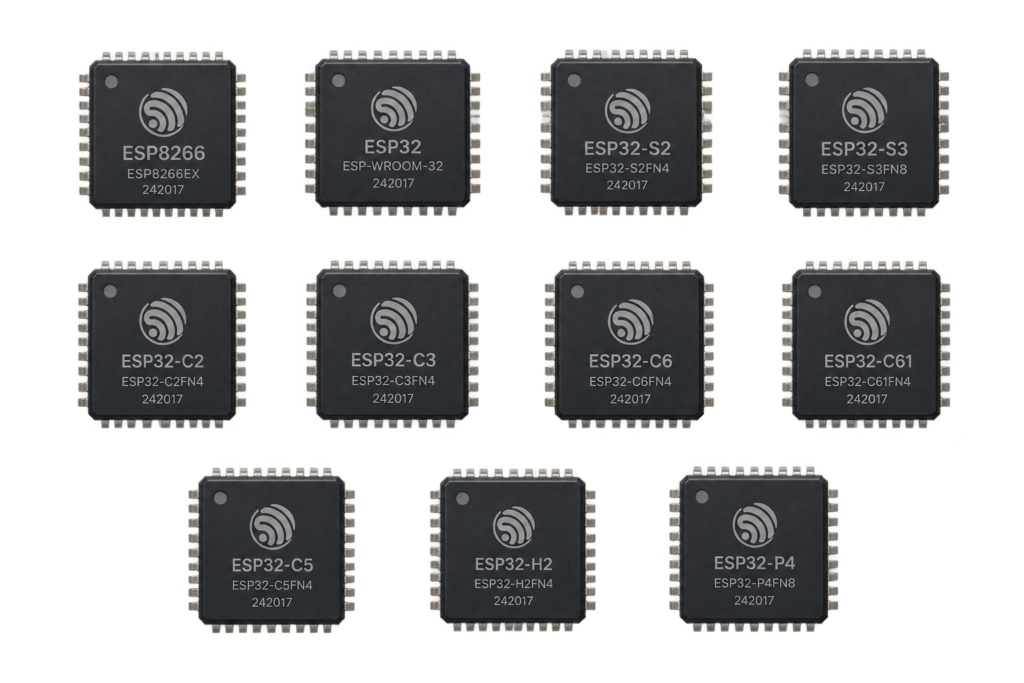
The ESP32 Family, Explained Honestly
A plain-language walkthrough of every real ESP32 family (and the ESP8266), what each is actually good at, and which one to reach for depending on what you're building.
Read more
 Software
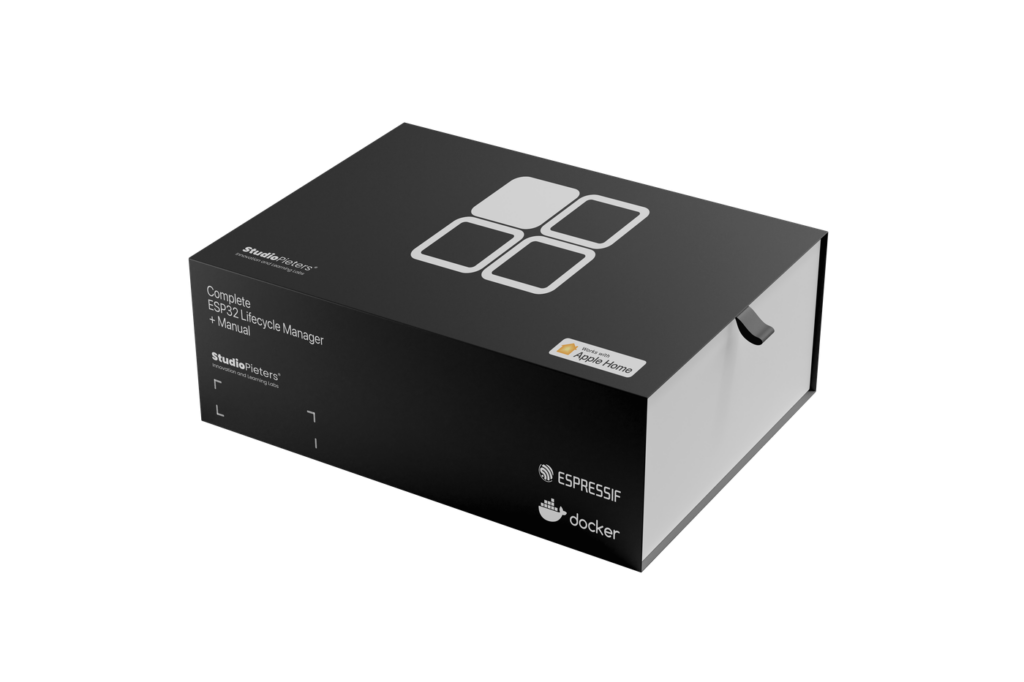
ESP32 Lifecycle Manager V2.0
A slow, friendly, step-by-step introduction to OTA updates trough Lifecycle Manager on the ESP32. I get quite a lot of messages and questions from people who want to “try OTA updates”, but who get stuck almost immediately.
Read more
Software
ESP32 Matter: 69 Open-Source Smart-Home Devices, No Cloud Required
A from-scratch toolkit for building Matter smart-home devices on the ESP32: 69 real, buildable device types, a wizard that writes the build commands for you, and nothing that phones home.
Read more
More projects
Keep building.
Electronics, 3D printing and CNC builds, documented from the first idea to the last screw.
All projects