
NeoPixels are individually addressable RGB LEDs that need just one data pin to control hundreds of LEDs, each with its own 24-bit color. NeoPixel is Adafruit’s brand name for LEDs based on the WS2812B and its successors — but whatever name they’re sold under, they all speak the same single-wire protocol. Combined with the ESP32-C6 SUPER MINI (which even has one on board!) they are the easiest way to add spectacular lighting to any project.
In this complete guide we cover:
- What NeoPixels are
- Technical specifications
- Pinout
- NeoPixel variants compared (WS2812B, SK6812, WS2813, WS2815)
- The single-wire protocol explained
- ESP32-C6 SUPER MINI wiring
- Power requirements – calculation table
- ESP-IDF example code (RMT / led_strip)
- NeoPixel vs DotStar (APA102) comparison
- Practical engineering tips
What are NeoPixels?
A NeoPixel is a smart LED: an RGB LED with a tiny driver IC built into the same package. Each LED:
- Has its own 24-bit color (8 bits per channel, 16.7 million colors)
- Reads the first 24 bits of incoming data, then passes the rest on to the next LED
- Can be chained almost endlessly: DOUT → DIN → DOUT → DIN…
The result: one GPIO pin controls an entire strip, with every LED individually addressable. No multiplexing, no driver ICs, no PWM channels — just power, ground and one data line.
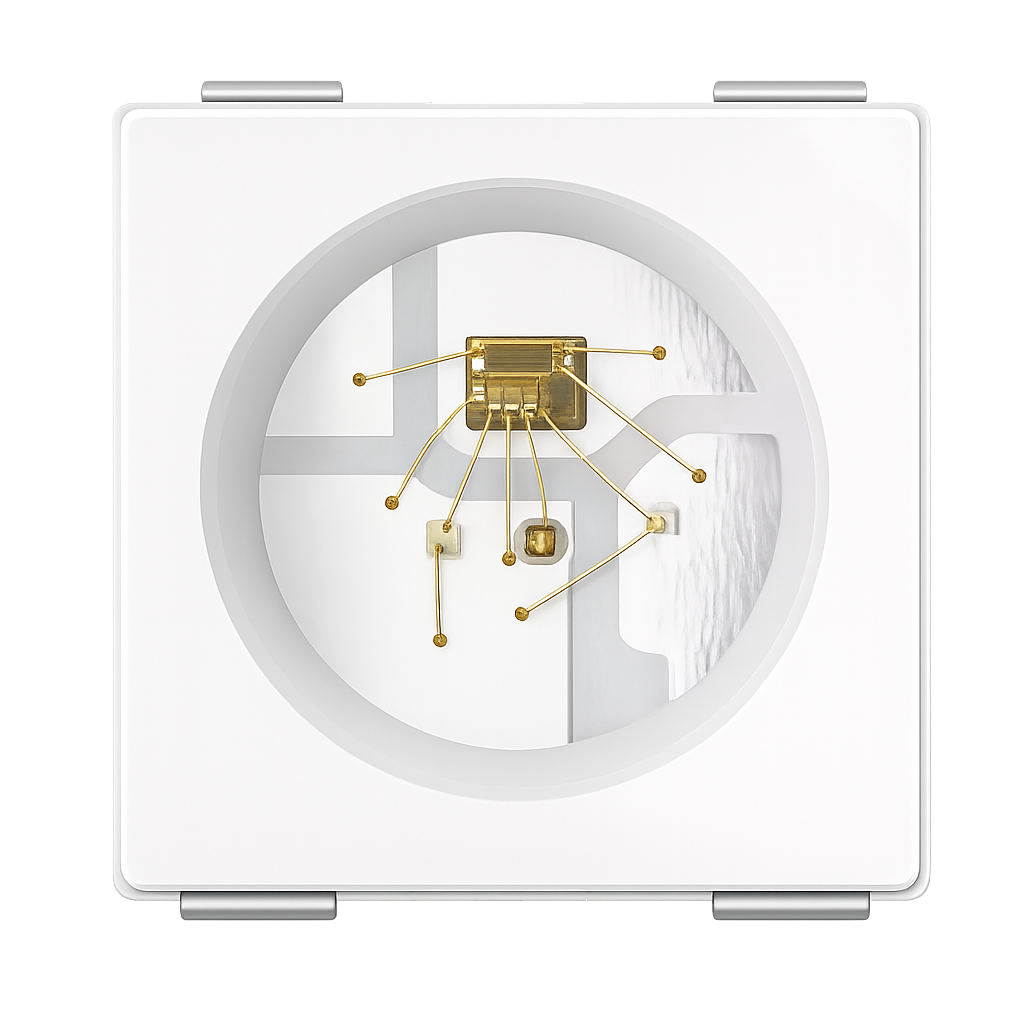
NeoPixels come in every imaginable form factor: strips (30/60/144 LEDs per meter), rings, matrices, sticks, and single through-hole or SMD LEDs.
Technical Specifications (WS2812B)
| Parameter | Value |
|---|---|
| Supply voltage | 3.5V – 5.3V (5V nominal) |
| Colors | 24-bit (8 bits × R, G, B) |
| Color order | GRB |
| Data protocol | Single-wire, 800 kHz |
| Data input level | ≥ 0.7 × VDD (3.5V at 5V supply!) |
| Current per LED | ~60 mA max (full white), ~1 mA idle |
| PWM refresh rate | ~2 kHz |
| Reset/latch time | > 50 µs (data low) |
| Operating temperature | -25°C to +80°C |
⚠️ Note that data input level: at a 5V supply, the WS2812B officially wants at least 3.5V on the data line — more than the 3.3V an ESP32 delivers. In practice it almost always works, but it is out of spec. The solutions are covered in the wiring section below.
Pinout
Every NeoPixel — strip or single LED — has four connections:
| Pin | Description |
|---|---|
| VDD (5V) | Power supply |
| GND | Ground |
| DIN | Data in — from the ESP32 or the previous LED |
| DOUT | Data out — to the next LED |
⚠️ Direction matters! Data flows only from DIN to DOUT. Strips have arrows printed on them — always connect your ESP32 to the DIN side. Connecting to DOUT does nothing (and breaks nothing, fortunately).
NeoPixel Variants Compared
“NeoPixel” covers a whole family of chips. These are the ones you’ll actually encounter:
| Feature | WS2812B | SK6812 | SK6812 RGBW | WS2813 | WS2815 |
|---|---|---|---|---|---|
| Supply voltage | 5V | 5V | 5V | 5V | 12V |
| Colors | RGB | RGB | RGB + White | RGB | RGB |
| Backup data line | ❌ | ❌ | ❌ | ✅ (BIN) | ✅ (BIN) |
| One dead LED kills the rest | Yes | Yes | Yes | No | No |
| Current per LED (max) | 60 mA | 60 mA | 80 mA | 60 mA | 15 mA (12V) |
| Voltage drop over long strips | High | High | High | High | Low |
| Protocol | Identical | Identical | Identical (32-bit) | Identical | Identical |
Which one should you pick?
- WS2812B — the default. Cheap, everywhere, fine for most projects
- SK6812 RGBW — when you need proper white light (warm/neutral/cold white die)
- WS2813/WS2815 — installations where one dead LED must not take down the chain
- WS2815 (12V) — long runs (> 5 m) with minimal voltage drop and thinner wiring
The Single-Wire Protocol Explained
NeoPixels don’t use I²C or SPI, but a timing-based protocol at 800 kHz:
- A 0-bit = short high pulse (~0.4 µs) followed by long low
- A 1-bit = long high pulse (~0.8 µs) followed by short low
- > 50 µs low = latch: all LEDs display their received color
Each LED consumes the first 24 bits (in GRB order) and forwards everything after. The timing tolerances are tight — which is why bit-banging is unreliable. The ESP32 has the perfect answer: the RMT peripheral, which generates these precise pulse trains in hardware while the CPU does other things. The ESP-IDF led_strip component uses it under the hood, so you never touch the timing yourself.
Connecting to the ESP32-C6 SUPER MINI
Fun fact first: the ESP32-C6 SUPER MINI already has one onboard NeoPixel connected to GPIO8 — perfect for testing your code before wiring anything.
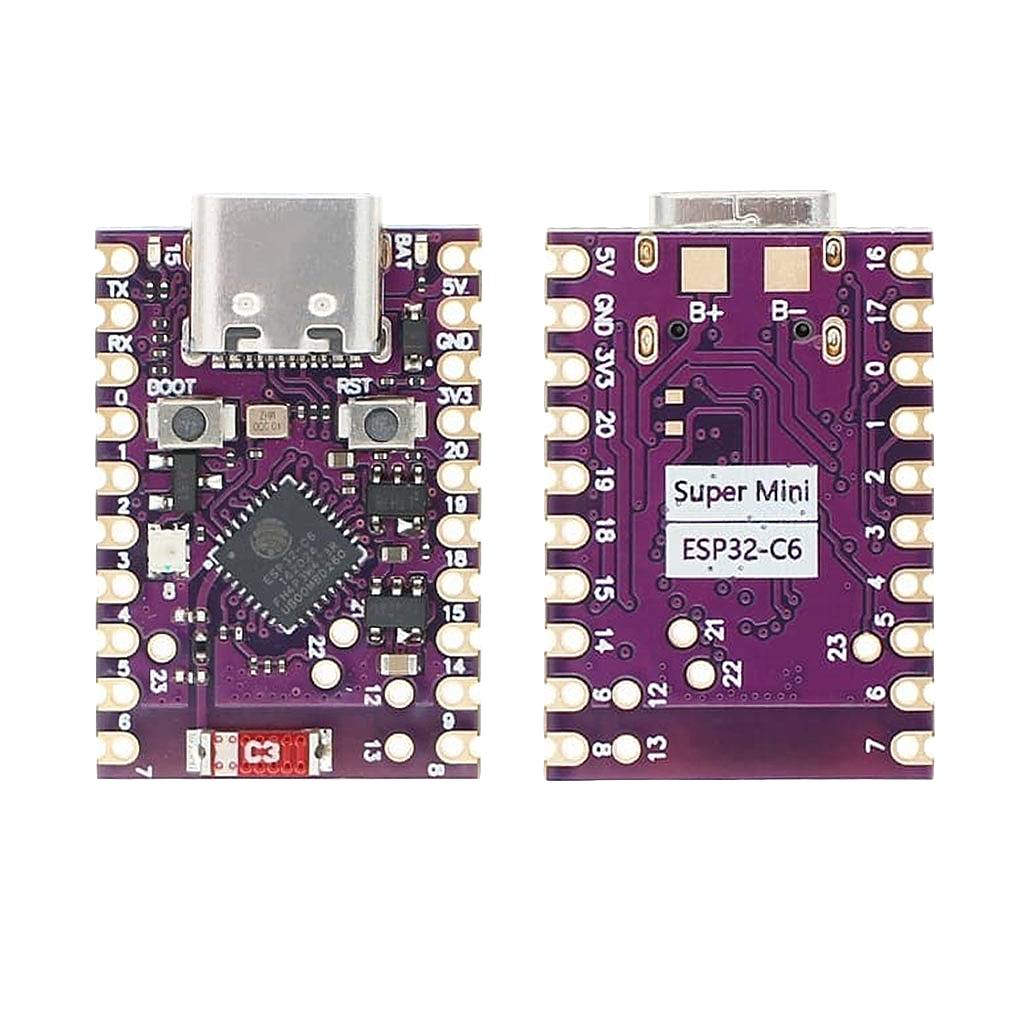
For an external strip:
| NeoPixel Strip | ESP32-C6 SUPER MINI / PSU | Note |
|---|---|---|
| VDD (5V) | 5V pin (few LEDs) or external 5V PSU | See power table below |
| GND | GND — shared with PSU! | Always connect grounds |
| DIN | GPIO4 (via 330 Ω resistor) | Any free GPIO works |
Three components make the difference between “works sometimes” and “works always”:
- 330–470 Ω resistor in the data line, close to the first LED — protects the first pixel against voltage spikes and reflections
- 1000 µF capacitor across 5V and GND at the strip — absorbs the inrush current at power-on
- Level shifter (74AHCT125) from 3.3V → 5V for the data signal — the official fix for the 0.7 × VDD requirement
No level shifter at hand? Two pragmatic tricks:

- Keep the data wire short (< 20 cm) — usually works fine despite being out of spec
- Or the sacrificial pixel trick: power the first LED from ~4.3V (5V through a diode). Its DOUT then swings to ~4.3V, which is comfortably in spec for the rest of the strip at 5V
⚠️ Never power more than ~10 LEDs from the SUPER MINI’s 5V pin — that pin comes straight from your USB port.
Power Requirements – Calculation Table
The rule of thumb: 60 mA per LED at full white, full brightness. Realistic mixed-color animations average 20 mA. Always size your PSU for the worst case:
| LEDs | Max current (full white) | Recommended 5V PSU |
|---|---|---|
| 8 (stick/ring) | 0.5 A | USB port is fine |
| 30 (1 m @ 30/m) | 1.8 A | 5V 2.5A |
| 60 (1 m @ 60/m) | 3.6 A | 5V 4A |
| 144 (1 m @ 144/m) | 8.6 A | 5V 10A |
| 300 (5 m @ 60/m) | 18 A | 5V 20A + power injection |
⚠️ From roughly 1–2 meters onwards, inject power at both ends of the strip (and every meter on dense strips). Copper traces have resistance: feed a 5 m strip from one end only and the far end turns visibly orange because the blue channel starves first.
Software helps too: limiting brightness to 50% halves your power budget and is still blindingly bright indoors.
ESP-IDF Example Code
ESP-IDF has an official led_strip component that drives NeoPixels via the RMT peripheral. Add it to your project:
idf.py add-dependency "espressif/led_strip"This example runs a smooth rainbow on a 30-LED strip connected to GPIO4:
c
#include <math.h>
#include "freertos/FreeRTOS.h"
#include "freertos/task.h"
#include "led_strip.h"
#include "esp_log.h"

#define LED_GPIO      4
#define LED_COUNT     10

static const char *TAG = "NEOPIXEL";
static led_strip_handle_t strip;

/* Simple HSV → RGB for smooth rainbows */
static void hsv_to_rgb(uint16_t h, uint8_t *r, uint8_t *g, uint8_t *b)
{
    uint8_t region = (h / 60) % 6;
    uint8_t rem = (h % 60) * 255 / 60;

    switch (region) {
        case 0: *r = 255;       *g = rem;       *b = 0;         break;
        case 1: *r = 255 - rem; *g = 255;       *b = 0;         break;
        case 2: *r = 0;         *g = 255;       *b = rem;       break;
        case 3: *r = 0;         *g = 255 - rem; *b = 255;       break;
        case 4: *r = rem;       *g = 0;         *b = 255;       break;
        default:*r = 255;       *g = 0;         *b = 255 - rem; break;
    }
}

void app_main(void)
{
    led_strip_config_t strip_config = {
        .strip_gpio_num = LED_GPIO,
        .max_leds = LED_COUNT,
        .led_model = LED_MODEL_WS2812,
        .color_component_format = LED_STRIP_COLOR_COMPONENT_FMT_GRB,
    };
    led_strip_rmt_config_t rmt_config = {
        .resolution_hz = 10 * 1000 * 1000,   /* 10 MHz tick */
    };
    ESP_ERROR_CHECK(led_strip_new_rmt_device(&strip_config, &rmt_config, &strip));
    ESP_LOGI(TAG, "NeoPixel strip initialized: %d LEDs on GPIO%d", LED_COUNT, LED_GPIO);

    uint16_t offset = 0;

    while (1) {
        for (int i = 0; i < LED_COUNT; i++) {
            uint8_t r, g, b;
            uint16_t hue = (offset + (i * 360 / LED_COUNT)) % 360;
            hsv_to_rgb(hue, &r, &g, &b);

            /* 25% brightness — easy on the eyes and the PSU */
            led_strip_set_pixel(strip, i, r / 4, g / 4, b / 4);
        }
        led_strip_refresh(strip);

        offset = (offset + 2) % 360;
        vTaskDelay(pdMS_TO_TICKS(20));
    }
}
Want to test without wiring anything? Change LED_GPIO to 8 and LED_COUNT to 1 — the onboard NeoPixel of the SUPER MINI will run the rainbow.
Prefer Arduino?
With the Adafruit NeoPixel library:
cpp
#include <Adafruit_NeoPixel.h>

#define LED_PIN    4
#define LED_COUNT  10

Adafruit_NeoPixel strip(LED_COUNT, LED_PIN, NEO_GRB + NEO_KHZ800);

void setup() {
  strip.begin();
  strip.setBrightness(64);   // 25%
}

void loop() {
  static uint16_t offset = 0;
  for (int i = 0; i < LED_COUNT; i++) {
    uint16_t hue = offset + (i * 65536L / LED_COUNT);
    strip.setPixelColor(i, strip.gamma32(strip.ColorHSV(hue)));
  }
  strip.show();
  offset += 256;
  delay(20);
}
NeoPixel vs DotStar (APA102)
The main alternative is the APA102 (Adafruit: DotStar), which uses two-wire SPI:
| Feature | NeoPixel (WS2812B) | DotStar (APA102) |
|---|---|---|
| Wires | 1 (data) | 2 (data + clock) |
| Protocol | Strict 800 kHz timing | SPI, any speed |
| Update speed | ~33 fps @ 1000 LEDs | 10× faster and more |
| PWM refresh | ~2 kHz | ~20 kHz |
| Timing-critical | Yes | No |
| Price | Low | Noticeably higher |
| Availability | Everywhere | Limited |
When to Choose NeoPixels
- Almost always: cheapest, most available, one pin
- Static colors and normal animations
- The ESP32 RMT peripheral makes the timing problem disappear
When to Choose DotStars
- POV displays, light painting (high refresh)
- Video capture without flicker (20 kHz PWM)
- Extremely long chains needing fast updates
Practical Engineering Tips
1. GND First, Always
When connecting a strip to a powered system, connect ground first. A data signal without a common ground reference can kill the first pixel.
2. The First Pixel Is the Fuse
If a strip misbehaves, the first LED is broken in 90% of cases — it absorbs all the abuse (spikes, level issues, hot-plugging). Cut it off, reconnect at LED 2, and the strip usually springs back to life.
3. Set the Brightness Limit in Software
led_strip at full white is a heater. Cap brightness at 25–50% in code: your PSU, your LEDs (heat!) and your eyes will thank you. Add a fuse in the 5V line for larger installations.
4. Watch Out with WiFi and Bit-Banged Drivers
On the ESP32, always use RMT-based drivers (ESP-IDF led_strip, or NeoPixelBus with RMT). Bit-banged or interrupt-based drivers glitch the moment WiFi traffic arrives — resulting in random flashes.
5. Ghosting on Long Data Runs
More than ~2 m between ESP32 and first pixel? Use a proper level shifter and twist the data wire with a ground wire. For really long runs, a differential driver (RS-485 transceiver pair) is bulletproof.
Conclusion
NeoPixels turned addressable lighting from an engineering challenge into a commodity: one GPIO, three wires, endless possibilities.
They offer:
- Individual control of every LED over a single pin
- 16.7 million colors, chainable into the hundreds
- Hardware-perfect timing thanks to the ESP32 RMT peripheral
- A free test pixel on board of the ESP32-C6 SUPER MINI (GPIO8)
- An ecosystem of strips, rings, matrices and libraries
Pair them with a properly sized power supply, add the resistor and capacitor, and you have lighting that simply works — from a single status LED to a room-filling installation.