In this blog, we will discuss how to use the ESP32 touch sensors and how to use the esp32 touch sensors as a push button without having to connect an external push button. The ESP32 chip offers ten touch sensors. These touch sensors are built-in with ESP32 chip and are capacitive type. These touch sensors are shared with ESP32 GPIO pins.
Capacitive touch
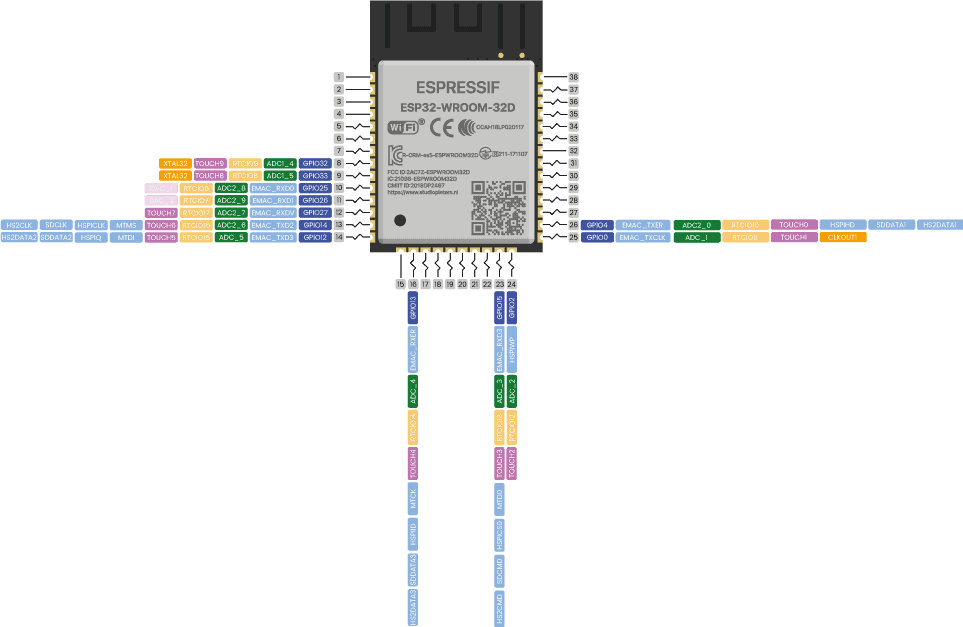
The ESP32 has 10 capacitive touch GPIO’s. These GPIO’s can detect variations in anything that contains an electrical charge, such as human skin. This allows them to detect variations caused by touching the GPIO’s with a finger. These pins can be easily integrated into capacitive pads and replace mechanical buttons. In addition, the touch pins can also be used as a wake-up source when the ESP32 is in deep sleep. Look at your board pinout to locate the 10 different touch sensors – the touch sensitive pins are highlighted in purple.
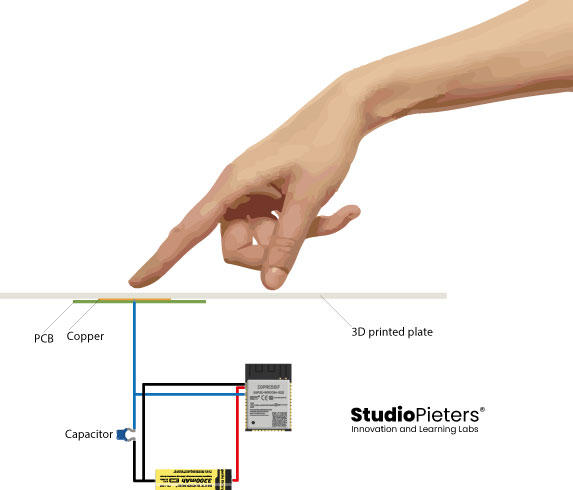
A touch sensor system is built on a substrate that carries electrodes and relevant connections beneath a protective flat surface. When a user touches the surface, the capacitance variation is activated and a binary signal is generated to indicate whether the touch is valid.
The ESP32 has 10 capacitive touch GPIO’s. These GPIO’s can detect variations in anything that has an electrical charge, such as human skin. Thus, they can detect variations that arise when touching the GPIO’s with a finger. These pins can be easily integrated into capacitive pads and replace mechanical buttons. In addition, the touch pins can also be used as a wake-up source when the ESP32 is in deep sleep.
Note: Touch sensor 1 is GPIO 0. However, it’s not available as a pin in this particular ESP32 development board (version with 30 GPIO’s). GPIO 0 is available on the version with 36 pins.
Reading the Touch Sensor
Reading the touch sensor is easy. In the Arduino IDE you use the touchRead() function which takes as its argument the GPIO you want to read.
touchRead(GPIO);We’ll program the ESP32 using Arduino IDE, so make sure you have the ESP32 add-on installed before proceeding.
Let’s see how that function works by using an example from the library. In the Arduino IDE, go to File > Examples > ESP32 > Touch and open the TouchRead sketch.
This example reads the touch pin 0 and displays the results in the serial monitor. The T0 pin (touch pin 0), corresponds to GPIO 4, as we saw earlier in the pinout. In this code, in the setup(), you start by initializing the serial monitor to display the sensor readings.
Serial.begin(115200);In the loop() is where you read the sensor.
Serial.println(touchRead(4));Use the touchRead() function and pass as argument the pin you want to read. In this case, the example uses T2, the touch sensor 2, in GPIO 2. You can pass the touch sensor number (T2) or the GPIO number (2). Now upload the code to your ESP32 board. Make sure you have selected the correct card and COM port.
Testing the sketch
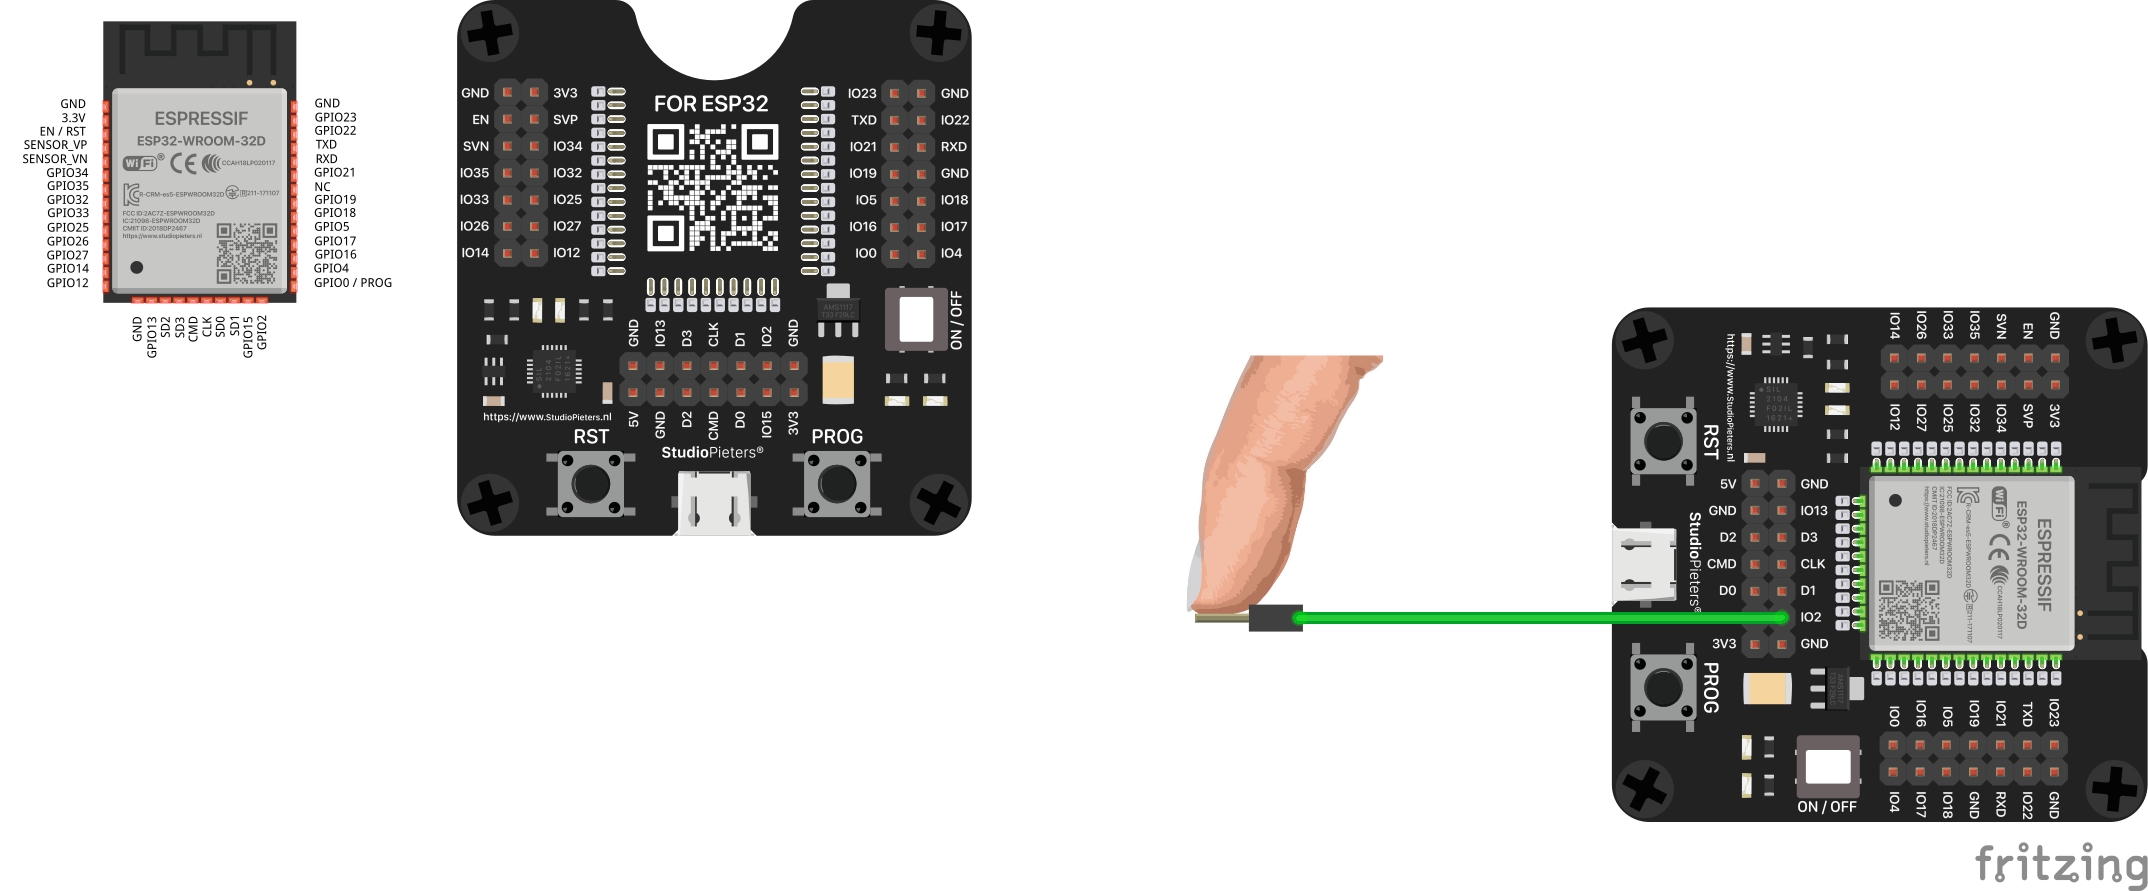
Connect a jumper wire to GPIO 2. You touch the metal part of this wire so that it feels the touch. In the Arduino IDE window, go to Tools and open the serial monitor with a baud rate of 115200. You will see that the new values are displayed every second. Touch the wire connected to GPIO 4, and you will see the readings decrease.

You can also use the serial plotter to better see the values. Close the serial monitor, go to Tools > Serial Plotter.

Threshold value
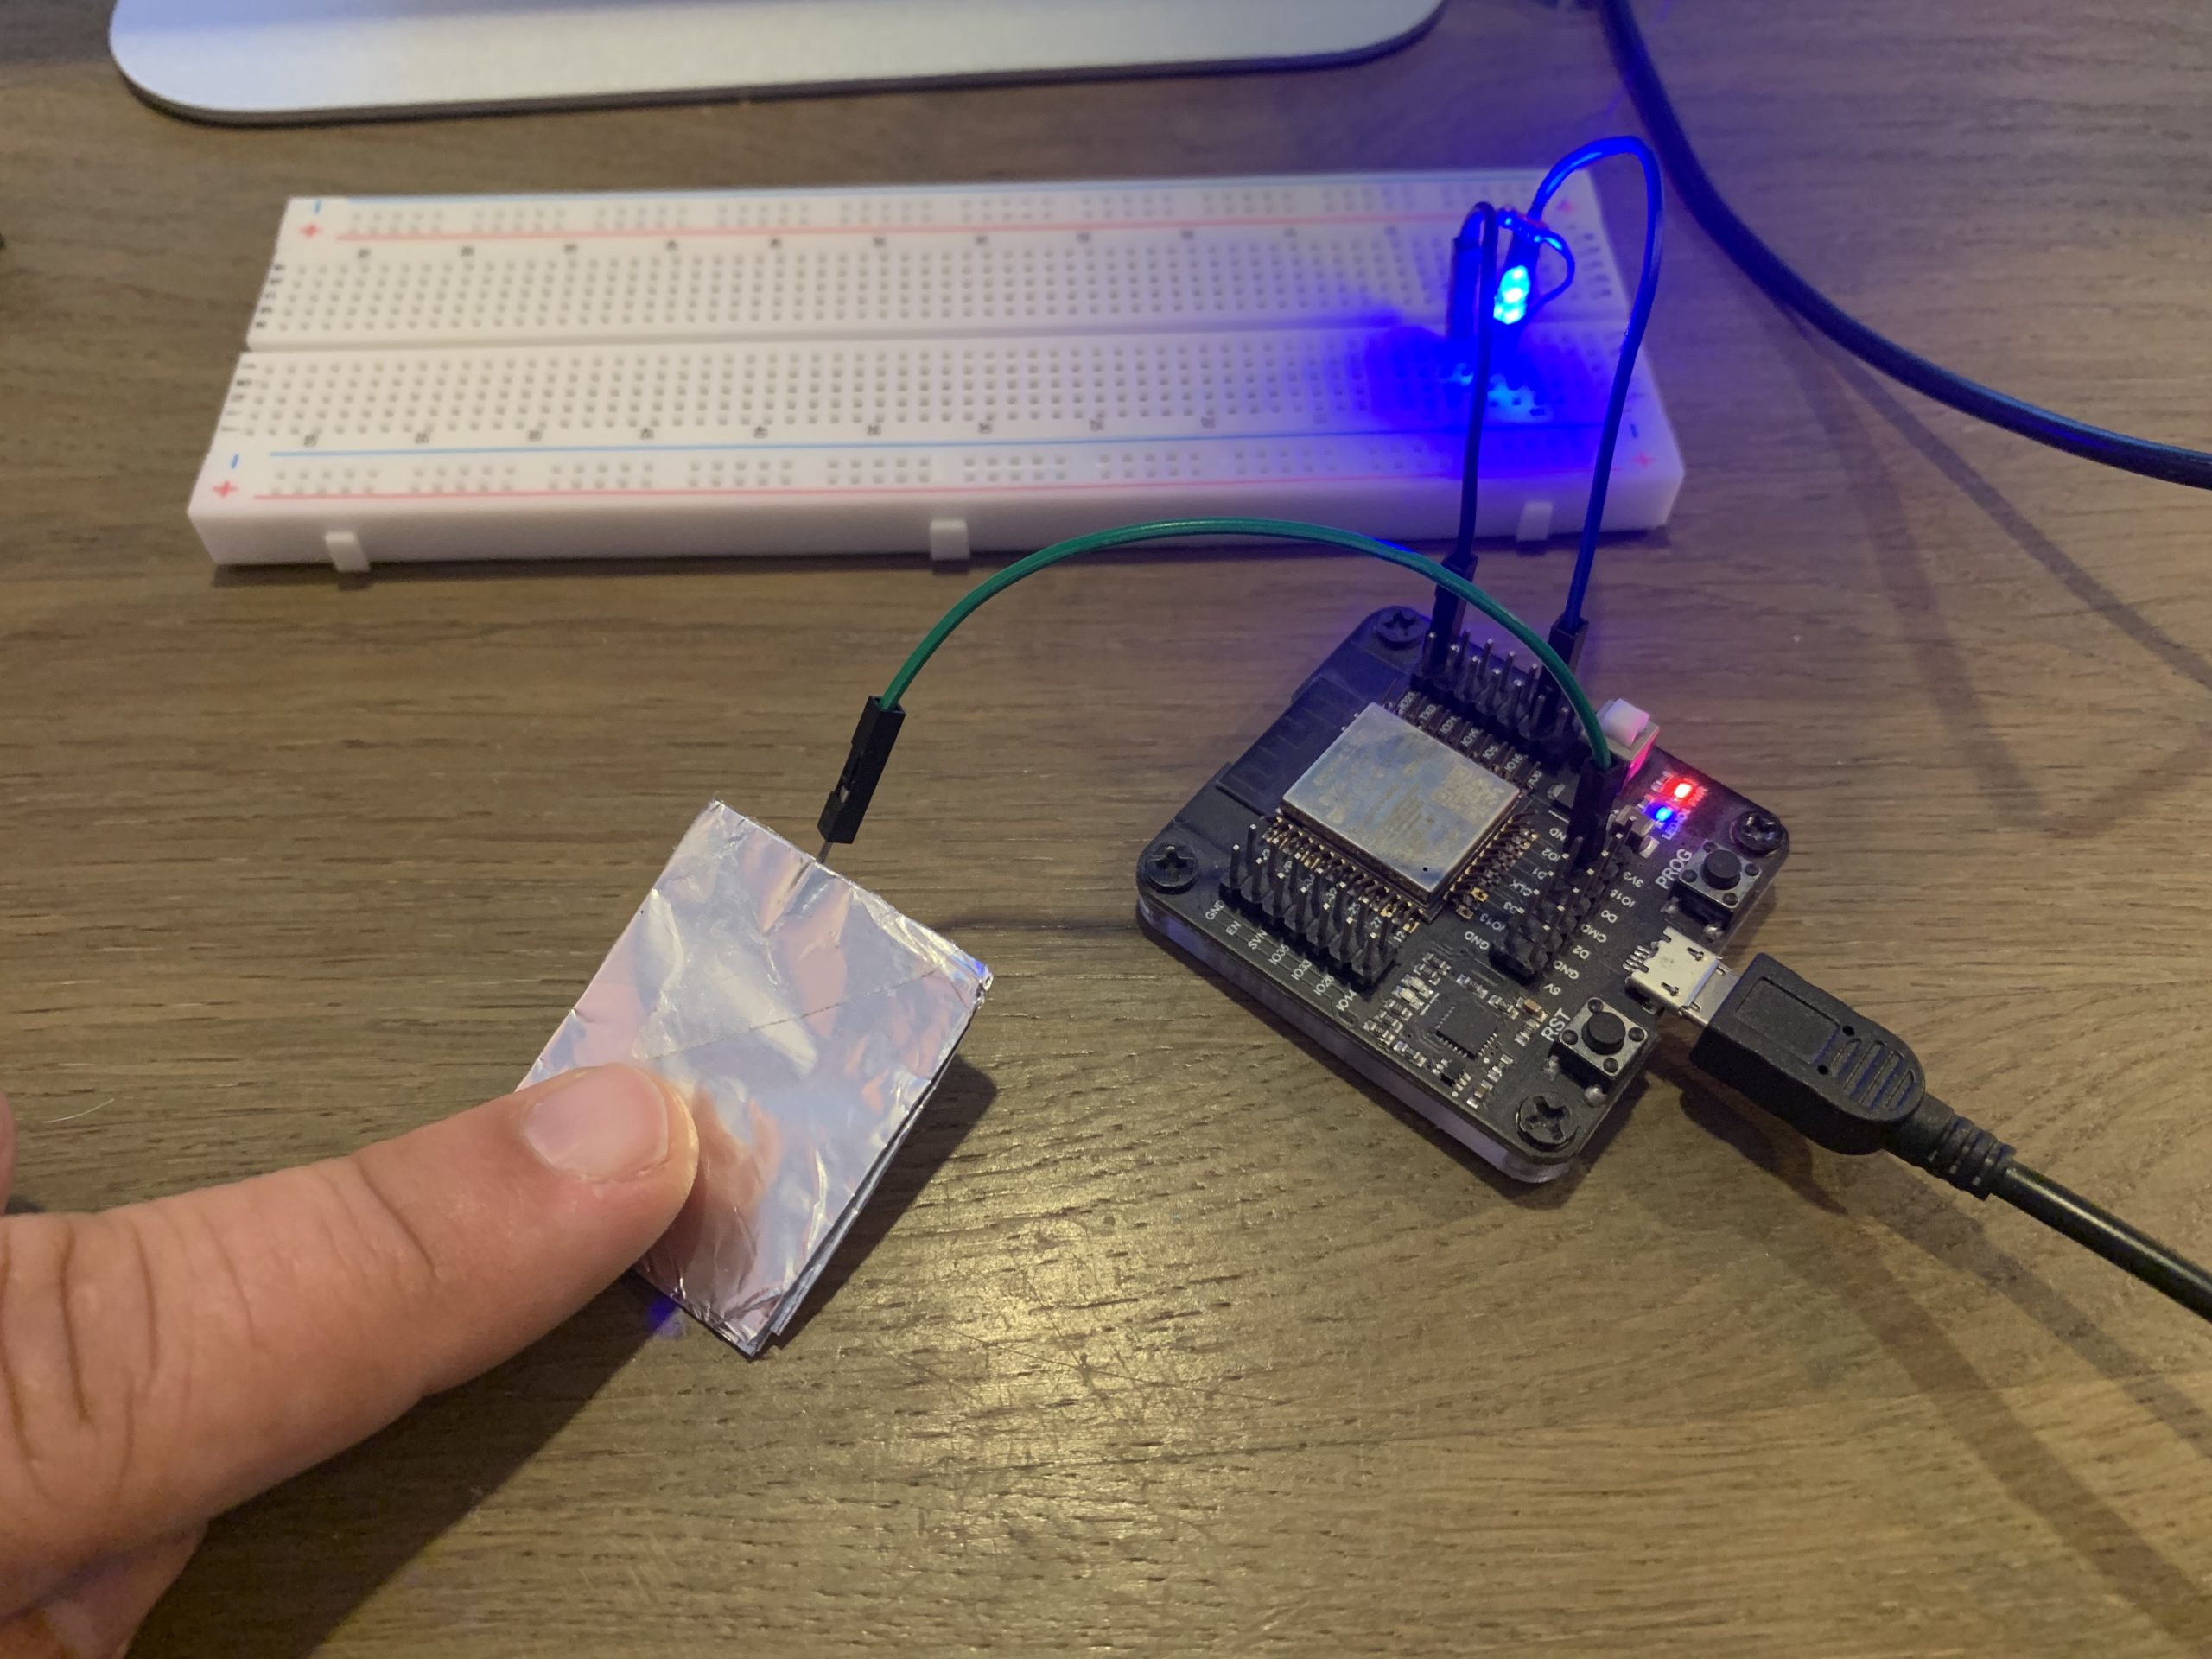
Grab a piece of aluminium foil, cut a small square, and wrap it around the wire as shown in the following image.
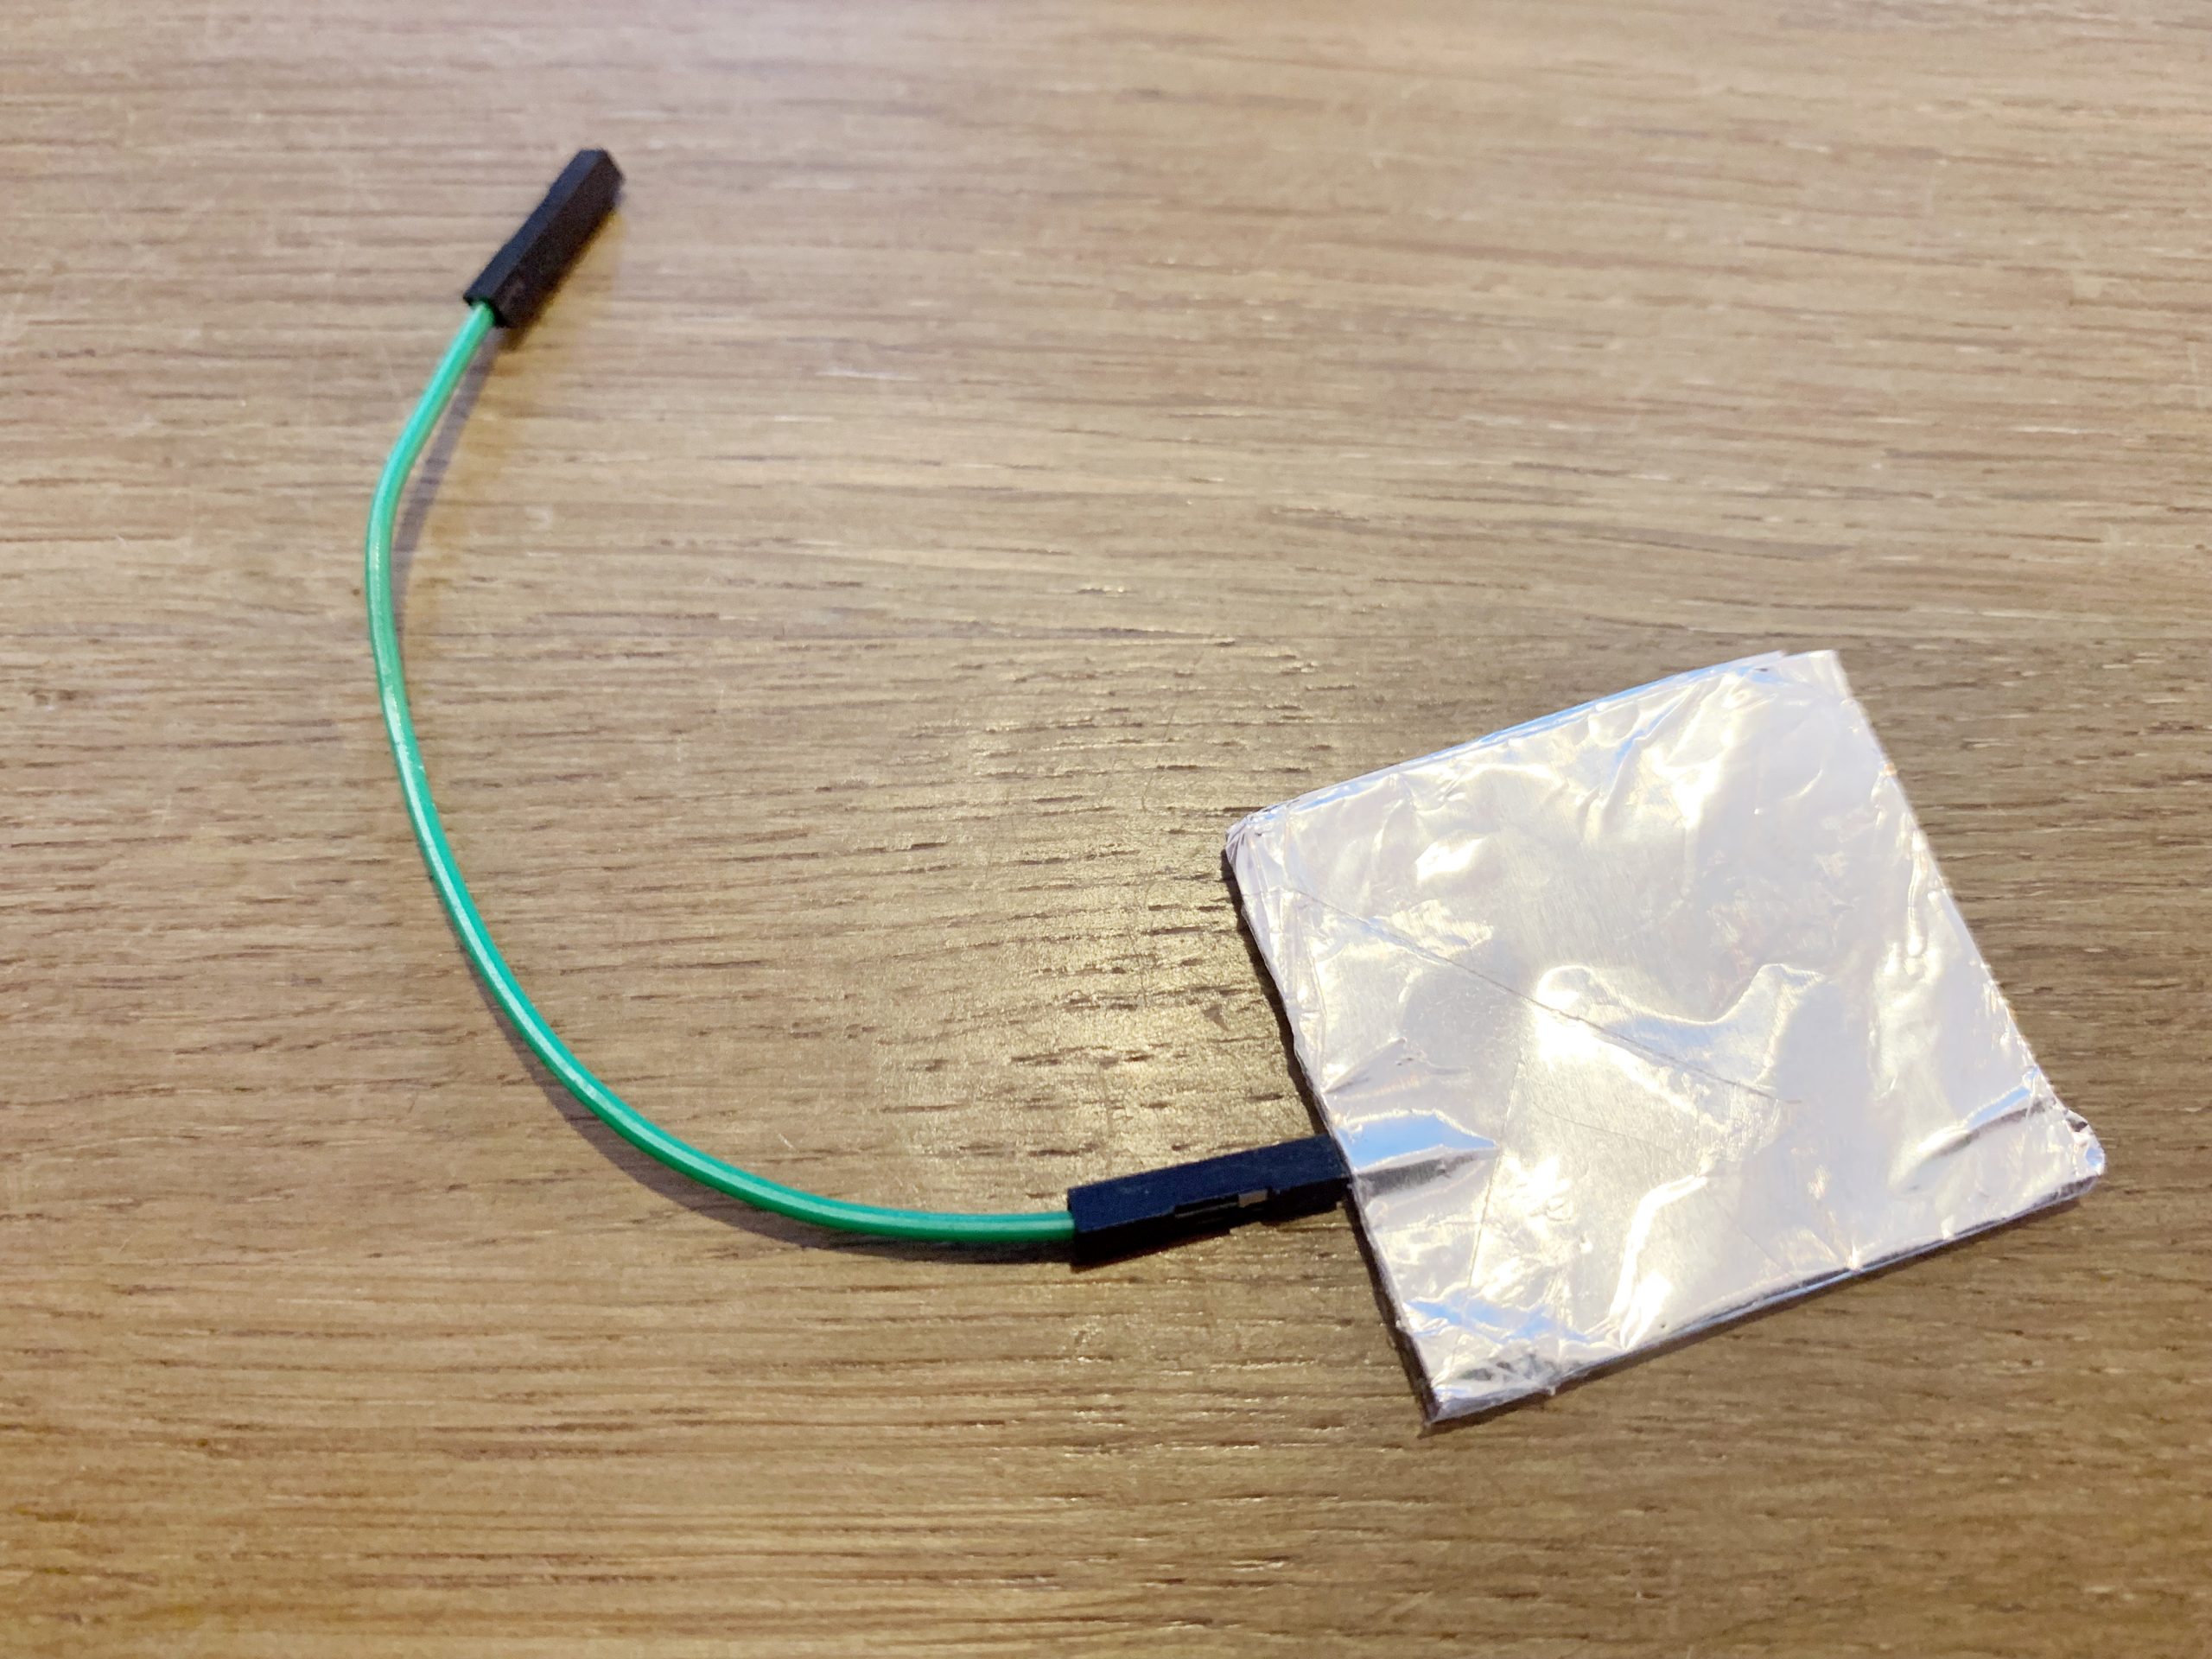
With the previous code running, go back to the serial monitor. Now, touch the aluminium foil, and you’ll see the values changing again.
In our case, when we’re not touching the pin, the normal value is above 70. And when we touch the aluminium foil, it drops to some value below 10. So, we can set a threshold value, and when the reading goes below that value, an LED light up. A good threshold value in this case is 20, for example.
Touch Sensitive Setup with a LED
You can use this feature to control outputs. In this example, we’ll build a simple touch controlled LED circuit. When you touch the GPIO with your finger, the LED lights up.
For this example, you need the following parts:
- ESP32
- ESP programmer
- 3 mm LED
- 330 Ohm resistor
- Breadboard
- Jumper wires
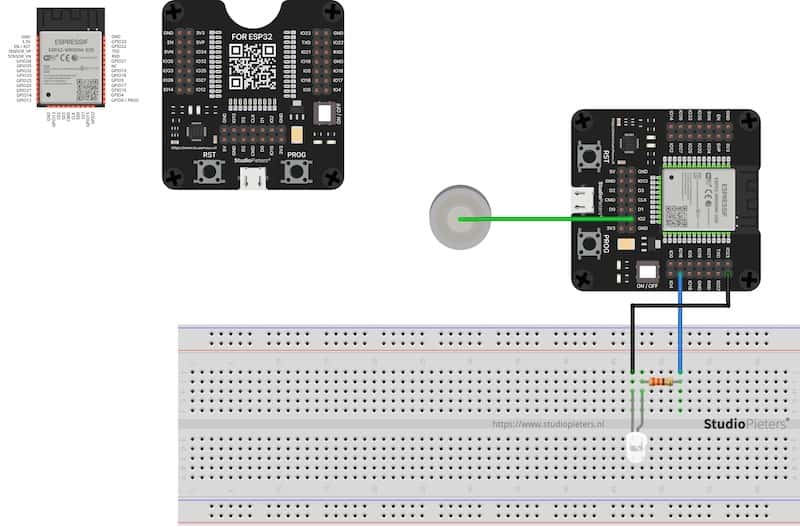
Schematic
Add an LED to your circuit by following the next schematic diagram. In this case, we’re connecting the LED to GPIO 17.
Code
Copy the following code to your Arduino IDE.
This code reads the touch value from the pin we’ve defined, and lights up an LED when the value is below the threshold. This means that when you place your finger in the aluminium pad, the LED lights up.
Testing
Upload the sketch to your ESP32. Now, test your circuit. Touch the aluminium foil and see the LED lighting up.
Summary
The ESP32 has 10 capacitive touch GPIO’s. When you touch a touch-sensitive GPIO, the value read by the sensor decreases. You can set a threshold for something to happen when it detects touch. The ESP32 touch pins can be used to wake the ESP32 from deep sleep.
Reference:
espressif, esp32_technical_reference_manual_en.pdf, https://www.espressif.com/sites/default/files/documentation/esp32_technical_reference_manual_en.pdf#sensor randomnerdtutorials, esp32-touch-pins-arduino-ide, https://randomnerdtutorials.com/esp32-touch-pins-arduino-ide