
HomeKit
ESP32 HomeKit Sunshade with Calibration and Weather Protection
A HomeKit Window Covering accessory for the ESP32 that replaces an up, down and stop switch, with touch buttons, calibration, power-loss recovery and optional wind, rain and light protection.
- ESP32
- HomeKit
- Safety notes
- 11 min read
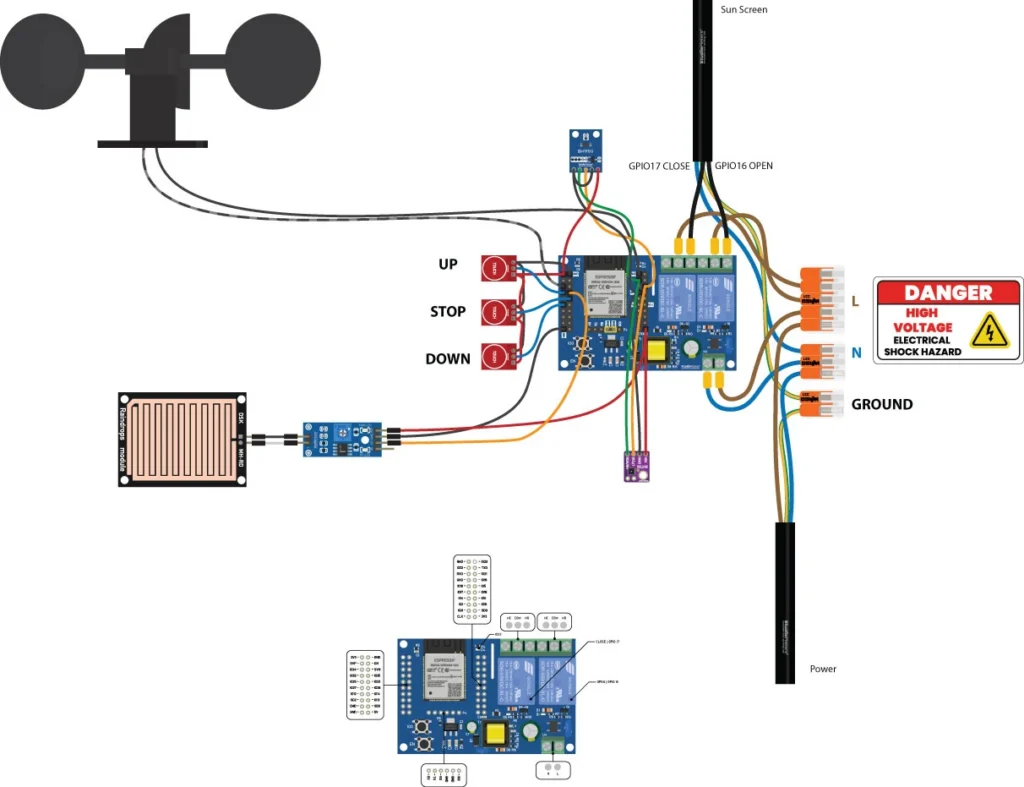
This is a complete Apple HomeKit Window Covering accessory for the ESP32-WROOM-32D, built with ESP-IDF v5. It replaces a standard UP, DOWN and STOP switch and adds HomeKit control, capacitive touch buttons, time-based position tracking, calibration and automatic recovery after a power loss. Optional wind, rain and light sensors close the sunshade for you, and restore the position when the weather calms down.
The whole project is open source on GitHub.
High voltage warning
The wiring diagram in the repository carries a high voltage electrical shock hazard warning, and for good reason: the relays switch the motor of the sunshade, which is normally powered from the mains. Only work on mains wiring if you know how, disconnect the power first, and test the firmware with the motor mechanically disconnected.
AC tubular motors must not be switched straight from one direction to the other. The firmware keeps both relays off for a short dead time before reversing, and the README still recommends a hardware interlock with cross-wired NC contacts for mains-driven motors.
What it does
| Feature | Details |
|---|---|
| HomeKit service | Window Covering: current position, target position, position state and hold position |
| Relay outputs | GPIO16 (open, up) and GPIO17 (close, down), with a software interlock, configurable active level and a direction-reversal dead time |
| Touch buttons | Three TTP223 capacitive modules: UP, STOP and DOWN |
| Physical button | A push button on GPIO25 with single, double and long press |
| Calibration | Measures the real travel time of your motor and saves it to flash |
| Power-loss recovery | On boot it closes fully, then goes back to the last HomeKit position |
| Position tracking | Time-based, 0 to 100 %, reported at most every 500 ms |
| OTA updates | Through a HomeKit characteristic or a single button press |
| Weather protection (optional) | Closes on high wind (HWFS-1), rain (MH-RD) or bright sun (BH1750), and restores the previous position when it clears |
| Sensors (optional) | Temperature and humidity (SHT3x) and ambient light (BH1750) as HomeKit sensor tiles |
| Lifecycle Manager | WiFi, NVS storage, factory reset and reboot counter, through ESP32 Lifecycle Manager |
Hardware
Required
| Component | Quantity | Notes |
|---|---|---|
| ESP32-WROOM-32D | 1 | Any ESP32 module with enough GPIOs. See the ESP32-WROOM-32D pinout |
| Relay module, 2 channel | 1 | One relay per direction. Optoisolated is recommended. See the dual channel relay module guide |
| Copper ring or touch pad | 3 | UP, STOP and DOWN, with shielded cable and a ground shield |
| Push button, momentary | 1 | Normally open, wired GND to button to GPIO25 |
| LED with resistor | 1 | Identify LED on GPIO23 |
Optional
| Component | Purpose |
|---|---|
| HWFS-1 anemometer and voltage divider | Wind protection. See the HWFS-1 anemometer guide |
| MH-RD or FC-37 rain module | Rain protection. See the MH-RD raindrop detection module guide |
| BH1750 (GY-302) light sensor | Sun protection and a HomeKit light tile. See the BH1750 guide |
| SHT3x (SHT30, SHT31 or SHT35) | HomeKit temperature and humidity tiles. See the SHT sensor series guide |
The BH1750 and SHT3x share one I²C bus, and each optional sensor is switched on separately in idf.py menuconfig.
Wiring
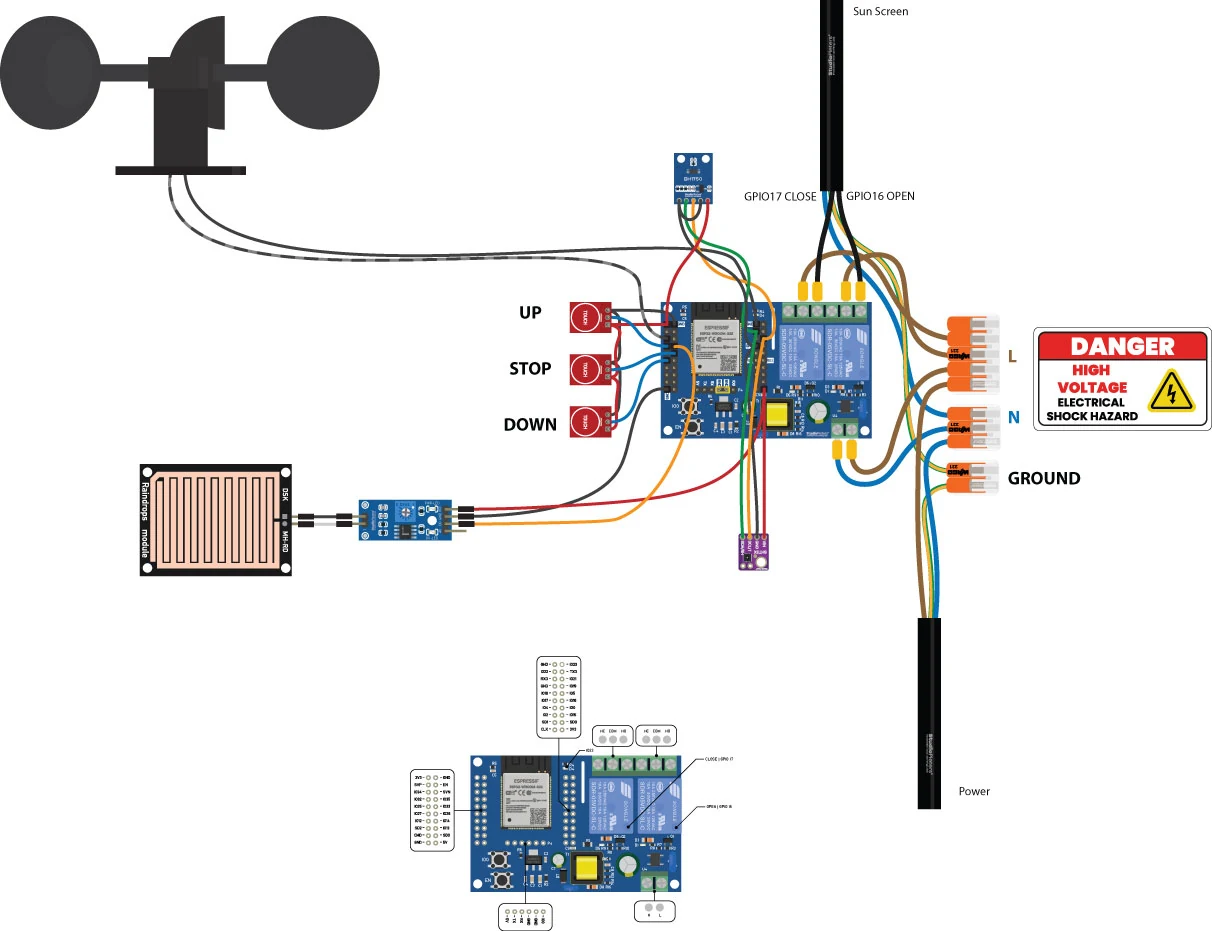
The two relay outputs switch the motor direction. The open relay (GPIO16) feeds motor terminal A, the close relay (GPIO17) feeds motor terminal B, and the common goes to the motor common. Never wire open and close to the same motor terminal at once. The software interlock already prevents both relays from being energised together, but check your wiring anyway.
The firmware drives the relays active-high by default. Many common optoisolated 2-channel modules are active-low. If both relays click on at boot and the motor runs unexpectedly, set ESP_RELAY_ACTIVE_LEVEL to 0 in menuconfig, and always test with the motor disconnected first.
Touch pads
Each capacitive button uses a TTP223 module in momentary, active-high mode between the electrode and the ESP32. The electrode is a copper ring or pad, wired to the TTP223 SIG input, and a shielded cable with the braid to GND runs between pad and module to prevent false triggers. The ESP32 reads the TTP223 output as a normal GPIO input, so its internal touch peripheral is not used.
GPIO pinout
| GPIO | Function | Notes |
|---|---|---|
| GPIO16 | Open or up relay | Output, active level configurable |
| GPIO17 | Close or down relay | Output, active level configurable |
| GPIO23 | Identify LED | Blinks on a HomeKit Identify request |
| GPIO25 | Physical push button | Input, active-low |
| GPIO27 | TTP223 DOWN | Digital input, active-high |
| GPIO32 | TTP223 UP | Digital input, active-high |
| GPIO33 | TTP223 STOP | Digital input, active-high; also starts calibration |
| GPIO34 | HWFS-1 wind sensor (optional) | ADC1 input, through a voltage divider |
| GPIO35 | MH-RD rain sensor (optional) | Digital input, active-low |
| GPIO21 and GPIO22 | Shared I²C SDA and SCL (optional) | BH1750 and SHT3x |
All defaults can be changed with idf.py menuconfig under StudioPieters. Only ADC1 GPIOs (32 to 39) work for the wind sensor, because ADC2 conflicts with WiFi.
Build and flash
git clone https://github.com/AchimPieters/esp32-homekit-Sunshade.git
cd esp32-homekit-Sunshade
idf.py set-target esp32
idf.py menuconfig
idf.py build flash monitor
If idf.py set-target fails with a CMake error, remove the stale build folder first with rm -rf build and run the set-target step again. New to the toolchain? Start with ESP32 HomeKit for total beginners or ESP32 HomeKit Development with ESP-IDF.
WiFi credentials are not stored on the first boot. Use any ESP-IDF provisioning method, for example the esp-idf-prov app on iOS or Android, to set the SSID and password. The device remembers them after that.
First-time setup and calibration
- Flash the firmware.
- Provision WiFi.
- Pair with HomeKit using the QR code or the setup code from menuconfig. The repository ships a default code, so change it before you use the device for real. Changing the code or setup ID needs a new QR code.
- Calibrate, so the device learns how long your motor takes.
To calibrate, hold the STOP touch pad for 3 seconds. The LED starts blinking rapidly.
- Phase 1: the motor closes for the stored travel time multiplied by 1.5, which makes sure it reaches the end stop. The LED blinks fast.
- Phase 2: the motor opens and a timer runs. The Home app shows the sunshade opening in real time, based on the previous value. When it is fully open, tap STOP once. The elapsed time is saved to flash. The LED blinks slowly.
| Result | LED | HomeKit |
|---|---|---|
| Success | 5 short flashes | Position set to 100 %, all positions 0 to 100 % available |
| Aborted (STOP within 2 s of phase 2) | 3 long flashes | Position reset to 0 % |
| Timeout (no STOP within 2 minutes) | 3 long flashes | Position reset to 0 % |
To update the travel time, for example after replacing the motor, run the calibration again.
Power-loss recovery
After a power loss the device does not know where the sunshade is. If it has been calibrated, it homes in the background on boot: it runs the motor closed for the calibrated time multiplied by 1.5, which ends at the physical end stop and counts as 0 %. It then waits 500 ms, loads the last saved target position and moves there. WiFi and HomeKit start in parallel, and commands are blocked while homing runs.
Every time you command a new position, from HomeKit or the touch buttons, the target is saved. If power fails while the shade is moving from 0 % to 70 %, it closes fully after the reboot and then moves to 70 %. Without calibration the device starts normally and logs a warning.
Controlling it from HomeKit
| Control | Result |
|---|---|
| Slider to 0 % | Closes the sunshade fully |
| Slider to 100 % | Opens it fully |
| Slider to 1 to 99 % | Moves to that position |
| Tap the tile | Fully opens or fully closes |
| Hey Siri, stop the sunshade | Stops at the current position |
At 0 % and 100 % the motor runs for the full calibrated time, and the motor’s own end stop gives the final accuracy. Intermediate positions are reached by running a fraction of the calibrated time, so their accuracy depends on how well the calibration matches the real travel time.
Touch pads and physical button
| Input | Action |
|---|---|
| UP pad | Open to 100 % |
| STOP pad, tap | Stop, or confirm the open position during calibration |
| STOP pad, hold 3 s | Start calibration |
| DOWN pad | Close to 0 % |
| Button, single press | Request an OTA update and reboot |
| Button, double press | Reset HomeKit pairing and restart |
| Button, long press (1 s or more) | Factory reset of WiFi and HomeKit, then reboot |
The relays are switched off before any reset or reboot. Inputs are polled every 25 ms by default and debounced over 60 ms, both configurable.
The identify LED is not a HomeKit service. It blinks three times in pairs when HomeKit sends an Identify request, for example while adding the accessory.
Weather protection and sensors
Wind, rain and light protection share one override mechanism: whichever triggers saves the current HomeKit target and restores it when the condition clears. Each sensor is enabled separately in menuconfig.
| Sensor | Sensor details | Closes when | Reopens when |
|---|---|---|---|
| HWFS-1 wind | Passive cup anemometer, 0 to 3.3 V, full scale 14 m/s, no supply needed | Wind is 8.0 m/s or more (default) | Wind is below 5.0 m/s (default) |
| MH-RD rain | LM393 module, digital output used, active-low when wet | Rain detected, stable for 2 s | Dry, stable for 2 s |
| BH1750 light | I²C, address 0x23 or 0x5C, 1 lux resolution | Light is 40000 lux or more (default) | Light is below 20000 lux (default) |
Wind sensor
The HWFS-1 output reaches 3.3 V at full scale, but the ESP32 ADC is only accurate up to about 2450 mV with 11 dB attenuation. The README therefore uses a voltage divider of 10 kΩ and 22 kΩ, which gives 2.27 V at 14 m/s. The signal wire goes to GPIO34, the ground wire to GND, and no supply voltage is connected. The firmware averages 16 samples per reading, and a 10 kΩ plus 10 µF RC filter on the signal wire is recommended against the ripple of the sensor’s DC generator. Readings at or below 30 mV are reported as 0 m/s.
The README also describes a field calibration: compare the log output with a reference anemometer in steady wind, and adjust WIND_SENSOR_MAX_SPEED_DS until they match.
Rain sensor
VCC goes to 3.3 V, GND to GND, and DO to GPIO35. The analog output is not used, and the sensitivity is set with the potentiometer on the module. Mount the sensing pad under a sheltered overhang so only falling rain reaches it, which extends its life and reduces false triggers.
Light and climate sensors
The BH1750 and the SHT3x (address 0x44 or 0x45) share SDA on GPIO21 and SCL on GPIO22. The GY-302 breakout has pull-ups, and the firmware also enables the ESP32 internal ones. The SHT3x readings appear as HomeKit temperature and humidity tiles only, and do not move the sunshade. Each sample is CRC-8 validated.
Sunrise and sunset automations
No firmware changes are needed. The Home app has built-in sunrise and sunset automations that use the location of your home hub, which needs a HomePod mini, HomePod or Apple TV 4K running continuously and location services on for the Home app. Without a home hub, time-based automations do not run.
Create an automation in the Home app with A time of day occurs, choose Sunrise (optionally with an offset), select the sunshade tile and set the position. Do the same for Sunset with 0 %. The README suggests opening to 80 % at sunrise, to 100 % two hours later, and closing to 0 % half an hour before sunset.
The weather protection in the firmware overrides HomeKit commands while it is active. When it clears, the sunshade goes back to the last position HomeKit commanded, not to an earlier sunrise position.
How position tracking works
There are no limit switches or encoders, so the position is estimated from time. Every 500 ms the movement task adds or subtracts 100 % times 500 ms divided by the calibrated time. HomeKit is notified only when the whole-number position changes, and always when the target is reached.
The mechanical end stop corrects the accumulated error each time the shade reaches 0 % or 100 %. For intermediate positions the README expects an error of 2 to 5 % over many cycles without recalibration. A new command during a move re-syncs the position and immediately changes direction, with the relay interlock making sure the opposite relay is off first.
Troubleshooting
| Problem | What to check |
|---|---|
| No response to touch | The boot log lists the TTP223 GPIOs and active level. Check momentary mode, active-high output, 3.3 V supply and ground. Reduce the debounce time if the output is stable but not registering. |
| Calibration aborts at once | STOP was tapped within 2 seconds of phase 2. Wait until the sunshade is fully open before tapping. |
| Position drifts over time | Recalibrate. Measure the real travel time with a stopwatch, because motor speed can vary with load or temperature. |
| Wrong position after a power loss | Confirm the device is calibrated and look for the homing message in the log. After a corrupted NVS, do a factory reset with a long button press and recalibrate. |
| Relay clicks but the motor does not run | Some relay modules need 5 V for the coil supply even with 3.3 V logic. Check the NO and COM wiring. |
| WiFi will not connect | Double press the button to reset the pairing and provision again, or long press for a full factory reset. |
| Wind sensor reads 0 | Check that it is enabled, that the ready message is in the boot log, the divider voltage with a multimeter, and that the GPIO is on ADC1. |
| Rain sensor does not trigger, or triggers falsely | Check the DO voltage while wetting the pad, adjust the potentiometer, and tune the debounce time. Move the pad away from condensation and irrigation spray. |
Get the code
The firmware needs ESP-IDF 5.0 up to but not including 7.0, the achimpieters/esp32-homekit component (3.0.0 or newer), achimpieters/esp32-button (1.2.3 or newer) and espressif/mdns (1.8.0 or newer).
Every push runs host unit tests for the pure logic (relay polarity, position maths, sensor conversions, SHT3x CRC and hysteresis), then builds the firmware for the ESP32 on ESP-IDF 5.3.2 and 5.4.1, with and without all optional sensors enabled. The repository has releases up to 0.0.7 with a signed main.bin.
Everything is in the esp32-homekit-Sunshade repository on GitHub.
Related
 HomeKit
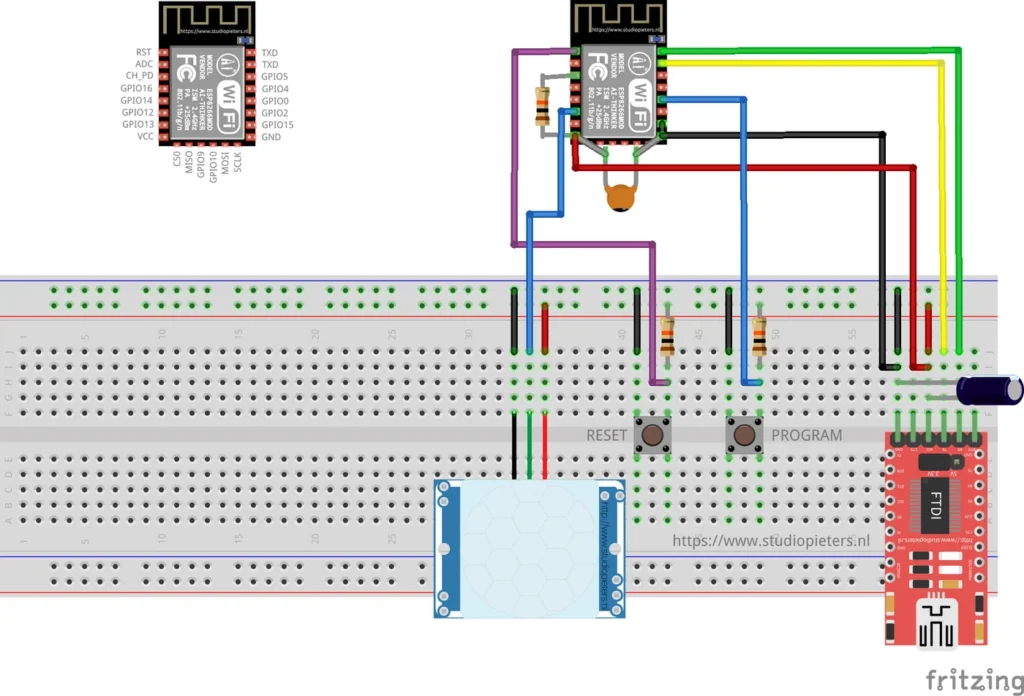
ESP8266 HomeKit Motion Sensor with an HC-SR501
A HomeKit motion sensor on an ESP8266 with an HC-SR501 PIR module, including how to set its sensitivity, time delay and trigger mode.
Read more
HomeKit
ESP8266 HomeKit Motion Sensor with an HC-SR501
A HomeKit motion sensor on an ESP8266 with an HC-SR501 PIR module, including how to set its sensitivity, time delay and trigger mode.
Read more
 HomeKit
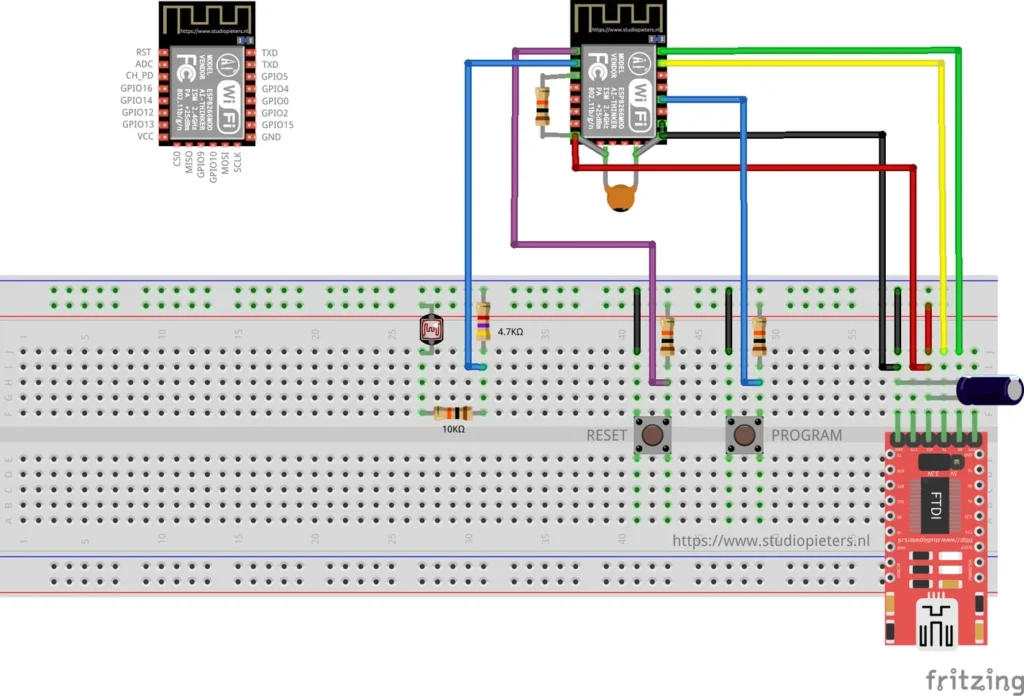
ESP8266 HomeKit Light Sensor Test with an LDR
A very simple test of an LDR on the analog input of an ESP8266 as a HomeKit light sensor, and why it does not give useful measurements.
Read more
HomeKit
ESP8266 HomeKit Light Sensor Test with an LDR
A very simple test of an LDR on the analog input of an ESP8266 as a HomeKit light sensor, and why it does not give useful measurements.
Read more
 HomeKit
ESP32 Power Plug with Energy Meter
For many years, the Dutch retailer Action has sold affordable smart‑home devices under the LSC Smart Connect brand.
Read more
HomeKit
ESP32 Power Plug with Energy Meter
For many years, the Dutch retailer Action has sold affordable smart‑home devices under the LSC Smart Connect brand.
Read more
More HomeKit
Keep building.
Switches, sensors, plugs and blinds: more accessories that you build yourself and add to the Home app.
All HomeKit