Sometimes the biggest challenges come from the smallest details. The Nest Protect (2nd Generation) is a beautiful piece of hardware – a combined smoke and CO alarm – that comes in two versions: battery powered and 220V wired.
I wanted the wired version, because I didn’t want to constantly replace batteries. But my house, built in the 1980s, didn’t have ceiling connection points in the right places. That meant I had to connect the Nest Protect with a visible plug. And here came the real problem: the plug sticks out, so the Nest Protect cannot be mounted flush against the ceiling. Time for a creative solution.
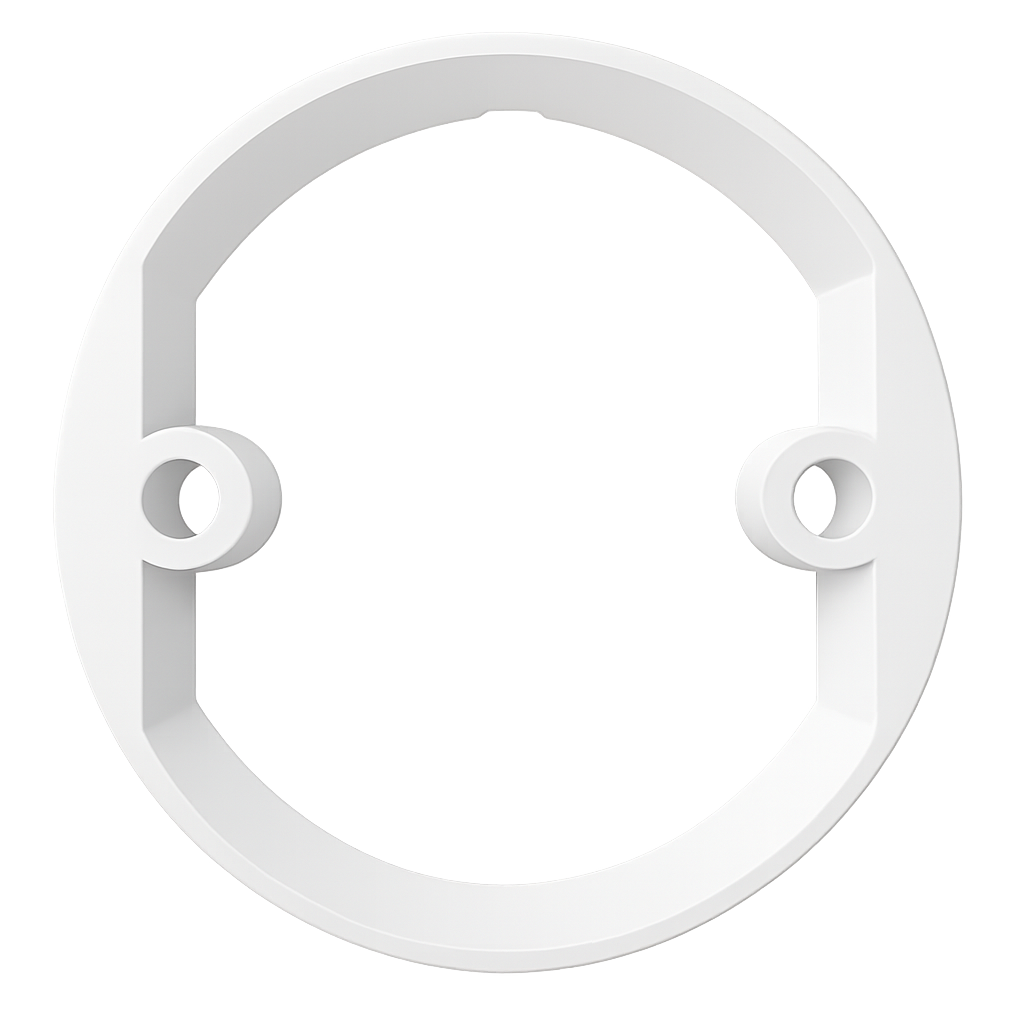
The Problem
Normally, the Nest Protect is designed to be mounted directly against the ceiling. But if you don’t have a recessed power point, the connector plug prevents a clean installation. It leaves an ugly gap, and the unit doesn’t sit flat against the ceiling. That’s not exactly the clean, minimal look that Nest products are known for.
The Design
So I decided to design a mounting ring – basically a ceiling spacer that makes room for the power plug and wiring, while still letting the Nest Protect attach securely.
I created the design in Autodesk Fusion 360, carefully measuring the original Nest mounting plate to ensure perfect fit. The ring raises the Protect just enough to allow the plug and wiring to fit neatly behind it.
After finishing the model, I sliced it with Ultimaker Cura and printed it on my Ender 3 V2 in sturdy PLA. Printing was straightforward, and the result was surprisingly strong.
The Installation
- Screw the printed ring and the Nest Protect plate on top of the spacer, to the ceiling.
- Feed the power cable through.
- Click the Protect into place.
And that’s it – the Nest now sits neatly on the ceiling, with space for the plug, no ugly gaps, and a much cleaner installation.

A Neat Solution
This project might look small, but it made a huge difference in my home. Instead of a wobbly, half-floating alarm, I now have a perfectly aligned, professional-looking installation – all thanks to a simple 3D print.
It’s a nice example of how 3D printing lets you adapt modern hardware to older houses. No need for messy renovations or compromises – just print the part you need.
Download & Print
Want to mount your own Nest Protect in a similar situation?
You can download the model for free and print it yourself.
* Free to use under the MIT license — attribution is required.
Conclusion
This project is a reminder that 3D printing isn’t just for gadgets or toys – it can solve real problems in everyday life. By designing a simple mounting ring in Fusion 360, slicing it in Cura, and printing it on an Ender 3 V2, I turned an impossible installation into a clean, professional solution.
A small print, but one that makes a world of difference.