The ESP32 WROOM 32E is a versatile, powerful microcontroller ideal for smart LED projects. Want to control an LED using Apple’s Home app or Siri? No additional hub required! Just a compact board, a simple LED, and a USB cable. With my ESP32 HomeKit demo, you’ll have it running smoothly in no time.
This guide is crafted specifically for beginners. No prior experience? No worries. I’ll guide you step-by-step.
What You’ll Build
With this tutorial, you’ll create a HomeKit-compatible LED controller using:
- ESP32 WROOM 32E programmer
- ESP32 WROOM 32E
- Standard LED
- Apple Home app + Siri voice control
You’ll be able to toggle your LED on or off using your iPhone or voice commands.
What Is the ESP32 WROOM 32E?
The ESP32 WROOM 32E is a robust development board with built-in Wi-Fi and Bluetooth, perfect for smart home and IoT applications.
Features:
- Dual-core Xtensa LX6 processor (up to 240 MHz)
- Built-in USB Micro-B for programming
- Wi-Fi and Bluetooth connectivity
- 4 MB flash memory
- Compact size
What You Need
Hardware:
- ESP32 WROOM 32E
- Standard LED
- 220 Ω resistor
- USB Micro-B cable
- ESP32 WROOM 32E programmer
Wiring Guide
Here’s how to wire the LED to the ESP32:
| ESP32 Pin | Component |
|---|---|
| GPIO2 | LED (+, via 220 Ω resistor) |
| GND | LED (-) |

How to Set Up the Software
This section shows you how to build and upload the HomeKit LED controller firmware using Docker. Just copy-paste the commands!
1. Install Docker (One Time Only)
If you don’t already have Docker installed:
- macOS/Windows: Download from https://www.docker.com/products/docker-desktop/
- Linux: Install via your package manager (e.g.
sudo apt install docker.io) - Make sure Docker is running before you continue.
2. Development Environment Setup
Before we begin coding or flashing anything, you need the right tools installed on your computer. Follow my full guide here: ESP32 HomeKit Development Setup
3. Clone the ESP32 HomeKit Repository
Open your terminal and run:
git clone https://github.com/AchimPieters/esp32-homekit-demo.git --recursive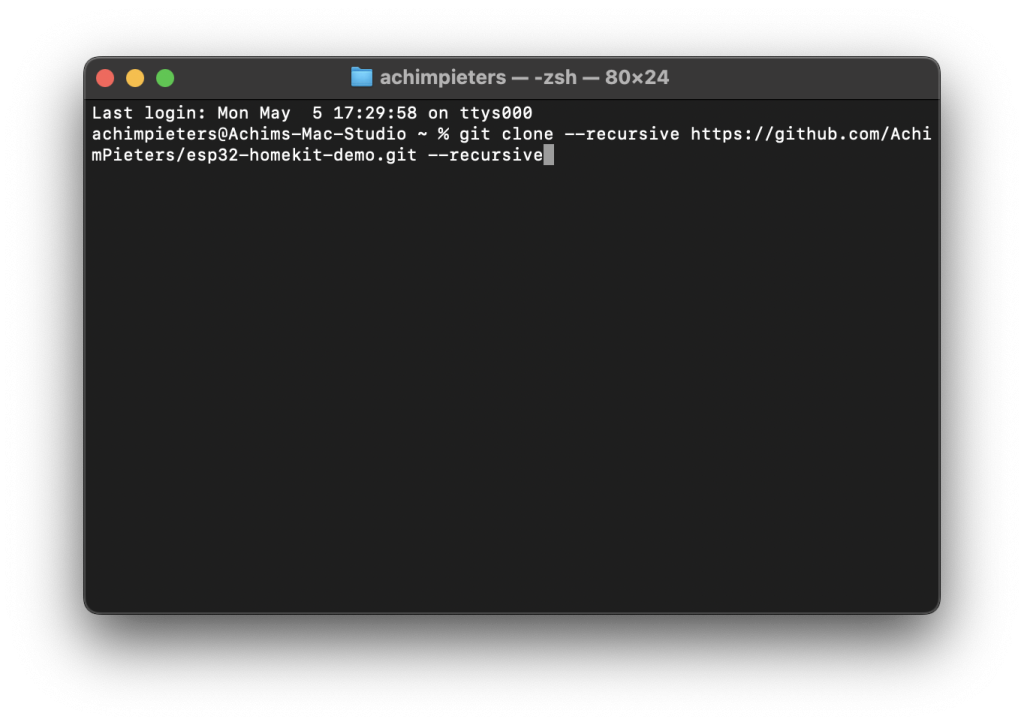
cd esp32-homekit-demo/examples/led3. Start the ESP-IDF Docker Container
Run the following command in your terminal to start a ready-to-use ESP32 development environment inside Docker:
docker run -it -v ~/esp32-homekit-demo:/project -w /project espressif/idf:release-v5.3On Windows, adjust the volume path if needed: -v C:/Users/YourName/esp32-homekit-demo:/project
Now you’re inside the container — but you still need to move into the example project folder.
cd examples/ledThis puts you in the correct directory for the HomeKit LED controller firmware.
4. Configure the Project
Set the target chip:
idf.py set-target esp32Open the config menu:
idf.py menuconfigIn the menu:
Go to StudioPieters
Enter your Wi-Fi SSID and password
Set GPIO2 for the LED strip
Press S to save, Q to quit
5. Build the Firmware
Run:
idf.py buildThis compiles the firmware and prepares it for flashing.
6. Flash the Firmware to the ESP32
After running idf.py build, the ESP-IDF toolchain will show a long command that looks like this:
python -m esptool --chip esp32 -b 460800 --before default_reset --after hard_reset write_flash --flash_mode dio --flash_size 2MB --flash_freq 40m 0x1000 build/bootloader/bootloader.bin 0x8000 build/partition_table/partition-table.bin 0x10000 build/main.bin
This command writes your firmware to the chip — but first, you need to erase any previous firmware.
Step 1: Erase the Flash
Open a new terminal window (outside Docker)
Change to the correct directory:
cd ~/esp32-homekit-demo/examples/ledRun the following command to erase the flash memory:
esptool.py erase_flash
Make sure your ESP32 board is connected via USB and in boot mode (press and hold the BOOT button while pressing RESET, then release BOOT).
Step 2: Flash the Firmware
Now run the command shown earlier — or copy and paste this example:
python -m esptool --chip esp32 -b 460800 --before default_reset --after hard_reset write_flash --flash_mode dio --flash_size 2MB --flash_freq 40m 0x1000 build/bootloader/bootloader.bin 0x8000 build/partition_table/partition-table.bin 0x10000 build/main.bin
Step 3: Monitor the Serial Output
Once flashing is complete, you can start monitoring the device logs. First, find your ESP32 USB port:
Windows: Look in Device Manager under “Ports (COM & LPT)”
macOS/Linux: Use ls /dev/tty.* or ls /dev/ttyUSB*
screen /dev/(your_port) 115200
place the port name and press enter.
screen /dev/cu.usbserial-A5069RR4 115200
7. Add to Apple Home
Once flashed, the ESP32 will reboot and show a QR code and setup code in the terminal.
To add it to HomeKit:
Open the Home app on your iPhone or iPad
Tap “Add Accessory”
Scan the QR code from the terminal
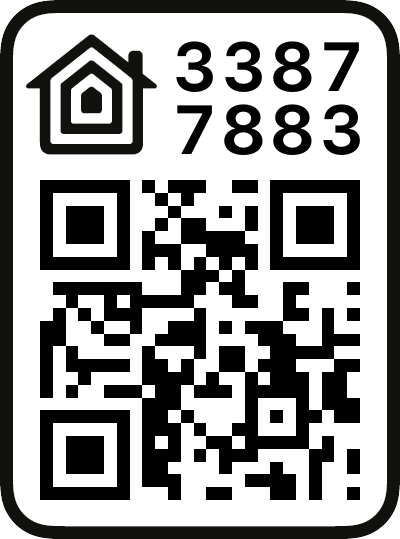
Name your accessory and choose a room.
That’s it — your LED strip is now HomeKit-enabled and controllable with Siri!
Conclusion: Compact Yet Powerful
The ESP32 WROOM 32E is a perfect choice for adding HomeKit compatibility to simple LED projects, delivering a responsive and user-friendly experience right from your iPhone. Small board, powerful outcomes. Enjoy your smart LED!