The ESP32-C3 Super Mini is a tiny, powerful microcontroller that’s perfect for smart LED projects. Want to control a colorful LED strip using Apple’s Home app or Siri? You can do it — no extra bridge or hub needed. Just a small board, some LED’s, and a USB cable. With my ESP32 HomeKit demo, you’ll be up and running in no time!
This guide is written especially for beginners. No experience? No problem. I’ll walk you through everything step-by-step.
What You’ll Build
With this guide, you’ll build a HomeKit-compatible LED controller using:
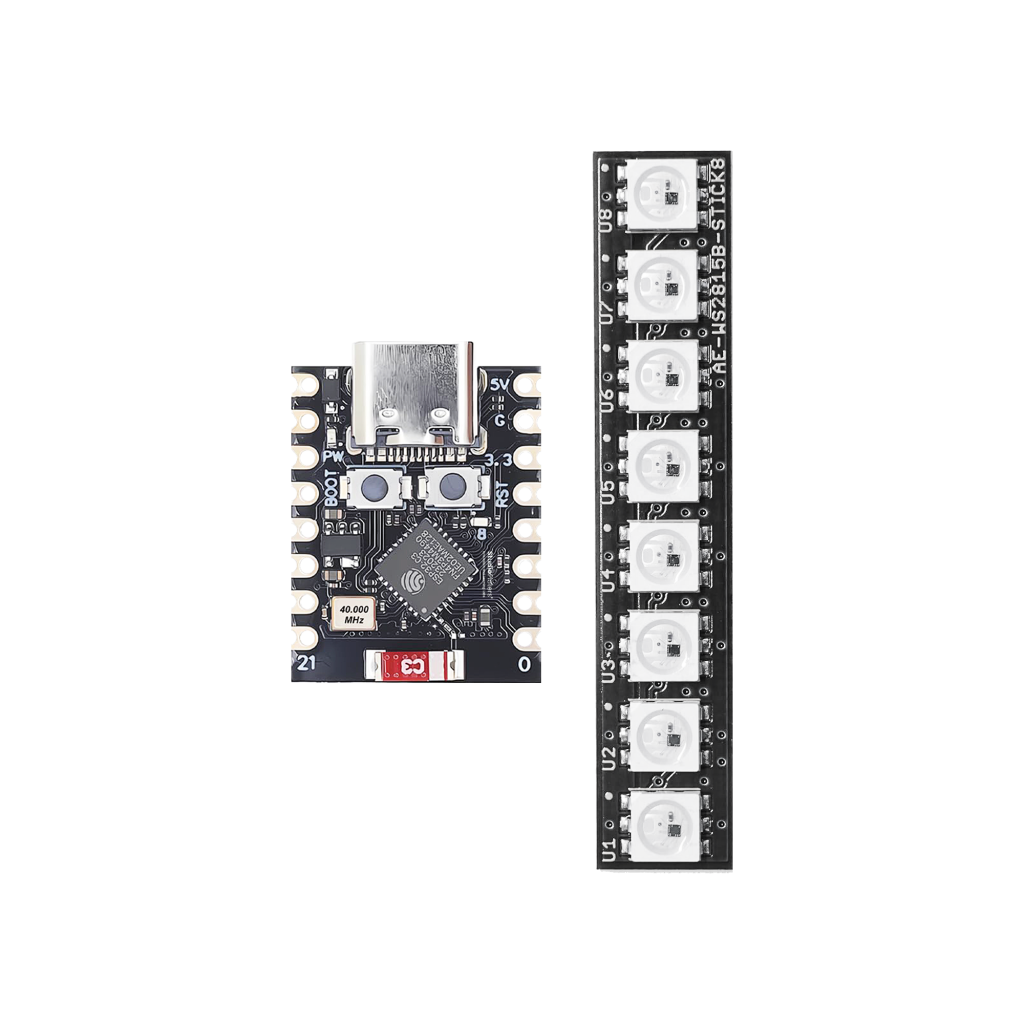
- ESP32-C3 Super Mini board
- WS2812B (NeoPixel) LED strip
- Apple Home app + Siri voice control
You’ll be able to change colors, brightness, and turn your lights on/off using your iPhone or voice.
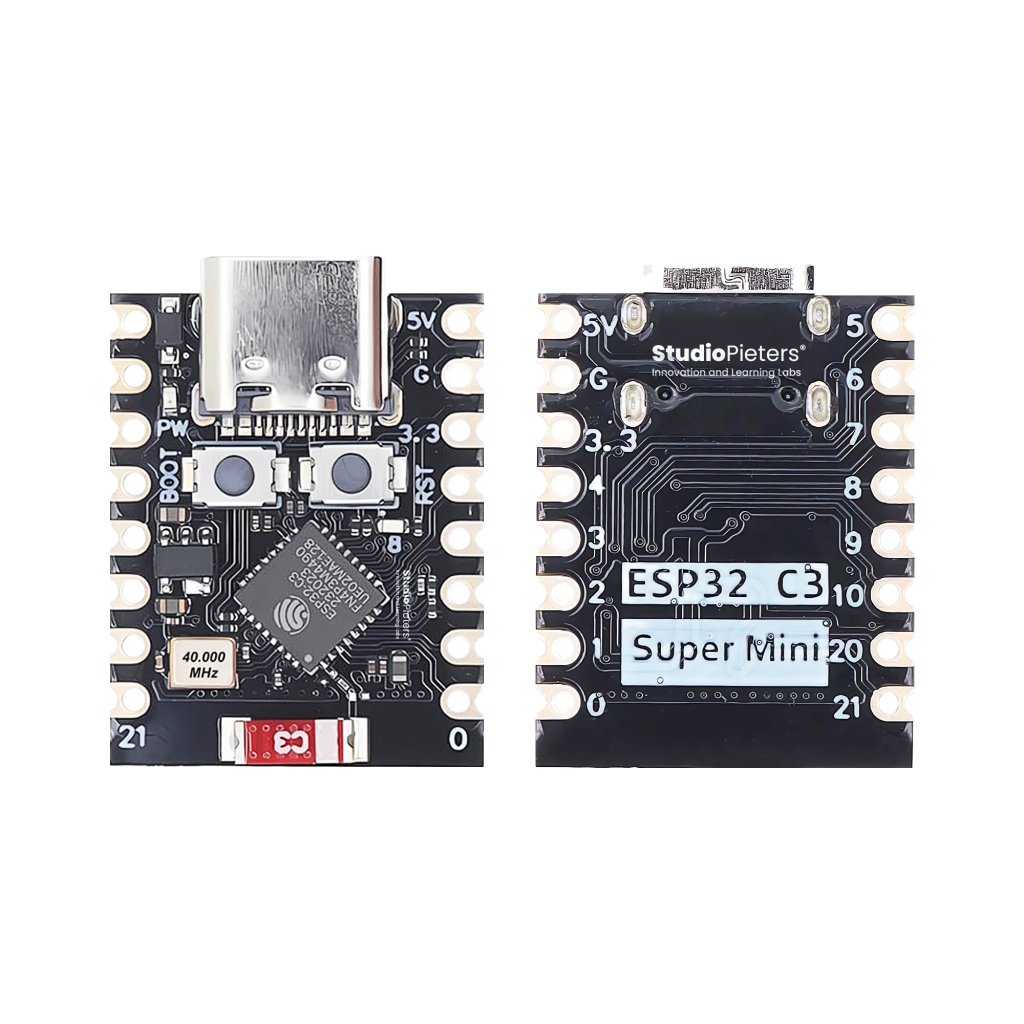
What Is the ESP32-C3 Super Mini?
The ESP32-C3 Super Mini is a small, affordable development board with built-in Wi-Fi and Bluetooth. It’s perfect for smart home projects, especially LED control.
Features:
- RISC-V processor (160 MHz, single-core)
- Built-in USB-C for power and programming
- Wi-Fi and Bluetooth 5 (LE)
- 4 MB flash memory
- Tiny size: 18 x 22.5 mm
What You Need
Hardware:
- ESP32-C3 Super Mini
- WS2812B LED strip (5V, also called NeoPixel)
- 1000 µF 6.3 V electrolytic capacitor
- USB-C cable (with data support!)
- Good USB-C power supply (at least 5V 2A — 3A recommended)
- Soldering iron + wires
Wiring Guide
Here’s how to connect the LED strip to the ESP32-C3:
| ESP32-C3 Pin | LED Strip |
|---|---|
| GPIO2 | Data In |
| GND | GND |
| 5V (USB) | 5V (Power) |
Keep the data wire short (less than 60 cm) for reliable results, especially if you don’t use a level shifter.
Powering the LEDs
NeoPixels can use a lot of current. Here are some tips:
- Max LEDs with USB power: ~60 LED’s at medium brightness
- Full brightness white: max 30 LED’s from USB power
- More LED’s? Use a separate 5V power supply — just connect GND’s together
How to Set Up the Software
This section shows you how to build and upload the HomeKit LED controller firmware using Docker. Just copy-paste the commands!
1. Install Docker (One Time Only)
If you don’t already have Docker installed:
- macOS/Windows: Download from https://www.docker.com/products/docker-desktop/
- Linux: Install via your package manager (e.g.
sudo apt install docker.io) - Make sure Docker is running before you continue.
2. Development Environment Setup
Before we begin coding or flashing anything, you need the right tools installed on your computer. Follow my full guide here: ESP32 HomeKit Development Setup
3. Clone the ESP32 HomeKit Repository
Open your terminal and run:
git clone https://github.com/AchimPieters/esp32-homekit-demo.git --recursive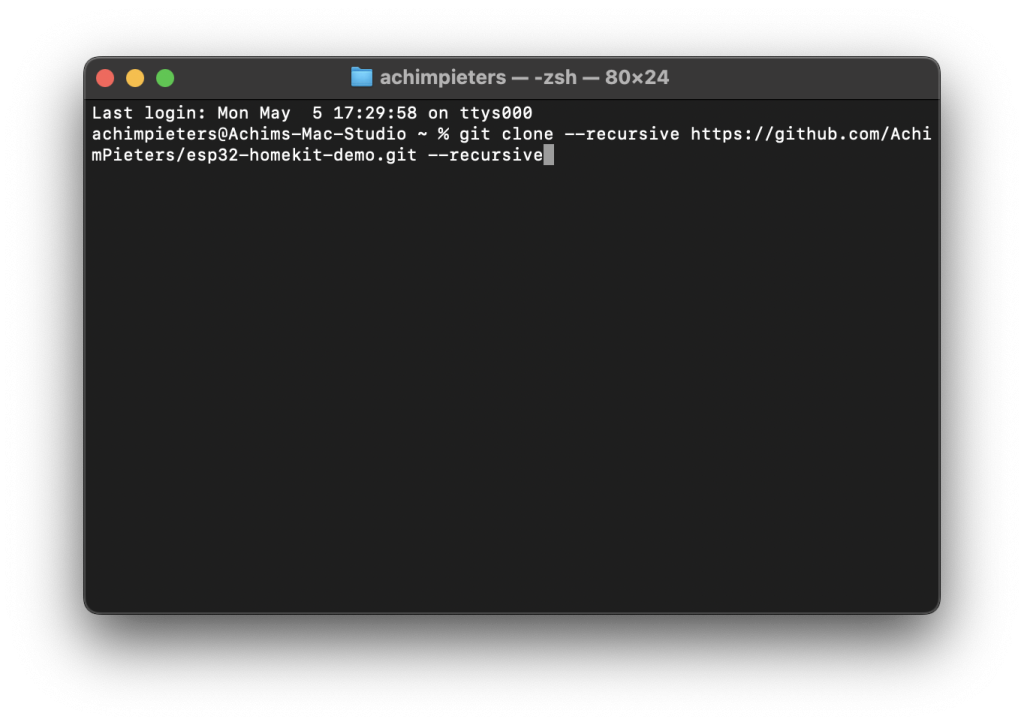
cd esp32-homekit-demo/examples/ws2811_led_strip3. Start the ESP-IDF Docker Container
Run the following command in your terminal to start a ready-to-use ESP32 development environment inside Docker:
docker run -it -v ~/esp32-homekit-demo:/project -w /project espressif/idf:release-v5.3On Windows, adjust the volume path if needed: -v C:/Users/YourName/esp32-homekit-demo:/project
Now you’re inside the container — but you still need to move into the example project folder.
cd examples/ws2811_led_stripThis puts you in the correct directory for the HomeKit LED controller firmware.
4. Configure the Project
Set the target chip:
idf.py set-target esp32c3Open the config menu:
idf.py menuconfigIn the menu:
Go to StudioPieters
Enter your Wi-Fi SSID and password
Set GPIO2 for the LED strip
Press S to save, Q to quit
5. Build the Firmware
Run:
idf.py buildThis compiles the firmware and prepares it for flashing.
6. Flash the Firmware to the ESP32-C3
After running idf.py build, the ESP-IDF toolchain will show a long command that looks like this:
python -m esptool --chip esp32 -b 460800 --before default_reset --after hard_reset write_flash --flash_mode dio --flash_size 2MB --flash_freq 40m 0x1000 build/bootloader/bootloader.bin 0x8000 build/partition_table/partition-table.bin 0x10000 build/main.bin
This command writes your firmware to the chip — but first, you need to erase any previous firmware.
Step 1: Erase the Flash
Open a new terminal window (outside Docker)
Change to the correct directory:
cd ~/esp32-homekit-demo/examples/ws2811_led_stripRun the following command to erase the flash memory:
esptool.py erase_flash
Make sure your ESP32-C3 board is connected via USB and in boot mode (press and hold the BOOT button while pressing RESET, then release BOOT).
Step 2: Flash the Firmware
Now run the command shown earlier — or copy and paste this example:
python -m esptool --chip esp32 -b 460800 --before default_reset --after hard_reset write_flash --flash_mode dio --flash_size 2MB --flash_freq 40m 0x1000 build/bootloader/bootloader.bin 0x8000 build/partition_table/partition-table.bin 0x10000 build/main.bin
Step 3: Monitor the Serial Output
Once flashing is complete, you can start monitoring the device logs. First, find your ESP32-C3’s USB port:
Windows: Look in Device Manager under “Ports (COM & LPT)”
macOS/Linux: Use ls /dev/tty.* or ls /dev/ttyUSB*
screen /dev/(your_port) 115200
place the port name and press enter.
screen /dev/cu.usbserial-A5069RR4 115200
7. Add to Apple Home
Once flashed, the ESP32 will reboot and show a QR code and setup code in the terminal.
To add it to HomeKit:
Open the Home app on your iPhone or iPad
Tap “Add Accessory”
Scan the QR code from the terminal

Name your accessory and choose a room
That’s it — your LED strip is now HomeKit-enabled and controllable with Siri!
Conclusion: A Small Board with Big Power
The ESP32-C3 Super Mini is the perfect starting point for anyone who wants to bring smart lighting into their home — without spending a fortune. Paired with NeoPixels and my HomeKit firmware, you get a responsive, flexible, and beautiful lighting system that works right from your iPhone.
Small board, big results. Happy hacking!