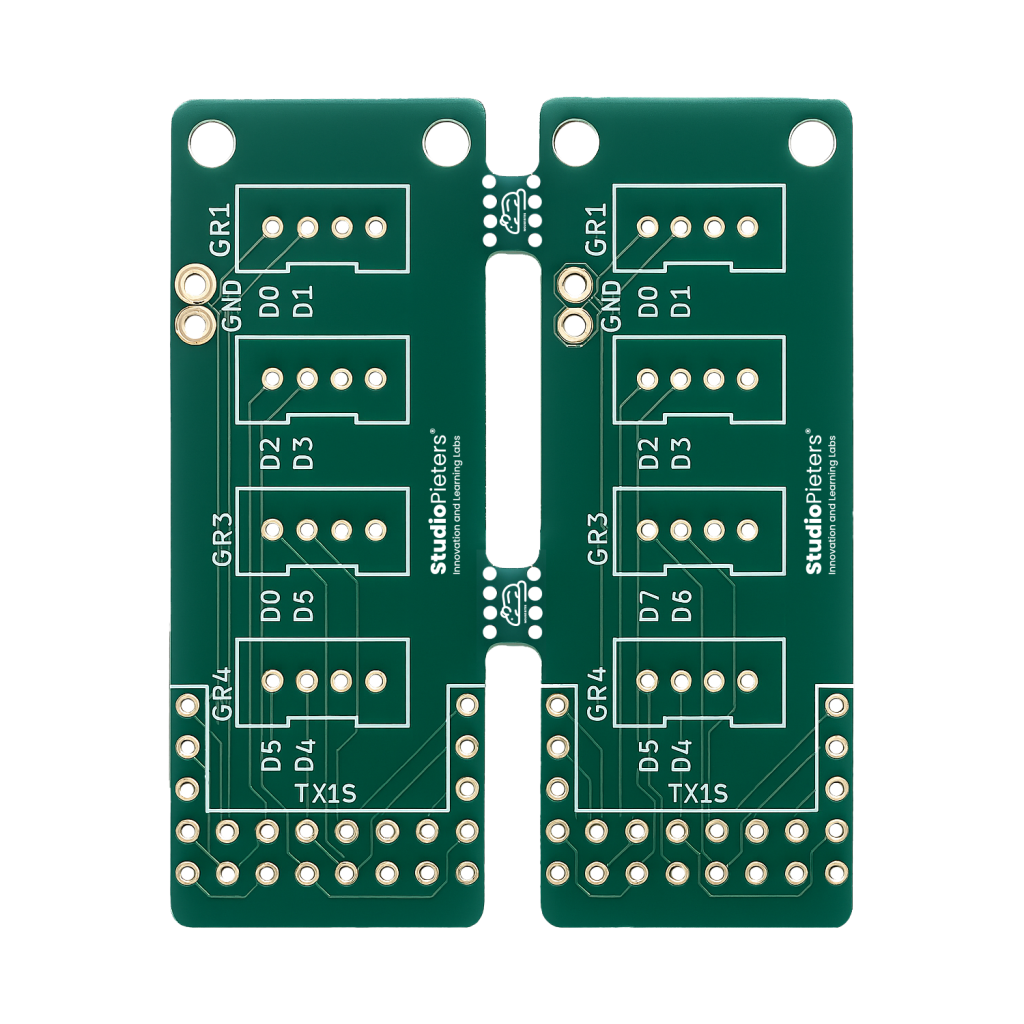
When designing printed circuit boards (PCB’s), panelization is a common technique to manufacture multiple boards simultaneously. A widely used method for separating these boards after production is the use of breakaway tabs, often referred to as mouse bites. The mouse-bite.pretty library offers a convenient collection of KiCad footprints that simplify this process.
What Are Mouse Bites?
Mouse bites are small perforation patterns placed along the edge of a PCB. These allow you to fabricate several boards in a single panel and easily snap them apart afterward—much like tearing along the perforations of a postage stamp. The mouse-bite.pretty library includes a variety of predefined perforation footprints to suit different board designs and manufacturing needs.

Why Use Breakaway Tabs in Your PCB Design?
Incorporating breakaway patterns into your layout provides several advantages:
- Efficient Panelization: Manufacture multiple boards together to save time and cost.
- Tool-Free Separation: Easily snap boards apart without needing specialized equipment.
- Design Consistency: Use standardized patterns to ensure uniform quality across projects.
- Faster Workflow: Eliminate the need to manually create perforation patterns from scratch.
How to Install the Mouse-Bite Footprint Library
Follow these steps to add the library to your KiCad project:
- Download the Repository
Visit the mouse bite footprint library on GitHub and download the ZIP file, or clone the repository using Git. - Add the Library to KiCad
- Open your project in the PCB Editor.
- Go to Preferences > Manage Footprint Libraries.
- Under Project Specific Libraries, click the folder icon and select the
mouse-bite.prettyfolder.
- Place a Perforation Pattern
- Click the Add Footprint icon in the PCB Editor.
- Search for “mouse” or “bite” to see the available options.
- Choose your preferred pattern and position it along the PCB edge where you want a separation line.
- Connect to Edge.Cuts
Make sure the pattern integrates with the Edge.Cuts layer using half-circles or outlines for proper fabrication alignment.
Available Footprints
The library includes various footprint sizes to accommodate different board thicknesses and mechanical strength:
mouse-bite-1mm-3mm.kicad_modmouse-bite-2mm-4mm.kicad_modmouse-bite-2.54mm-4.66mm.kicad_modmouse-bite-3mm-6mm.kicad_modmouse-bite-5mm-10mm.kicad_mod
Each of these creates a row of small holes along the edge, enabling clean and controlled board separation.
Tips for Effective Use
- Alignment: Precisely position the pattern along intended break lines for best results.
- Footprint Selection: Choose a pattern size that suits your PCB thickness and structural needs.
- Post-Separation Finish: After snapping the boards apart, sanding or filing the edges may be needed for a smooth finish—especially for enclosures.
Conclusion
The mouse-bite.pretty library is an excellent resource for KiCad users looking to implement clean and efficient panelization. By providing a range of ready-to-use perforation footprints, it speeds up your workflow and ensures reliable, repeatable results across PCB projects.
Explore the collection and simplify your panel designs: mouse bite footprint library on GitHub