Welcome back to another blog article. In my previous blog, I have set up a Raspberry – Digital Signage / Narrowcasting system. But I need to connect trough a Mobile Hotspot. In this method, you only need your Mac or PC. No need for internet and router. But this method will only work with newer version of Raspberry Pi because they have the Wi-Fi chip build in and we will be using the WI-Fi only.

What is a Wi-Fi hotspot?
What do we mean when we say Wi-Fi hotspot? Any device connected to the internet to which another device can connect via Wi-Fi and share its internet connection. In this case, your Mac is connected to the internet, and another device can connect to it and share its internet connection. There are some limitations. The most important one is that if your Mac is connected to the internet using Wi-Fi, you can’t connect the other device to it via Wi-Fi. So, if your Mac is connected to a Wi-Fi network, you’ll need to share that connection using Bluetooth, Ethernet, USB, or Thunderbolt.

Apple doesn’t explain the reason for this limitation, but it’s likely to be related to bandwidth. If you use your Mac’s Wi-Fi to connect to a router and connect to another device, its bandwidth will be split between incoming and outgoing connections.
The other main limitation is that the Mac you use as a hotspot must be running macOS Lion or later. But given how old Lion now is, that shouldn’t be too much of a restriction.
How to create a hotspot on your Mac
First, you’ll need to decide how you want to share your Mac’s internet connection. Remember, if your Mac is connected to the internet using Wi-Fi, it can’t connect to the device using it as a hotspot via Wi-Fi. For this example, we’ll assume that the Mac is connected to a router with an Ethernet cable and that the other device is going to connect to Mac’s hotspot over Wi-Fi.
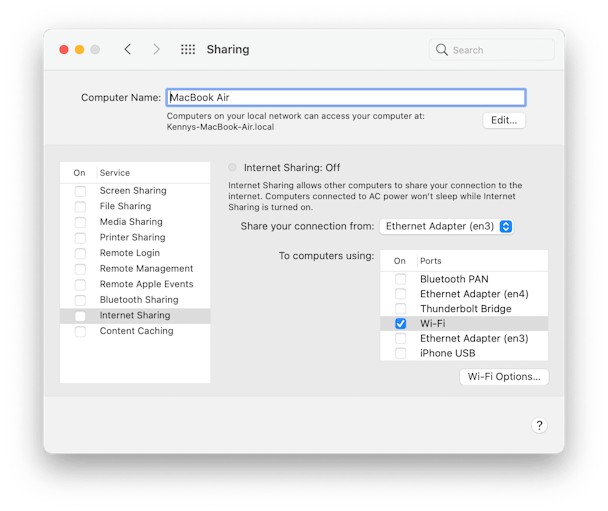
- Go to Apple menu > System Preferences.
- Choose the Sharing pane.
- In the left part of the window, select Internet Sharing.
- Click on the dropdown menu next to ‘Share your connection from’ and choose an option. We’ll select the Ethernet Adapter.
- In the window ‘to computers using,’ check the box next to one of the options. We’ll choose Wi-Fi.
- Press the Wi-Fi options button and give the network a name and password.
- Click Ok.
- Check the box next to Internet Sharing in the left part of the window.
- Press Start to confirm.
- Quit System Preferences.
Your Mac’s hotspot is now set up. All you have to do on the device you want to connect to is go to its Wi-Fi settings, choose the network name you created and type in the password. If you chose to connect via Bluetooth, go to Bluetooth settings instead. And if you chose a tethered method, like USB or Ethernet, you’ll need to plug the device into your Mac.
When you want to stop sharing your Mac’s internet connection, go back to System Preferences > Sharing and uncheck the box next to Internet Sharing.

How to create a hotspot on your PC
Turn your Windows PC into a mobile hotspot by sharing your Internet connection with other devices over Wi-Fi. You can share a Wi-Fi, Ethernet, or cellular data connection. If your PC has a cellular data connection and you share it, it will use data from your data plan.
- Select the Start button, then select Settings > Network & internet > Mobile hotspot.
- For Share my Internet connection from, choose the internet connection you want to share.
- For Share over, choose how you want to share your connection—over Wi-Fi or Bluetooth. Wi-Fi is usually faster and the default.
- Select Edit > enter a new network name, password, and network band > Save.
- Turn on Mobile hotspot.
- To connect on the other device, go to the Wi-Fi settings on that device, find your network name, select it, enter the password, and then connect.
Connect the Raspberry Pi to the mobile Hotspot
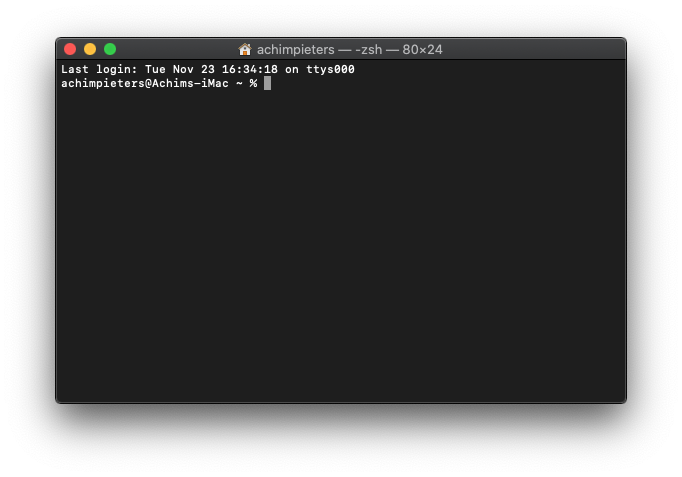
Click the Launchpad icon in the Dock, then Other, then click Terminal.
Now make a connection to your Raspberry Pi. By typing ssh pi@screenly.local and pressing Enter.
ssh pi@screenly.local
Now we only have to do on thing before we can install Screenly OSE. First we going to change one setting and do some updating. Type the following command and press enter.
sudo raspi-config
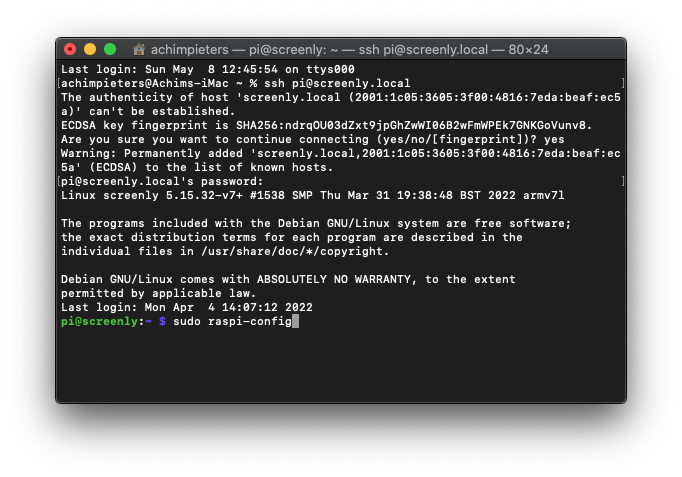
The Raspberry Pi Software Configuration Tool opens.

Select 1 System Options and press enter.
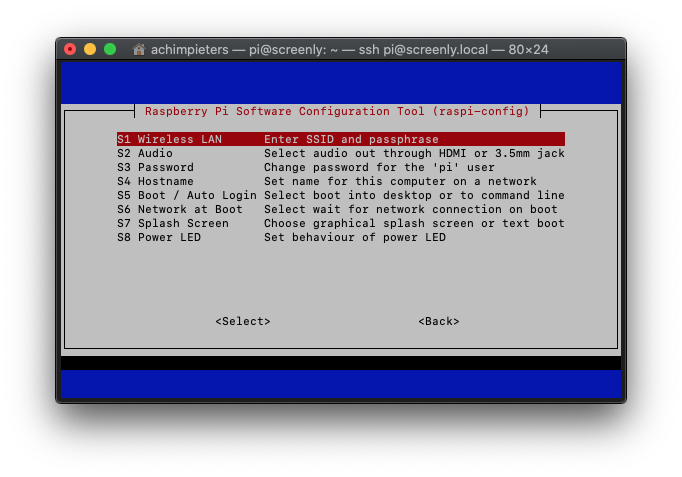
Now, let’s type in the SSID and PSK which are the hotspot name and password respectively.
Next, shutdown the Raspberry Pi.
Turn on the Raspberry Pi and make sure that the mobile hot spot is turn on. Check the connect devices. There will be a new user with the name “Screenly”. Done! Easy, right?
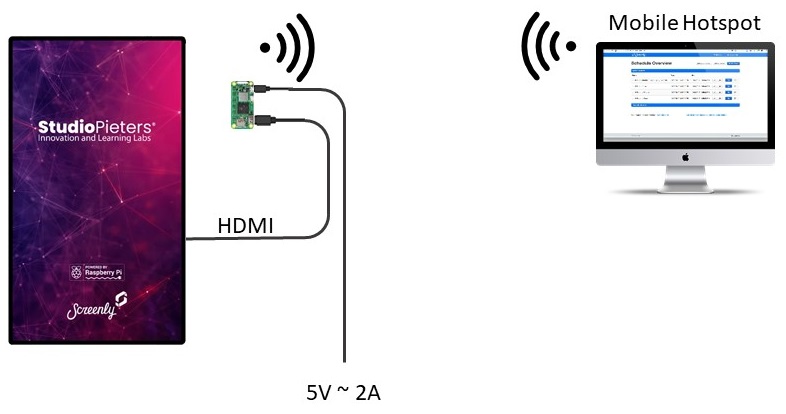
Note: Make sure your Mobile Hotspot is turned on before you power on the Raspberry Pi.