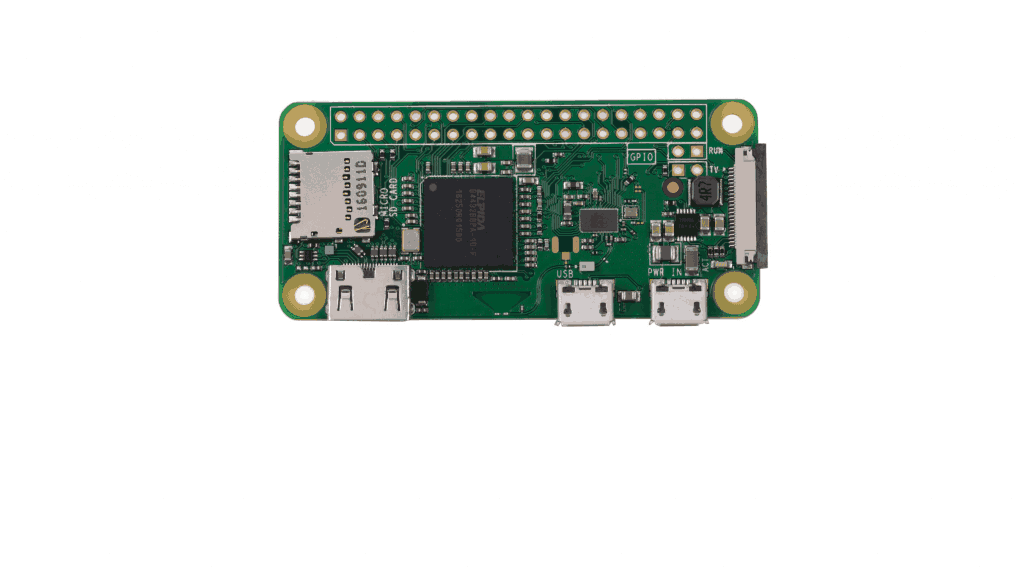
This is a Project, that’s for a really long time on my bucket list! The MagicMirror², so time to realize this one. Despite the fact that the Raspberry Pi 0/1 is currently not supported. I want to install the MagicMirror² on my Raspberry Pi Zero W anyway. So let’s start building.

MagicMirror²
MagicMirror² is an open source modular smart mirror platform. With a growing list of installable modules, the MagicMirror² allows you to convert your hallway or bathroom mirror into your personal assistant. MagicMirror² is built by the creator of the original MagicMirror with the incredible help of a growing community of contributors. MagicMirror² focuses on a modular plugin system and uses Electron as an application wrapper. So no more web server or browser installs necessary! As mentioned before Electron, the app wrapper around MagicMirror², only supports the Raspberry Pi 2/3. The Raspberry Pi 0/1 is currently not supported. But I want to run MagicMirror² on My Raspberry Pi Zero W.
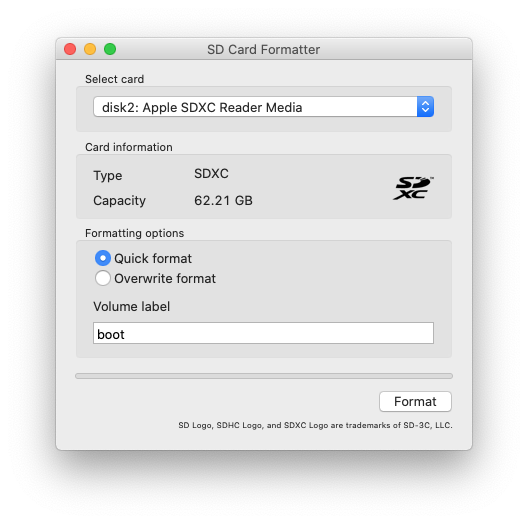
SD Formatter
Visit the SD Association’s website and download SD Formatter 4.0 for either Windows or Mac. Follow the instructions to install the software. Insert your SD card into the computer or laptop’s SD card reader, select the drive letter for your SD card and format it.
Download Raspbian lite image
These instructions are for a Raspbian Buster image that I downloaded from here: Raspbian Buster with desktop
Note: that you will need to install the latest full version of Raspbian, don’t use the Lite version.
Once you download the file, note the location of the *.img file.
Download etcher
Visit etcher.io and download and install the Etcher SD card image utility. Run Etcher and select the Raspbian image you unzipped on your computer or laptop. Select the SD card drive. Note that the software may have already selected the right drive. Finally, click Burn to transfer Raspbian to the SD card. You’ll see a progress bar that tells you how much is left to do. Once complete, the utility will automatically eject/unmount the SD card so it’s safe to remove it from the computer.

Take your SD card out of your computer and place it back so it can be mounted again.
Enable ssh
For security reasons, ssh is no longer enabled by default. Open the Terminal app. Click the Finder icon in your dock. Click Go. Click Utilities. Double-click Terminal. To enable it, run this command:
touch /Volumes/boot/ssh
Add network information
Create a new empty file that will hold network information:
touch /Volumes/boot/wpa_supplicant.conf
then open the file:
sudo nano /Volumes/boot/wpa_supplicant.conf
Edit the file that you just created and paste this into it (adjusting for the name of your country code, network name and network password):
country=GB
ctrl_interface=DIR=/var/run/wpa_supplicant GROUP=netdev
update_config=1

network={
    ssid="NETWORK-NAME"
    psk="NETWORK-PASSWORD"
}
Save your changes, press CTRL + O, followed by Enter. Then press CTRL + X.
Eject the micro SD card
Issue an eject command:
diskutil eject /dev/disk2
The command won’t physically eject the disk/card. It’s more of a logical eject: meaning it’s safe to remove the card now. You can also do this by right-clicking on the card on your desktop.

Boot the Pi Zero W
Put the SD card into the Pi Zero W. Plug a Micro-USB power cable into the power port (the one closest to the end of the board). Give the Pi Zero plenty of time to bootup (it can take as much as 90 seconds — or more)
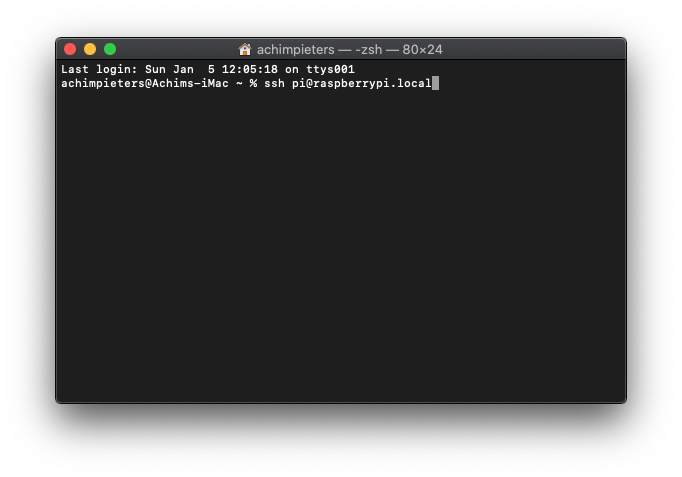
Login over Wifi
This part assumes that ssh is enabled for your image and that the default user is pi with a password of raspberry. Open the Terminal app. Click the Finder icon in your dock. Click Go. Click Utilities. Double-click Terminal. Run the following commands:
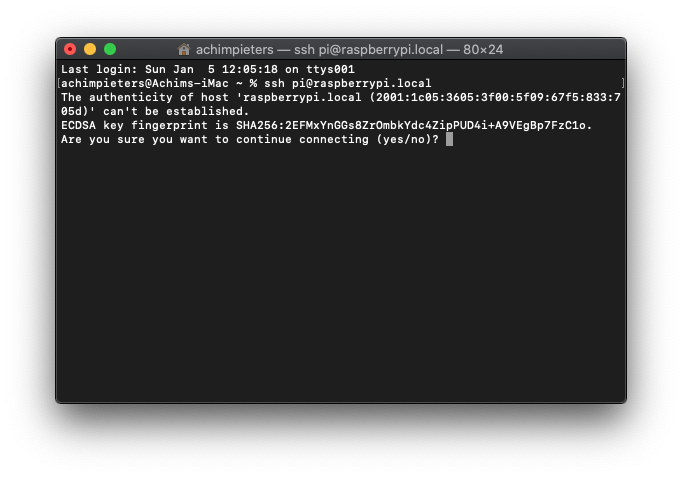
ssh pi@raspberrypi.local
If prompted with this warning:
The authenticity of host 'raspberrypi.local (xxxxxxxxxxxxxxxxxxxxxxxxxxxxx)' can't be established.
ECDSA key fingerprint is SHA256:xxxxxxxxxxxxxxxxxxxxxxxxxxxxxxxxxxxxxxxxxxx.
Are you sure you want to continue connecting (yes/no)?
just hit enter to accept the default (Yes). Type in the password — by default this is raspberry.
Congratulations! You can now access your Pi Zero W over wifi! If you can’t connect, see the troubleshooting blog here.
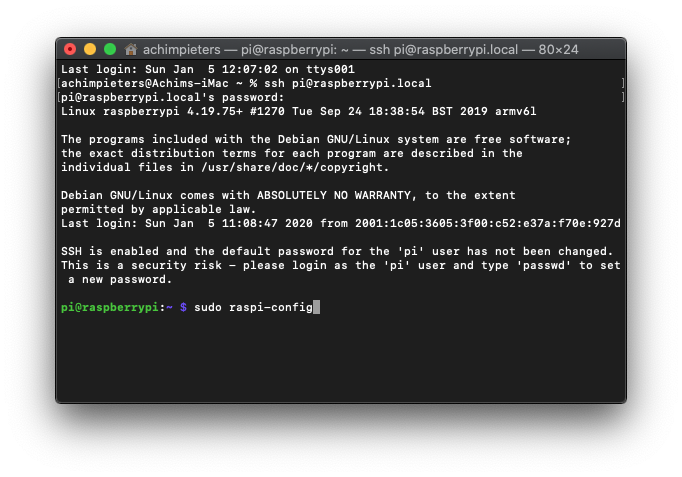
Change your Hostname and Password
Because your pi is now on the network, you should immediately change the host-name and password. At the command line type:
sudo raspi-config
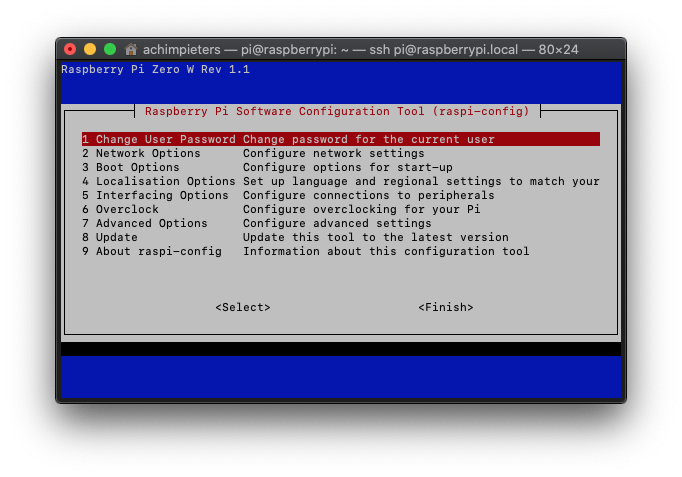
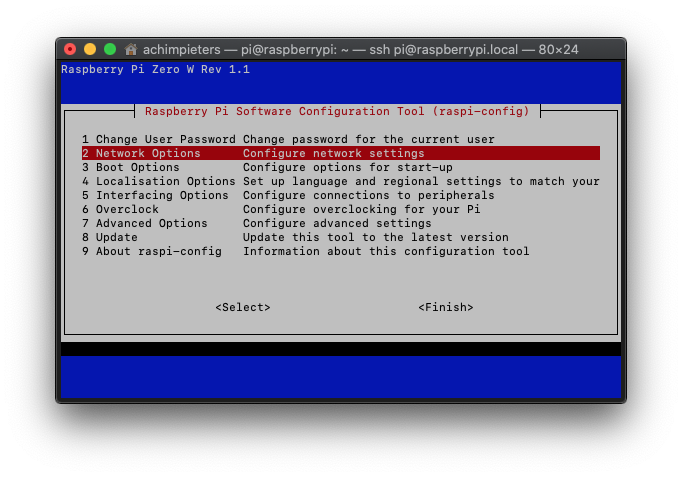
Select the options for changing the host-name (eg. MagicMirror) and password. On a new image, I would also recommend expanding the file system.
1 Change User Password - Change password for the current user
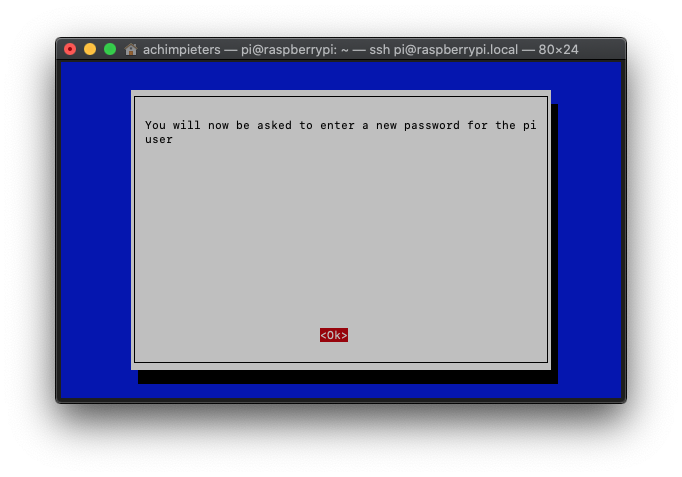
 You will see a screen “You will now be asked to enter a new password for the pi user” press ‘OK‘.
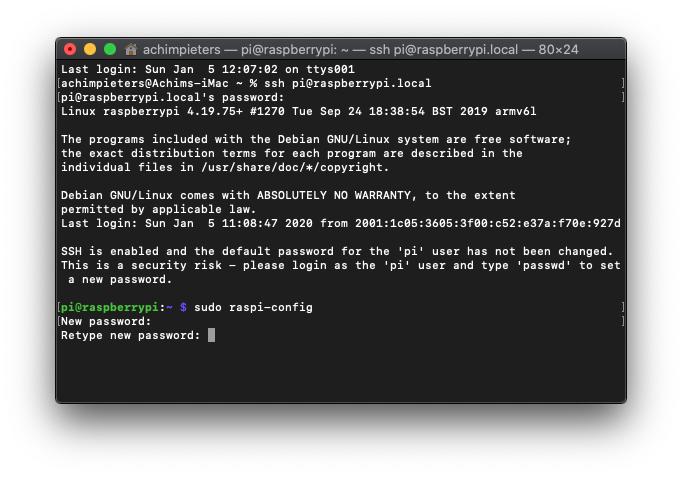
 Now you need to type your ‘New password‘ and press ‘Enter‘ the the raspberry will ask you the ‘Retype new password‘ and press ‘Enter‘.
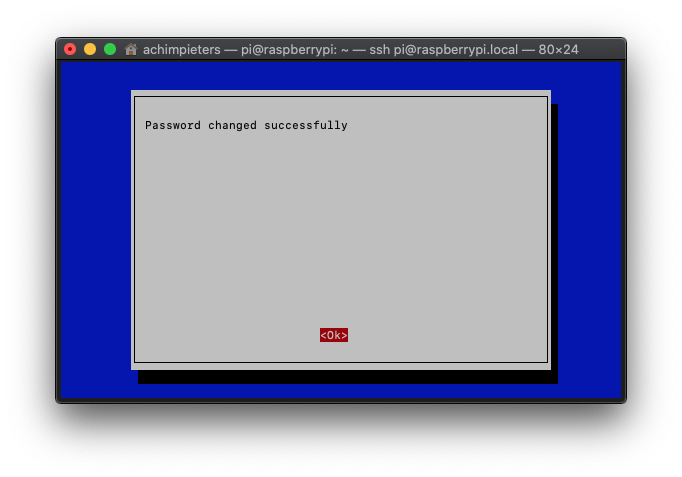
 Then you will return to the raspi-config menu, it will say ‘ Password changed successfully‘ and press ‘OK‘.
host-name
2 Network Options - Configure network settings
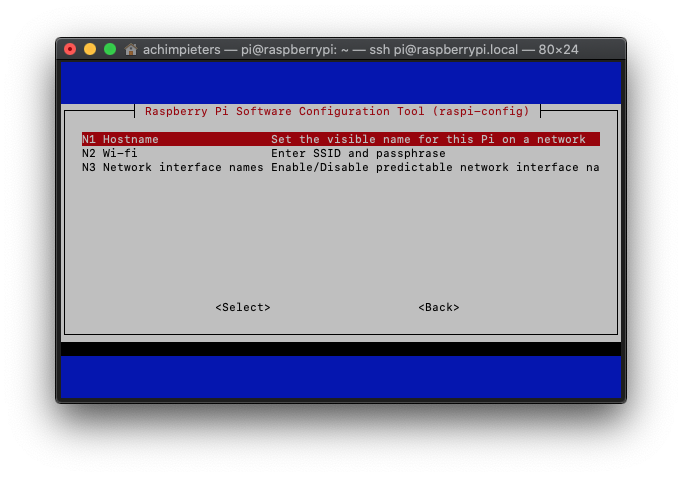 Here Choose ‘N1 Hostname – Set the visible name for this pi on a network‘ and press ‘OK‘ twice.
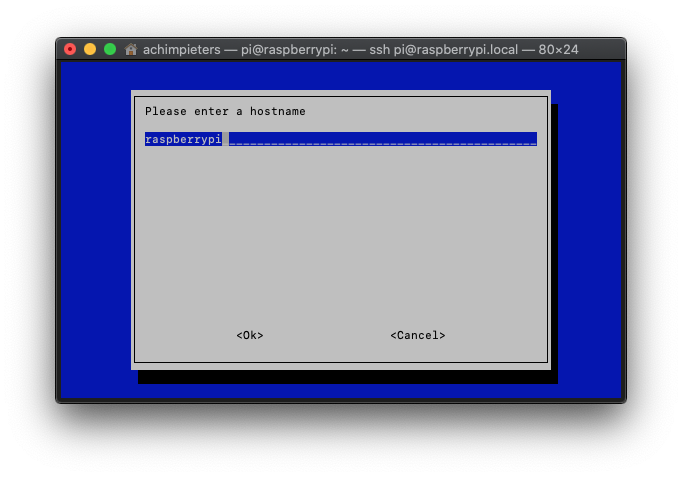
 hen you will see a screen that say ‘ Please enter a Hostname‘ Default this is ‘raspberrypi.
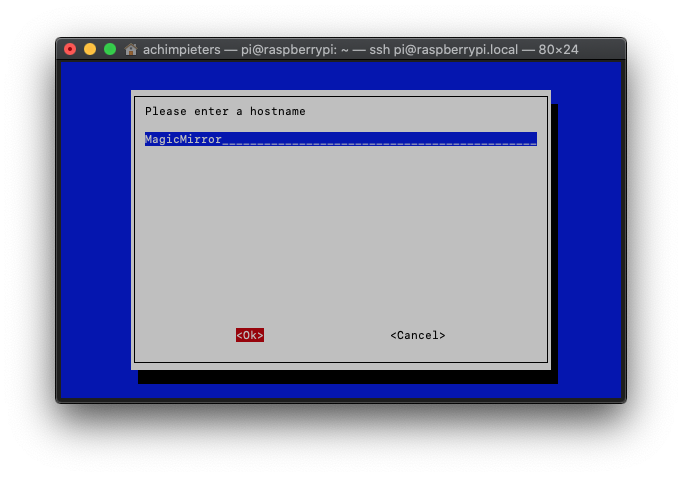
 Change this to’MagicMirror‘ and press ‘OK‘.
expanding the file system.
7 Advanced Options - Configure advanced settings
 Here choose ‘A1 Expand Filesystem – Ensures that all of the SD card storage is available‘ and press ‘Enter‘.
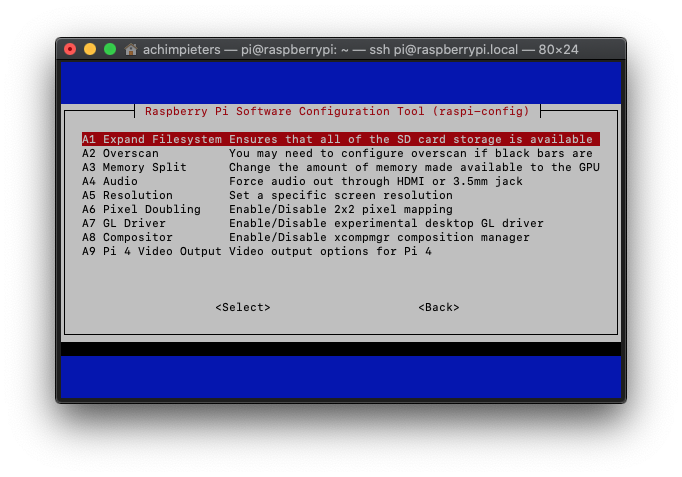
Your Pi will change the partition en come back to the raspi-config menu, here press ‘OK‘.
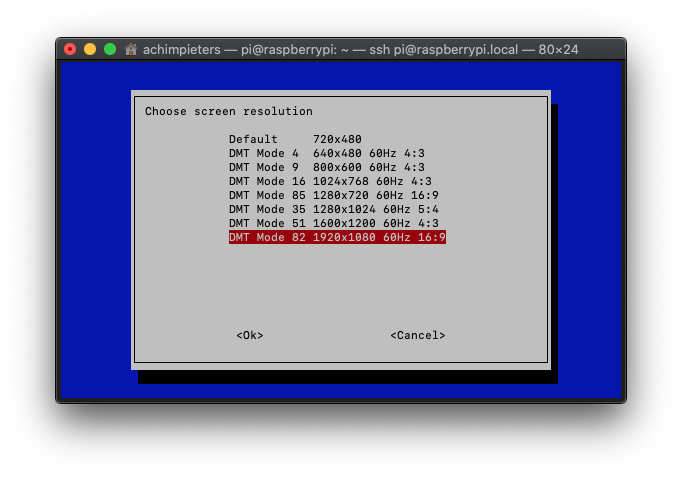
set the screen resolution.
7 Advanced Options - Configure advanced settings
Here choose ‘A5 Resolution – Set a specific screen resolution‘ and press ‘Enter‘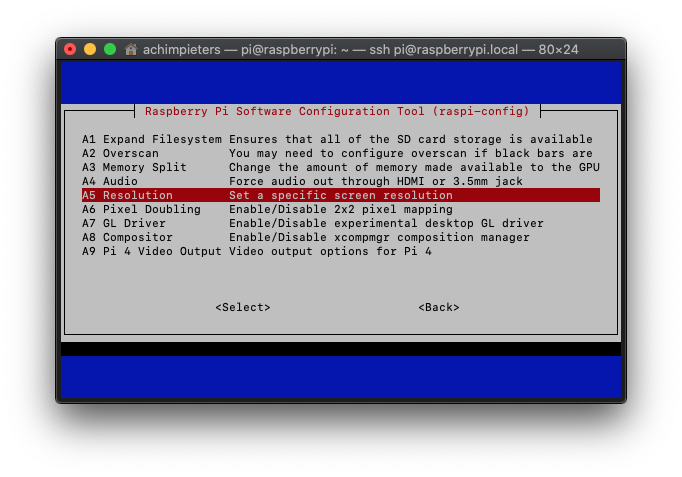 choose your screen resolution (eg DMT Mode 82 1920×1080 60Hz 16:9 ) and press ‘OK‘ twice.
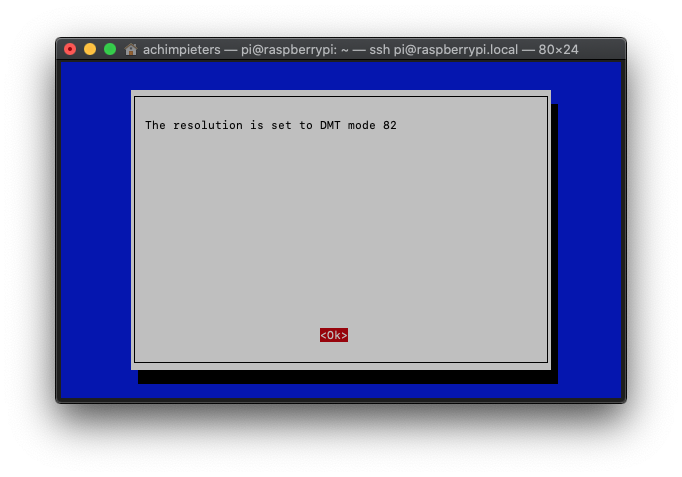
Note: This will give you a better resolution when opening a new VNC window.
Now your back in the main rasps-config menu and select ‘Finish‘ it will ask you ‘Would you like to reboot now?‘ select ‘No‘ for now. This will take you to the terminal session.
Fix the locale issue
Last week I was trying to make my Raspberry Pi work again, and while reinstalling and upgrading Raspbian OS packages I run into an issue where a perl warning is displayed.
The warning message appears during the installation packages(invoking Perl) and it’s due to missing locales. Type:
locale
when you see this message and see that LC_ALL = (unset), and LANG = (unset) are (unset), then proceed with the fix.
[...]
perl: warning: Setting locale failed.
perl: warning: Please check that your locale settings:
        LANGUAGE = "en_GB.UTF-8",
        LC_ALL = (unset),
        LC_TIME = "en_GB.UTF-8",
        LC_MONETARY = "en_GB.UTF-8",
        LC_ADDRESS = "en_GB.UTF-8",
        LC_TELEPHONE = "en_GB.UTF-8",
        LC_NAME = "en_GB.UTF-8",
        LC_MEASUREMENT = "en_GB.UTF-8",
        LC_IDENTIFICATION = "en_GB.UTF-8",
        LC_NUMERIC = "en_GB.UTF-8",
        LC_PAPER = "en_GB.UTF-8",
        LANG = (unset),
    are supported and installed on your system.
perl: warning: Falling back to the standard locale ("C").
locale: Cannot set LC_ALL to default locale: No such file or directory
I searched the internet for the fix but non of them where working. But I found one that did. Type:
sudo nano /etc/default/locale
Change it, and include these three lines:
LANG=en_GB.UTF-8
LC_ALL=en_GB.UTF-8
LANGUAGE=en_GB.UTF-8
Save your changes, press CTRL + O, followed by Enter. Then press CTRL + X. Once the changes are made you need to, reboot. To reboot your raspberry pi zero w, type:
sudo reboot

Remember that once you reboot, you will need to use the new host-name to login over ssh. For example, if your new host-name is MagicMirror you would connect like this:
ssh pi@magicmirror.local
Now we only have to enable the VNC® Server on the Raspberry Pi Zero W.
At the command line type:
sudo raspi-config
Navigate to Interfacing Options
5 Interfacing Options Configure connections to peripherals
Here choose ‘P3 VNC – Enable/Disable graphical remote access to your pi using …‘ Now you will be asked ‘Would you like the VNC Server to be enabled?‘ press ‘Yes‘ and then press ‘OK‘ . Click on Finish, which should either prompt you to reboot, or return you to the main command line shell. If you are returned to the main command line shell, issue the command:
sudo reboot
The system will restart, so you will lose your connection.At this point, you can exit the terminal session. Now we have to install VNC® viewer so we can make a remote connection to our raspberry Pi Zero W.
VNC® Viewer
In computing, Virtual Network Computing (VNC) is a graphical desktop-sharing system that uses the Remote Frame Buffer protocol (RFB) to remotely control another computer. It transmits the keyboard and mouse events from one computer to another, relaying the graphical-screen updates back in the other direction, over a network.
VNC is platform-independent – there are clients and servers for many GUI-based operating systems and for Java. Multiple clients may connect to a VNC server at the same time. Popular uses for this technology include remote technical support and accessing files on one’s work computer from one’s home computer, or vice versa.

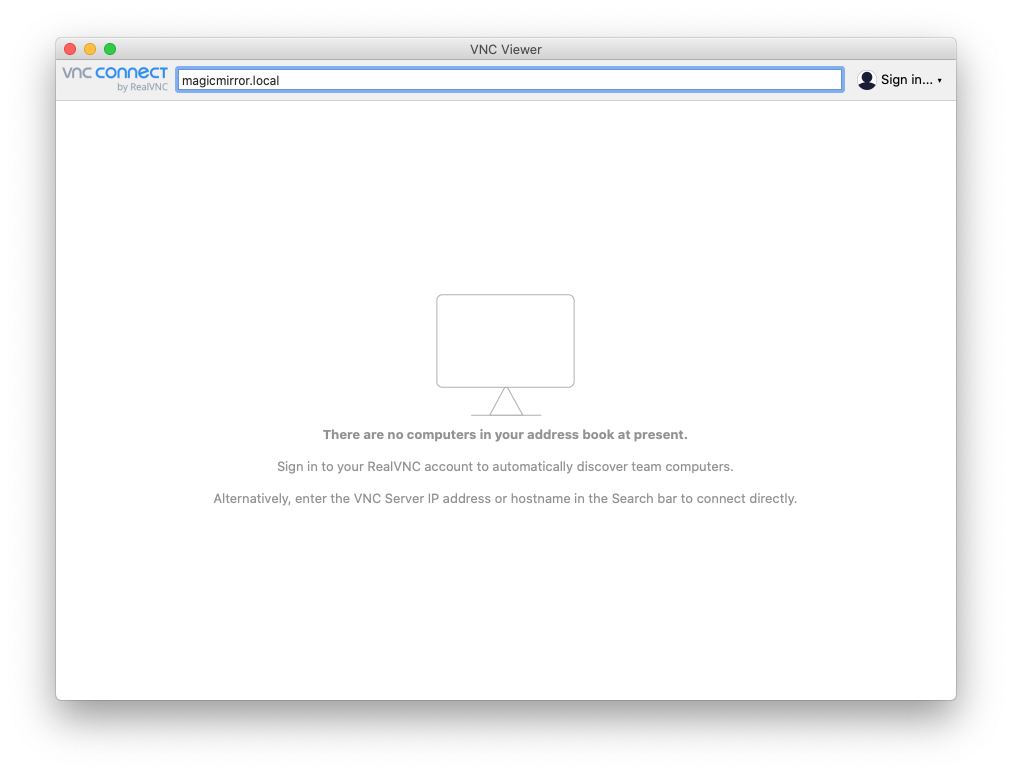
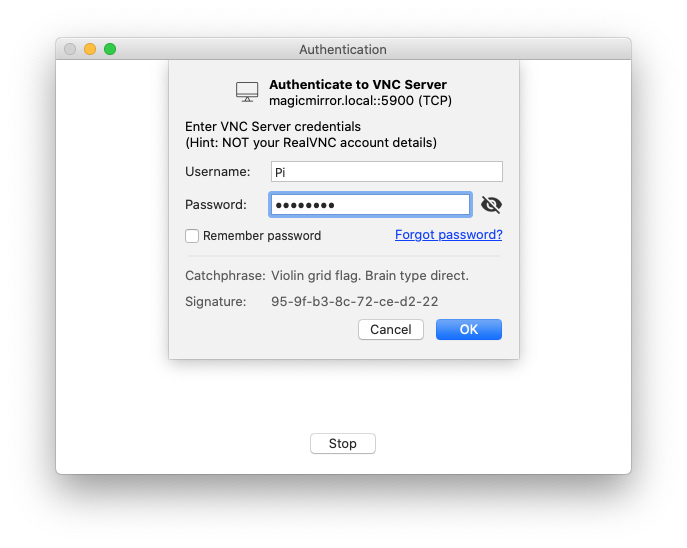
Open up RealVNC and connect to Raspberry Pi
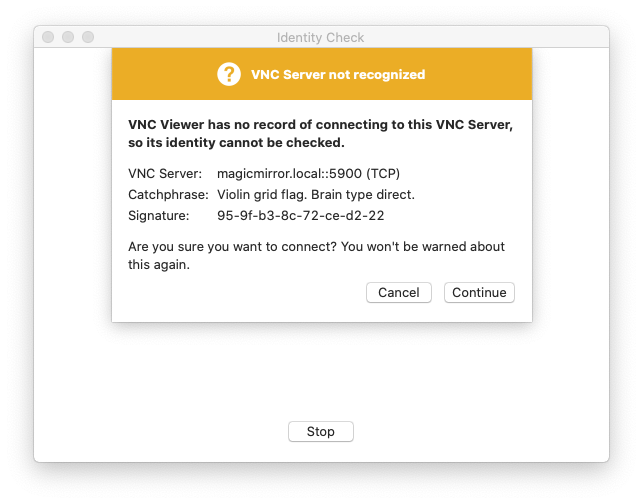
you may get a security warning, press Continue.
 Login in with your Username (pi) and your password. and press OK.
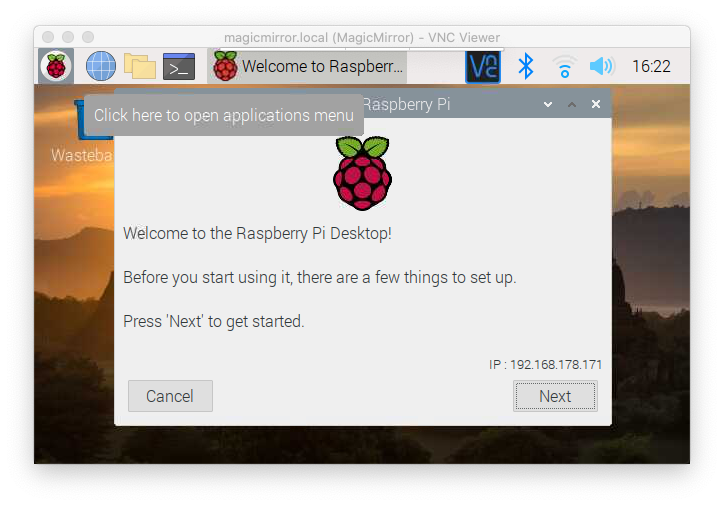
You will see a welcom screen, press Next.
Set you country Settings and press Next.

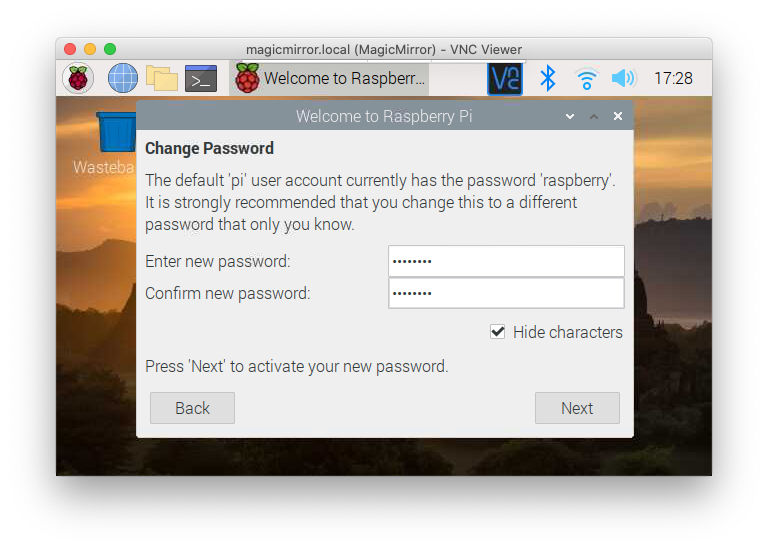
Now you will be asked to change your password. I have used the same password as I did before in the Raspberry Pi config menu.
Then you will be asked about the screen settings, choose what applies to you, and pres Next.

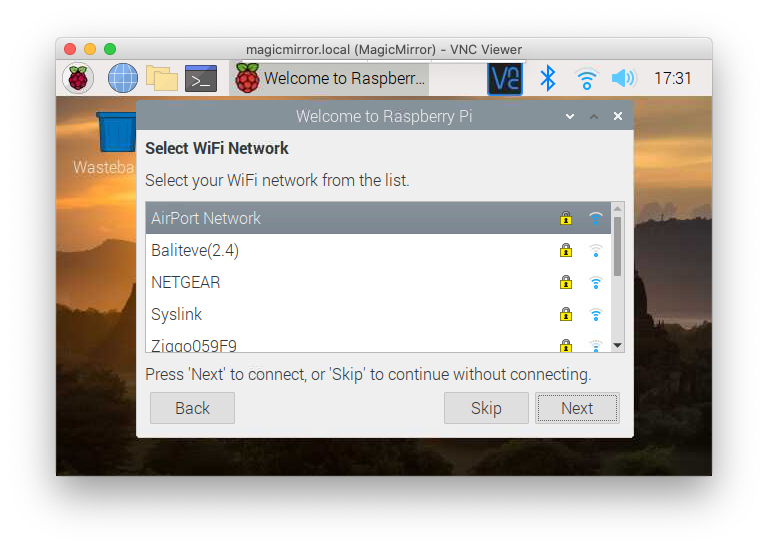
Select your Wifi Network, You already applied the network settings (if you followed this whole blog) when setting up your SD card. And press Next.
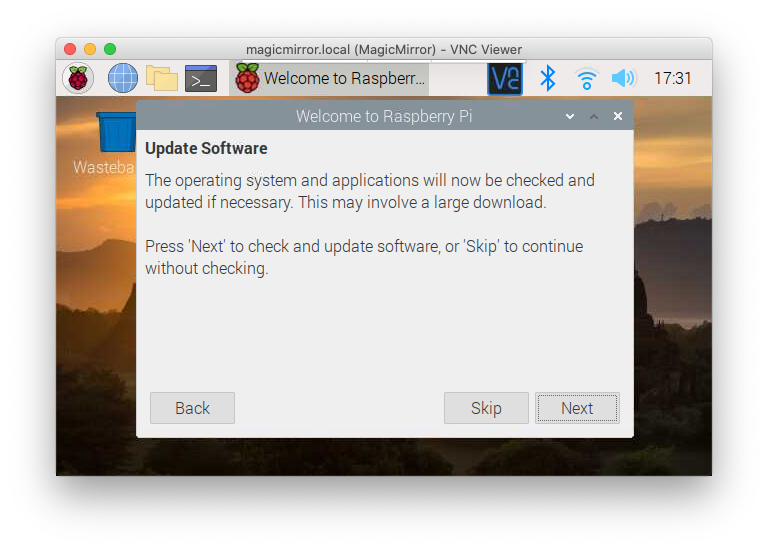
Where almost there, the Raspbian OS ask you to check for updates, Just Press Next.
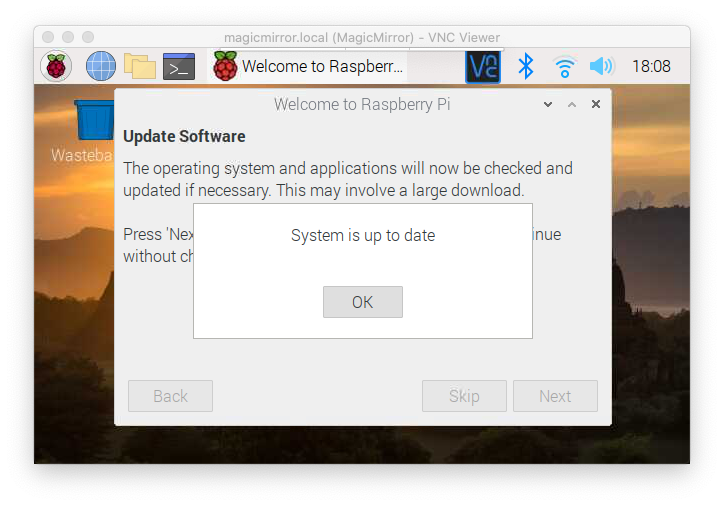
Once the system is updated you will see this screen, Press OK.
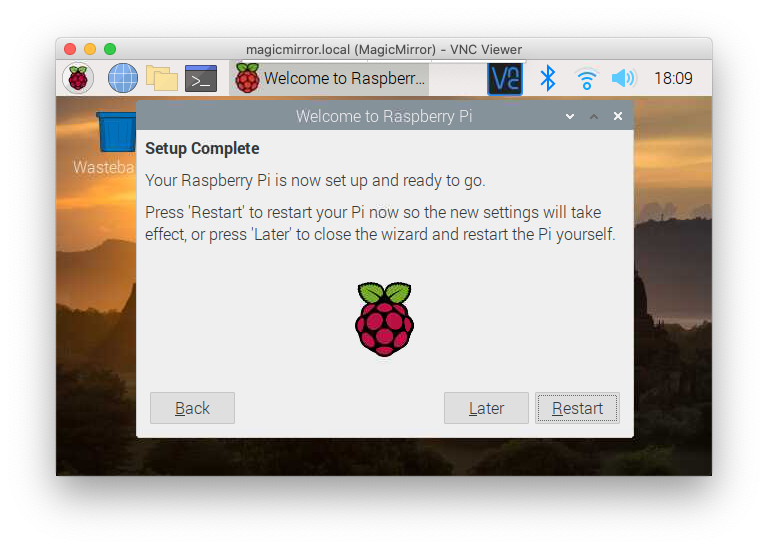
Now your Raspbian OS Setup is completed, press Restart.
Installing MagicMirror²
Now that We have installed The Raspberry pi Zero W, With the latest ( at time of writing) Rasbian OS. And fully configured it. It’s time to Install MagicMirror². Once again make a connection to your Raspberry Pi trough VNC.
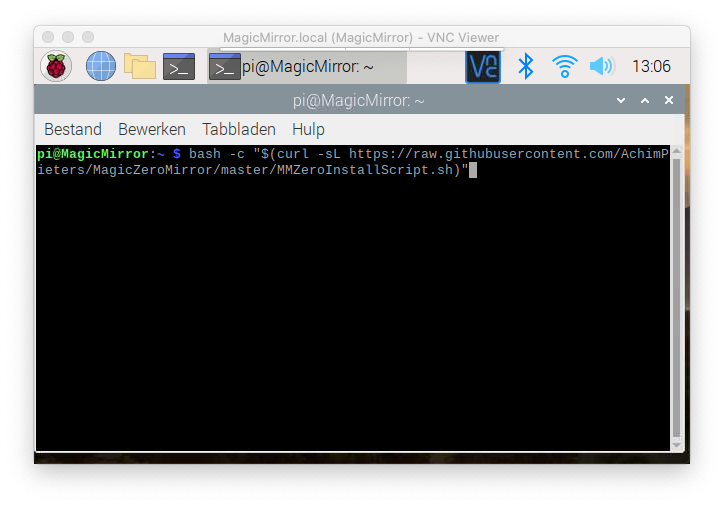 Once you start your VNC session, clone this project into your home directory (It should come down into the folder ~/Raspberry-MagicMirror. Start a terminal session on your Raspberry Pi Zero W. At the command line type:
bash -c "$(curl -sL https://raw.githubusercontent.com/AchimPieters/MagicZeroMirror/master/MMZeroInstallScript.sh)"
This will make the shell script executable, and if that is successful, it will also run the script. This can take up to an hour, depending on how many updates and upgrades need to be made to your Raspbian version. There is minimal interaction required, except to press enter a couple of times to agree to updates outside of the repository (e.g. updates to the Raspbian operating system). If it prompts to ask if you want to continue; type Y and Enter.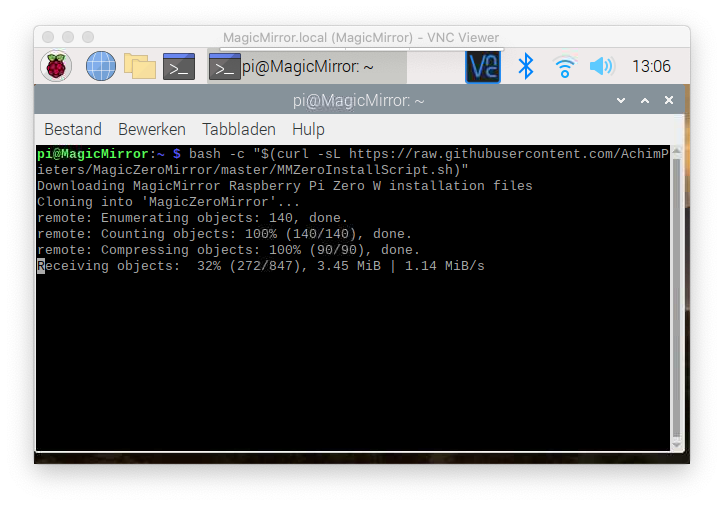
Note: There may be a few warnings (e.g. these about grunt‐stylelint and acorn‐jsx) These are dealt with later in the install process.
The installation may take a wile…

When it finishes, it will ask you whether you want to use pm2 to autostart your MagicMirror. Type Y and Enter to continue. The process will create a MagicMirror Application, and it should read online in green.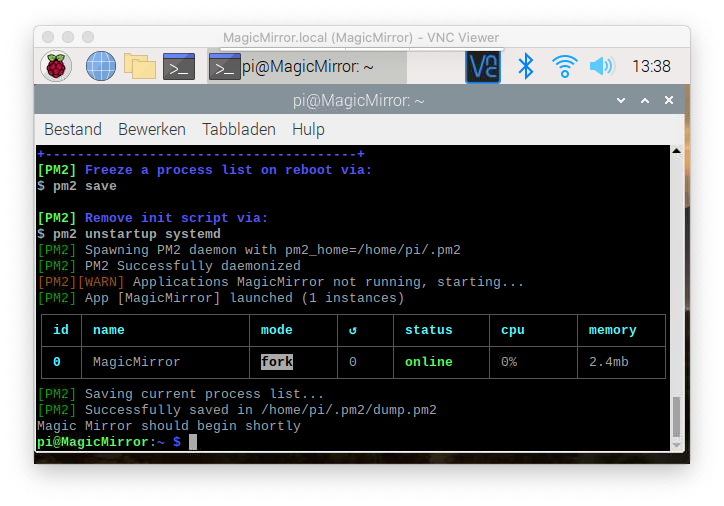
Restart your Pi Zero W using the command:
sudo reboot
The VNC window will say that the Server was exited and it is attempting to reconnect. The system should return to the desktop within a couple of minutes. After 2 or 3 minutes more, chromium will launch and it will say waiting for local-host. The screen will load a blank screen for a few seconds. The widgets will now load. Magic Mirror is now installed!

Now That the first part of this project is finished, it’s time to look for a suitable LCD display and Mirror.

DO YOU HAVE ANY QUESTIONS? LEAVE A COMMENT DOWN HERE.
REFERENCE
Michael Teeuw, MagicMirror²,The open source modular smart mirror platform., https://magicmirror.builders AC2799, Installer for the Pi Zero, MagicMirror 2.6.0 Installer for the Pi Zero, https://github.com/ac2799/MagicMirrorPi0Installer Emmanuel Contreras, How to: Create a Magic Mirror 2 with Pi Zero W!, http://emmanuelcontreras.com/how-to/how-to-create-a-magic-mirror-2-with-pi-zero-w/